How to Compare Two Microsoft Word Documents?
Microsoft Word is used for creating various types of documents for personal and office use. However, documents are often created and revised by different writers. When it comes to two copies; original and revised, the users would like to compare them and find the changes. Microsoft Word already has a feature that compares two documents and identifies the changes. In this article, we will be showing the comparison feature of Microsoft Word in detail.
Comparing Two Documents in Microsoft Word
First of all, you must have both files available on your system. In Microsoft Word, you will be required to browse both files and select them. The comparison will be opened in another window. It also provides many additional options for comparison of the documents. Users can use only a specific option or all of them depending on the document type. Down below we have provided steps to demonstrate the idea of comparing two documents in Microsoft Word:
- Open your Microsoft Word by double-clicking the shortcut on the desktop. You can also open it by searching it through the Windows search feature.
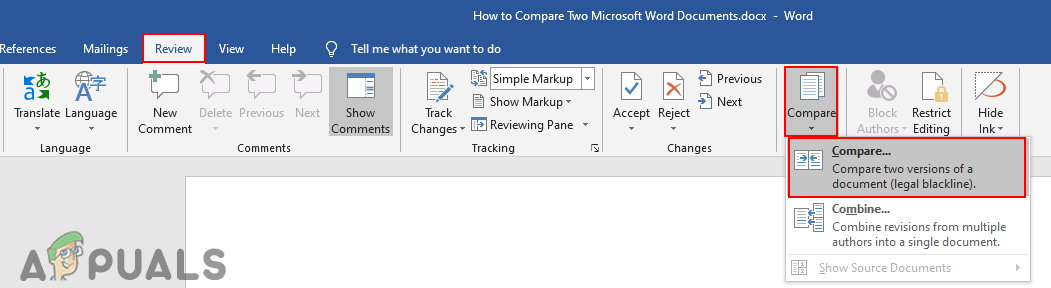
- Click on the Review tab in Microsoft Word, then click on Compare and choose the Compare two versions option.
Comparing two documents - A new Compare Documents window will appear, select the Original and Revised documents by browsing them. You can also add a label for the revised document to see the changes with that label.
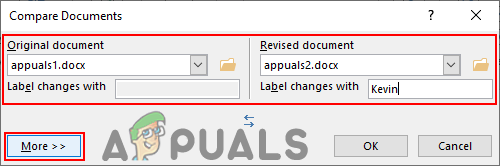
Selecting original and revised documents - Also, click on the More button for additional options. It will expand the window and show more Comparison settings. Here you can choose which comparison you want to be found in the documents.
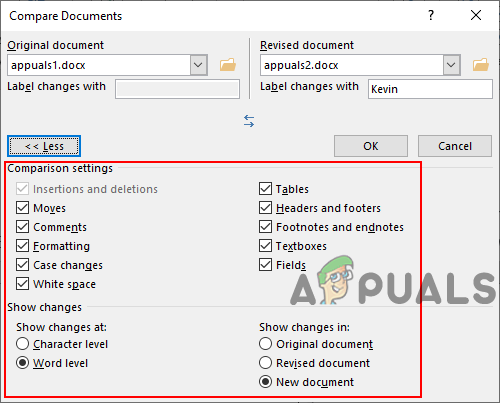
Configuring more options - Once everything is configured, click on the Ok button to compare both documents.
Overview of the Comparison
There will be three areas when documents are compared. The right area will be showing both original and revised documents. The middle area will be showing the compared document and the changes between both documents. The left area will be showing the changes that have been made in the revised document. You can get an idea about it from the screenshot below.
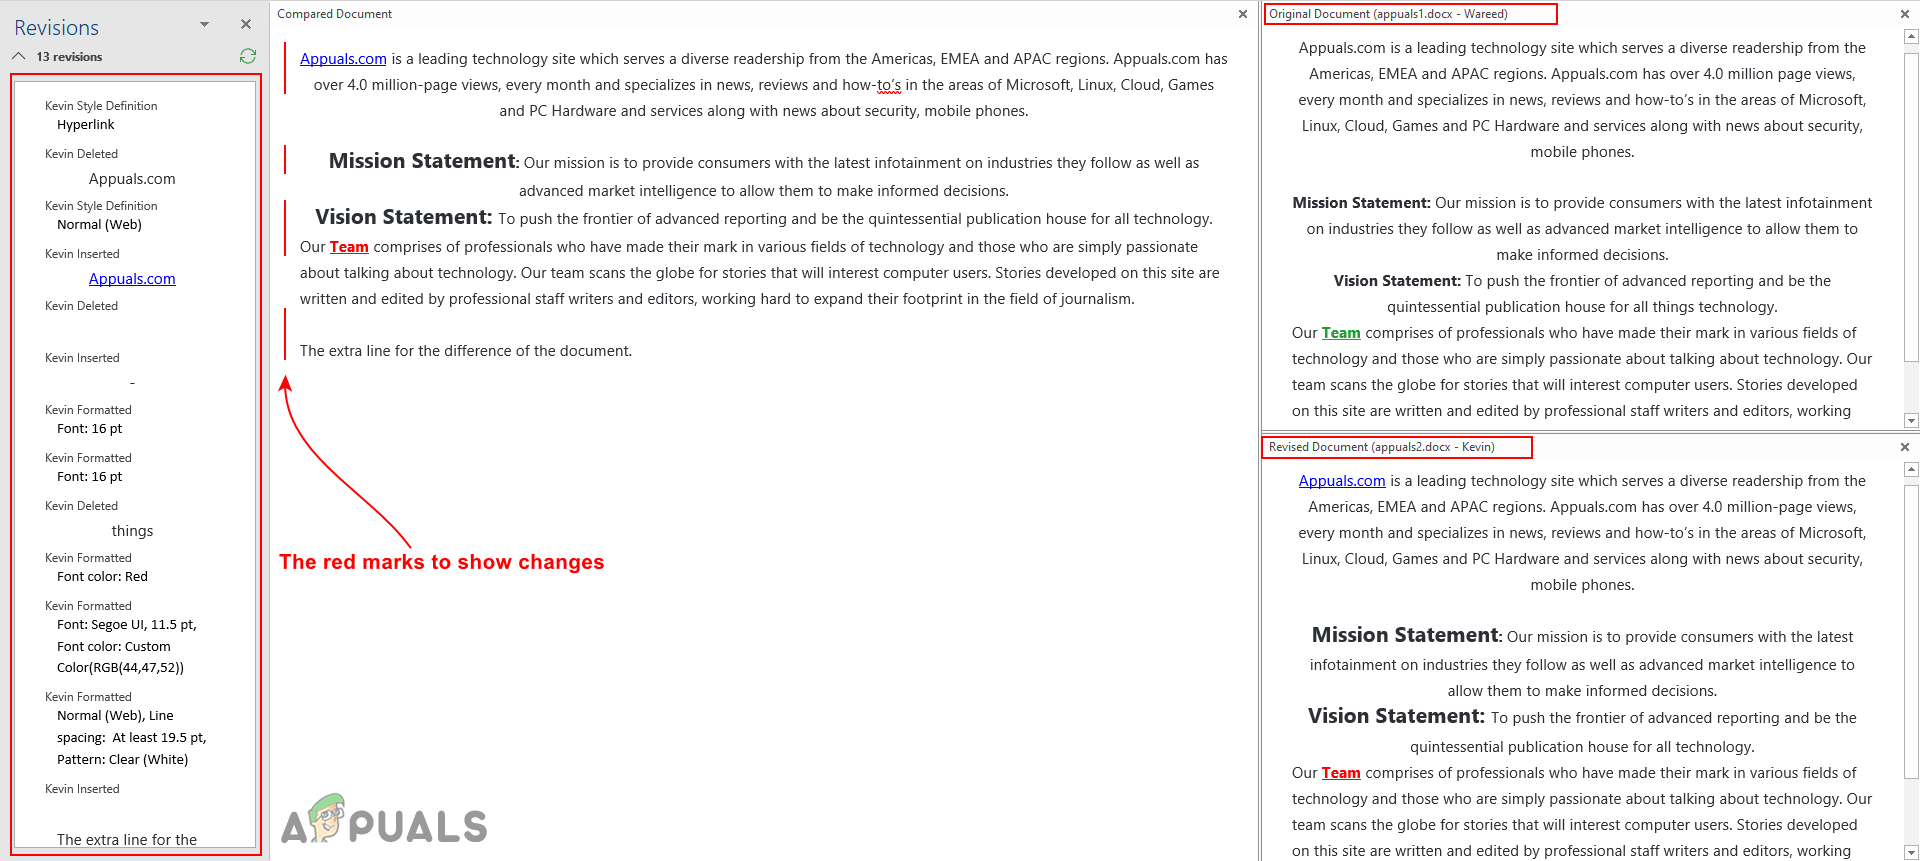
However, the viewing of the document can be changed in the Tracking drop-down menu under the Review tab. Reviewing Pane is the left area where it shows the revisions of documents, you can hide/show it by clicking on it. Display for Review drop-down will have four different options that you can choose according to how you want to display a comparison of documents.

Merging the Documents
The final step after comparing two documents will be merging them. Merging of documents is done when all the changes and editing is done. It is nothing different than just saving a document. However, you must accept the changes first. You can click on Accept in the Review tab and choose one of the following options to accept changes.
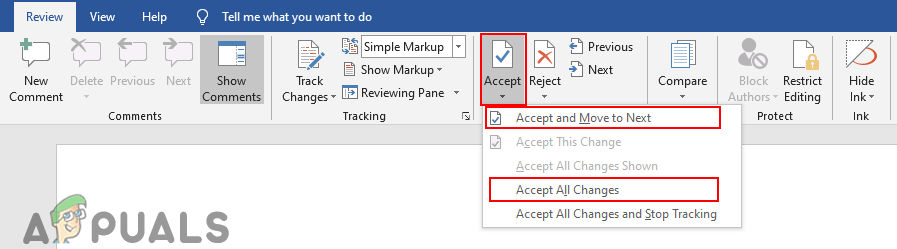
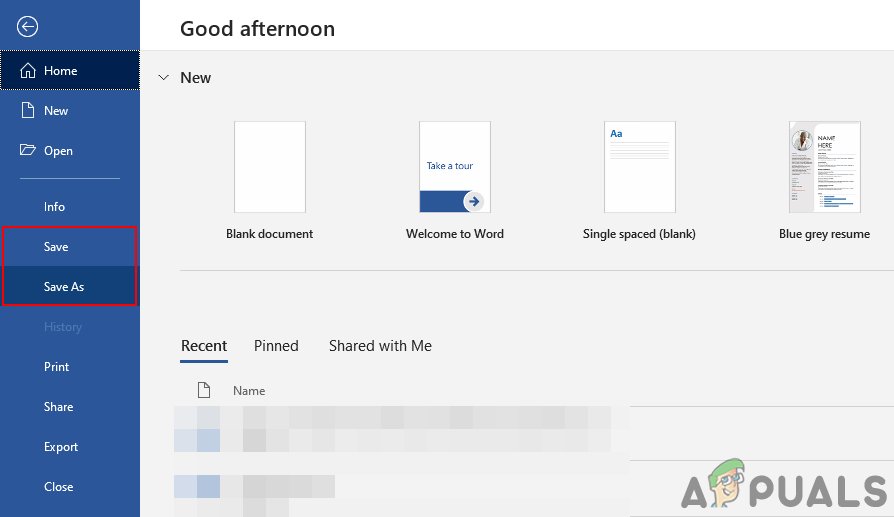
Once changes are accepted, click on the File tab and click on Save or Save as an option to save the document.