How to Fix Chromecast Remote Not Working – Guaranteed Working Methods
Chromecast is rapidly growing in popularity among streaming devices. Wherever it has been made available, users have responded passionately. The combination of Google TV and Chromecast (in the latest iteration of the platform) is a fantastic deal for those who want to modernize their dumb TV to take advantage of modern streaming services on a large screen.
However, the Chromecast remote has been causing problems for some users, including freezing and hanging up suddenly. The remote has been a constant point of troubleshooting for many, and this guide aims to fix all your Chromecast remote problems once and for all.
How to Resolve Chromecast Remote Not Working
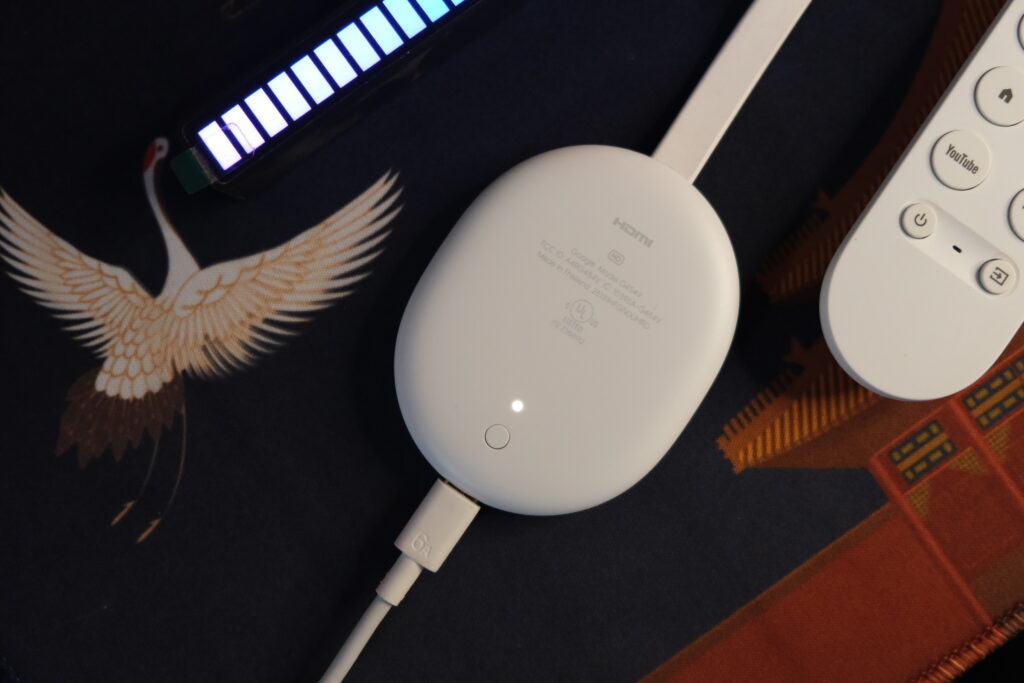
It is suggested that you test out all of the solutions below to find the one that best suits your needs. So, keeping that in mind, let’s start.
Restart your Chromecast
One possible fix is rebooting your Chromecast. To restart it, tap and hold the power switch on the Chromecast remote until the TV turns off and the message “power off” displays.
After a short pause, restart the TV. You can also restart your device by unplugging it, waiting 30 seconds, and then plugging it back in.
Change remote batteries
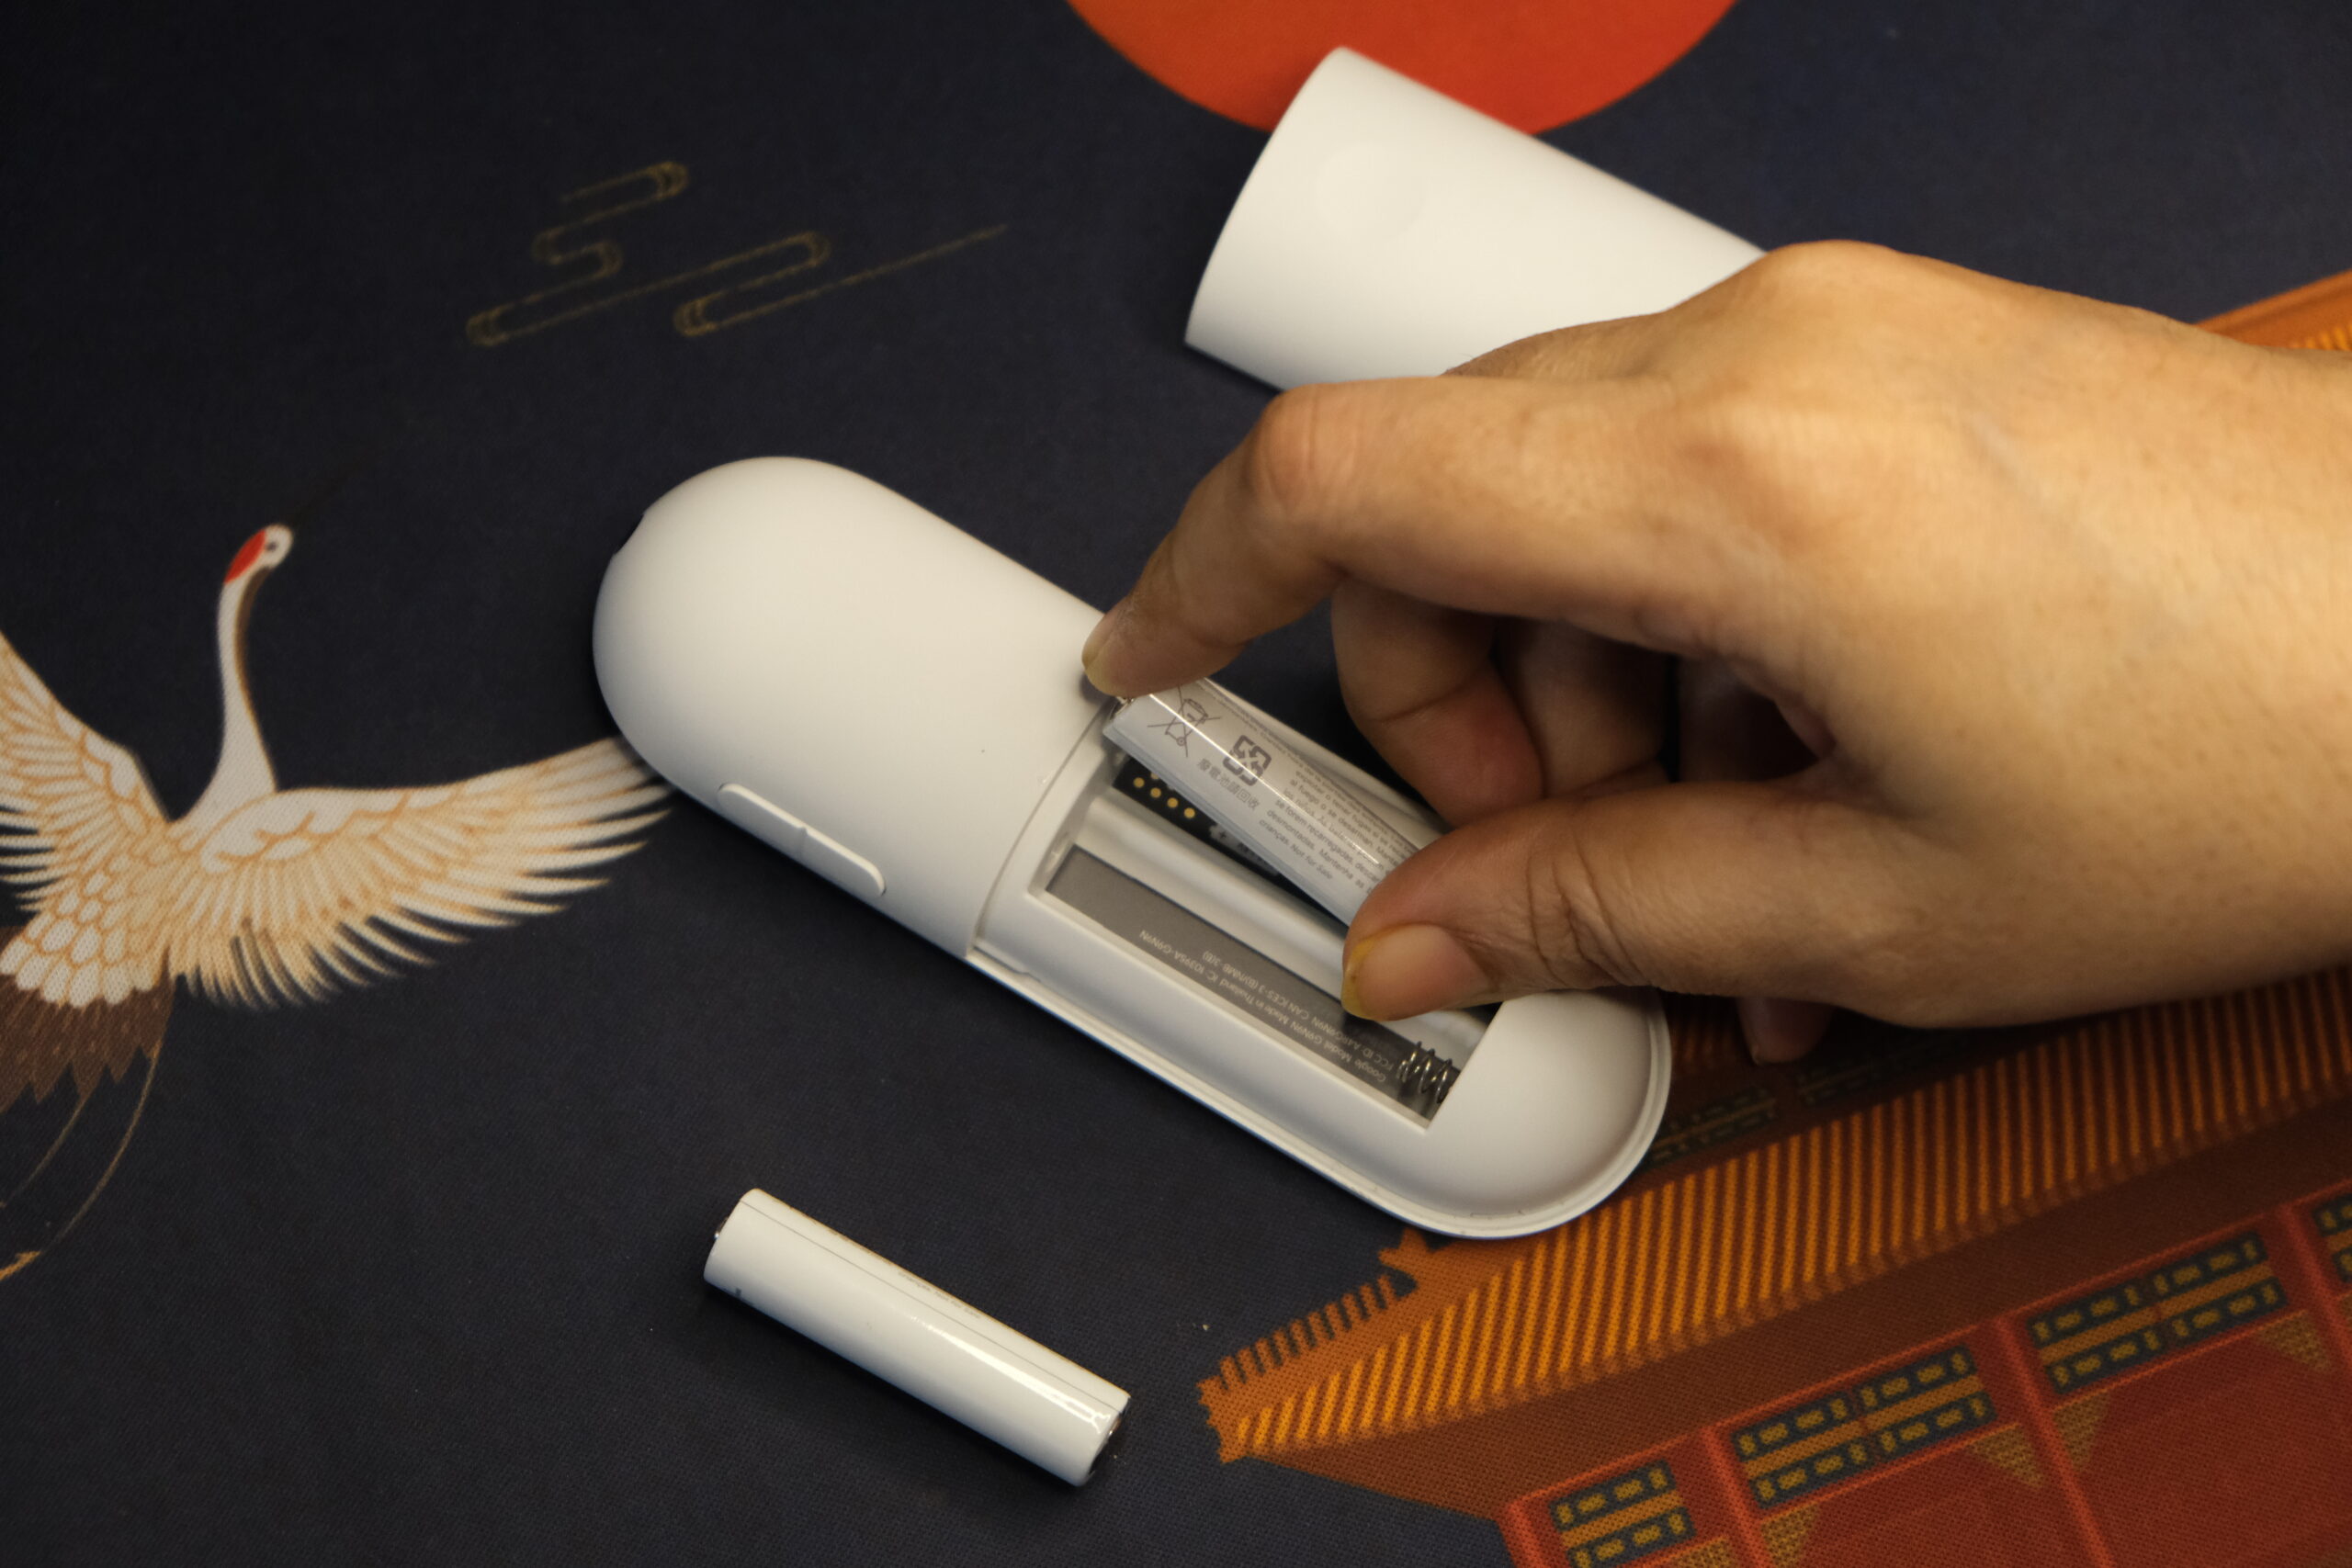
If the remote control stops responding, the batteries can be at fault. Try taking out the batteries and replacing them carefully. When batteries are completely drained and left in there for days on end, there can be further complications like leakage of liquid and smell. Change your batteries the first chance you get, always.
To determine if this is the case, check the batteries in nearby battery-operated gadgets. If the batteries in your Chromecast remote are no longer working, you will need to replace them.
Reconnect the Chromecast to Wi-Fi
Your Chromecast can be disconnected from Wi-Fi, which could be why the remote has disconnected and it is not working.
To modify the Wi-Fi network on your Chromecast, turn on the TV and launch the Google Home app. Make sure to connect your smartphone or another device to the same network as the Chromecast. If you can’t do this, you’ll need to reset the Chromecast manually, as described later.
Follow these steps to change the Wi-Fi network on your Chromecast:
- Power on the TV and connect your Chromecast. You’ll know it’s on if there’s a light visible on the device.
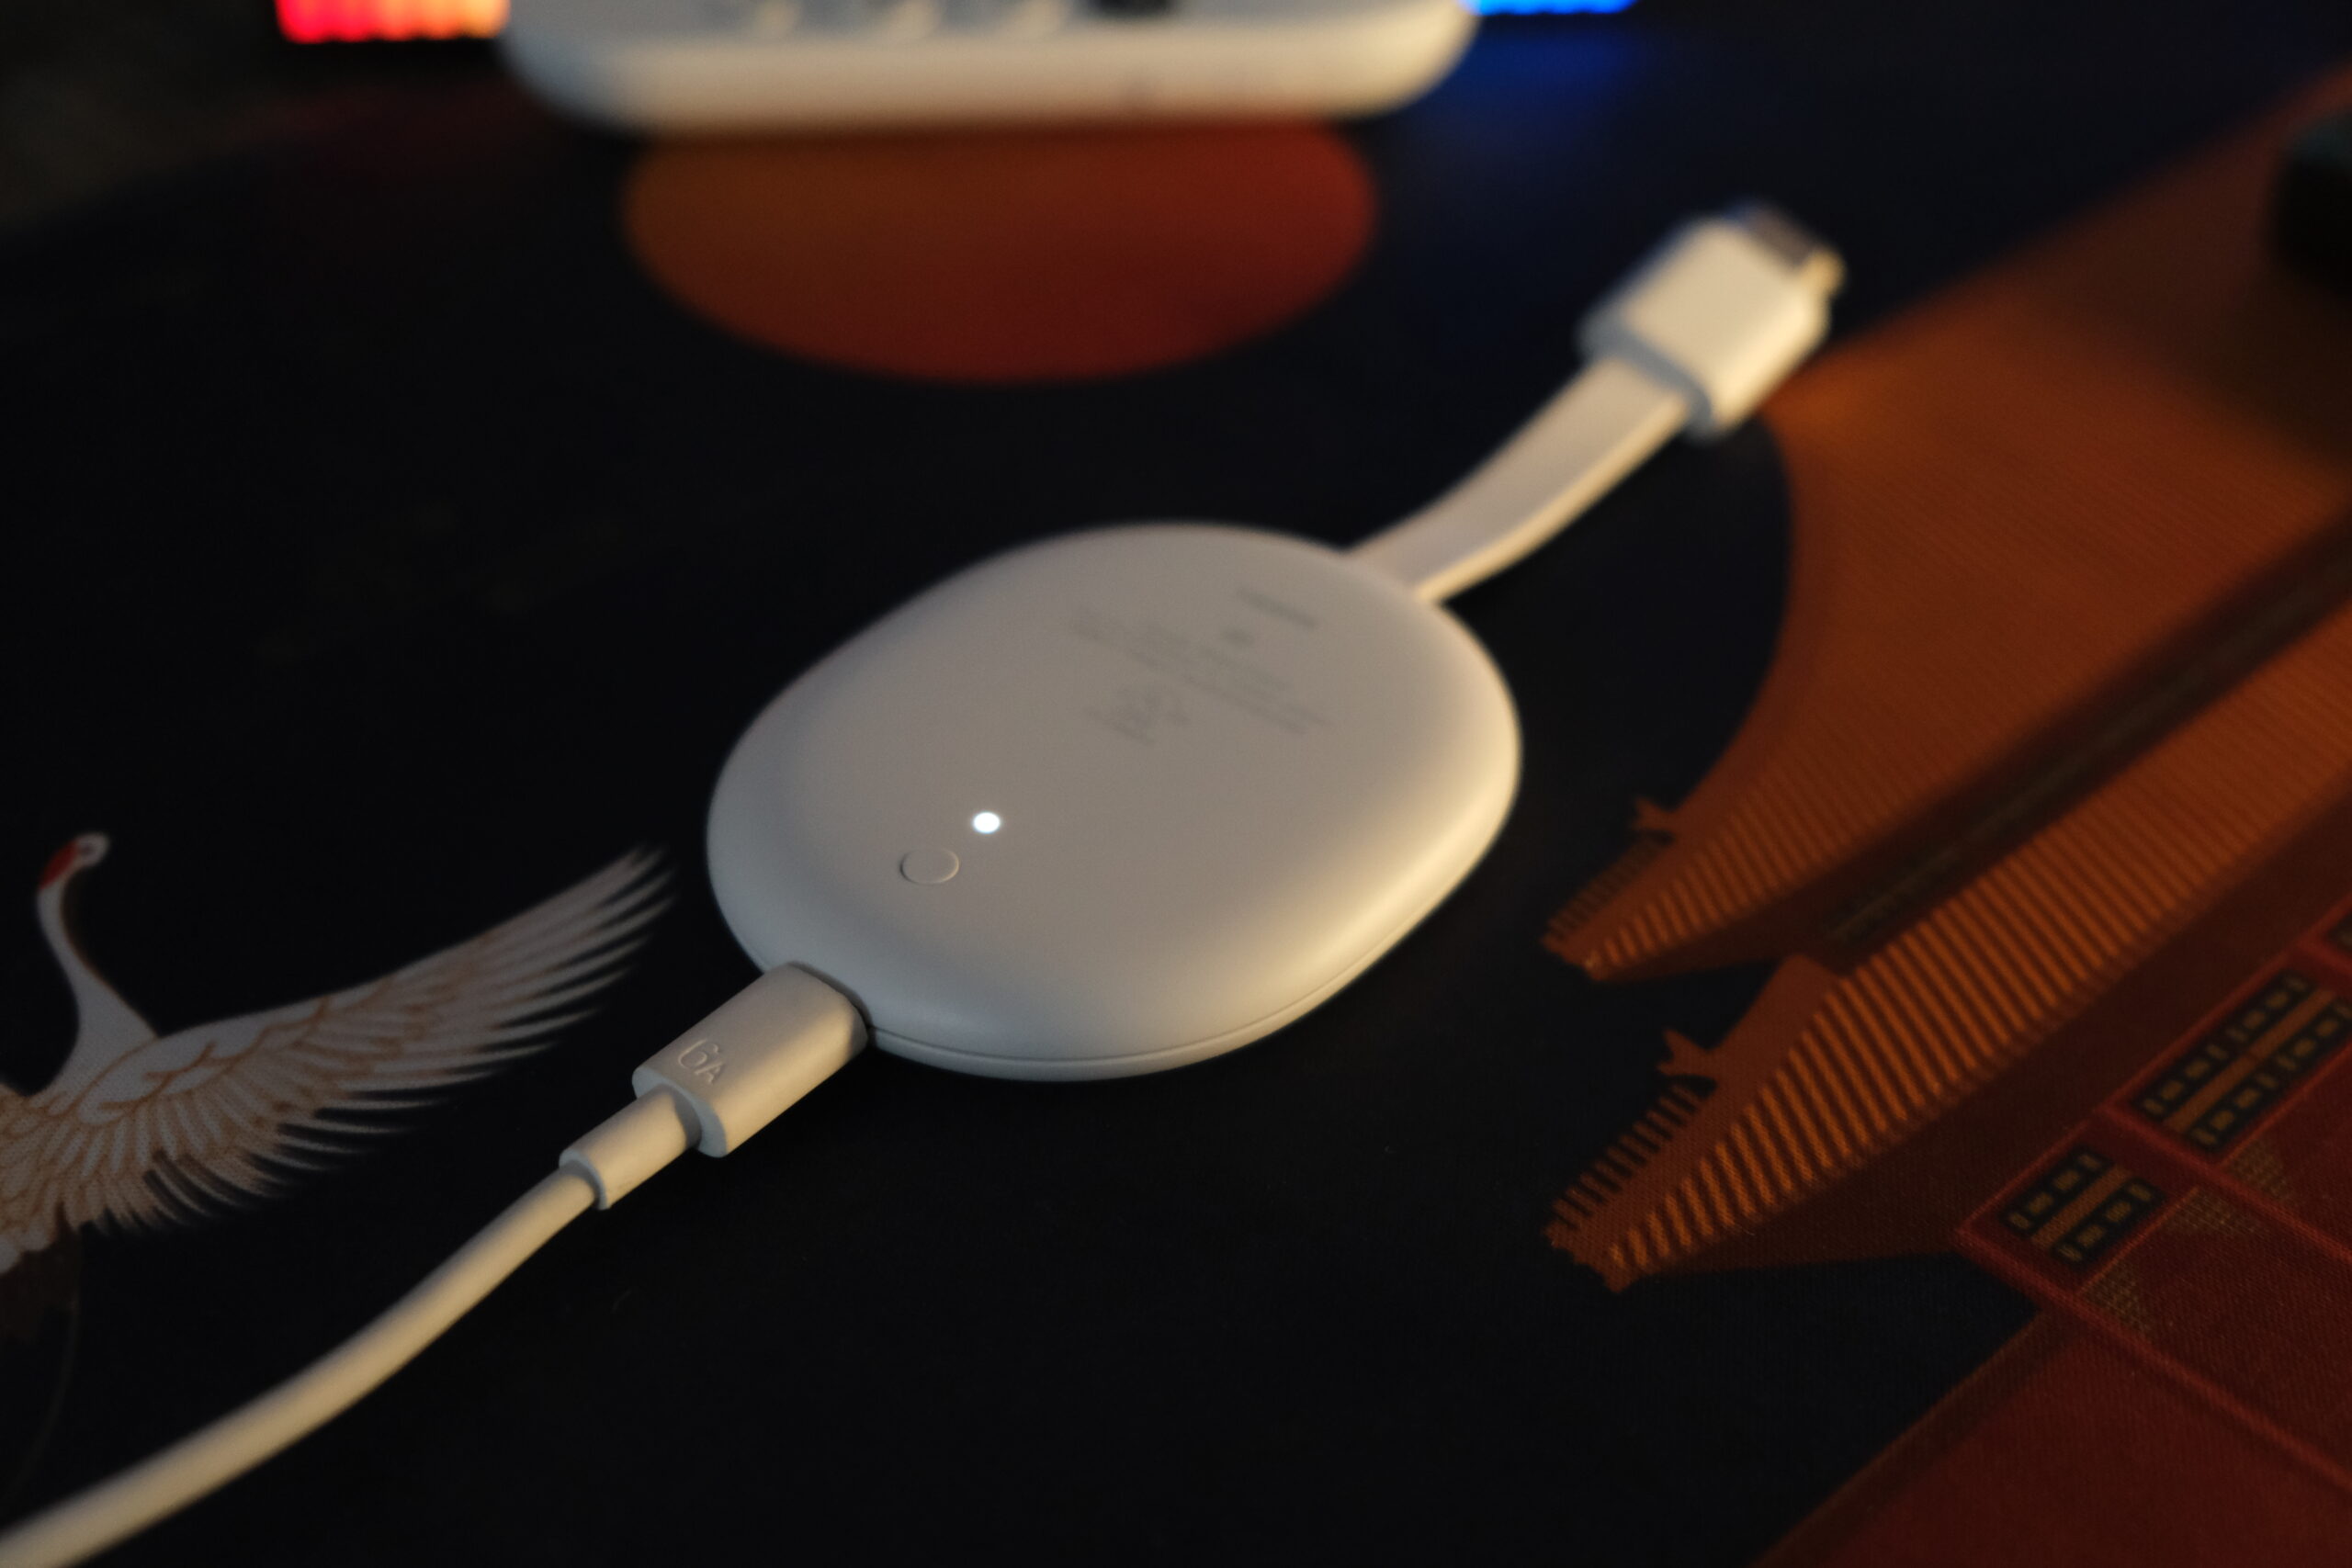
The white light indicating that the device is on - Open the Google Home app. It’s available for free on the App Store and Play Store.
- Choose your Chromecast from the list of devices. It should have the name you assigned during the setup, like “Living Room TV.”
- Tap the gear icon located in the upper-right corner of the screen.

Tap the gear icon at the top-right to acess Settings - Select “Wi-Fi.”

Select the Wi-Fi option from the list - Tap “Forget this Network” OR simply tap on “Forget” as shown above, if you see that option.

Confirm that you want to forget this Wi-Fi network
After forgetting the Wi-Fi network, you can set up your Chromecast with a new one. If you cannot connect to the new network, you may need to reset the Chromecast manually and set it up again.
Update the Firmware
Consider the issue in Chromecast’s software before you smash your remote control. Your Chromecast may stop working if you don’t install the latest updates from the app’s developers.
The developers refuse to allow you to use an outdated version of Chromecast; therefore, the light stays on, and the remote stops functioning.
Using your smartphone’s Google TV remote app is a common solution. You can also use the Google TV app to turn your phone into a Chromecast remote if you haven’t already.
If your mobile device and Chromecast are linked to the same WiFi network, you should see Chromecast when the app is launched. To complete the task, perform as follows:
- Navigate to the Chromecast settings. On Chromecast with Google TV, look for the gear icon in the top-right of the screen.
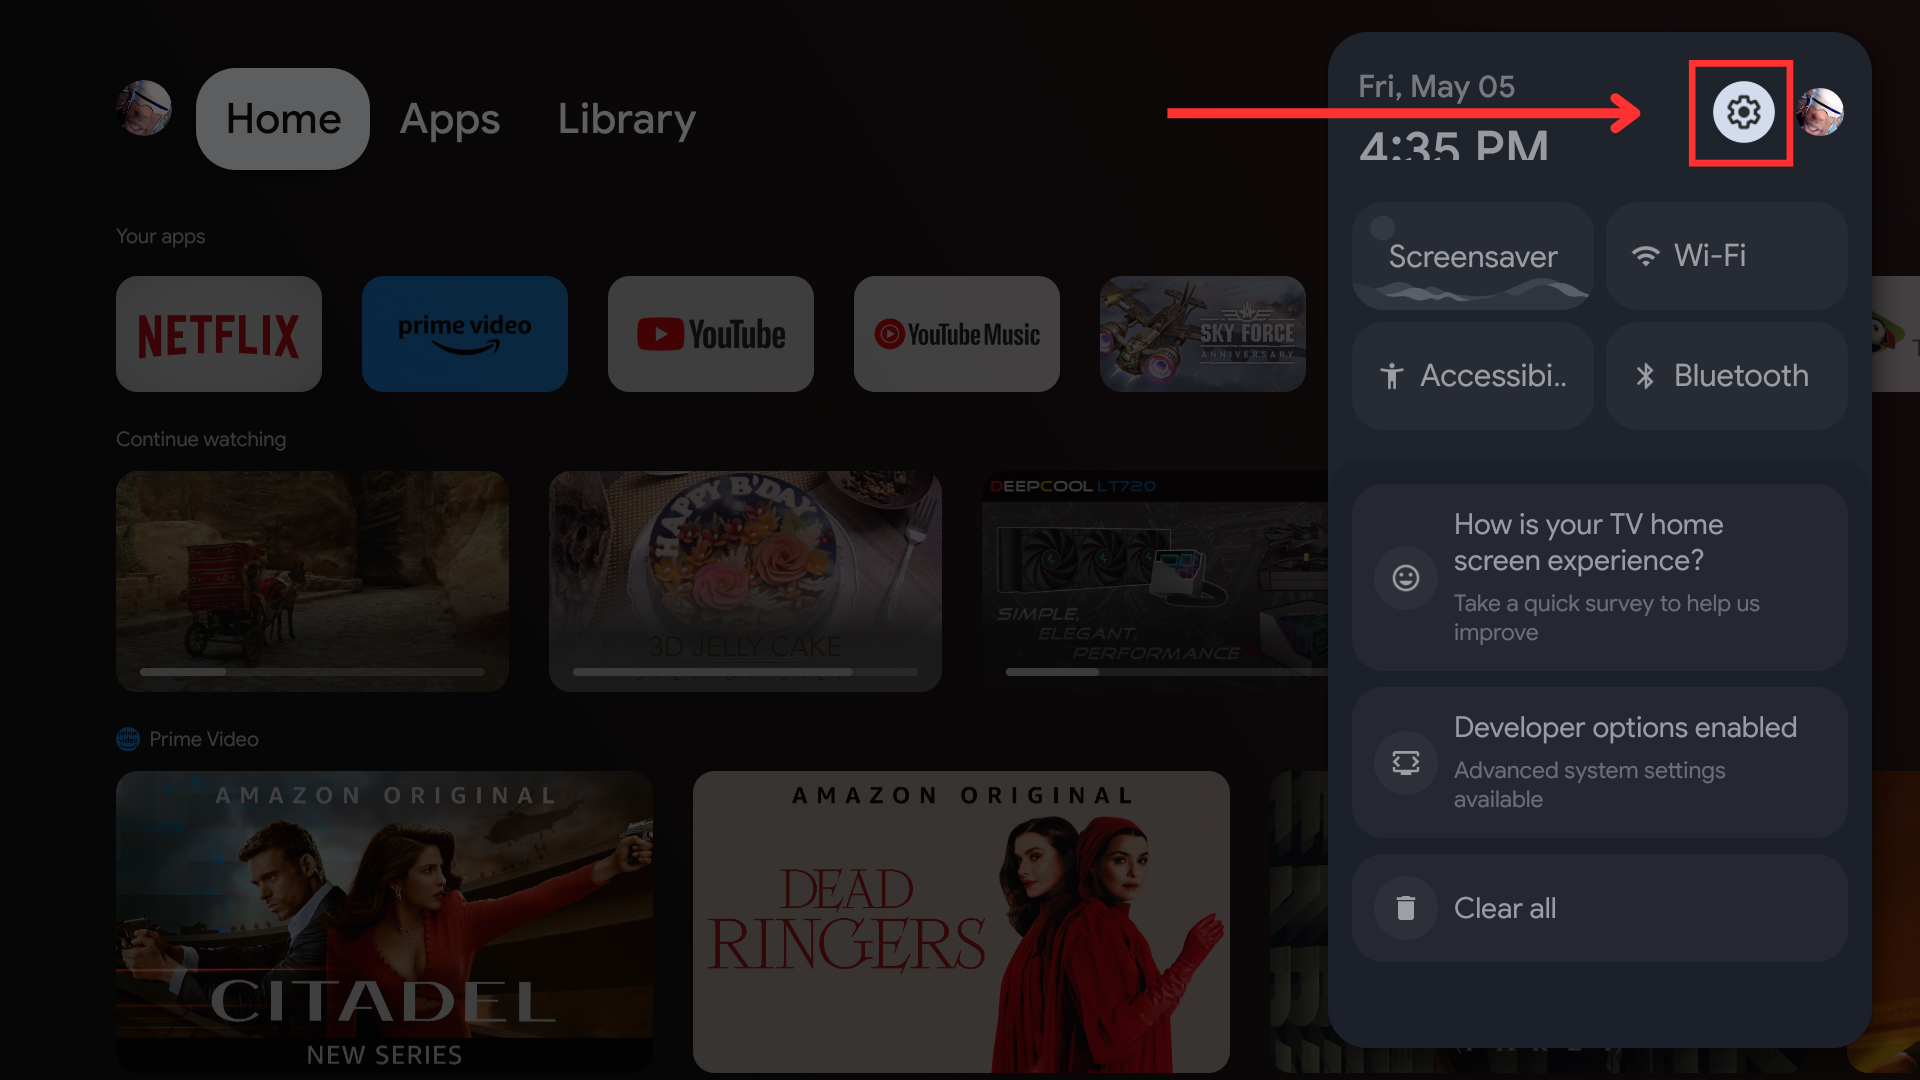
Open the settings - Select the “Remotes & Accessories” menu to locate your Chromecast’s compatible remote.
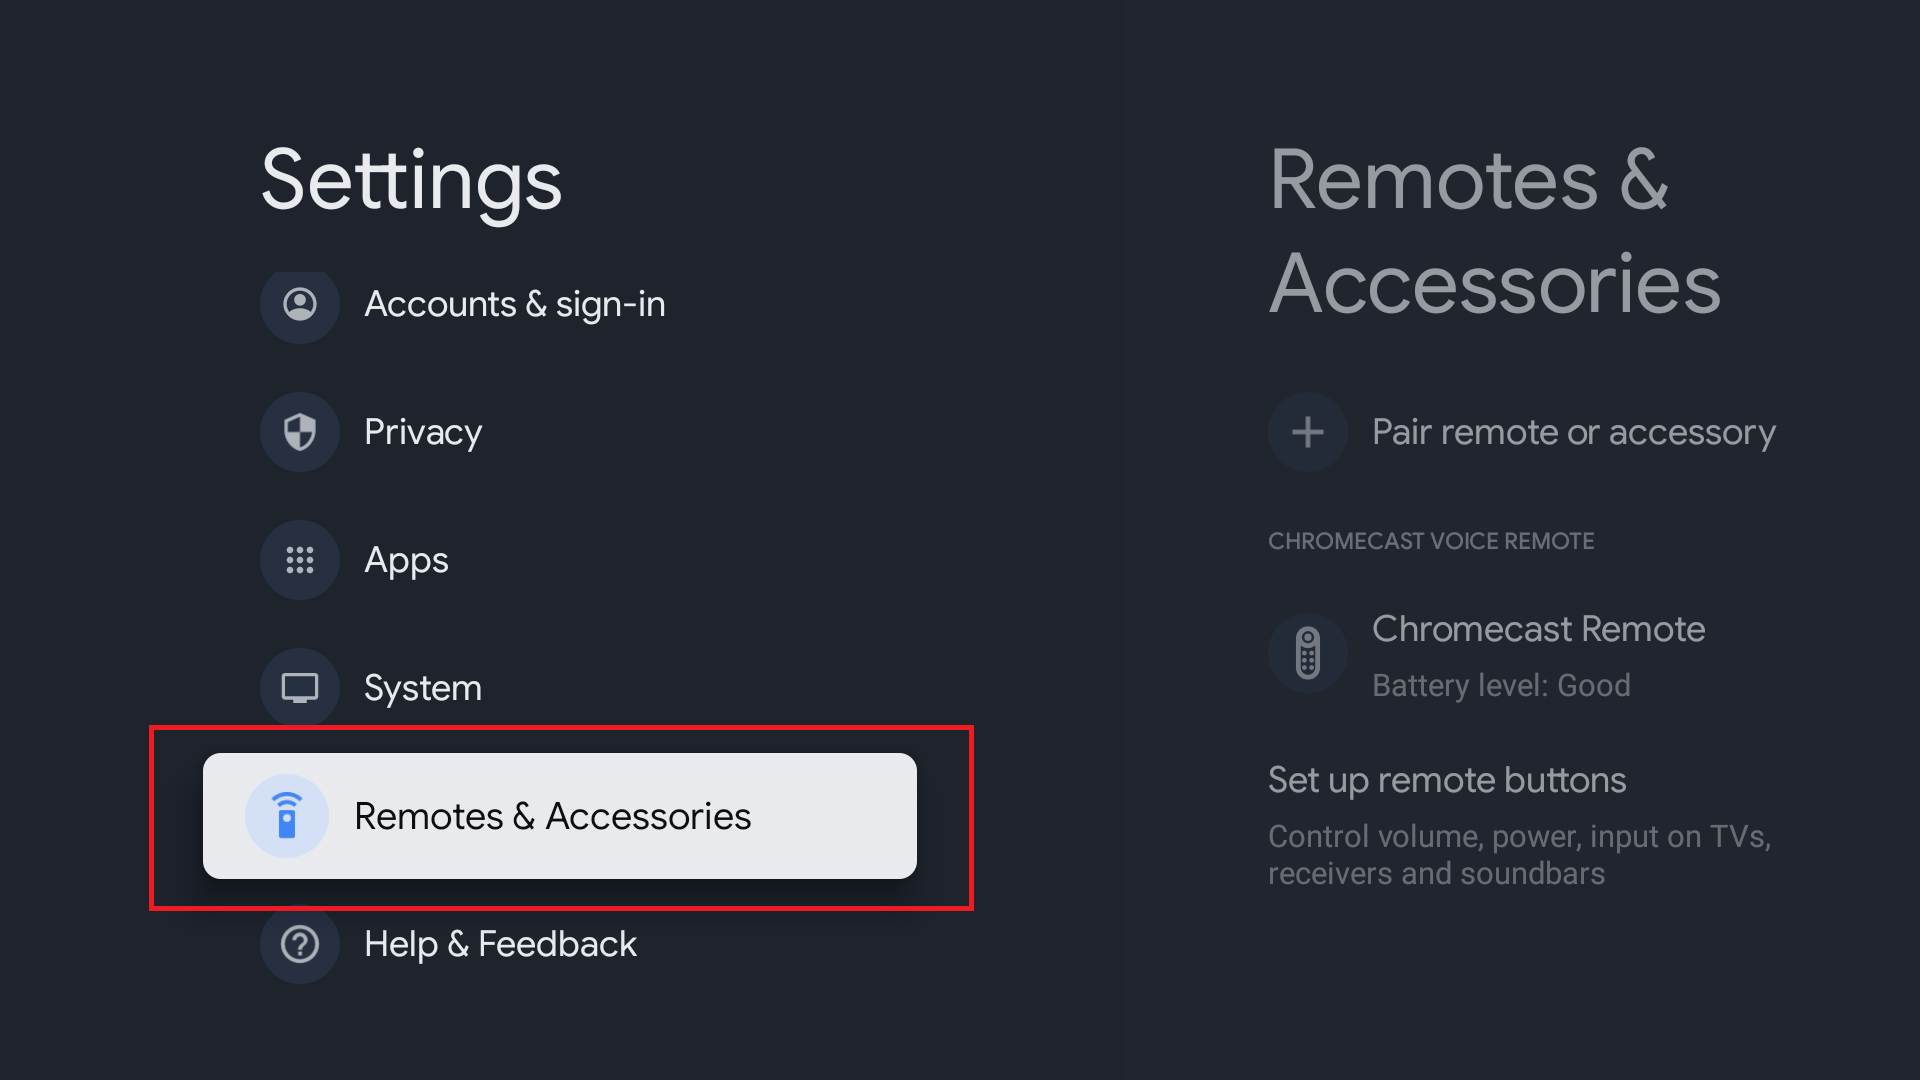
Go to Remote and accessories - Click on your currently paired remote, and see if it says, “Remote is up to date” on the right.
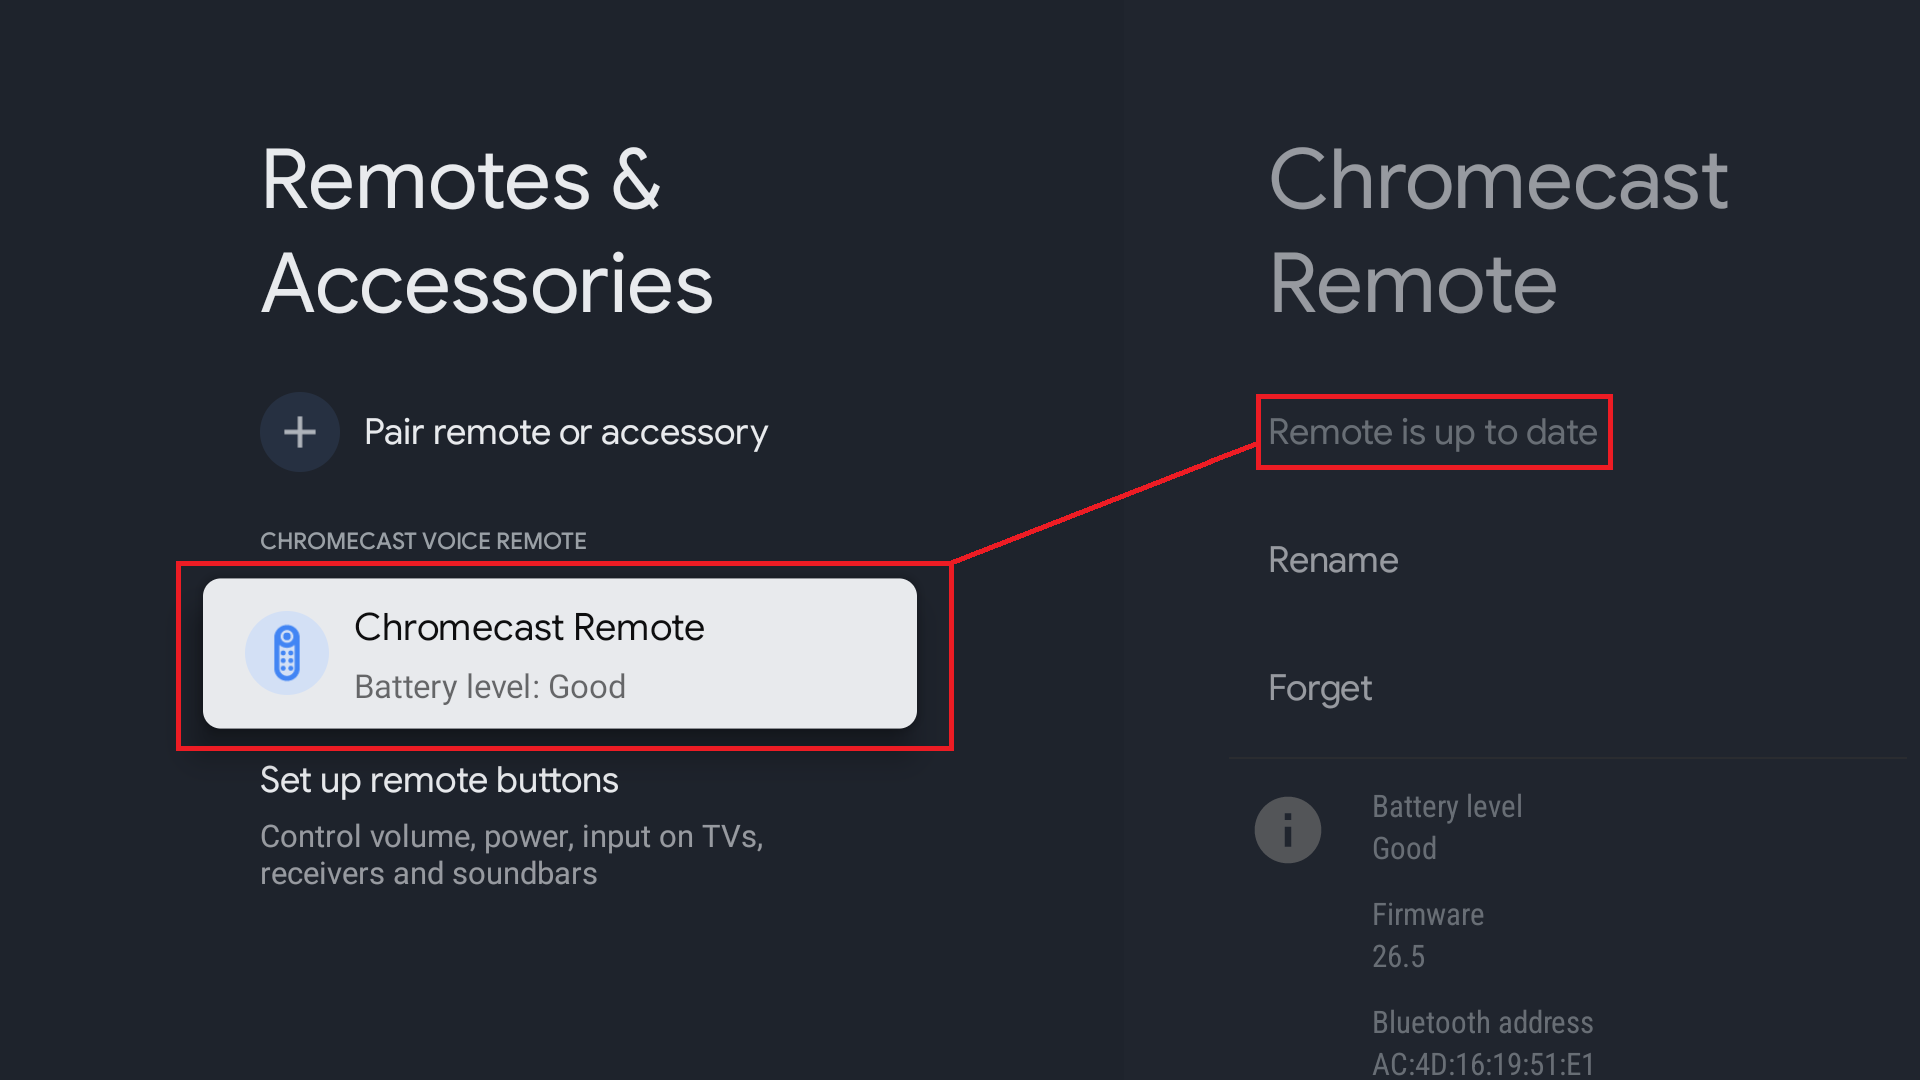
Choose the currently connected remote
If there is an available update for firmware, select the option to update it. The update typically occurs every 10 minutes. You should be ready to go after the update.
Factory Reset the Chromecast
If it doesn’t work, try this other method. You will not lose any information if you restore your Chromecast to factory settings, but you must set up your Google TV from the start. A factory reset can also help solve other issues preventing the Chromecast from working.
- To perform a factory reset, you’ll need to get to the physical reset button on your Chromecast.
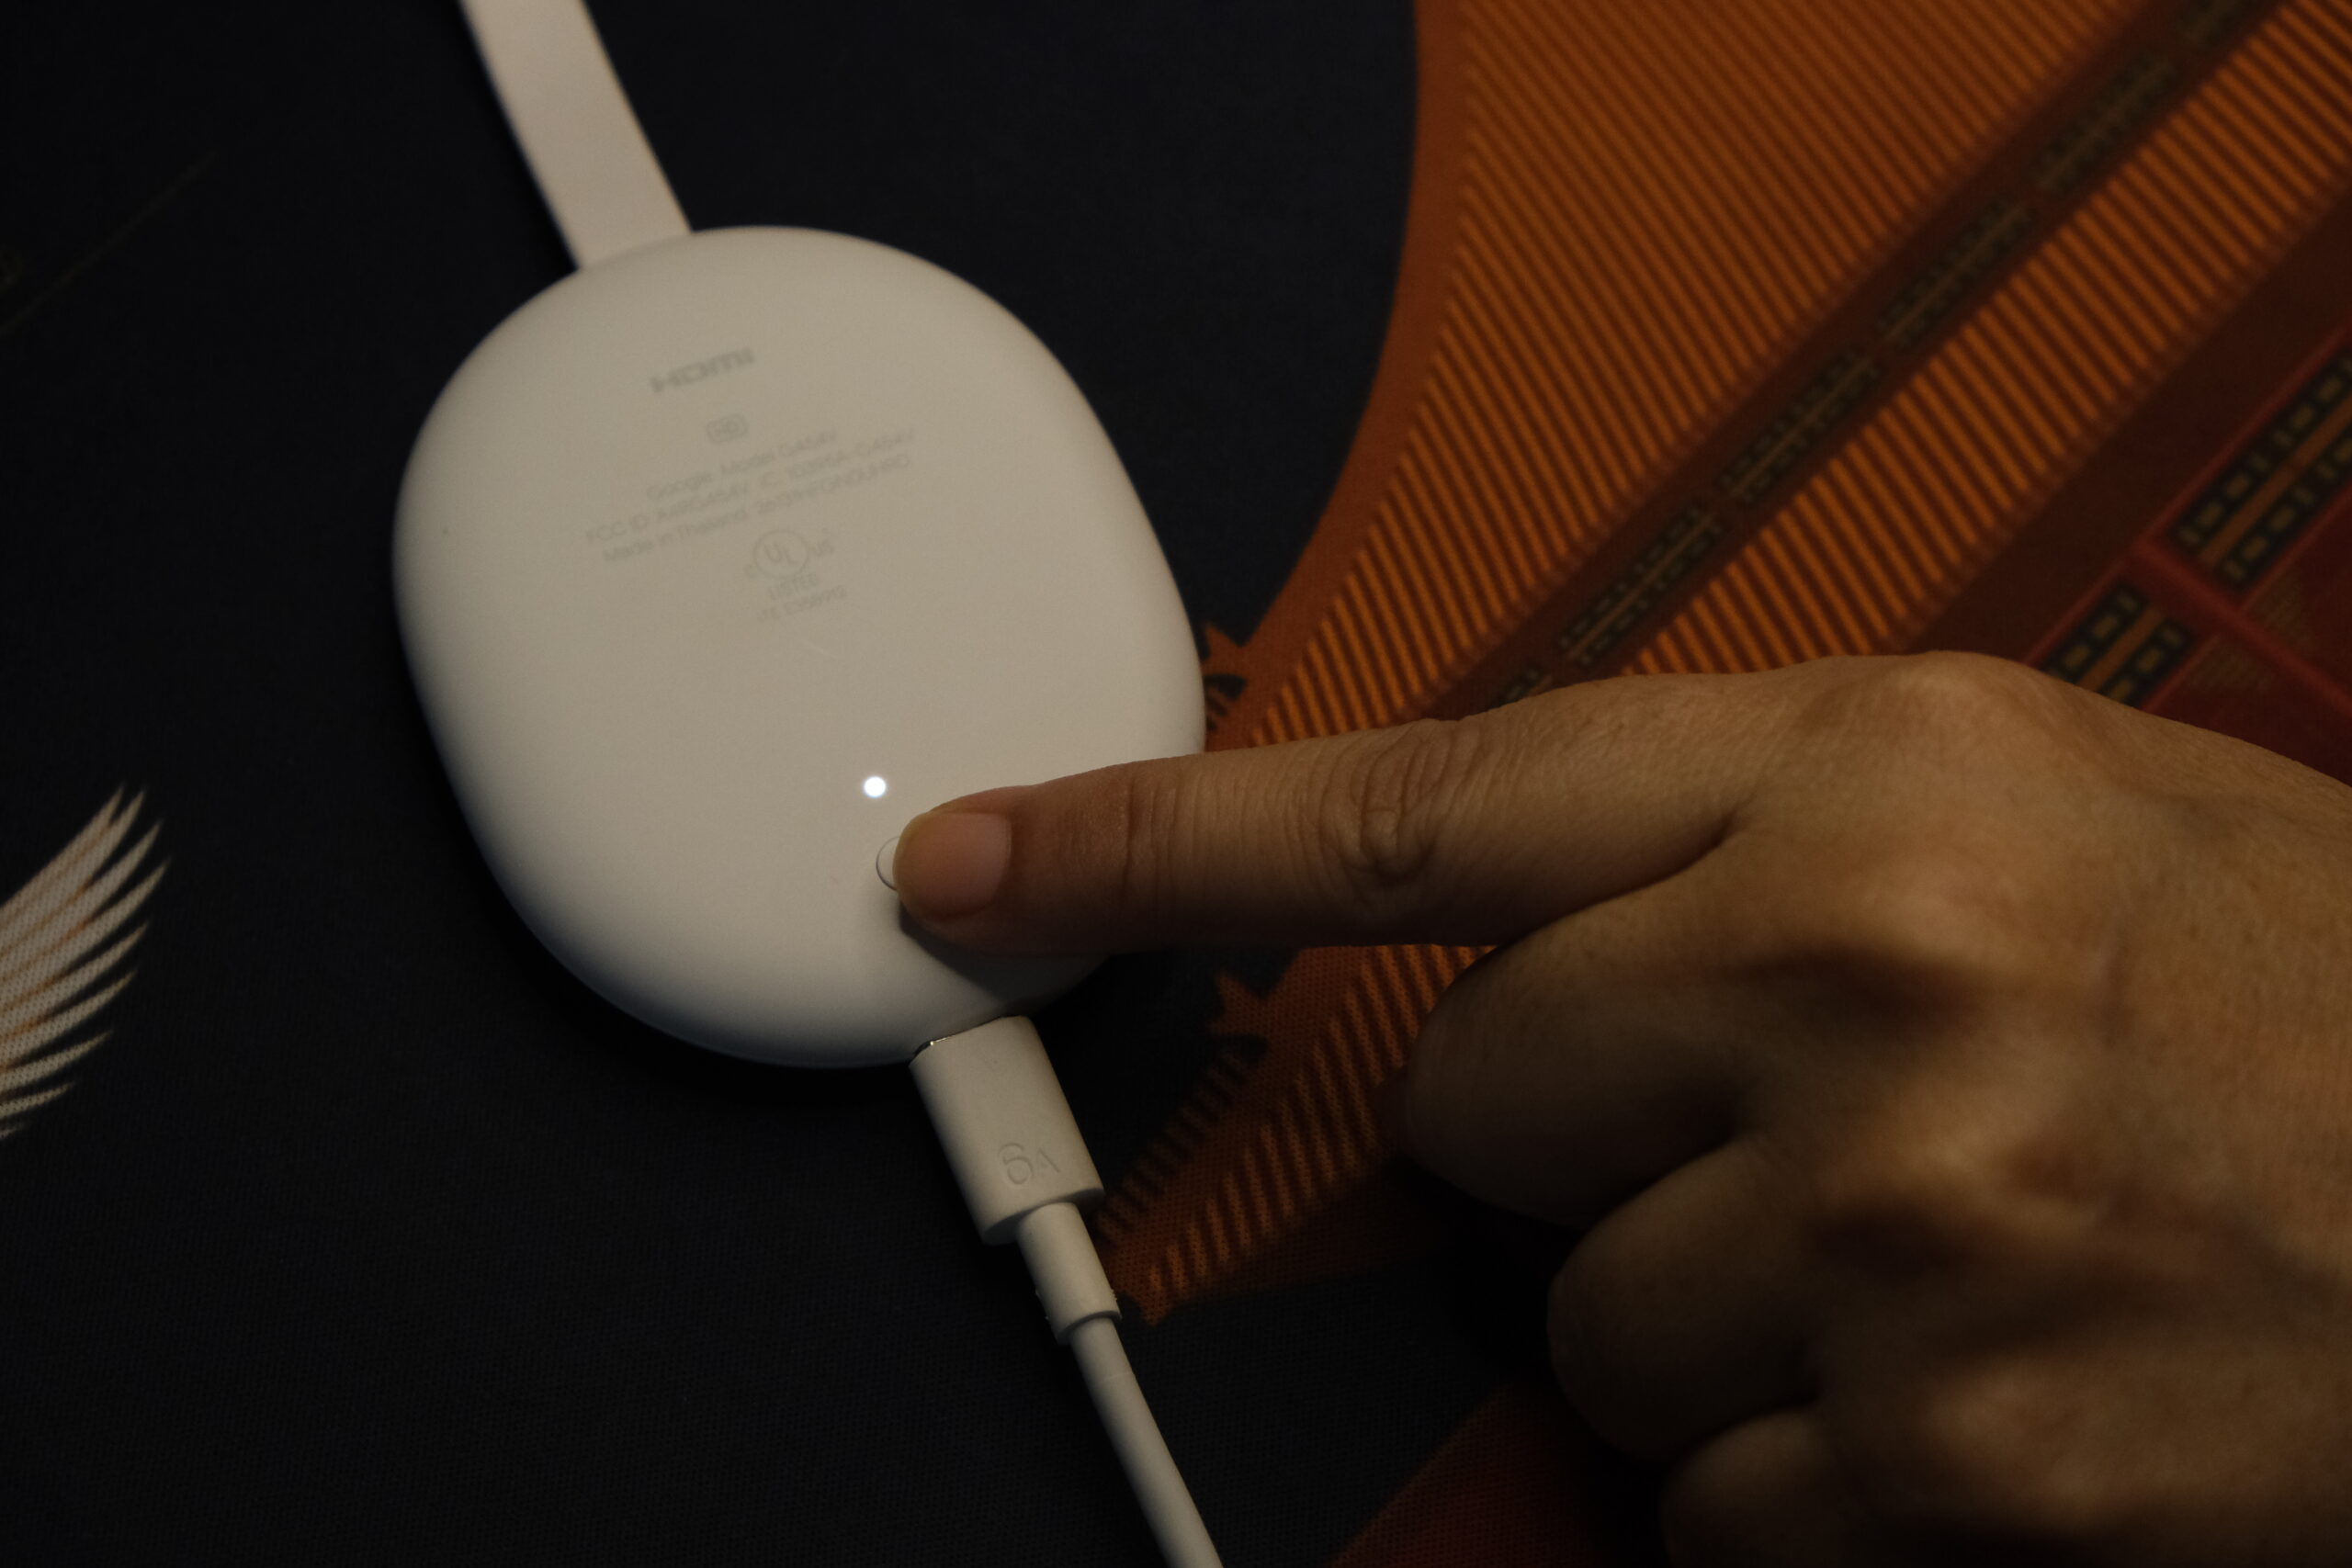
- Keep pressing and holding the Chromecast’s power button while it’s on. On Chromecast with Google TV, the light will begin flashing yellow, while on Chromecast Ultra (2nd and 3rd generation), it will flash orange. If you have a Chromecast from the first generation, a red light will flash.
- Hold the button until the indicator goes white (this works across generations).

After the Chromecast restarts, the factory settings are restored. You can restart the Chromecast setup process now. After a factory reset, Chromecast will begin the remote setup procedure again.
Repair the Remote
If changing the Chromecast’s batteries doesn’t solve the problem, try repairing the controller. Restarting the device will pair the remote automatically if it is already in pairing mode. In addition, the Chromecast button or the TV’s remote can initiate pairing.
Using Chromecast Physical Button
- Find the physical reset button located on your Chromecast and press it. You must have your device plugged into your TV for this to work. The button should be pressed once. The screen should display a search for accessories.
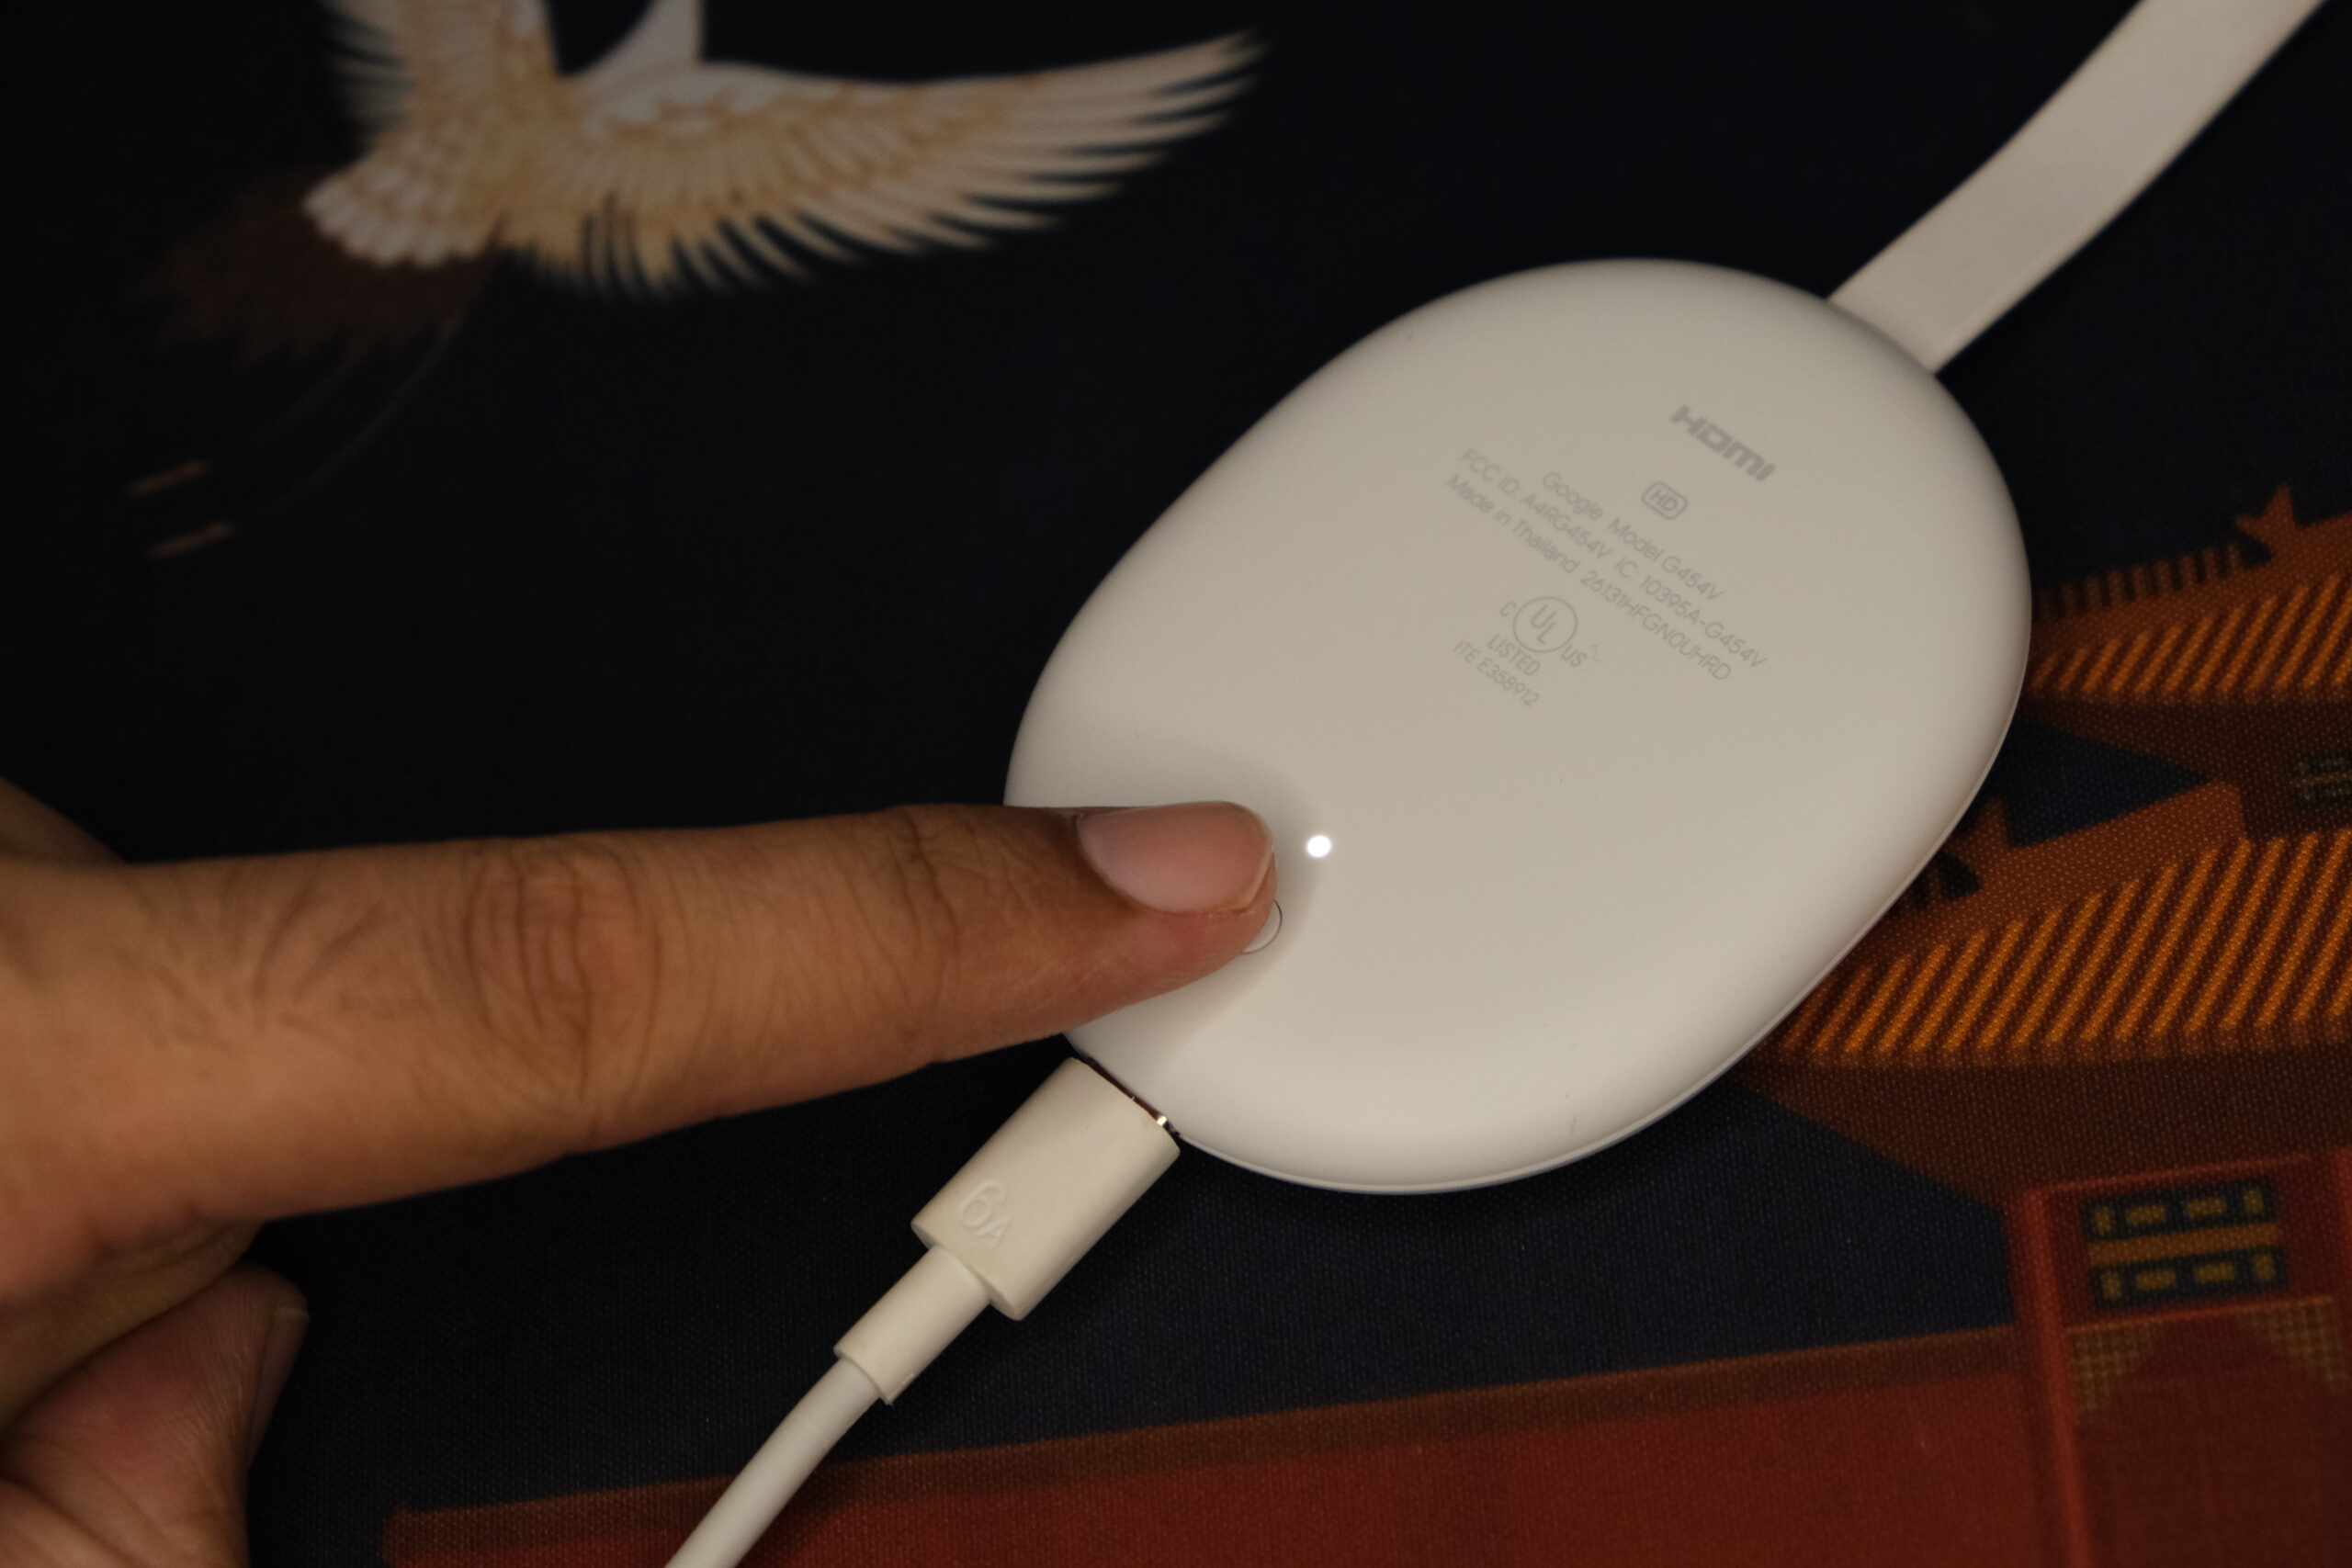
- Hold down the Back and Home buttons simultaneously to activate the flashing LED.
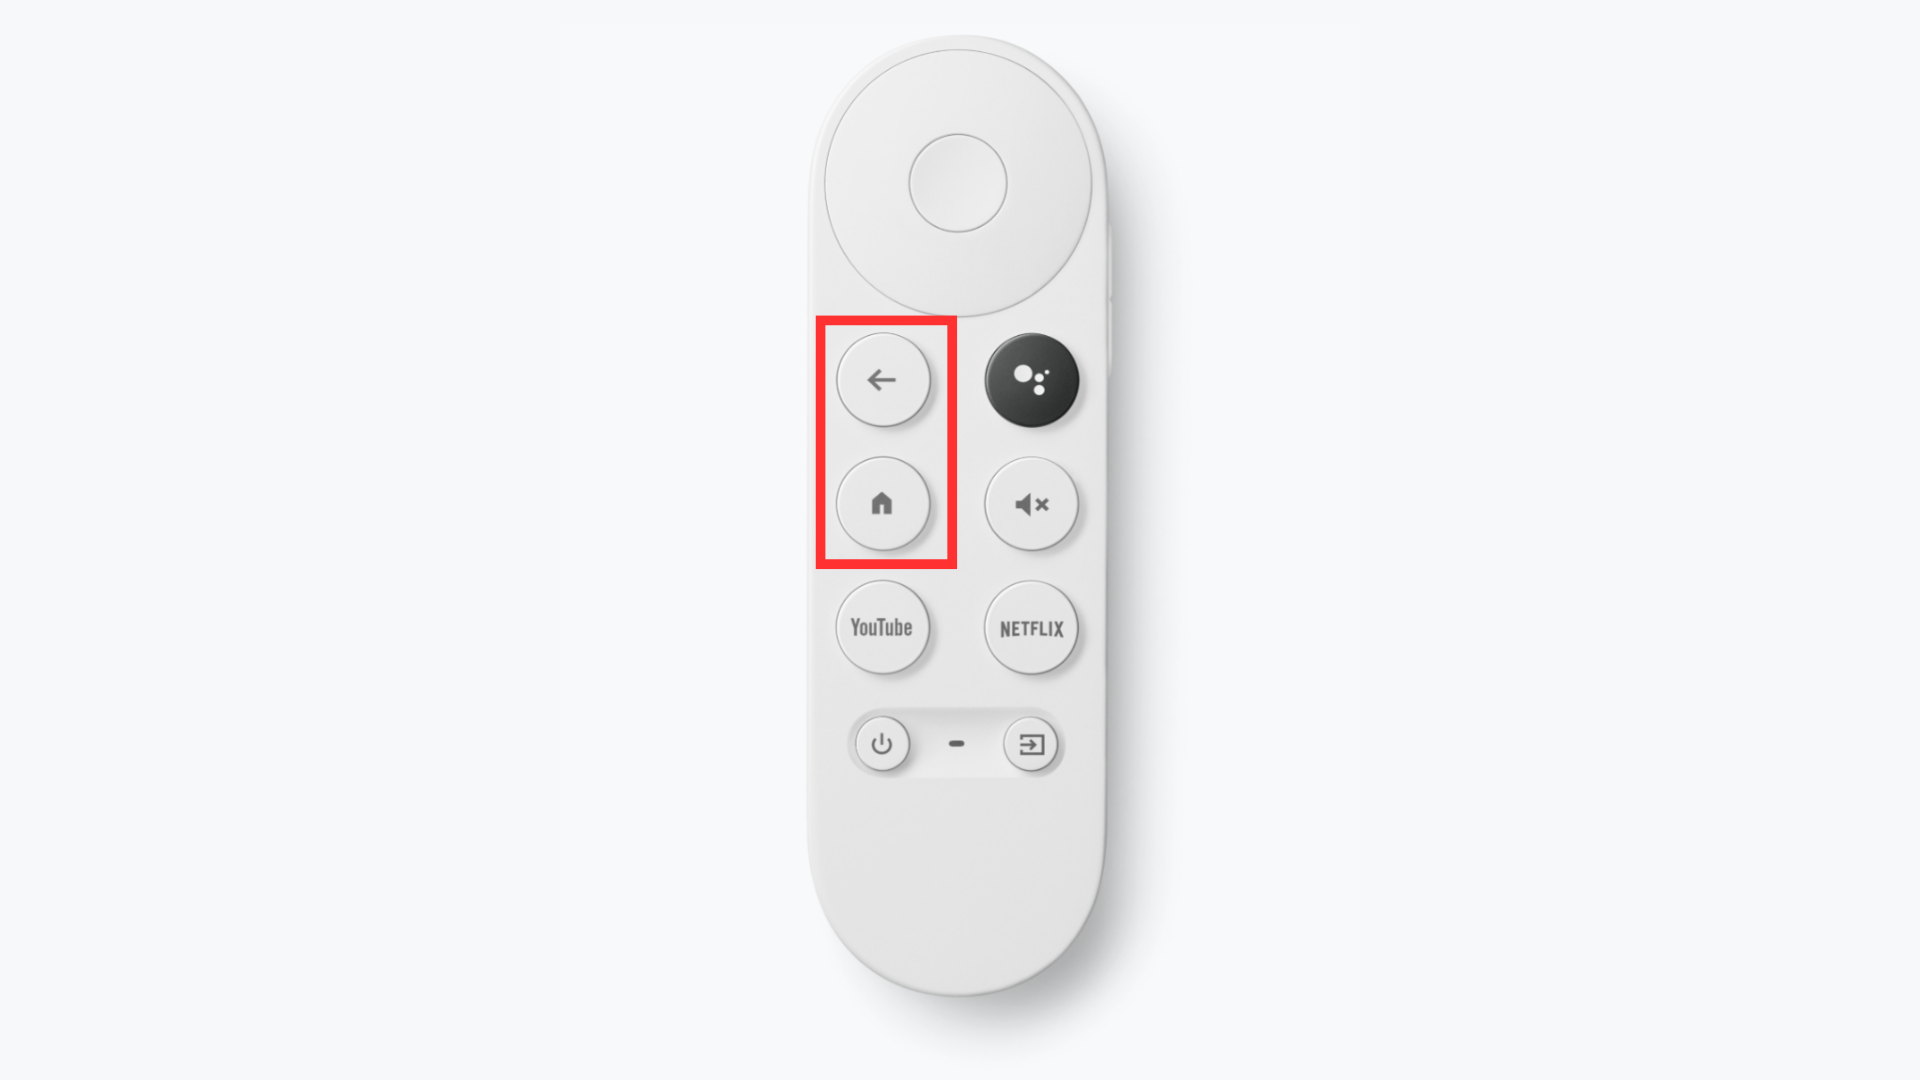
Press and hold the Back and Home button at the same time
Using TV’s Remote
If Chromecast and your TV support HDMI CEC, you can use this way to navigate settings easily. It’s possible that certain TVs don’t have this feature, though.
- Access the Settings menu by selecting the gear icon at the top right of the homepage.

Open the settings - Select Chromecast Remote from the “Remotes & Accessories” menu.

Go to Remote and accessories - Click on the currently-paired remote.
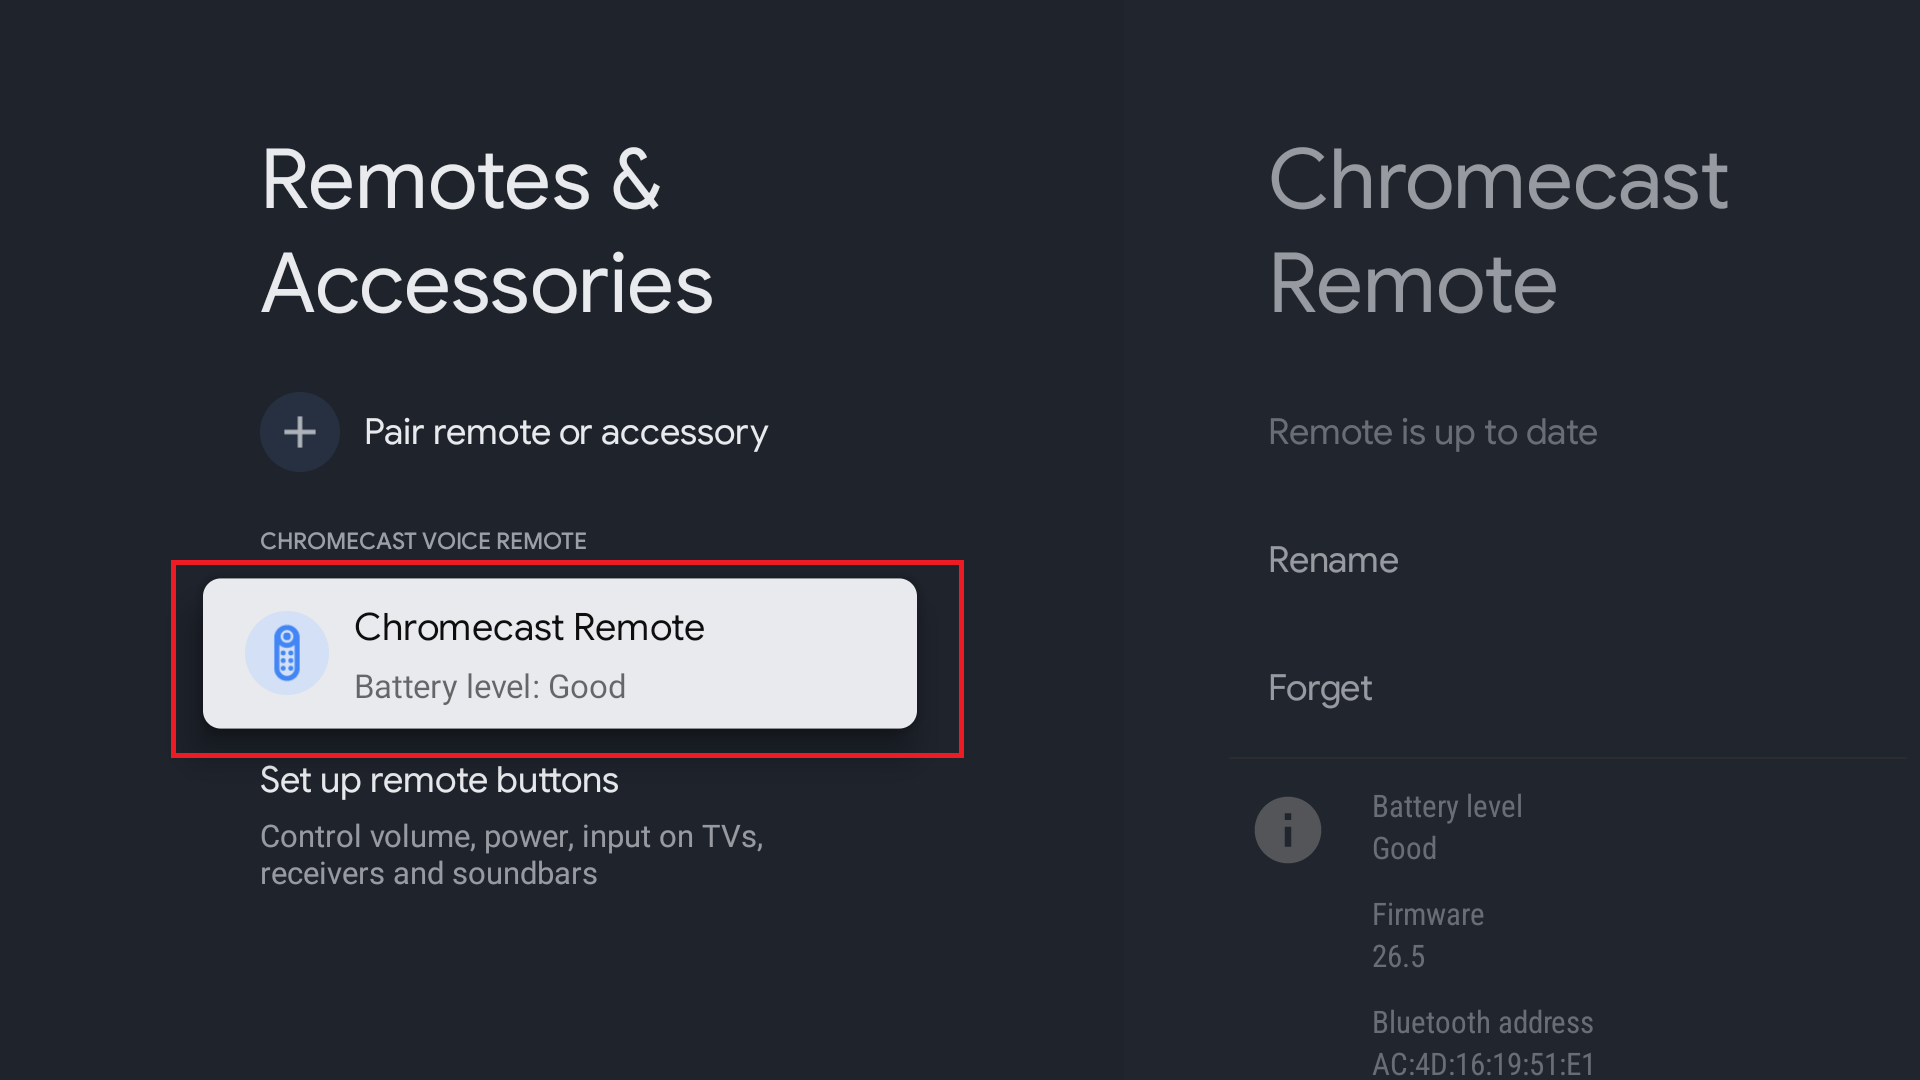
Click on the remote name - Tap the Forget button. Confirm you selection by tapping yes.
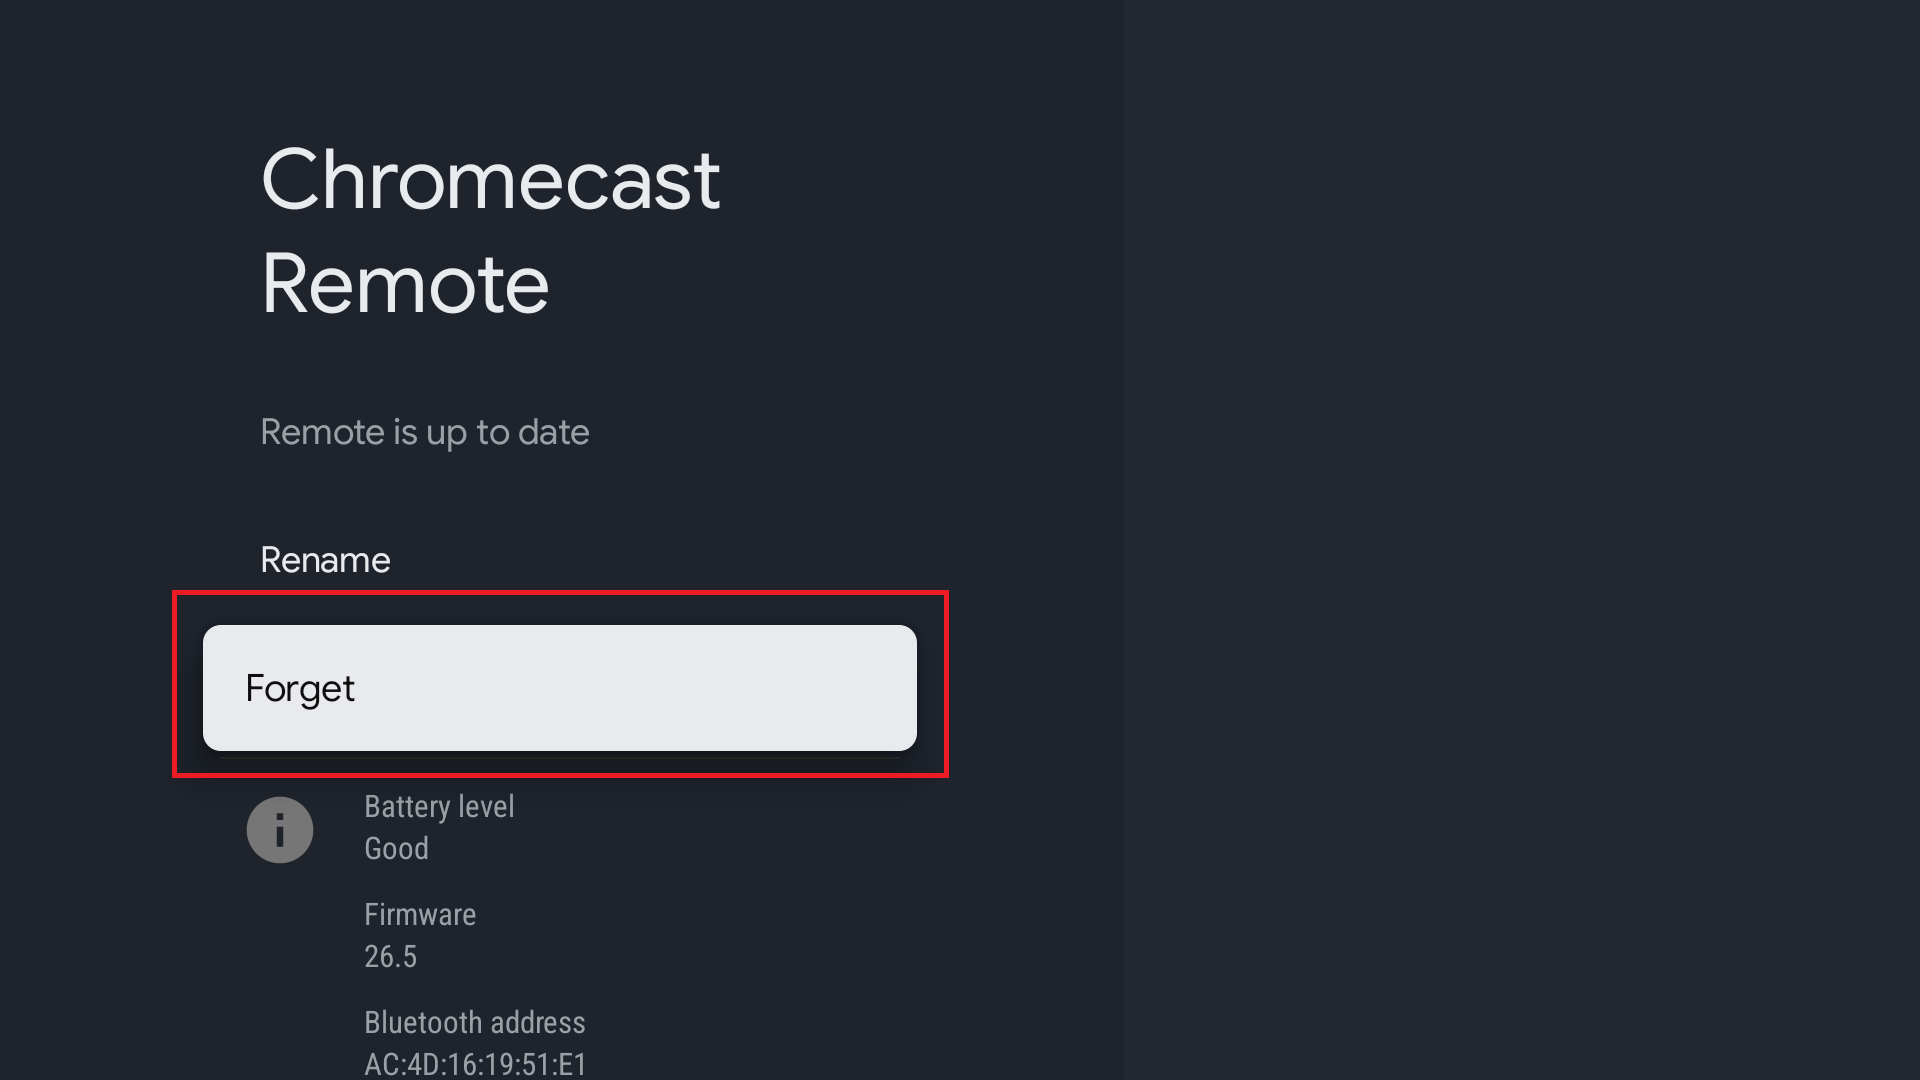
Click on “Forget” - Go back to Remotes & Accessories from the menu and choose “Pair remote or accessory.” Your Chromecast will immediately begin looking for accessories.
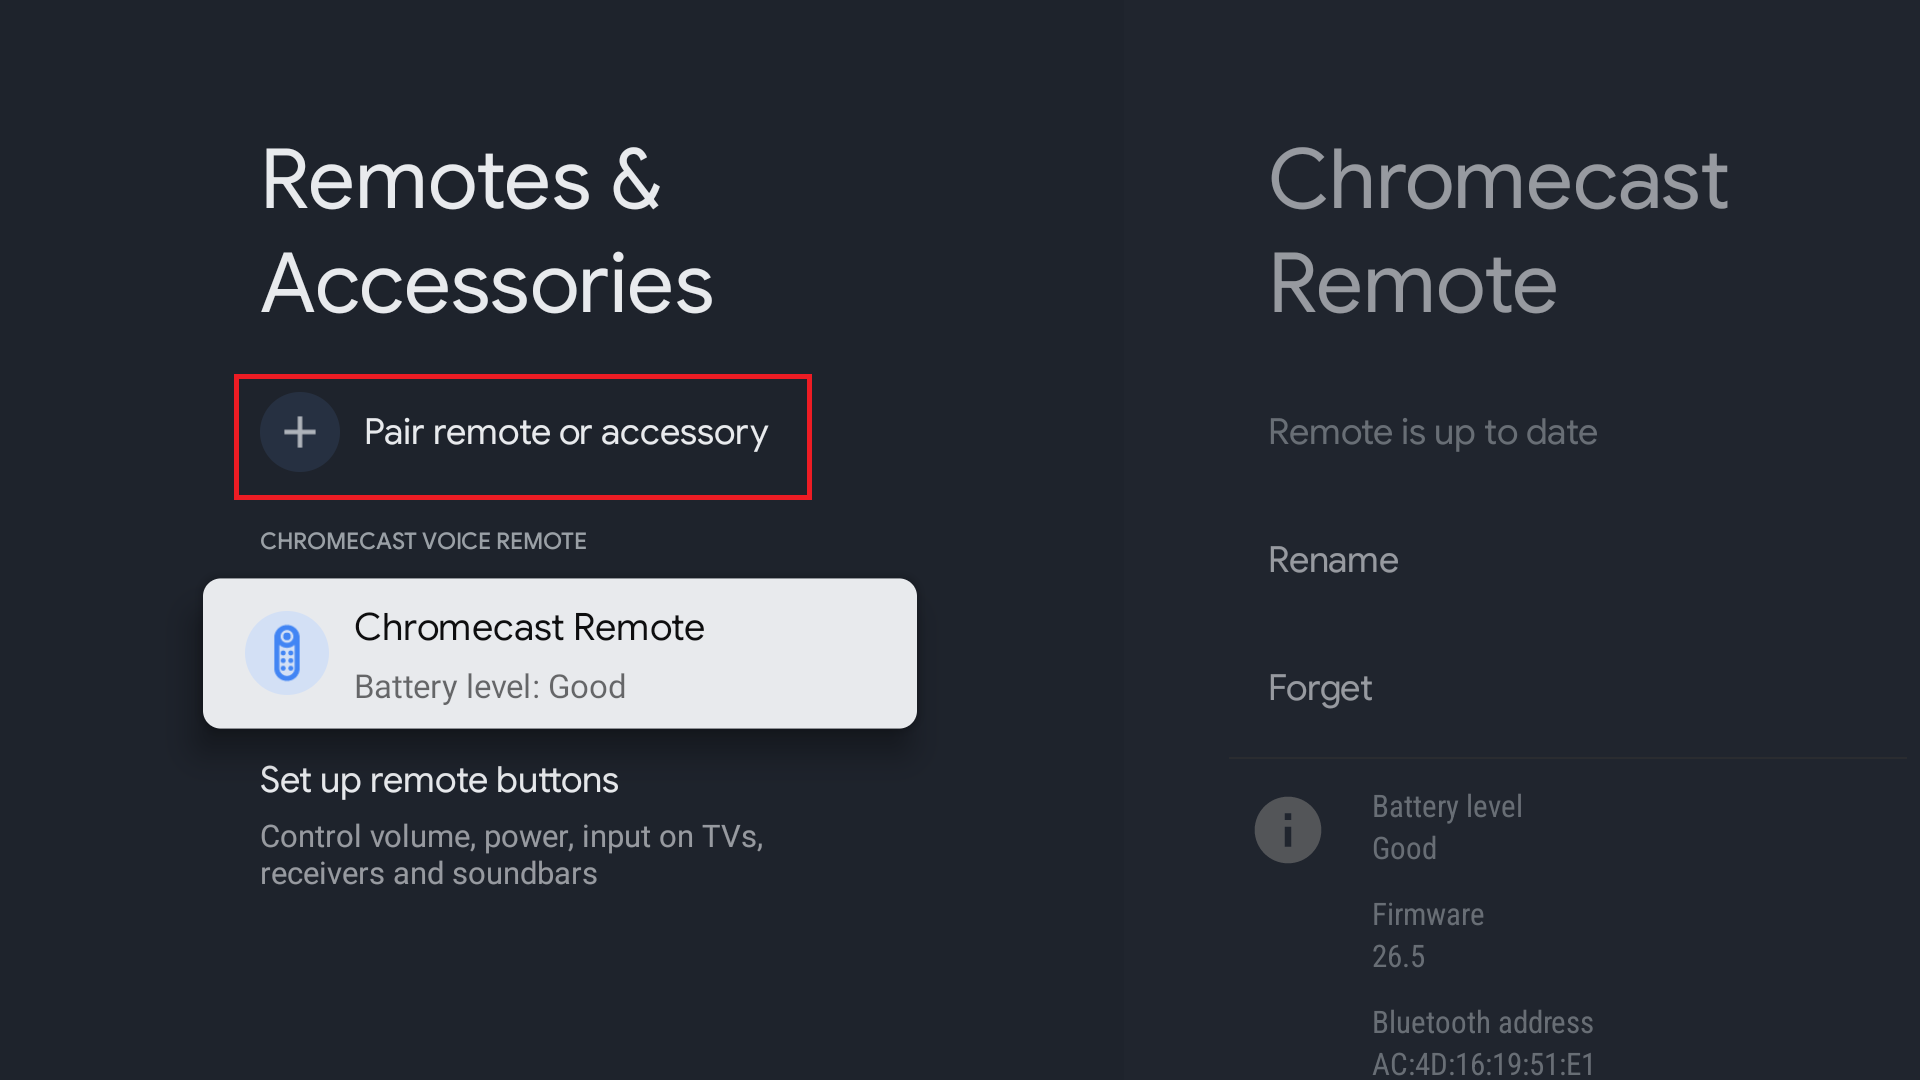
Click on “Pair remote or accessory” - To pair a remote, press and hold the Back and Home buttons until you see the light pulsing on the remote. Chromecast will detect the remote and start pairing.
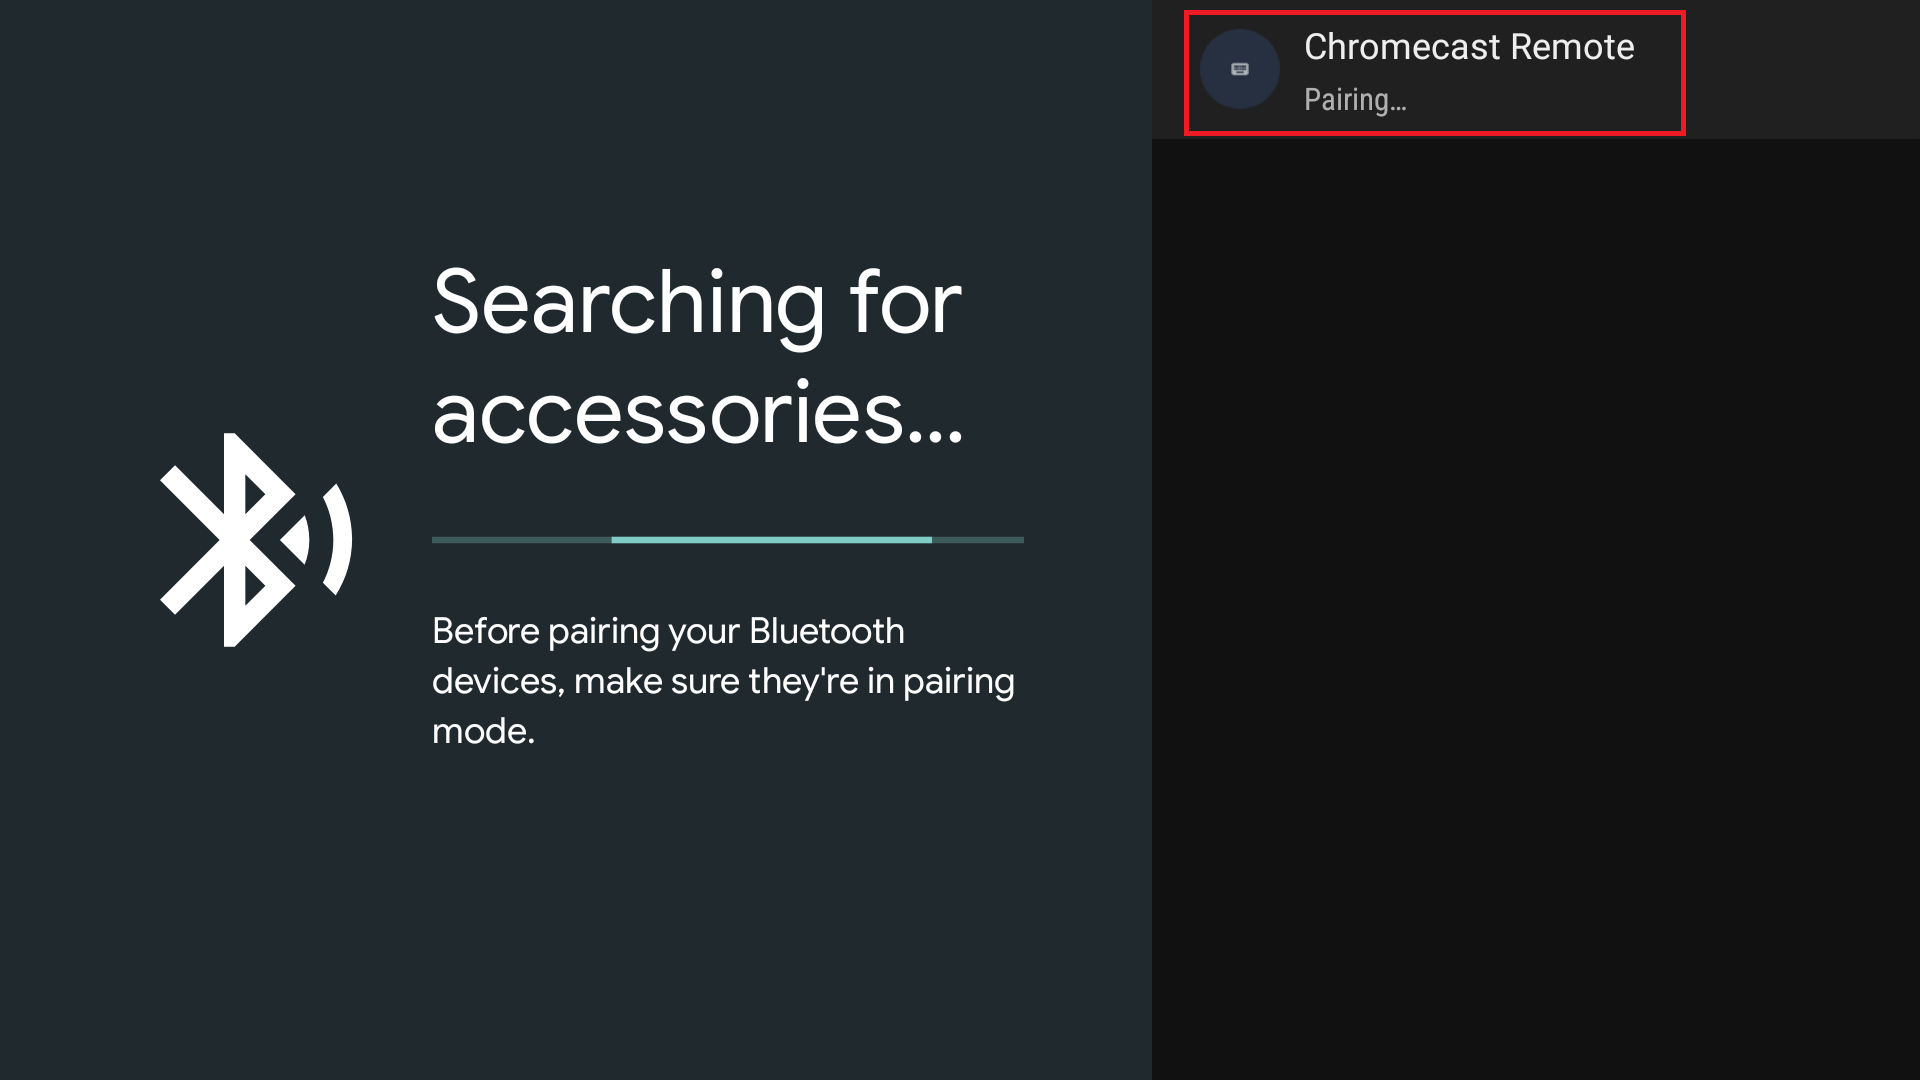
Chromecast will start pairing with remote
When the Paired icon appears on the screen, the Chromecast remote control device will be ready to use.
Use Rechargeable Batteries
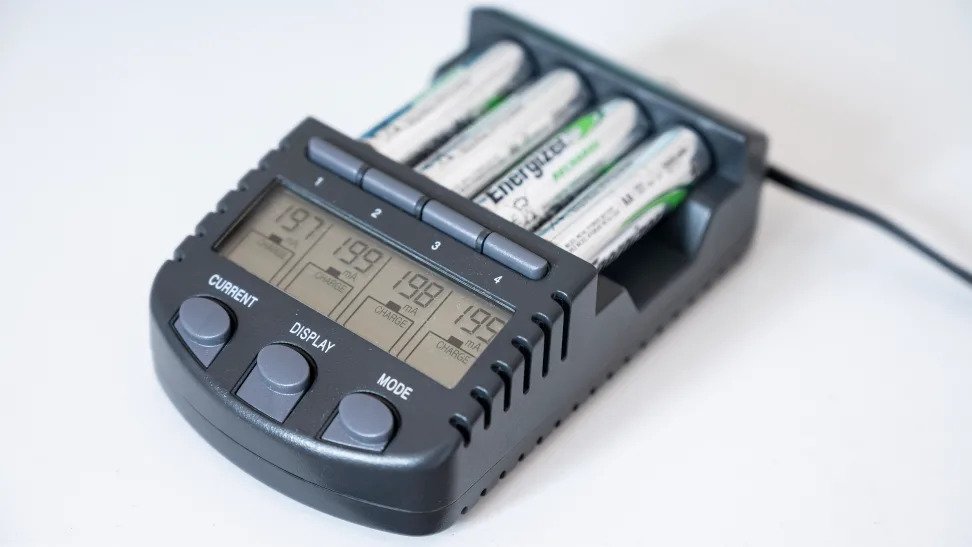
Using the rechargeable batteries for Chromecast remote control is one solution. If battery depletion is happening too frequently, this will significantly decrease battery expenses. This solution can be useful if the issue remains with all Chromecast remote controls.
Check the IR Blaster of the Chromecast remote
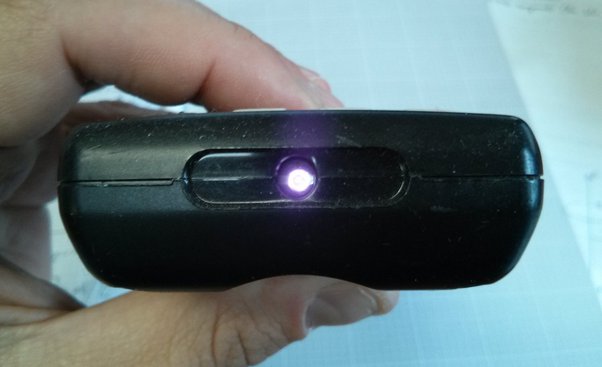
The IR Blaster on the Chromecast remote transmits signals to Chromecast devices. IR blaster will flash in response to button presses on the controller. A camera can be used to inspect the IR Blaster.
If the IR Blaster’s light blinks on its own, it signifies a key is trapped in the pushed position or there is some problem with the device. If the IR Blaster stays turned off and acts normally, there is likely nothing wrong with it.
Contact Support
Unfortunately, if none of those steps helped, your only remaining option is to contact technical support and have them reset your device or repair your remote. If the Chromecast you’re using is still under warranty, you can have the controller replaced or fix it at no extra charge if that fails.
 Reviewed by


