How to Change or Replace Colors in GIMP?
GIMP is similar to Photoshop, and many photographers and designers use it for photo editing. When it comes to changing or replacing colors in GIMP, it offers a variety of options for this task. Colors in a photo are significant as they can alter the entire image’s look.

Whether you’re looking to correct colors, create artistic effects, or experiment with new looks, GIMP provides tools that can help. In this article, we’ll explore some basic yet essential methods for changing and replacing colors in GIMP.
Using the Bucket Fill Tool to Change Colors
The bucket fill tool is commonly used for adding or changing colors in an image area. Most users are familiar with this tool because it is also used in Microsoft Paint. The bucket tool works best with solid colors but can also fill patterns when set accordingly.
- Open GIMP and choose File > Open to locate and open your image file.
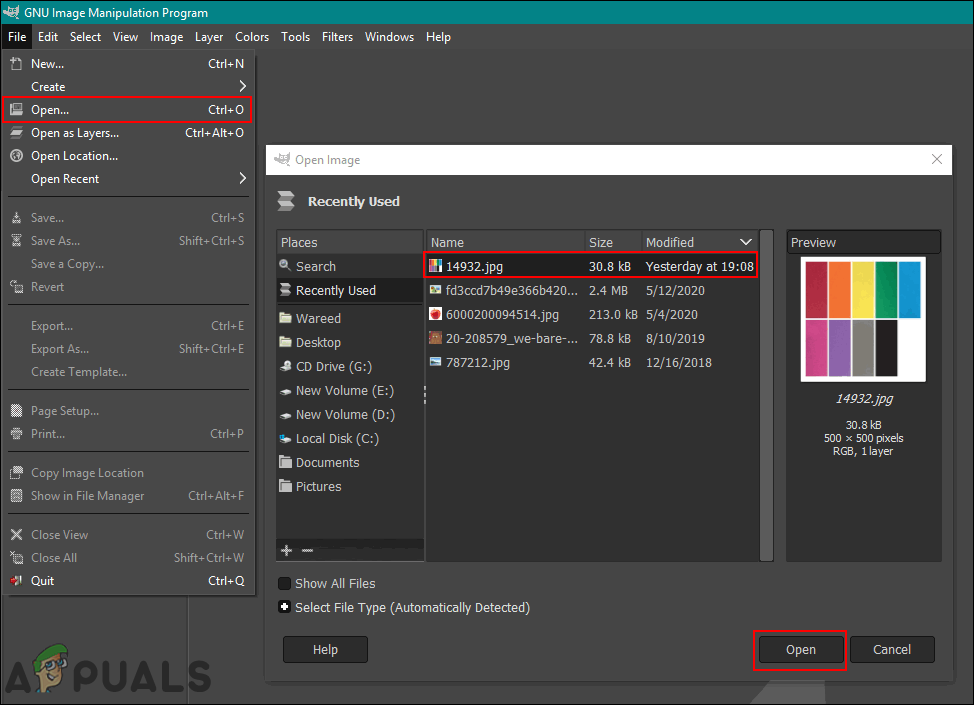
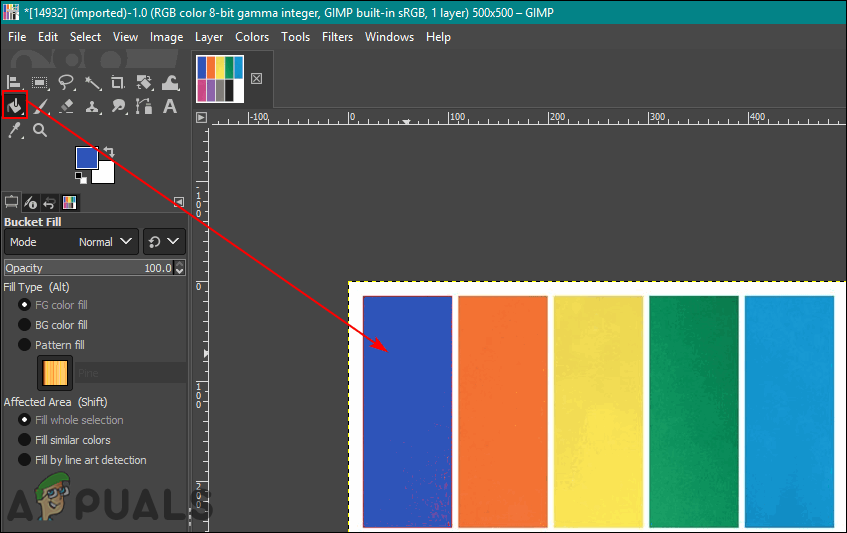
Opening file in GIMP - Click the active foreground color on the left side to select a new color.

Changing the foreground color in GIMP - Select the bucket fill tool and click on the area to change it to the new foreground color. You can choose between “Fill whole selection” and “Fill similar colors” under Tool Options to suit your needs.
Using the Bucket Tool to change colors - Optionally, use the Select tool to choose an area, then use the Bucket tool to add color to that area.
Note: You can create another layer before using the selection tool if you want to preserve the original image.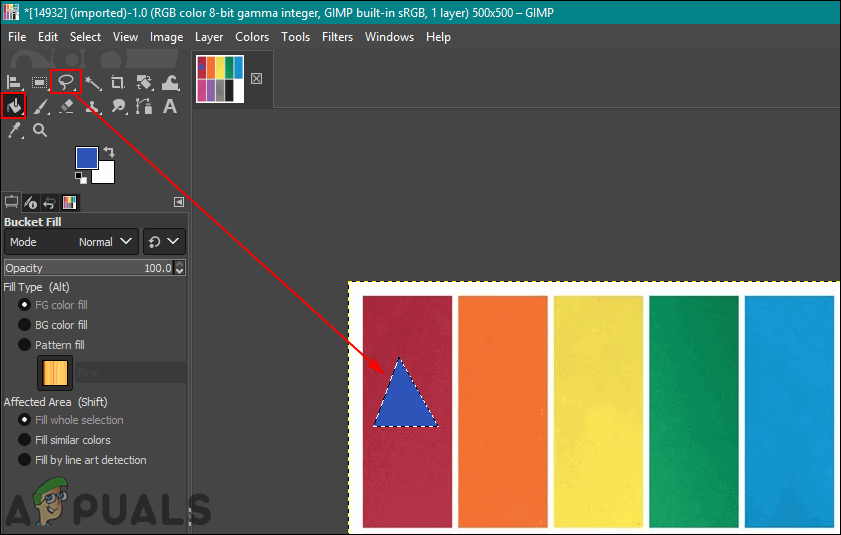
Changing color for the selected area with the Bucket Tool - To undo changes, press CTRL + Z on your keyboard.
Using Color Balance and Colorize to Change Colors
The color balance tool modifies the color balance of a selected area or layer. It’s mostly used for correcting predominant colors in digital photos. The colorize tool changes the Hue, Saturation, and Lightness of the image. These tools can quickly change the image’s colors.
- Open your image in GIMP via File > Open.
- To adjust color levels, navigate to Colors > Color Balance. Here, you can change the balance of the highlights, midtones, and shadows to achieve the desired effect.

Adjusting Color Balance in GIMP - To apply a specific color, go to Colors > Colorize. Adjust the Hue, Saturation, and Lightness sliders to see immediate changes to your image’s color tone. Experiment to find the perfect combination.

Colorizing an Image in GIMP - Optionally, select an area using a Select tool.
Note: Create a new layer before selecting if you want to maintain the original image intact.
Selecting an area for Colorize - You can then apply any of the previous options for the selected area, ensuring changes are limited to specific parts of the image.
- Finally, save your work by selecting File > Export. Choose the desired file format suitable for your needs. For example, PNG for lossless quality or JPEG for smaller file sizes.
Using the Color Exchange Option to Replace Colors
This method replaces solid color pixels from one color to another. It will change all the pixels of one color to another color if the pixels are similar.
- Open or create a new image in GIMP via the File menu.
- Go to Colors > Map > Color Exchange.
Note: Ensure RGB is selected in the Image > Mode menu for accurate color editing.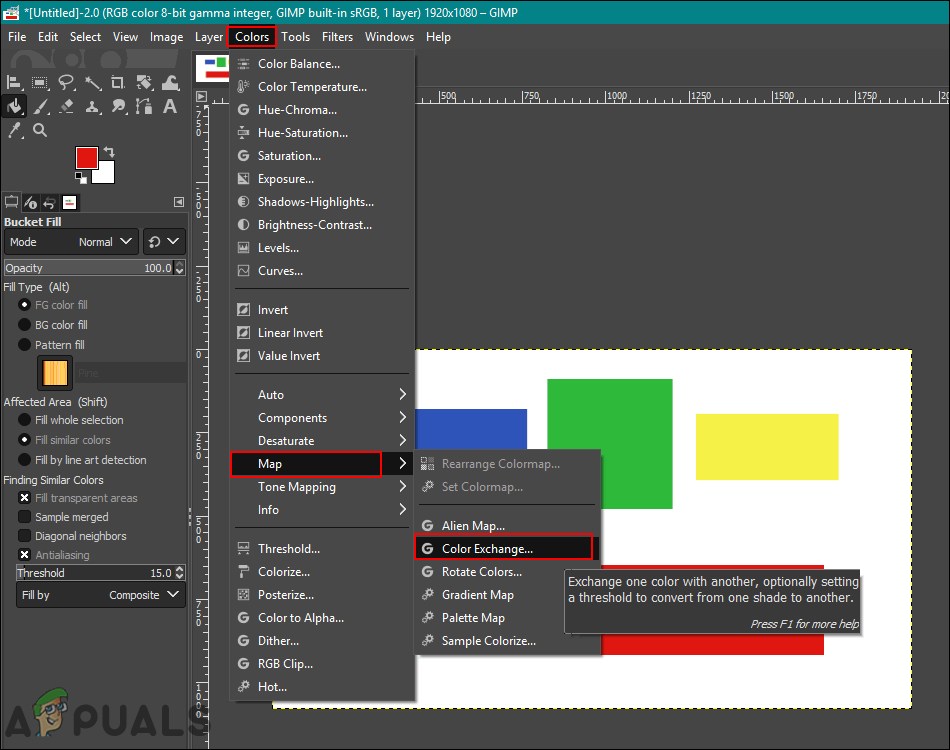
Color Exchange option in GIMP - Set your desired From Color and To Color using the Pick Color tool. Adjust the “Threshold” setting to determine how similar the pixels need to be for the color change to apply effectively.
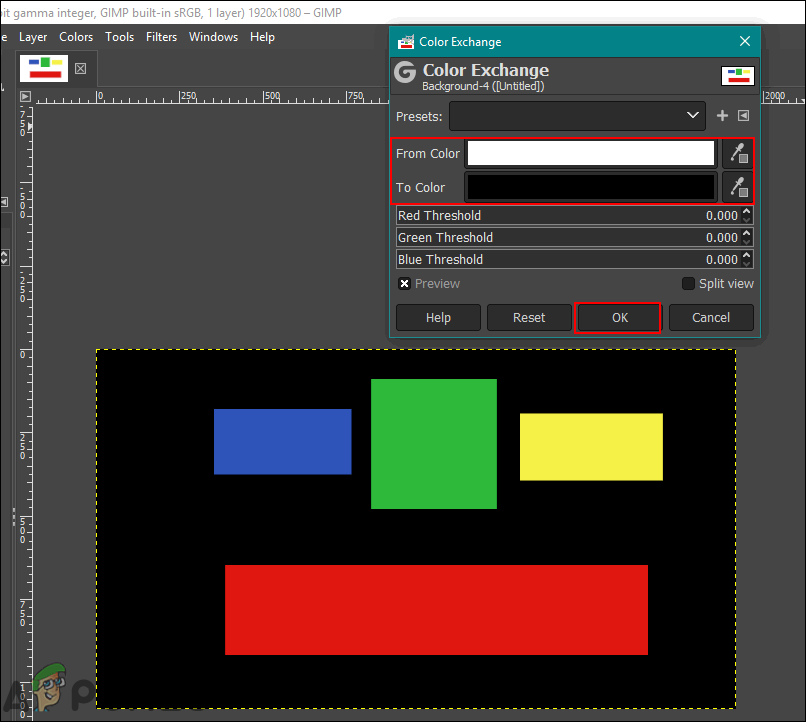
Setting color options in Color Exchange - Click Ok to apply the changes. If you’re not satisfied with the result, use the Threshold option again to fine-tune the similarity range of the colors being replaced.
There are many other ways to change colors in GIMP. Depending on the necessary changes, you may use the Hue/Saturation option for quick changes or the Brush Tool for coloring specific areas. Users can experiment with different options to find what best suits their needs. Most color-changing options are in the Colors menu in the menu bar. Don’t hesitate to experiment with different tools and options to achieve the best results for your specific project. Happy editing!


How can I Replace Color for INDEXED png files?
looks like it is not working here :/
https://uploads.disquscdn.com/images/2a5ac11b00ea796ea6898bfedab9339793ca6efe40697ddcebecf39816c5f815.png