How to Change Font Size on Windows 10 Creators Update
The ability to change the text size for icons and other elements in Windows 10 was removed in the Creators Update. Users can no longer change the text size as the setting for that has been removed. There was a control panel alternative for this, but it was also removed with Windows 10 build 15019.
To change the text size for icons, we will be dealing with the registry or use the System Font Changer utility. This article will provide you with how to get this done.
Note that, changing icons text size will affect elements in
- Address Bars
- Desktop
- File Explorer
Method 1: Using the Registry
Be careful when dealing with the registry, it’s advised to backup your registry before proceeding with this guide.
- Browse the table below and download font size you want, and if you want the font to be bold or not.
- Double-click on the .reg file you just downloaded to merge it.
- If a UAC prompt comes on your PC, click Yes and OK to approve the merge.
- Reboot, or sign out and sign in again to your PC to apply changes to the font.
Method 2: Using the System Font Changer
The System Font Changer is a simple program which gives you back the ability to set custom font sizes for texts. You can customize font sizes for the title bar, menu, message box, palette title, icon and tooltip.
- Download System Font Changer from here.
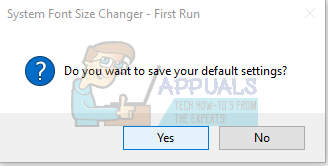
- Launch the application from the Download folder. When asked to save your default settings, click Yes and provide a location for the backup to be saved.

- In the application, select the radio button of area where you’d like to change to change the font, and use the slider to set the font size you wish to set. You can also check the Bold box to make the texts bold.

To set the default value, drag the slider to 0.
- After setting your desired fonts, click on Apply. You’ll have to log off for the changes to be applied.