How to Change Boot Order while Dual Booting
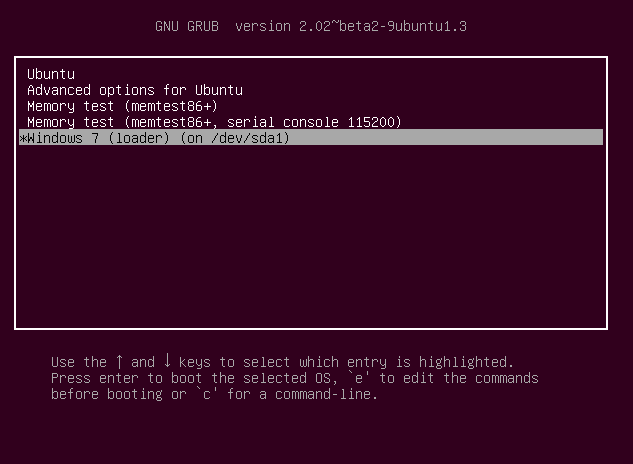
By default, Ubuntu will always be the first entry on the boot menu if it’s installed last after another OS. Well, this doesn’t only happen with Ubuntu, but with all the other Operating Systems. The last installed will always appear first in the boot menu.
For this guide, we shall use Windows 10 and Ubuntu Linux however the same steps can be used for other versions of Windows and Linux.
Method 1: Change Boot Order on Windows 10
We shall use a program called EasyBCD which is used to tweak Boot configuration data. Don’t worry, it’s free software.
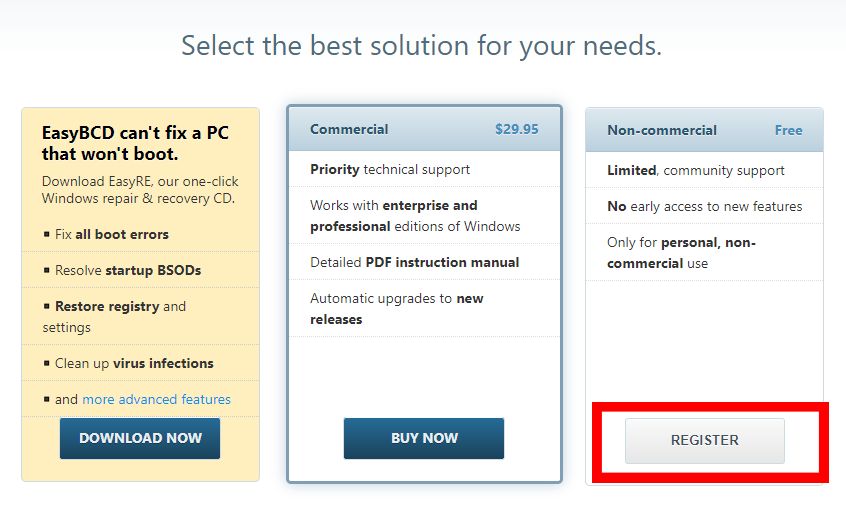
- Visit the EasyBCD website
- Navigate to the download options section labeled “Select the best solution for your needs“
- Under the Non-Commercial section, click Register
Register for EasyBCD to continue to the download - Provide details to register and then click the Download button. The download will then start.
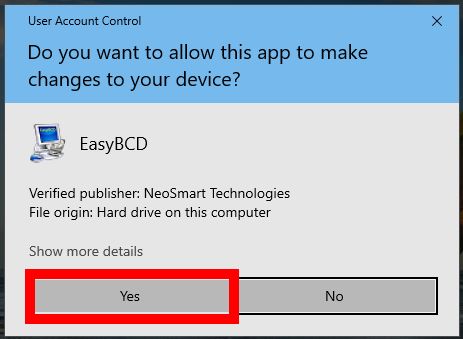
- Open the app when the download is complete. If prompted with a dialog showing “Do you want to allow this app to make changes to your device”, click Yes
Allow EasyBCD to run - Navigate to Edit Boot Menu section from the left menu
- The left window will display the installed Operating Systems (If you don’t see your Operating Systems in the list, continue down to see how to add them) on your Computer.
- Click on an Operating System and then use the arrow icons at the top to move it to the desired position in the list. You can also use the checkboxes on the right of the Operating Systems to change the default Operating Systems
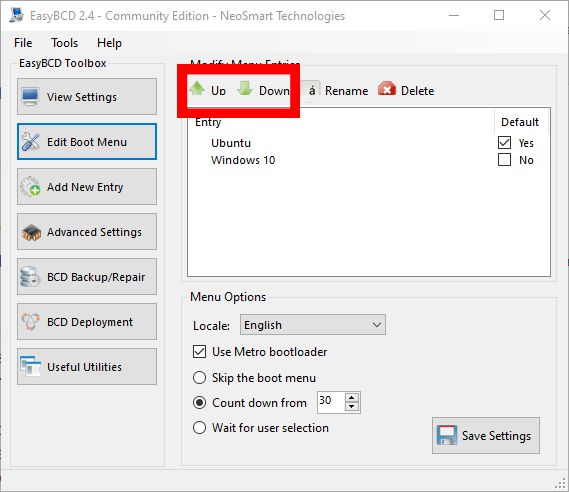
Edit Boot Menu - After tweaking the settings, click Save Settings in at the bottom right corner
If you didn’t see your Operating Systems in step 7, follow these steps to have it listed.
For Windows Operating System not listed:
- Navigate to the Add New Entry section
- In the Operating Systems section, click on the Windows section
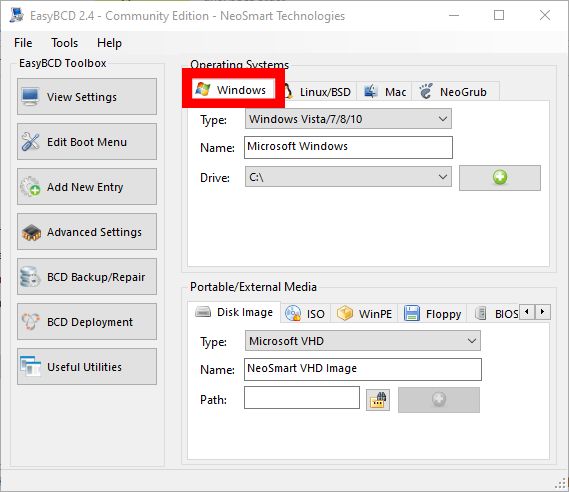
Adding Windows to the boot menu - In the Type field, select Windows Vista/7/8/10
- Enter the Operating System name in the name section and select the drive with the Operating System. (Use Automatically locate and locate if the option is listed)
- Click the green plus icon at the bottom right corner to add the Operating System to the boot menu
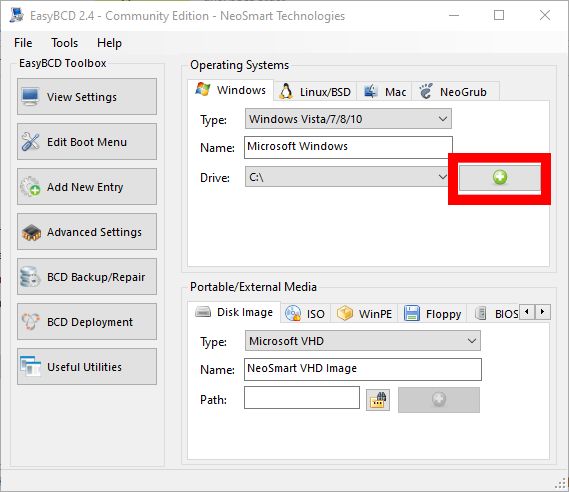
Saving Windows to boot menu - You can then go back to editing the boot menu described in the first section
For Linux Operating System not listed:
- Navigate to the Add New Entry section
- Click on Linux/BSD in the Operating Systems sections
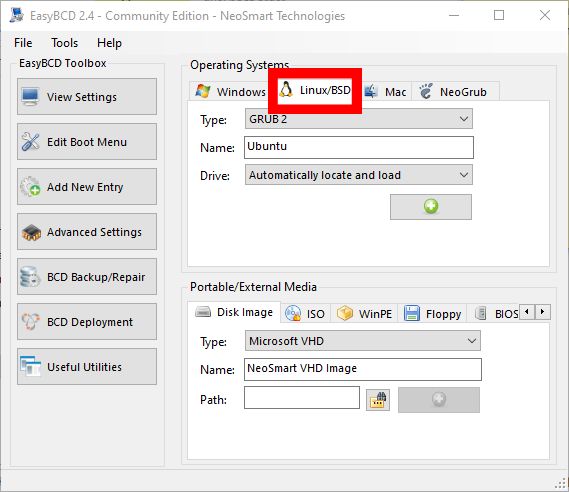
Adding Ubuntu to the boot menu - In the Type section, select GRUB 2, enter the Linux Distribution name in the name field
- Select Automatically locate and load in the Drive section
- Finally save these settings by clicking the green plus icon at the bottom right corner
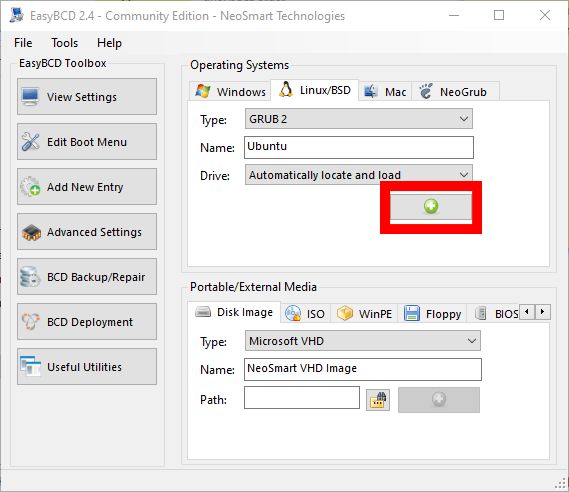
Saving Ubuntu to the boot menu - Go back to the editing the boot menu in the first section
Method 2: Change Boot Order on Ubuntu
Changing Boot Order on Ubuntu requires editing the grub file. However, editing the grub file manually is not recommended since it may render the whole Operating System useless if done in the wrong way. Not to mention that system upgrades usually edit the grub which leaves chances for your manual settings to be overridden.
We shall use a program called Grub customizer that will do all the editing work to the grub file.
- Open the terminal by clicking Ctrl + alt + T or by searching it from the applications menu
- Since the program is not in the official Ubuntu repository, use the following command to add it to your repositories.
sudo add-repository ppa:danielrichter2001/grub-customizer
- Update your repositories reference with the following command
sudo apt update
- Then install Grub Customizer with the following command
sudo apt install grub-customizer
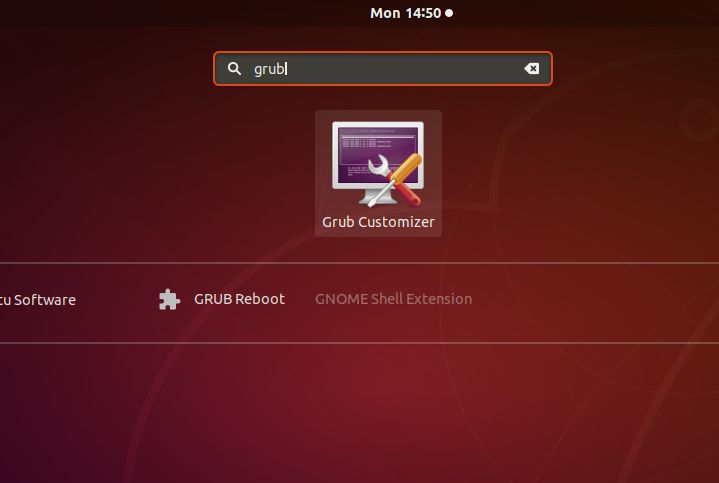
- When the installation is done, search for Grub Customizer from the applications menu and open it
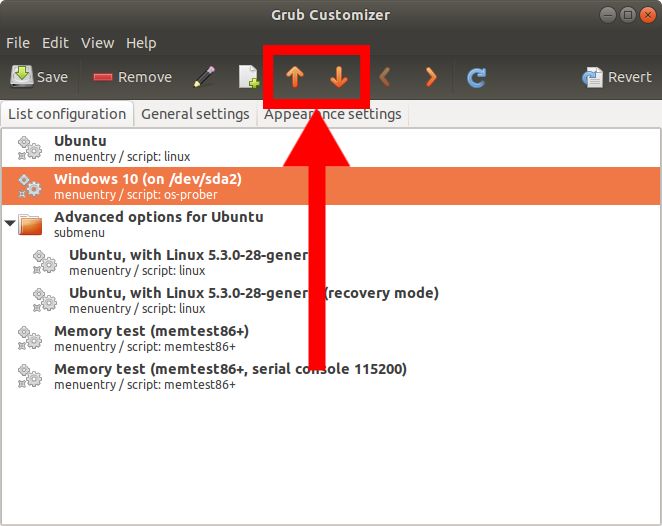
Open Grub Customizer from the Apps menu - Select an Operating System from the list and then use the up and down arrow icons in the top menu to move the position of the OS to the desired position
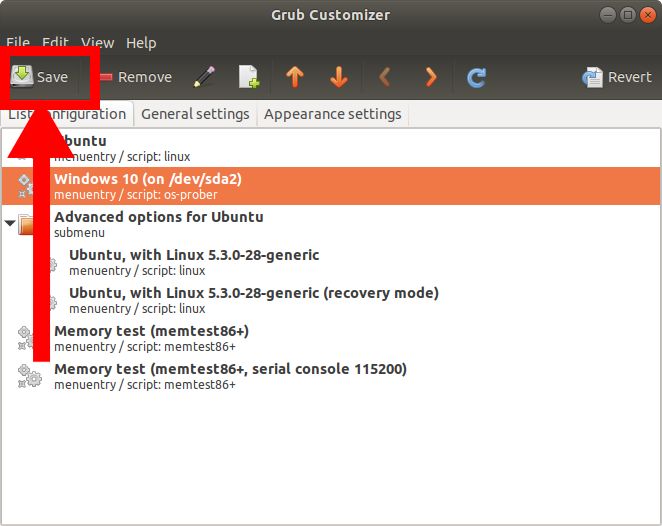
Grub Customizer settings - After changing to the desired order, click on Save.
Save Grub Customizer settings


