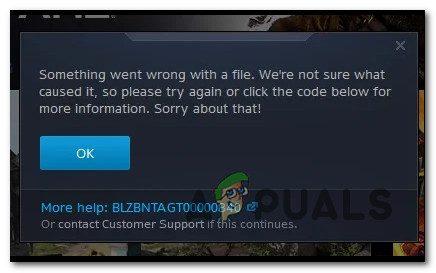
Can’t Update World of Warcraft Error BLZBNTAGT00000840? Here’s the Fix
A lot of World of Warcraft players are complaining that they can no longer update their World of Warcraft installation on PC. Every update that they attempt installing fails with the same error – Something went wrong with the file (BLZBNTAGT00000840).
As it turns out, this particular issue has a wide array of potential culprits that might be ultimately responsible. To make things easier for you, we made a list of scenarios that are most likely contributing to the World of Warcraft problem you’re currently dealing with:
- Ongoing Blizzard server issue/maintenance period – There’s a chance Blizzard is currently patching or undergoing maintenance for the World of Warcraft servers in your region. Because of this, the ideal way to start this troubleshooting task is by checking if other players in your area are currently dealing with the same thing. Check the official Blizzard Twitter account and investigate directories like DownDetector to get a bird’s eye view of the situation.
- Battle.Net is lacking admin access – Another reason why you might expect to deal with this issue when attempting to update your World of Warcraft version is a scenario in which the game launcher (Battle.net) doesn’t have admin rights to replace the current game files with new equivalents. If this scenario is applicable, you will be able to fix the issue by forcing admin rights on the game launcher.
- Glitched service running in the background – As it turns out, another fairly common occurrence that might cause this problem is a glitched Battle.net or WoW service that is running in the background. In this case, a simple restart should do the trick.
- AV interference – As some affected players have reported, there are several different overprotective Antivirus suites that have the potential of blocking the update due to a false positive. If you find yourself in this scenario, you can try temporarily disabling the real-time protection or uninstall the suite completely if the issue persists.
- Addon Manager interference – Just like AV suites, there’s an entire category of addon managers that are known to prevent the main Agent from updating game files belonging to World of Warcraft. The only way to deal with this type of issue is to temporarily uninstall or disable these programs.
- Game file corruption – Game corruption can also be responsible for preventing new WOW updates from installing (in case Agent is affected by corruption). In this case, you should start by running the repair tool and work your way towards reinstalling the game + Battle.net if the issue persists.
- Proxy or VPN interference – As it turns out, Blizzard will actively block download attempts that are being filtered through a Proxy or VPN connection. So if you currently used the services of a Proxy server or VPN to remain anonymous, you’ll need to disable these services before you’ll be able to complete the update.
- Secondary logon service is Disabled – The updating function of Battle.net needs a very important dependency service to repair enabled at all times (Secondary Logon Service). If you previously modified the default behavior of this service, you can probably get the issue fixed by accessing the Services screen and configuring this service properly.
- Interference caused by WOW Voice proxy – WowVoiceProxy is the established voice chat functionality for World of Warcraft. However, it’s still glitchy (especially on Windows 11) and known to conflict with the download agent. You can make sure it’s not affecting the download function by force stopping it via Task Manager.
- Conflict with Overwatch’s CrashMailer – If you have both Overwatch and World of Warcraft installed, you might want to access your Overwatch folder and get rid of the 64-bit file called CrashMailer. This will not affect the functionality of the game and will ensure that there’s no conflict between the two games.
- Conflict with Riot Vanguard – If you have the anti-cheat engine from Riot installed (Riot Vanguard), you should take the time to uninstall it temporarily and attempt to update WOW while the engine is uninstalled. We found some reports confirming a conflict between Riot Vanguard and the download Agent of World of Warcraft.
1. Check for an ongoing server issue
When you start troubleshooting this particular issue, you should start by ensuring that the issue is not beyond your control.
It’s not uncommon for users to experience the BLZBNTAGT00000840 while the game client is in the middle of scheduled maintenance or when Blizzard engineers are busy patching a server issue in your region.
Because of this, it’s important to take the time and investigate if other users in your area are currently experiencing issues with Battle.net and World of Warcraft.
You can do so by checking the DownDetector listings of the two:
Note: If the investigation has revealed that other users in your area are also experiencing this type of issue, chances are the issue is indeed beyond your control.
To be certain, you can also check the official Twitter support page of Blizzard for an official announcement related to the outage or scheduled maintenance period.
On the other hand, if this investigation didn’t allow you to conclude that you’re dealing with a server issue, move down to the next potential fix below.
2. Reboot your PC
If you used the method above to make sure that you’re not dealing with an underlying server issue affecting World of Warcraft, the next thing you should do is troubleshoot against a potential glitches service that should be running in the background to facilitate the download of the update files.
The quickest way to ensure that no glitched service dependency is running in the background is to simply reboot your PC and initiate the download immediately after the next startup is complete.
In case the same Something went wrong with the file (BLZBNTAGT00000840) is still occurring even after you rebooted your PC, move down to the next potential fix below.
3. Grant admin access to Battle.Net
Now that you ruled out a potential glitched service from the list of culprits, the next thing you should do is ensure that the main game launcher (Battle.Net) has the administrative privileges to replace existing game files with new equivalents – to do this, it needs admin access.
By default, Battle.net will be granted admin rights as you are being prompted by the UAC (User Account Control) window when you open up the launcher. But this might not happen if you use more aggressive UAC settings on Windows 10 or Windows 11.
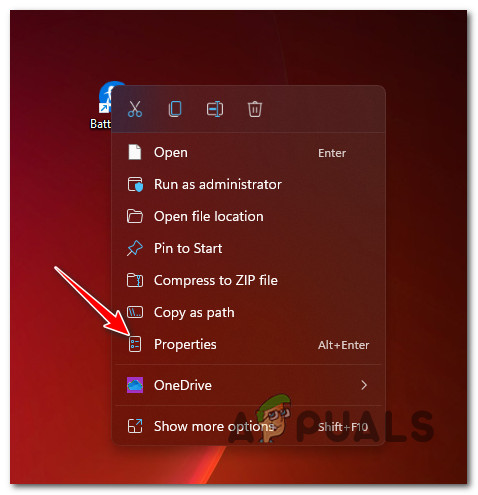
You can ensure that admin access is granted to Battle.Net by right-clicking on the main executable and clicking on Run as Administrator from the context menu.

Note: At the UAC (User Account Control), click Yes to grant admin access.
Once Battle.net is open with admin access, attempt to install the World of Warcraft update once again and see if the operation is complete.
If the update now completes successfully, you can ensure that Battle.Net will always open with admin access by modifying the default behavior of the shortcut that you use.
Follow the instructions below to force admin access on the Battle.net shortcut:
- Right-click on the Battle.Net shortcut and choose Properties from the context menu that just appeared.
Access the Properties screen - Once you’re inside the Properties screen, access the Compatibility tab from the menu at the top.
- From the Compatibility tab, scroll down to the Settings menu and check the box associated with Run this program as an administrator.
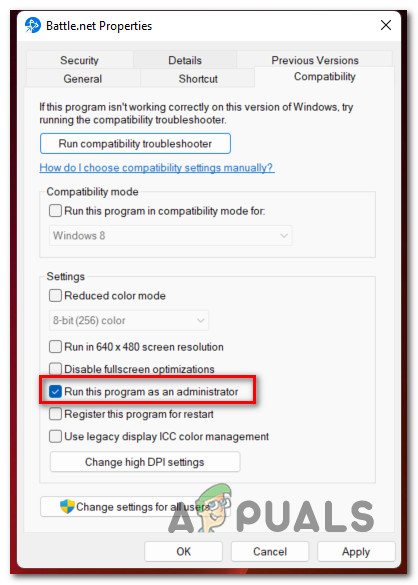
Run this program as administrator - Hit Apply to hit the changes and that’s it. Battle.Net is now configured to always open with admin access.
If the problem is still not fixed, move down to the next potential fix below.
4. Disable or Uninstall 3rd party Security Programs (if applicable)
As it turns out, another potential cause that might actually cause this problem is an overprotective antivirus suite that is blocking the data transfer between the WOW download agent and the Blizzard server due to a false positive.
Several users that were also dealing with this problem have confirmed that the problem was finally resolved after they either disabled or uninstalled the interfering 3rd party suite.
Note: This method is only applicable for games using 3rd party suites – if you use Windows Security as your default antivirus, skip this method altogether.
If you use an ordinary antivirus suite without a firewall component, it should be enough to disable the real-time protection.
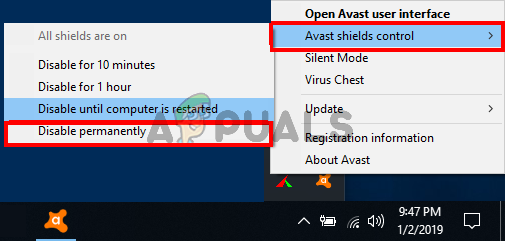
Note: You can typically do this by accessing the tray bar icon of your antivirus.
However, if you’re using a 3rd party AV that includes a firewall component, the only viable action that fixes the issue is to uninstall the suite temporarily. This is necessary because the same security rules will remain in place even after you disable the real-time protection.
Follow the instructions below to uninstall a 3rd party AV suite that includes a firewall component:
- Press Windows key + R to open up a Run dialog box. Next, type ‘appwiz.cpl’ and press Enter to open up the Programs and Features menu.
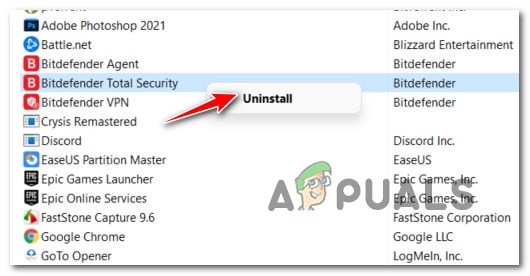
Open up the Programs and Features menu - Once you’re inside the Programs and Features menu, scroll down through the list of installed programs and locate the security suite that you wish to uninstall.
- Once you find it, right-click on it and choose Uninstall from the context menu to initiate the uninstallation process.
Uninstall problematic antivirus - Once the problematic antivirus has been uninstalled, reboot your PC and see if the BLZBNTAGT00000840 is now fixed.
If the same kind of issue is still occurring, move down to the next potential fix below.
5. Disable or Uninstall Add-on Managers (if applicable)
Keep in mind that the community around World of Warcraft has developed a lot of different Addon managers that make it easier to install community-created mods on the vanilla versions of WOW.
However, it’s important to understand that the majority of these add-on managers will actually prevent the main Blizzard agent from installing the latest available updates available for World of Warcraft.
So if you are looking to play the game as the original developers intended (on official servers and with the latest updates installed), chances are you’ll only be able to do so after disabling or uninstalling the add-on manager that you currently have installed.
In some cases, you might be able to allow the update to go through without the BLZBNTAGT00000840 error simply by ensuring that the main process behind the WOW addon manager is closed and not running in the background.
You can do this by opening Task Manager (Ctrl + Shift + Enter) and ending the process related to the addon manager from the Processes tab.
If this doesn’t work and the same issues persist, the remaining option is to temporarily uninstall your add-on manager. Here’s how to do this:
- Press Windows key + R to open up a Run dialog box. Next, type ‘appwiz.cpl’ inside the text box and press Enter to open up the Programs and Features screen (Windows 10 and older) or the Installed apps screen (Windows 11).
Open up the Installed apps screen - Once you’re inside the Installed apps or Programs and Features screen, search for your WOW addon manager using the search function at the top.

Search for WOW addon managers - Next, click on the action icon associated with the WOW addon manager that you wish to remove and click on Uninstall from the context menu.
- At the confirmation prompt, click on Uninstall once again, then proceed with the uninstallation of the remaining items.
- After the WOW addon manager is finally uninstalled, reboot your PC, then launch Battle.net once the next startup is complete and see if the problem is now fixed.
In case your attempts at updating World of Warcraft end with the same “Something went wrong with the file (BLZBNTAGT00000840)” error, move down to the next potential fix.
6. Run the repair tool
If none of the methods above have proven to be effective in your case, the next thing you should investigate is a potential issue brought about by some corrupted game files or game dependencies.
This is especially likely if you have previously attempted to modify or replace certain game files belonging to World of Warcraft.
You can expect to see the BLZBNTAGT00000840 in case the Battle.net update agent detects that the game installation folder contains file corruption. In this case, the solution is simple – you’ll need to repair the current World of Warcraft installation using the scan & repair functionality available inside Battle.net.
Follow the instructions below for specific instructions on how to do this:
- Make sure that World of Warcraft is closed and not running in the background.
- Open Battle.net with admin access (right-click on the executable and choose Run as Administrator).
Running as administrator - Next, select World of Warcraft from the library section of Battle.Net.
- With the game selected, click on the Settings (gear icon), then click on Scan & Repair from the context menu that just appeared.
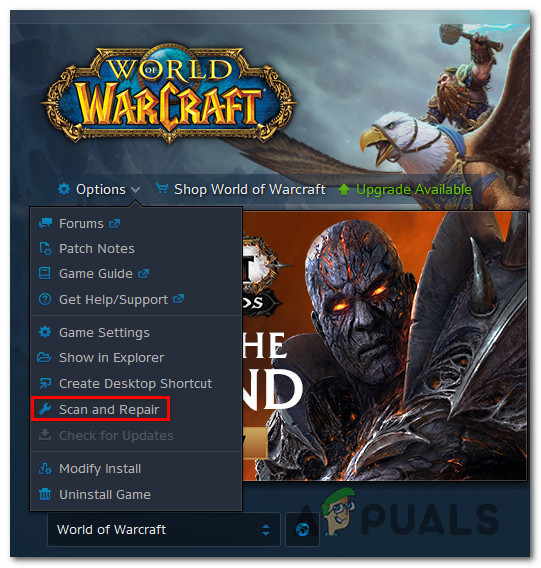
Scan and Repair World of Warcraft - At the next confirmation prompt, click on Begin Scan to start the operation.
- Wait until the operation is complete, then attempt to install the pending update for World of Warcraft and see if the problem is now fixed.
In case the same problem is still occurring, move down to the next potential fix below.
7. Disable Proxy or VPN connections
Keep in mind that the update agent that Blizzard uses for their Battle.net launcher is notoriously known for being extremely picky when it comes to allowing updates to come through a connection funneled through a VPN or Proxy network.
So if you are currently using a proxy or VPN connection, you would likely be forced to temporarily disable them (or even uninstall them) in order to be able to install the pending update.
Depending on the technology that you’re using, you’ll either need to disable the anonymity solution or uninstall it from your PC.
To help you with both potential scenarios, we’ve put together two separate guides that will guide you through this:
Disable the proxy server
If you’re on Windows 10 or Windows 11 and you’re using the native Proxy connectivity feature, this can be done directly from the Proxy tab of the Settings menu.
Here’s what you need to do to disable the proxy server:
- Open up a Run dialog box by pressing Windows key + R. Next, type ‘ms-settings:network-proxy’ and press Enter to open up the Proxy tab from the native Windows 10 menu.
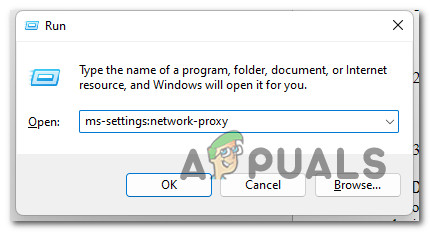
Open up the Proxy server - Once you are inside the Proxy tab, scroll down to the Manual proxy setup and disable the toggle associated with Use a proxy server.
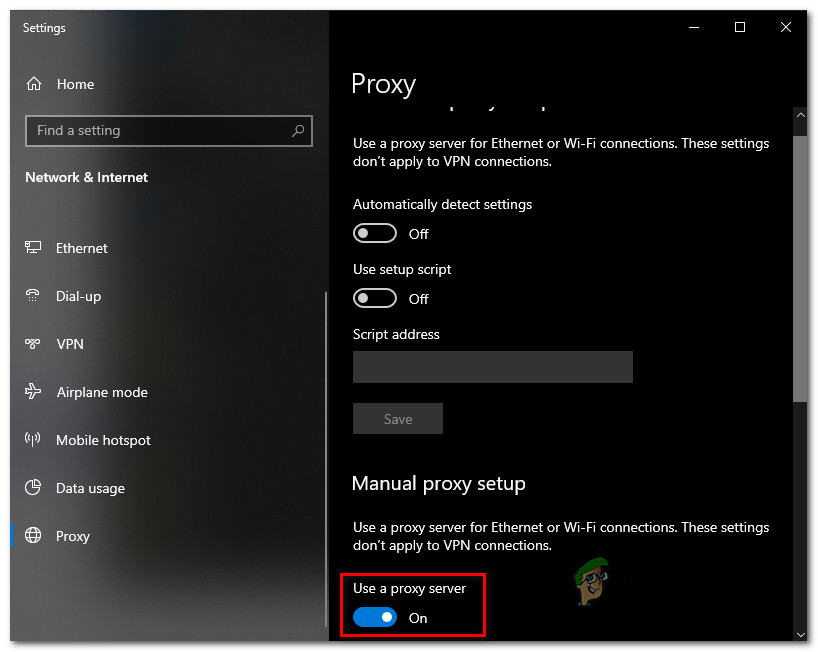
Disable the use of a proxy server - As soon as the proxy solution has been disabled, you can safely reboot your PC and attempt to install the pending World of Warcraft update once again.
Disable or uninstall the VPN client
In case you are currently using a system-level VPN deployed directly using the native functionality (present on Windows 10 and Windows 11), you can revert the settings by visiting the VPN tab of the Settings menu.
Here’s how:
- Press Windows key + R to open up a Run dialog box. Next, type ‘ms-settings:network-vpn‘ inside the text box and press Enter to open up the VPN tab of the Settings app.

Opening up the VPN tab - Once you’re finally inside the VPN tab, move over to the right-hand section of the screen, then click on the VPN network that you currently have set up.
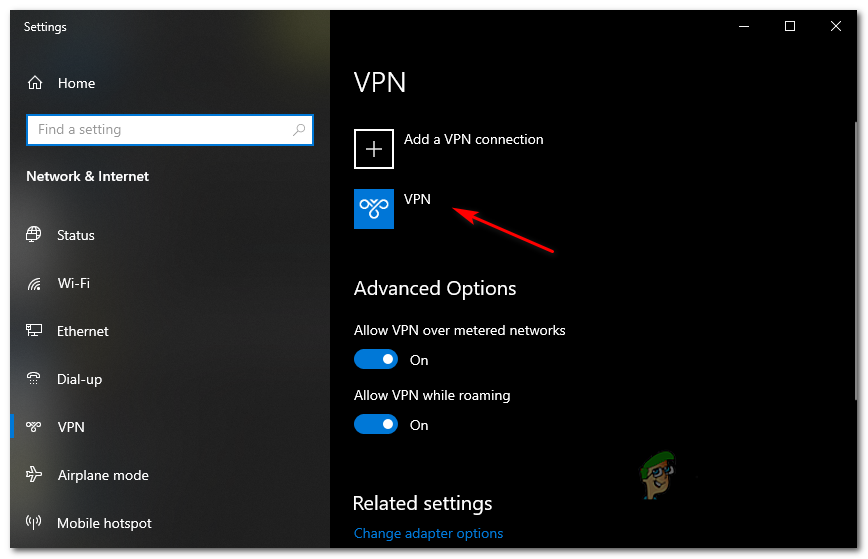
Disabling the VPN client - Next, click on Disconnect from the context menu that just appeared.
- At the final confirmation prompt, click Yes and wait for the VPN connection to be terminated.
- Finally, open Battle.net again and attempt to install the pending update that was previously failing.
If this problem is still not fixed, move down to the next potential fix below.
8. Enabling the Secondary Logon service
A key dependency that is often overlooked by players engaging with Blizzard games is the Secondary Logon service.
Note: Secondary Logon is a process that enables processes under alternate credentials. It’s heavily used by Battle.Net and every game released on the platform.
This service should be enabled by default unless you modify its default behavior. If you’ve configured it to remain disabled, chances are that’s the reason why you are getting the BLZBNTAGT00000840 error while attempting to install the pending update.
Follow the instructions below to ensure that the Secondary Logon service is enabled and properly configured via the Services screen:
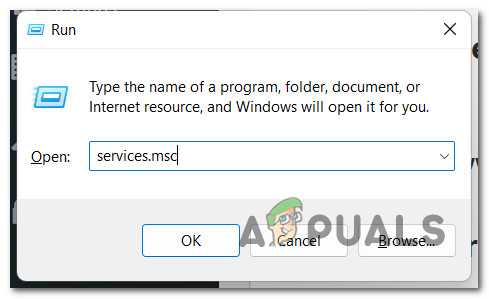
- Press Windows key + R to open up a Run dialog box. Next, type ‘services.msc’ inside the text box and press Enter to open up the Services screen.
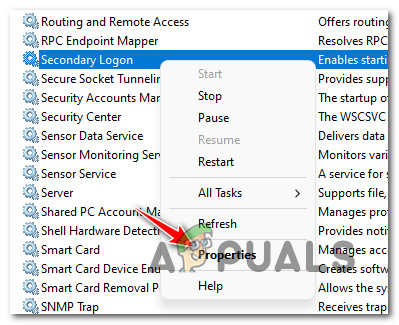
Open up the services screen - Once you’re inside the Services screen, scroll down through the list of services and locate the Secondary Logon service.
- Once you see it, right-click on it and click on Properties from the context menu that just appeared.
Accessing the Properties screen - Once you’re inside the Properties screen of Secondary Logon, access the General tab, then change the Startup type from Disabled to Automatic.
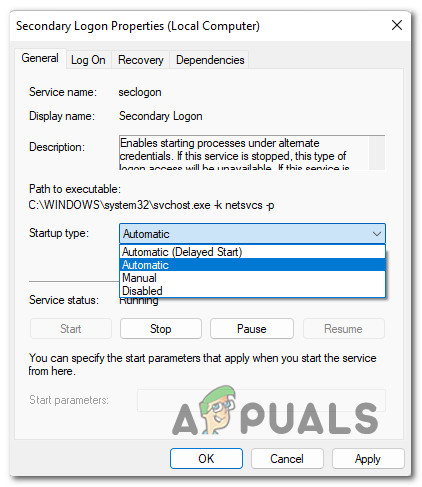
Setting the Startup type to Automatic - Finally, click on Apply to save the changes, then reboot your PC and see if you can now install the pending World of Warcraft patch without experiencing the same error.
If the problem is still not resolved or this method was not applicable, move down to the next potential fix below.
9. Disable the World of Warcraft Voice Proxy in Task Manager
If you’re looking for a quick fix that a lot of affected World of Warcraft players have successfully used to get around this issue, you should also try disabling the WOW Voice Proxy service via Task Manager.
Note: WowVoiceProxy has been the backbone for the voice chat functionality inside World of Warcraft since 2018.
Although this service is completely harmless and should be kept enabled, increasingly more WOW players are blaming it for blocking new game updates carried over by the Blizzard update agent.
Fortunately, there’s one workaround available in this case – opening Task Manager and force-closing the WOWVoiceProxy service before initiating the download inside Battle.net.
Here are the complete step-by-step instructions on how to do this:
- Press Ctrl + Shift + Enter to open up Task Manager.
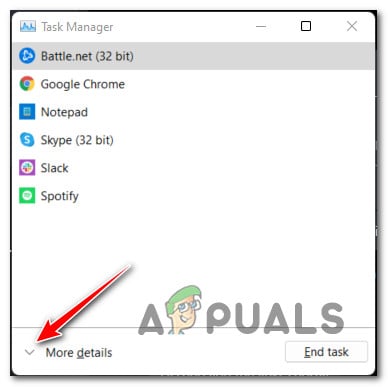
Showing more details in Task Manager Note: If the simple interface opens by default, click on More Details to get the expert interface.
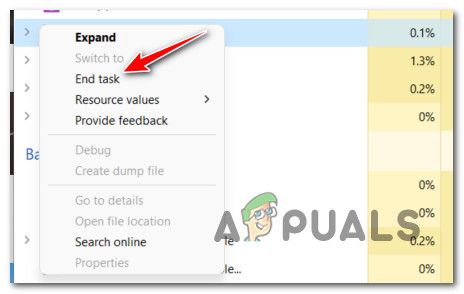
- Once you’re inside the expert interface of Task Manager, select the Processes tab and scroll down to the Background Processes.
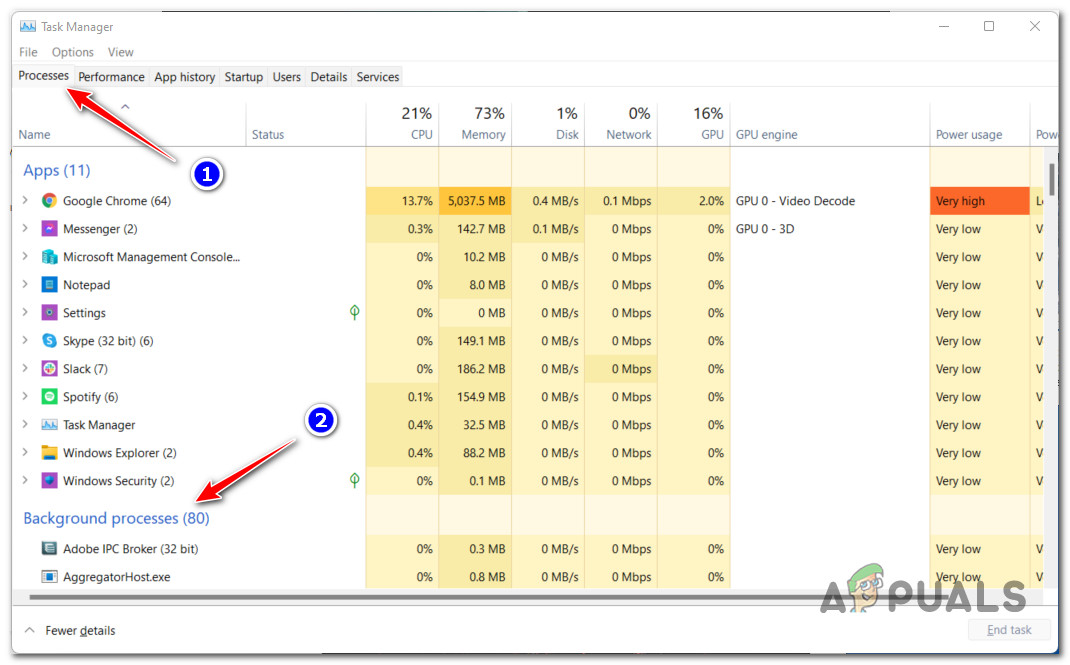
Accessing the Background processes - Under Background Processes, scroll down through the list and locate the WOWVoiceProxy server. When you see it, right-click on it and choose End Task from the context menu.
- After you’ve done the step above, return to Battle.net and attempt to install the pending update for World of Warcraft once again.
If the attempt fails with the same BLZBNTAGT00000840 error, move down to the next potential fix below.
10. Delete CrashMailer from Overwatch folder
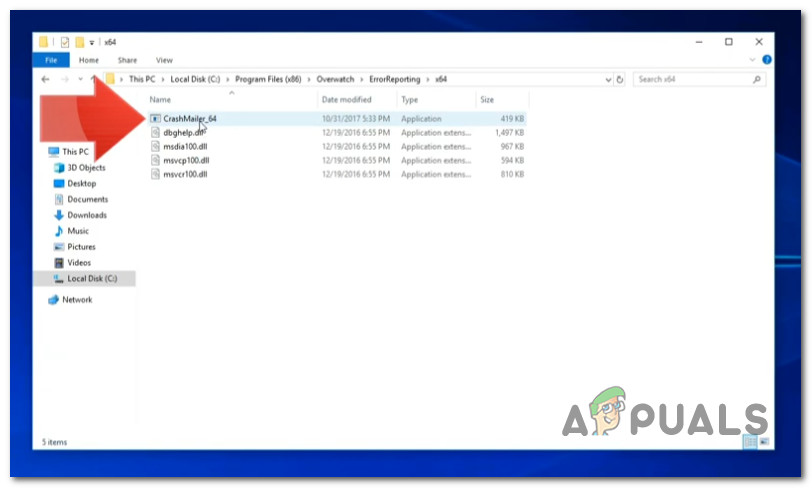
If you also have Overwatch installed on the PC that is currently exhibiting the BLZBNTAGT00000840 error, another scenario that you should investigate is a potential conflict with Overwatch’s 64-bit version of the Crashmailer (CrashMailer_64.exe) file.
Note: CrashMailer_64.exe is a non-essential process that belongs to Overwatch. It’s a reporting tool that’s used to compile error logs when the game crashes unexpectedly. It’s in no way essential to the game and can be deleted – the Battle.net launcher will regenerate the file the next time you launch overwatch.
Several affected users have discovered that by deleting the CrashMailer file, the conflict is temporarily resolved and the pending World of Warcraft update can finally be installed.
Keep in mind that even if you end up deleting the CrashMailer_64.exe file, Battle.net will just regenerate it once again the next time you launch overwatch.
So if you want to deploy this fix, follow the instructions below for specific instructions on how to do this:
- Open File Explorer, then access the following location to discover the CrashMailer_64 file:
C:\ Program Files (x86)\ Overwatch \ ErrorReporting \ x64
- Once you’re inside the correct location, locate the CrashMailer_64 file, then right-click on it and choose Delete from the context menu.
Deleting the CrashMailer_64 file - Once the file is successfully deleted, open Battle.net once again and attempt to install the pending update for World of Warcraft.
If the same kind of error is still occurring, move down to the next potential fix below.
11. Uninstall Riot Vanguard (if applicable)
If you’ve come this far without a viable solution, one last thing that you can try is to temporarily uninstall the Riot Vanguard installation.
Note: Riot Vanguard is a custom anti-cheat system that’s designed to prevent gamers from cheating and upholding the latest industry-standard when it comes to competitive gaming. It’s primarily used for League of Legends and Valorant.
If you have Valorant or League of Legends installed, there’s a very big chance you have Riot Vanguard installed too (since it’s bundled with both of these games).
While this anti-cheat engine is great and we would encourage anyone to use it as intended, there are a lot of users blaming it for blocking certain updates coming through Battle.net (including pending WOW updates).
Several users that we’re also dealing with this problem have confirmed that the WoW BLZBNTAGT00000840 error was finally resolved and the update went through after they temporarily uninstalled Riot Vanguard.
Here’s how to uninstall Riot Vanguard from your PC (and reinstall it again):
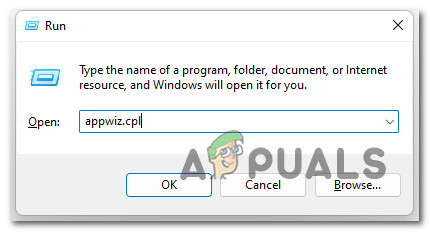
- Press Windows key + R to open up a Run dialog box. Next, type ‘appwiz.cpl’ and press Enter to open up the Programs and Features (Windows 10 and older) menu or Installed apps menu (on Windows 11).
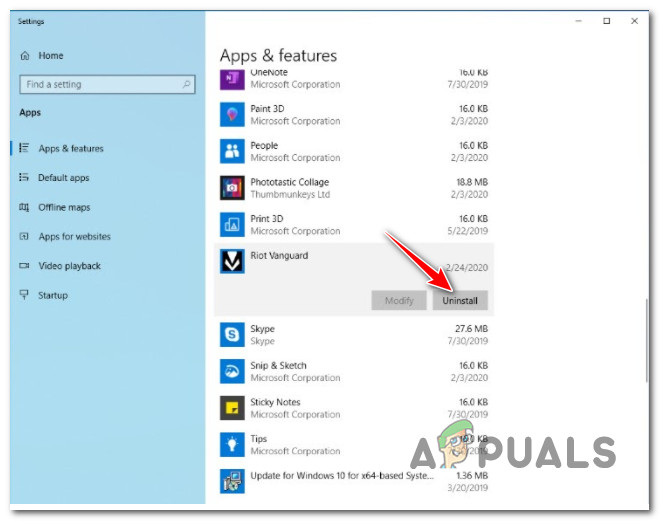
Open up the Programs and Features menu - Once you’re inside the Programs and Features or Installed apps menu, use the available search function to find ‘riot vanguard’.
- Next, from the list of installed apps, click on the Uninstall button associated with Riot Vanguard.
Uninstall Riot Vanguard - Follow the remaining prompts to complete the uninstallation process.
- Open Battle.net once again and install the pending update once again to see if the problem is now fixed.


