How to Fix Can’t Share Desktop Screen on Microsoft Teams on Windows 10?
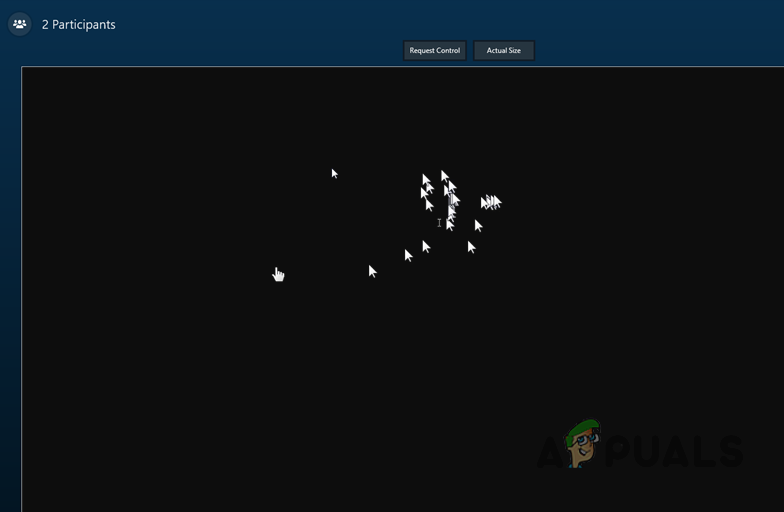
Since Microsoft Teams is a recent development, bugs and error reports come by every now and then. One of the highly reported problems is not being able to share the desktop screen on Microsoft Teams. In this case, the audience connected to the meeting can only see a black screen instead of the desktop which an individual is intending to share. People only share desktop screens when they have to switch between multiple tabs while presenting to the audience. If the desktop sharing option doesn’t work, they have to keep on changing the shared application screen in order to present properly to the audience. This makes this issue more annoying than it already sounds.
What Causes Can’t Share Desktop Screen on Microsoft Teams?
In the wake of checking on the client’s input through network support, we concluded that this issue arises due to the following reasons:
- Web Browser: If you’re using MS Teams on any browser other than the latest Google Chrome, Firefox, or Microsoft Edge then you are most likely to get this error. These three browsers have handsome cache and bandwidth capacity than the others which is why MS Teams sharing screen features works perfectly well on these.
- Meeting Policies: Sometimes, MS Teams meeting policies prohibit a user from sharing his/her screen with others connected to the meeting. This mostly happens when a user sets one or more custom global group meeting policies.
- Outdated MS Teams: If you are running an old version of MS Teams, you are most likely to get this error. MS Teams runtime patches need to be the latest in order to support the medium at which you are trying to share the screen i.e. Web Browser, desktop client, etc.
- Corrupted Cache: If you have not installed a fresh copy of Windows in a while then you are most likely to have a lot of junk in the system cache. The corrupted cache may take up a lot of space in the cache memory due to which sharing screen is just not possible.
- Bad Internet Connection: MS Teams won’t be able to transfer high bandwidth screen data to the people connected to your meeting if you have a band internet connection.
- Firewall: Windows firewall may be blocking MS Teams to share data over the internet. In this case, users will not be able to share their screens or send files with the others connected to the meeting.
- RAM Capacity: Though it is the least possible situation as people these days use PCs with high RAM capacity but still if an individual is running his/her system with RAM less than 4GBs then this is the most reasonable cause. It is evident that sharing screens on MS Teams requires a handsome amount of Processor power and RAM capacity both.
- Miscellaneous: As MS Teams is a recent development thus, facing errors is kind of a usual routine. Due to which, there may be arbitrary reasons behind the cause of the problem under consideration i.e. third-party software, outdated Windows Updates, etc.
All the causes discussed above are the result of thorough online research. Let us jump to the solutions now.
Solution 1: Clear MS Teams Cache
The more information that is saved in the cache, the slower your computer will be. As already discussed in the causes, the corrupted cache may take up a lot of space in the cache memory due to which there isn’t much room left for screen sharing data to process. Deleting the cache data helps to troubleshoot, to decrease the loading time of web pages, and increases the performance of your computer. This has been reported to be a working solution for many users online. Follow the steps given below to remove MS Teams cache:
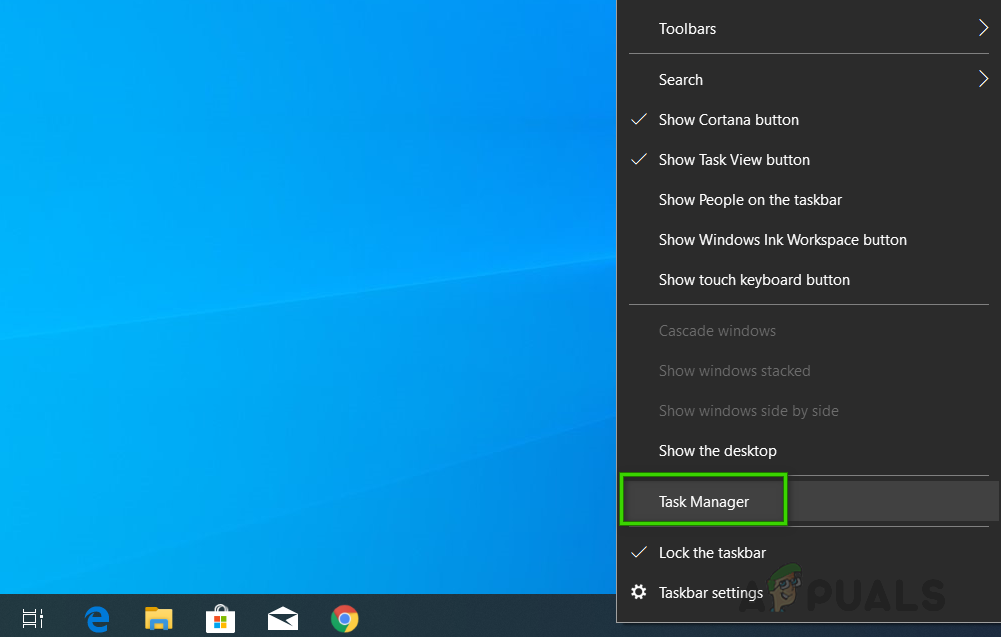
- Right-click on the Taskbar and select Task Manager.
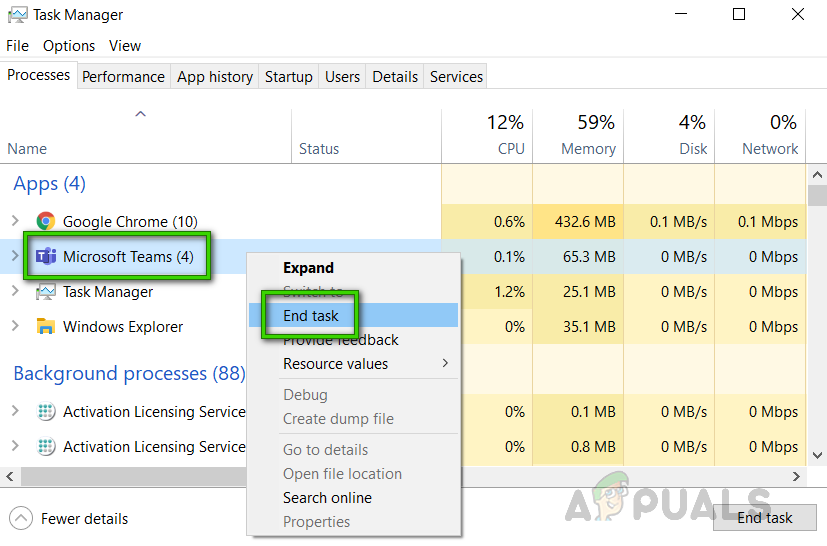
Opening Task Manager - Right-click on Microsoft Teams and select End task. This will terminate all the ongoing background processes related to MS Teams.
Closing Microsoft Teams Processes - Click Start, search File Explorer and open it.

Opening File Explorer - Copy-paste the location address in the search bar and press Enter.
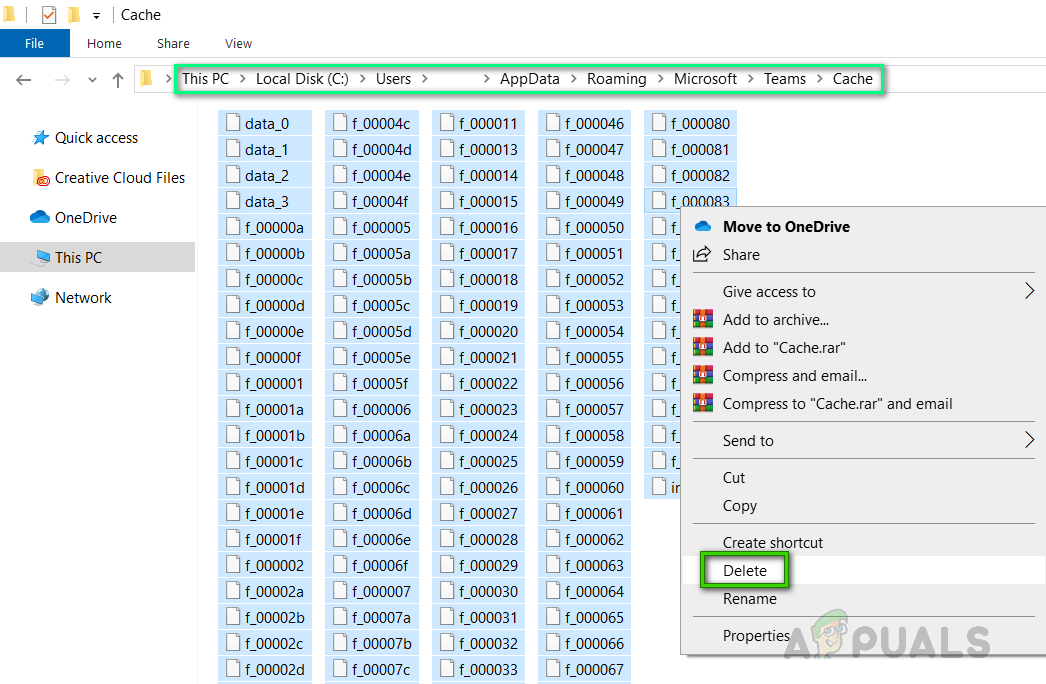
%appdata%\Microsoft\teams\Cache

Navigating to MS Teams Folder - Press Ctrl + A keys together on your keyboard to select all the files, right-click and select Delete. This will delete all the files in this folder.
Deleting all the files in the MS Teams cache folder - Repeat steps 4-5 for all the folder locations given below, one by one. This will complete the MS Teams Cache deletion procedure.
%appdata%\Microsoft\teams\tmp
%appdata%\Microsoft\teams\databases
%appdata%\Microsoft\teams\GPUCache
%appdata%\Microsoft\teams\IndexedDB
%appdata%\Microsoft\teams\Local Storage
- Now launch MS Teams and join or create a meeting in which you want to share your screen with the connected audience. Your problem should now be fixed.
Solution 2: Update Microsoft Teams
Software updates are important because they often include critical patches to security holes. They can also improve the stability of your software and remove outdated features. All of these updates are aimed at making the user experience better. Outdated MS Teams may arise the problem under consideration (as already discussed in causes). Many users were able to resolve this issue by updating their MS Teams software. Please go through the following steps to do so:
- Click Start, search Microsoft Teams and open it.
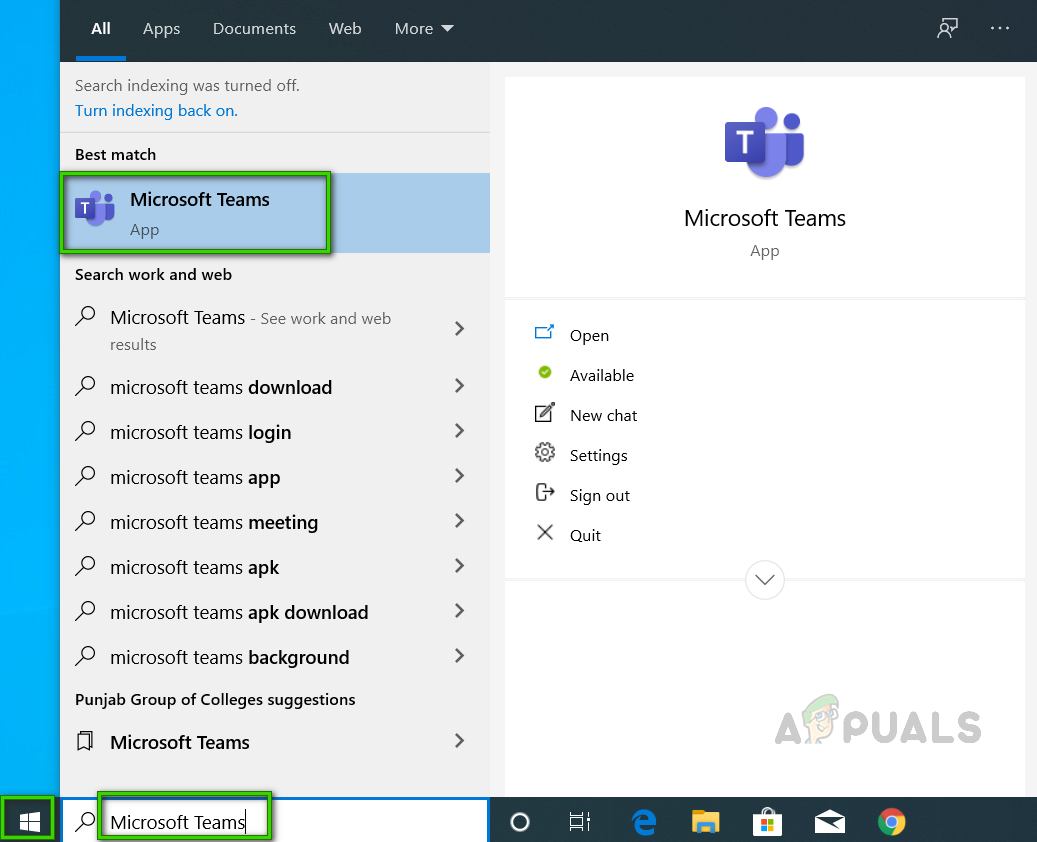
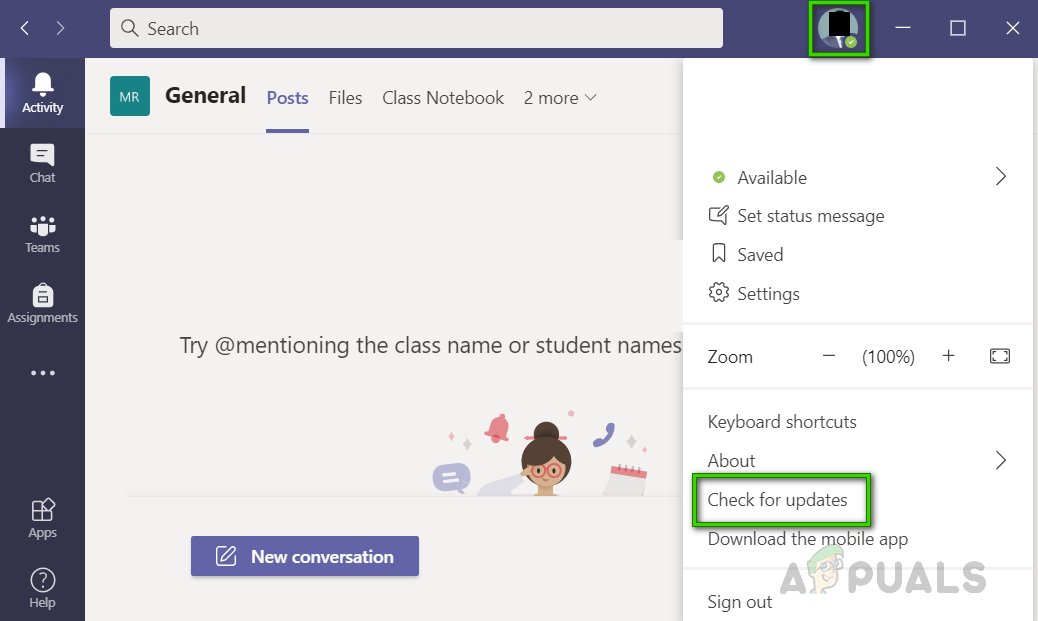
Opening Microsoft Teams - Click on your Avatar and select Check for Updates. This will open an update prompt. It will connect with the Microsoft servers to check for any recent patch updates. If found, it will download and install it on your PC. This procedure may take time so wait until the process is completed successfully.
Checking for MS Teams Updates - Now launch MS Teams and join or create a meeting in which you want to share your screen with the connected audience. Your problem should now be fixed.
Solution 3: Configure MS Teams Meeting Policies
When a host (admin) creates a meeting, he can adjust settings according to the meeting requirements as who can share the screen and how. If someone shares a single page everyone can see it properly but it is not the case when someone tries to share the desktop (concerned problem). In such cases, one needs to contact the meeting host (admin) to check the settings in MS Teams admin center that whether you are allowed to share the entire desktop or not. If not then ask the host to create a new meeting policy and allow you to share the entire desktop screen. This helped many users online. Follow the steps given below:
- Open Microsoft Teams Admin Center. This will take you to the login screen. Fill in your user credentials to log yourself in.

Logging into MS Teams - Click Meetings > Meeting Policies. This will open the Meeting policies page where you can add a new policy or edit a previous one.
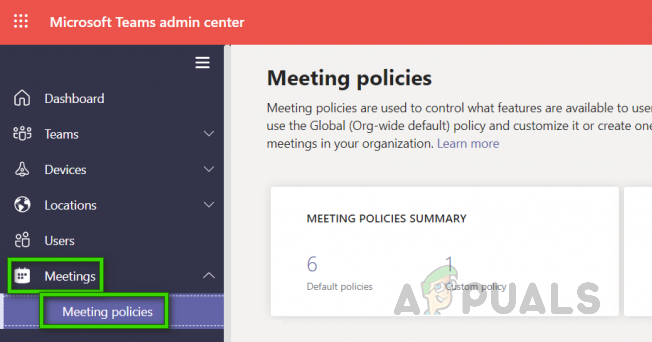
Opening Meeting Policies Settings - On the Meeting policies page, select Add New Policy. This will open a prompt where you are supposed to provide details for the new MS Teams Meeting policy.
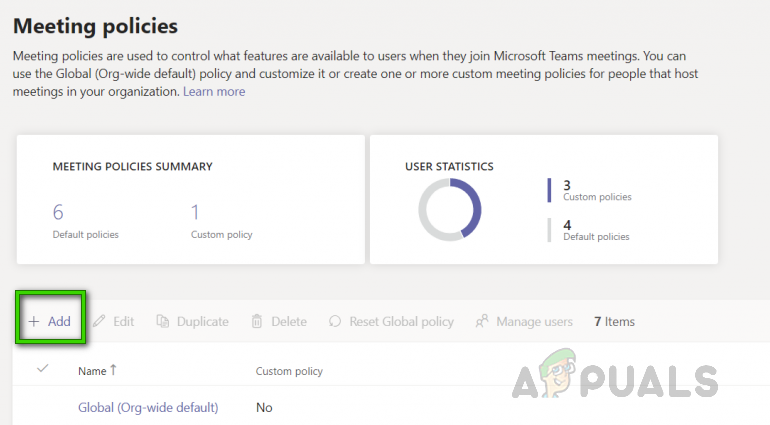
Adding New MS Teams Meeting Policy - Give your policy a unique title, enter a brief description and select Next. This will take you to the Content sharing settings page.

Providing New Meeting Policy Details - Select Entire screen option for Screen sharing mode and set the rest of the settings as desired. Once done, select Finish to finalize adding a new meeting policy to MS Teams.
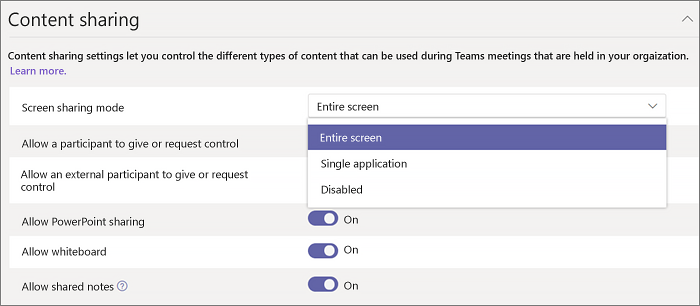
Selecting Required Options - Now launch MS Teams and join or create a meeting in which you want to share your screen with the connected audience. This should finally fix your problem.


