Can’t Hear Anyone In Valorant? Try these Solutions
Valorant players have been experiencing a lot of technical issues, including not being able to communicate properly via in-game voice chat. This has been the case for a long time, but recently, reports about this voice bug in Valorant have ramped up quite a bit. Below, we have compiled a list of the most common reasons that often lead to this issue in Valorant.
- In-Game Settings – Incorrect in-game audio settings in Valorant can cause voice chat to lag, sound distorted, or not come through at all. This can usually be fixed by reconfiguring a few audio options.
- Windows Input/Output Device Settings – Third-party audio apps can change Windows’ default input/output devices, which may lead to the Valorant voice bug.
- Windows Compatibility Settings – On some systems, Valorant components don’t launch correctly unless the game is run with administrator privileges.
- Outdated Audio And Network Drivers – Old or faulty network and audio drivers can prevent in-game voice chat from working properly.
- Outdated Operating System – Not running the latest stable build of Windows can also cause this issue.
- Corrupted Game Files or Vanguard Files – If Valorant or Vanguard files are corrupted or removed (by mistake or by another program), they can cause voice chat problems.
- Windows Defender/Security – Some users report Windows Security/Defender flagging Valorant as suspicious, which can block communication with Riot’s servers and break voice chat.
- Network Auto Proxy Settings – Auto proxy settings can interfere with online games. Turning them off has helped many users.
- Default Network DNS Server – Using your ISP’s default DNS instead of Google or Cloudflare DNS can sometimes cause connection and voice chat issues in games like Valorant.
- Windows Firewall – Windows Firewall may restrict Valorant or Vanguard from accessing the Internet, causing voice chat to fail to send or receive.
Note: If you are in Pakistan and facing this issue, it may not be on Riot’s end. One user, Zeshan Ramzan, reached out to Riot Support about the issue and received the following reply:
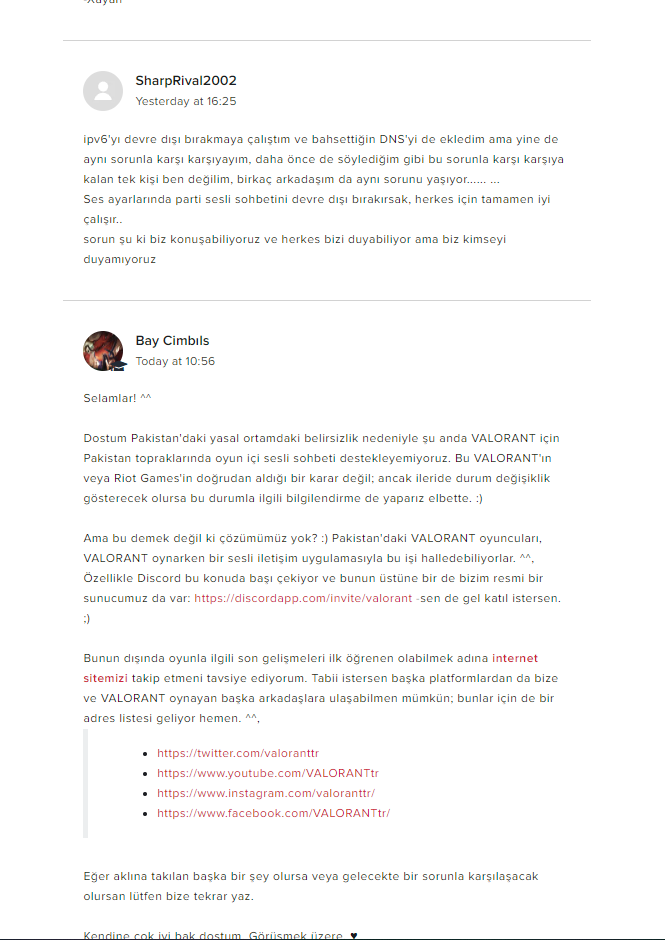
The reply is in Turkish, which roughly translates to:
Due to the uncertainty in the legal environment in Pakistan, we are currently unable to support in-game voice chat for VALORANT in Pakistani territory. This is not a direct decision of VALORANT or Riot Games; However, if the situation changes in the future, we will, of course, inform you about this situation.
But that doesn’t mean we don’t have a solution. VALORANT players in Pakistan can handle this with a voice communication application while playing VALORANT. ^^, Especially Discord is leading the way in this regard, and on top of that, we also have an official server: https://discordapp.com/invite/valorant – come and join if you want.
Take care of yourself, my friend. See you.
This reply is specific to players in Pakistan, but if you are in a region with limited or unstable Internet infrastructure, it may apply to you as well.
Please ensure that your telecommunication authority or any other Internet-related regulatory body allows access to video game servers. You can also try changing your DNS server to Google or Cloudflare, which often improves overall connectivity and stability. We discuss this in detail below.
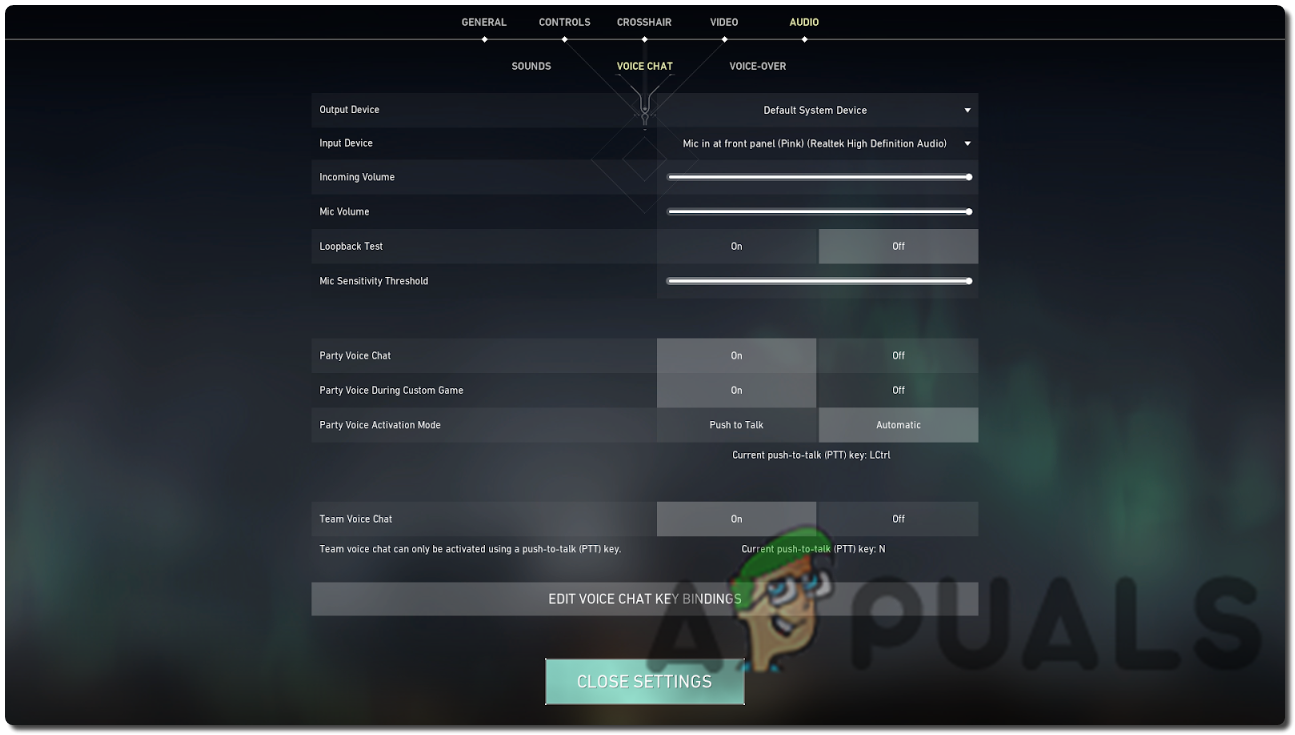
1. Valorant In-Game Settings
The first thing to check is your Valorant in-game settings, as this is often the most common cause of the voice bug. Make sure your audio settings are configured correctly and that you’ve selected the right input/output devices.
2. Check Windows Input/Output Device Settings
After checking your in-game audio settings, also verify your Windows audio settings. Windows doesn’t usually change input/output devices on its own, but a third-party app can. If Windows is using the wrong mic or speakers, voice chat won’t work.
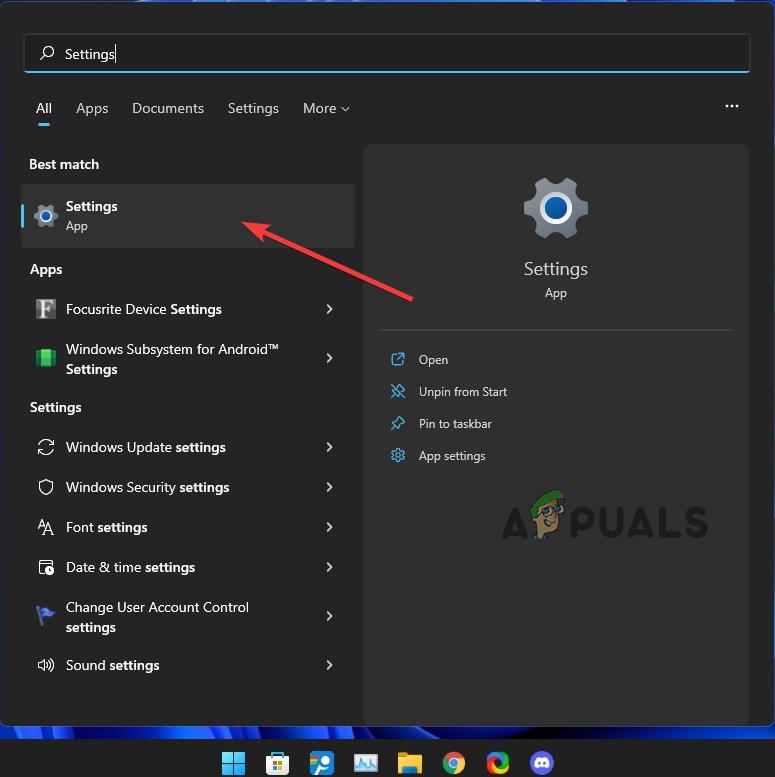
- Click the Start Menu and type Settings
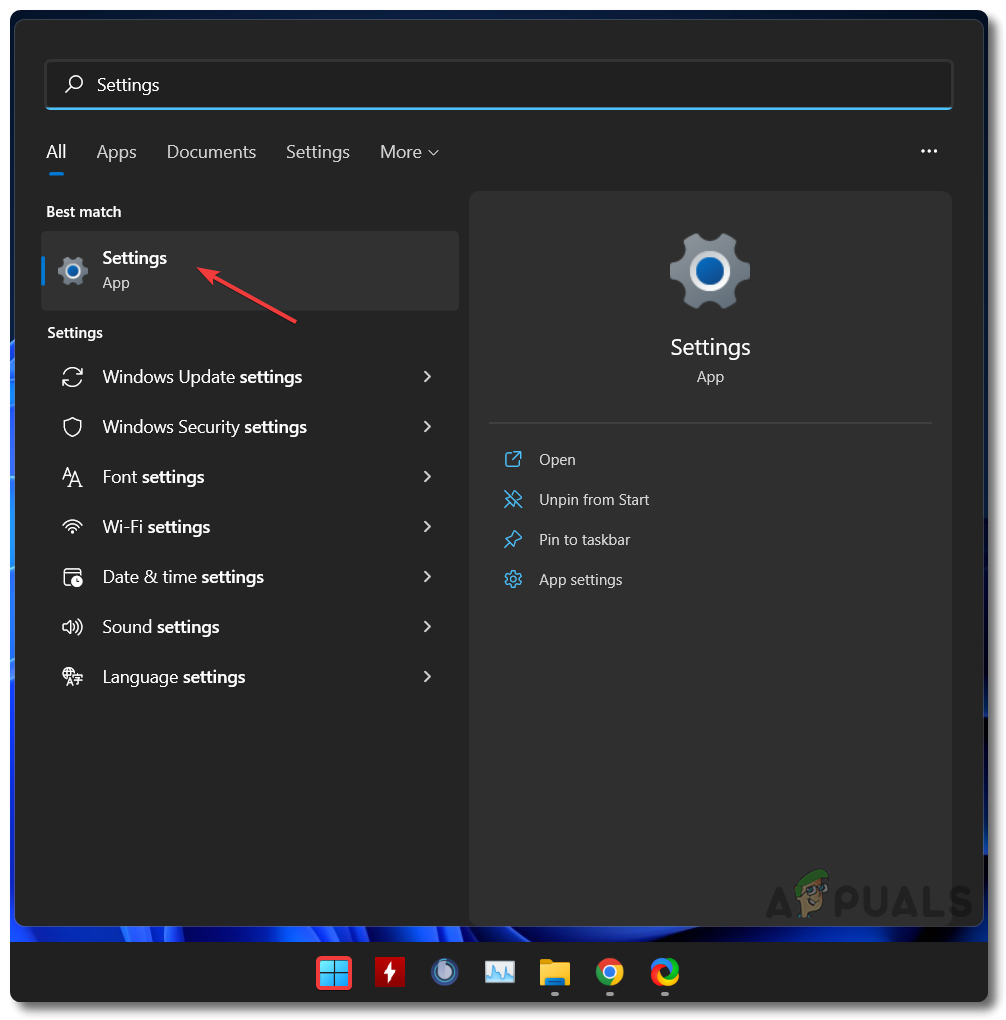
Start Menu To Settings Menu - Click Sound in the System tab
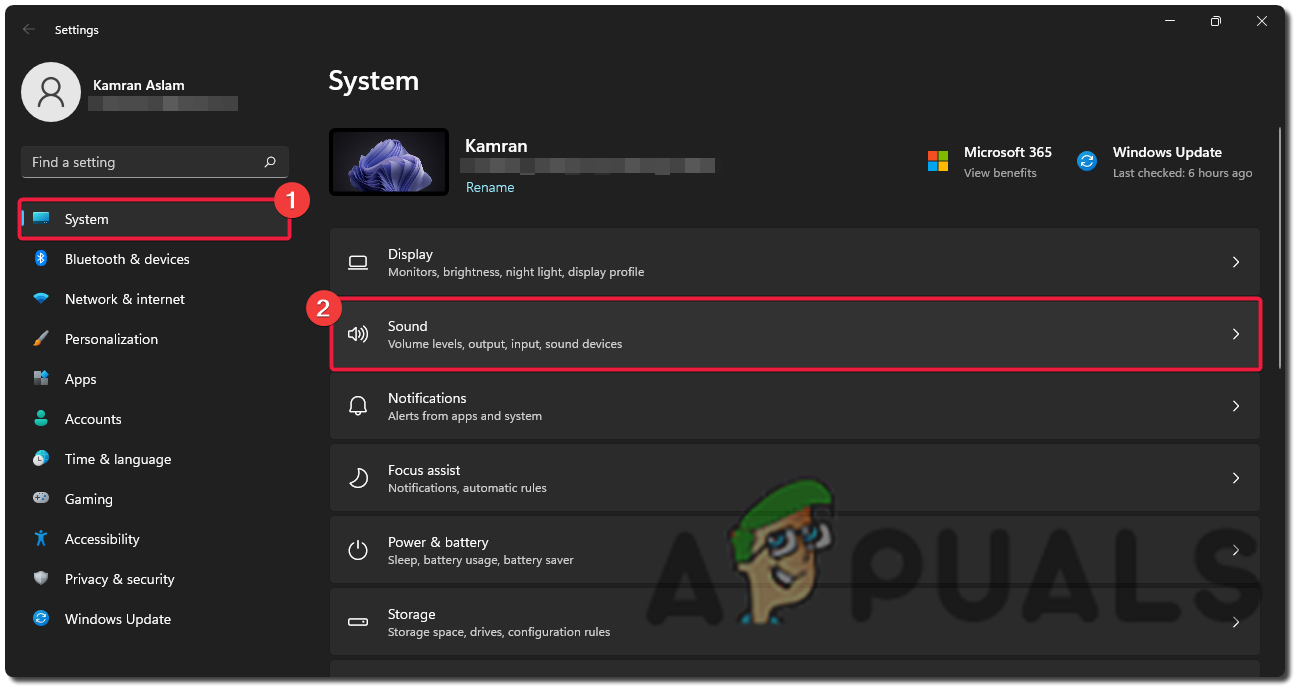
Windows System To Sound Settings - Scroll to the Advanced section and select More Sound Settings

Windows More Sound Settings - Go to both the Playback and Recording tabs and make sure the correct input and output devices are set as default.
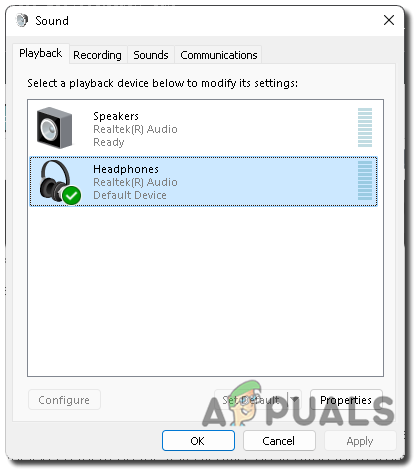
Windows Playback Sound Settings
3. Power Cycle Your Router
If you’re using an older router, it helps to power cycle it once a day. Routers can slow down or become unstable after running for many days. To power cycle, turn your Wi-Fi router off for about 20 seconds, then turn it back on.
Many Valorant players have reported that simply rebooting the router made the game more stable and reduced lag.
4. Perform A Clean Boot
If you still have network errors or voice chat bugs in Valorant, try to perform a clean boot of your PC. This clears up background apps and services that you don’t need, frees up RAM, and can help the game run without glitches.
5. Change Windows Compatibility Settings
Windows compatibility settings can sometimes fix this issue. Valorant may need admin permissions to work properly, including for in-game voice chat. It’s a good idea to run programs that need special permissions as an administrator so they aren’t limited by Windows.
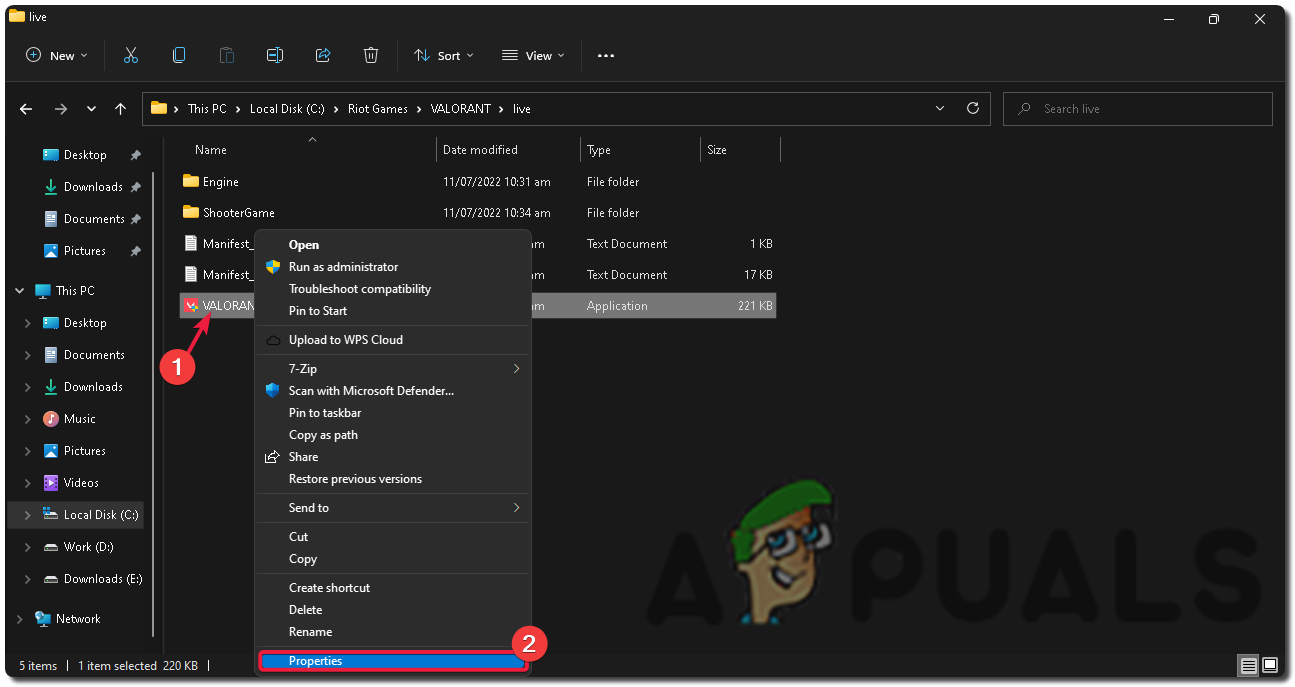
- Go to Valorant’s installation folder (Default: C:\Riot Games\VALORANT\live)
- Right-click on VALORANT.exe and select Properties
Opening Valorant Properties - Click the Compatibility tab and tick both Disable fullscreen optimizations and Run this program as an administrator.
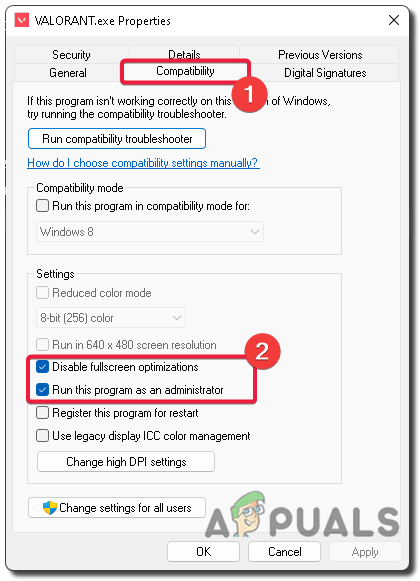
Valorant Run This Program As An Administrator - If the problem isn’t fixed, tick Run this program in compatibility mode for and try an older version of Windows from the drop-down list.
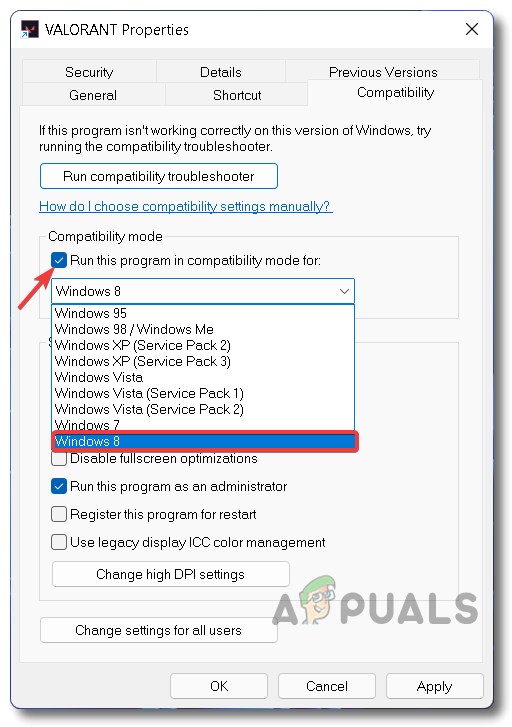
Run This Program in Compatibility Mode For Old Windows - Now go deeper into the Valorant folder and repeat the same steps for VALORANT-Win64-Shipping.exe (Default: C:\Riot Games\VALORANT\live\ShooterGame\Binaries\Win64)
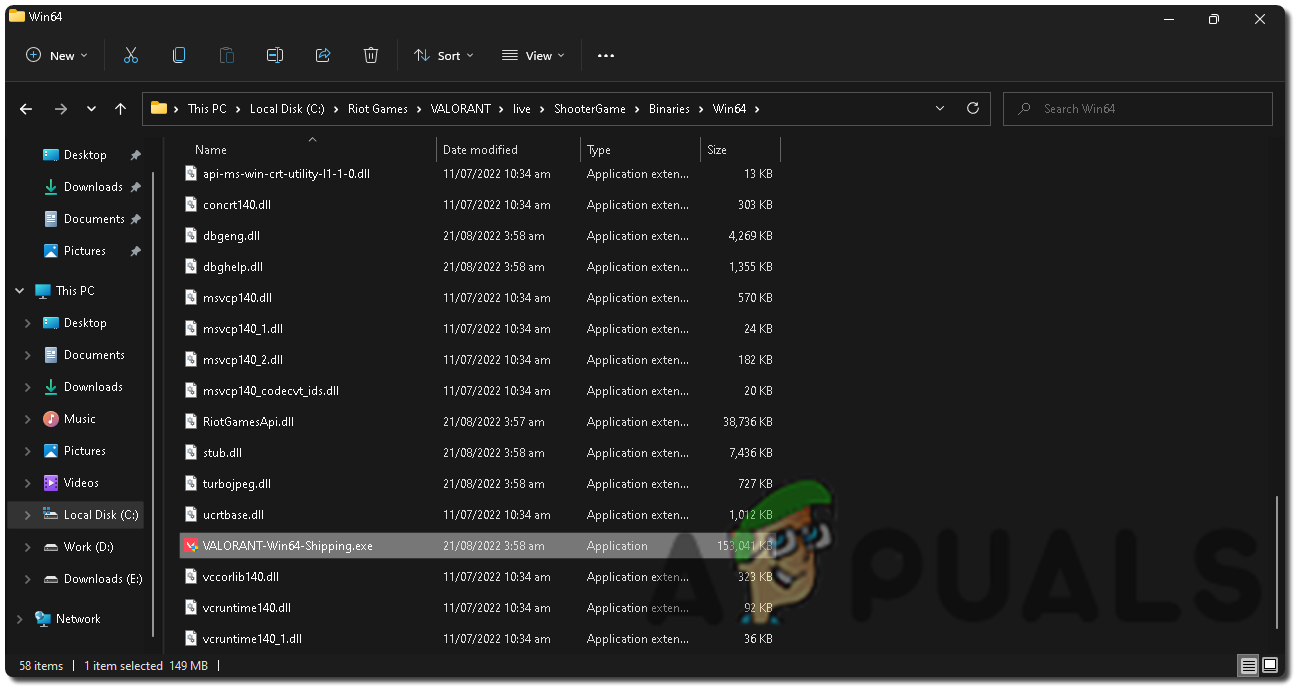
VALORANT-Win64-Shipping.exe Location
6. Update Audio And Network Drivers
Outdated audio and network drivers are common culprits. Valorant works best with the latest drivers. Whenever possible, get the newest drivers from your laptop manufacturer (for laptops) or your motherboard manufacturer (for desktop PCs).
Below are the steps to update your audio and network drivers via Device Manager. However, drivers from your device manufacturer are usually more reliable and compatible.
- Click the Start Menu and type Device Manager
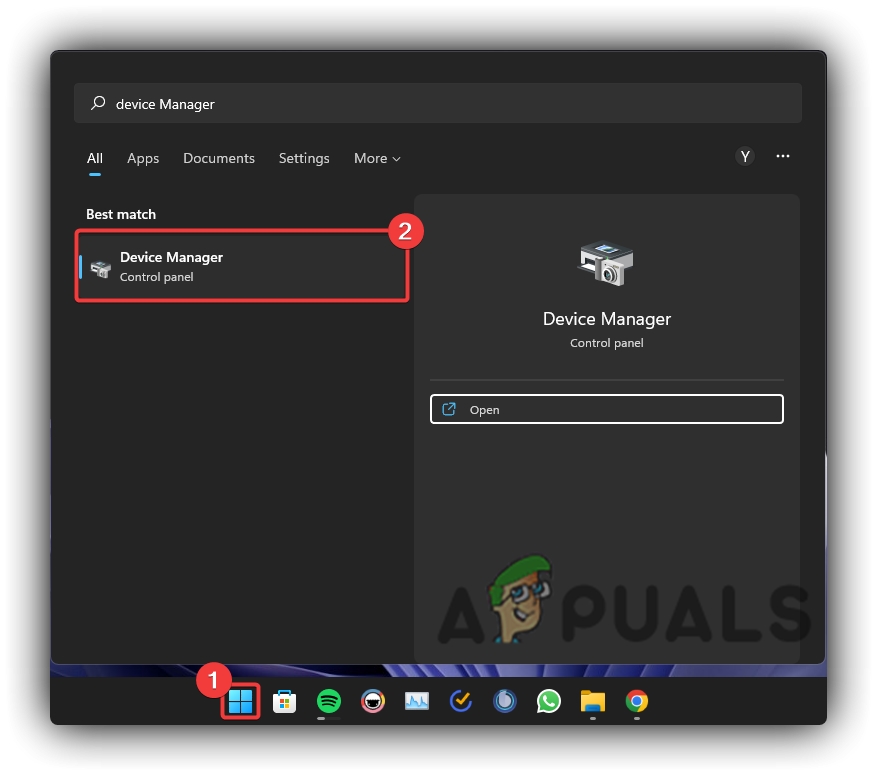
Windows 11 Opening Device Manager - Open Sound, video and game controllers, then right-click your device and select Properties.
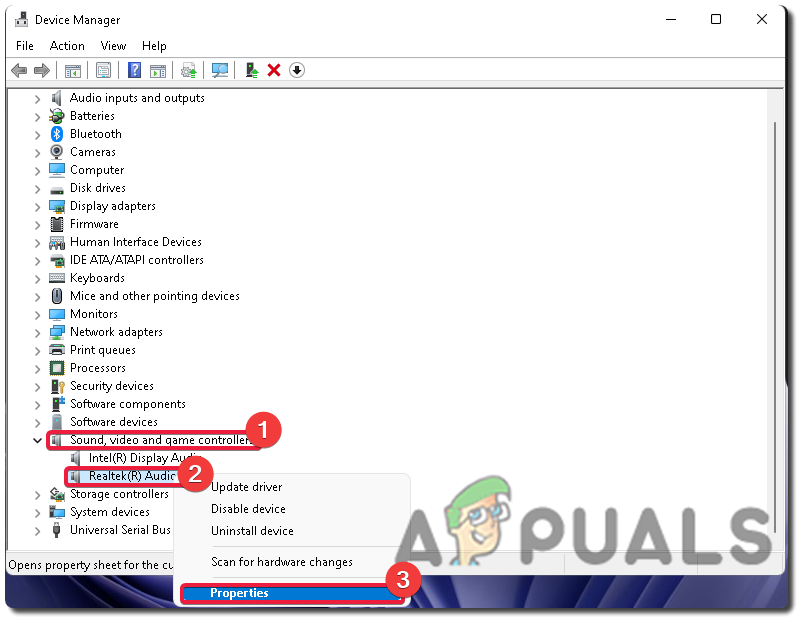
Windows Device Manager – Updating Drivers - Go to the Driver tab and click Update Driver.
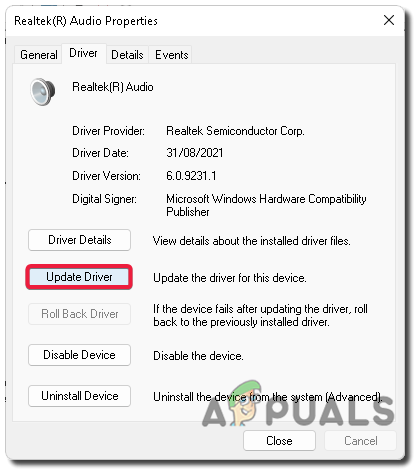
Select Update Driver from Windows Device Manager - Click Search automatically for drivers and let Windows find and install any available updates.
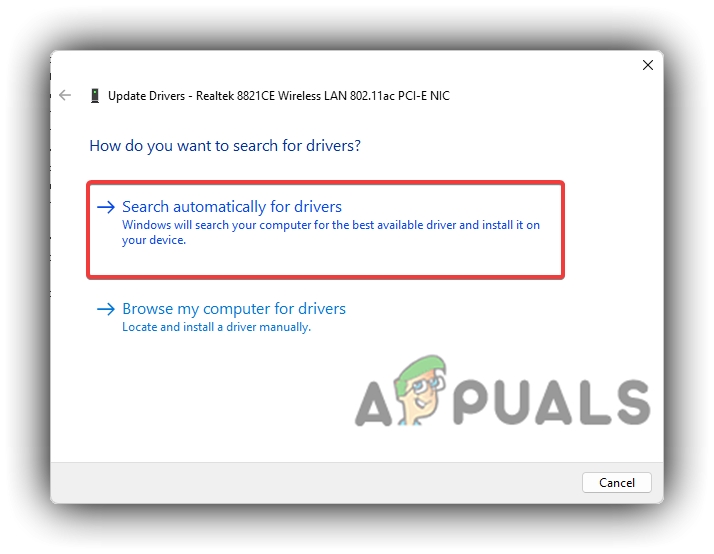
Search Automatically For Drivers In Device Manager - If an updated driver is installed, reboot your PC so the changes take effect.
7. Update Windows Operating System
Not having the latest stable build of Windows on your PC can cause issues in and out of games. For a smoother experience, always keep Windows up to date.
- Click the Start Menu and type Settings
Windows Settings - Go to the Windows Update tab and click Check Now

Windows Settings – Check For Updates - Let it check for updates. If any are found, install them and reboot your PC afterward.
8. Add Windows Security/Defender Exception
Sometimes Windows Security/Defender flags Valorant or Vanguard as potentially harmful, which can affect how the game works and cause glitches. Add trusted games and programs to the Windows Security/Defender exclusions list so they’re not restricted.
- Open the Start Menu and type Security
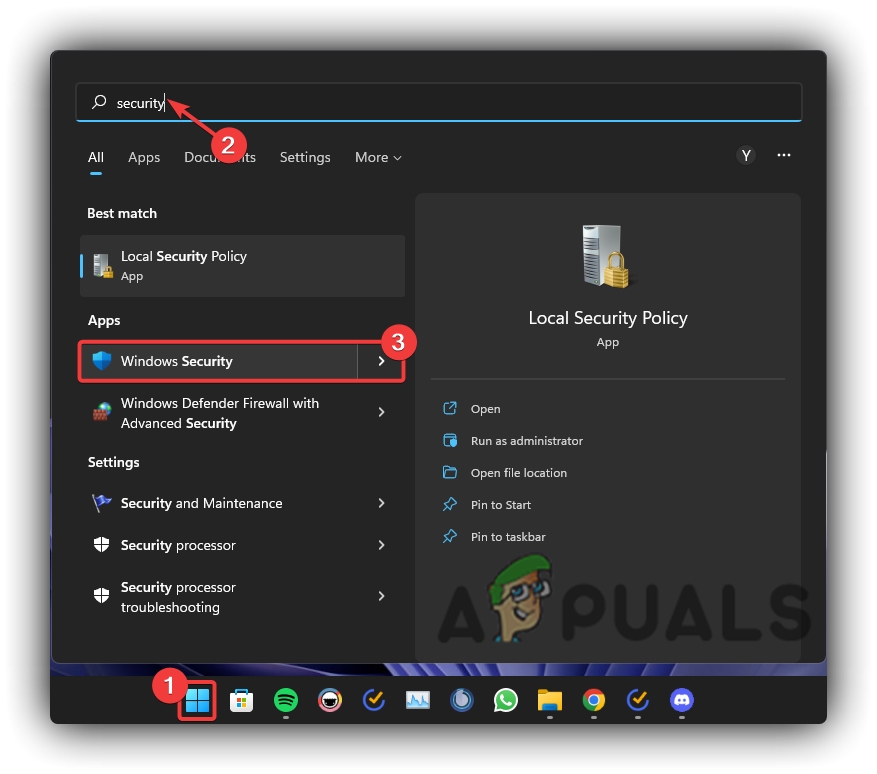
Opening Windows Security - Select Virus & threat protection
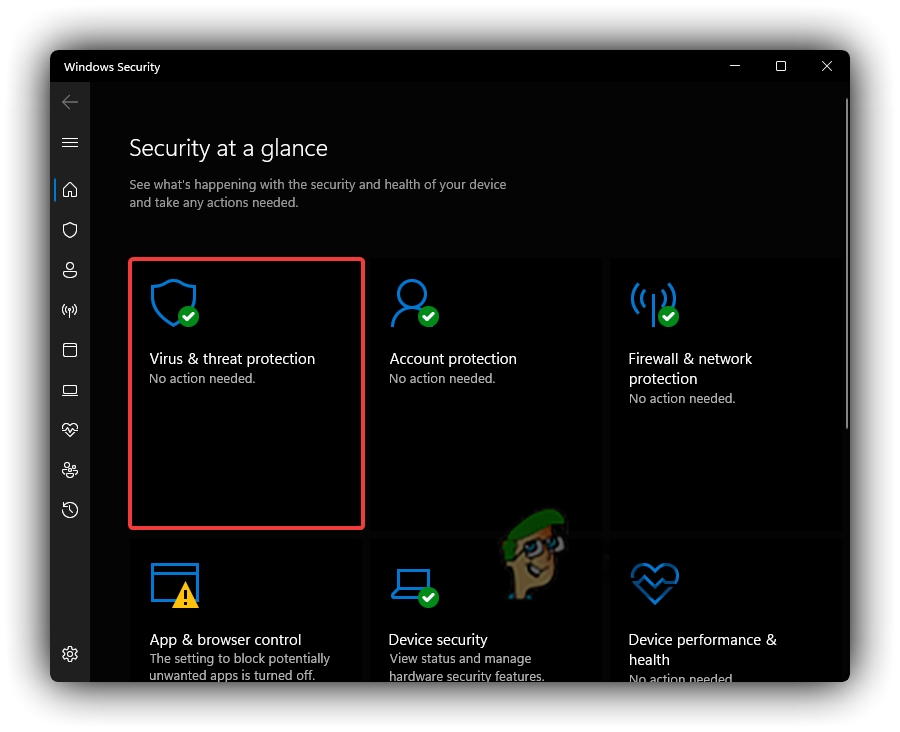
Clicking On Windows Security Virus & Threat Protection Settings - Click Manage settings under the Virus & threat protection settings section
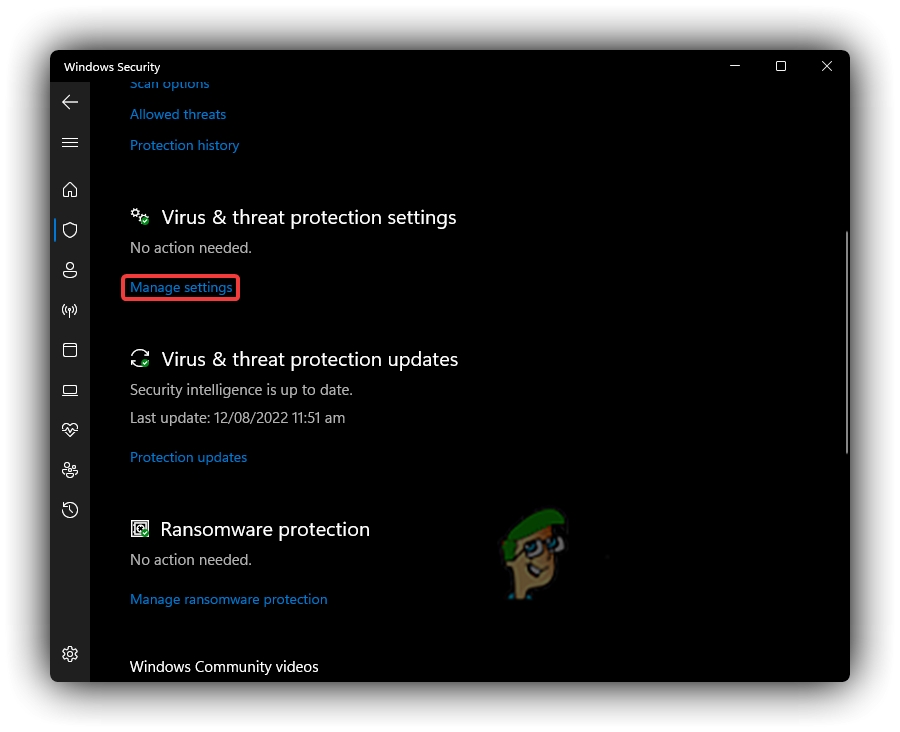
Windows Security Virus & Threat Protection Settings To Manage Settings - Scroll down and click Add or remove exclusions under Exclusions
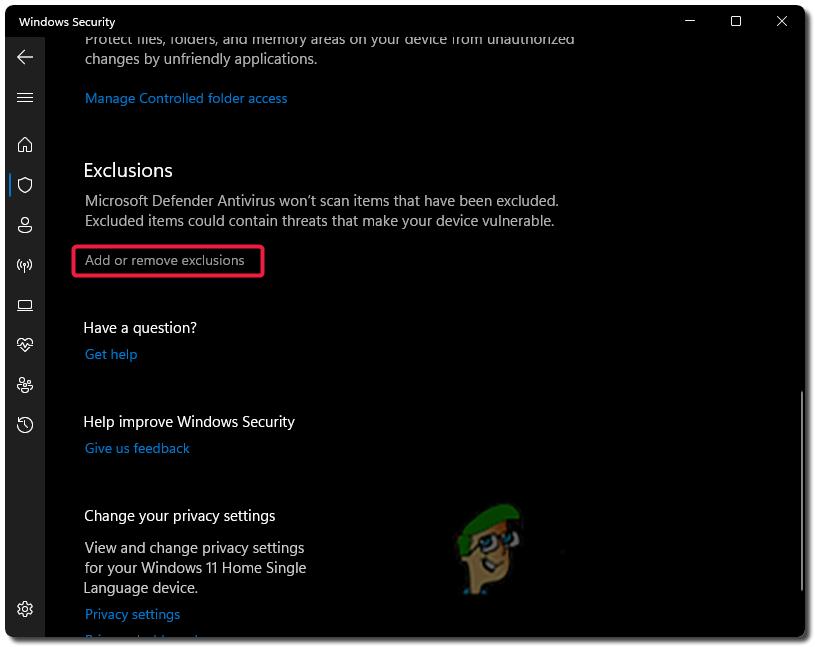
Windows Security – Add Or Remove Exclusions - Click Add an exclusion and select Folder
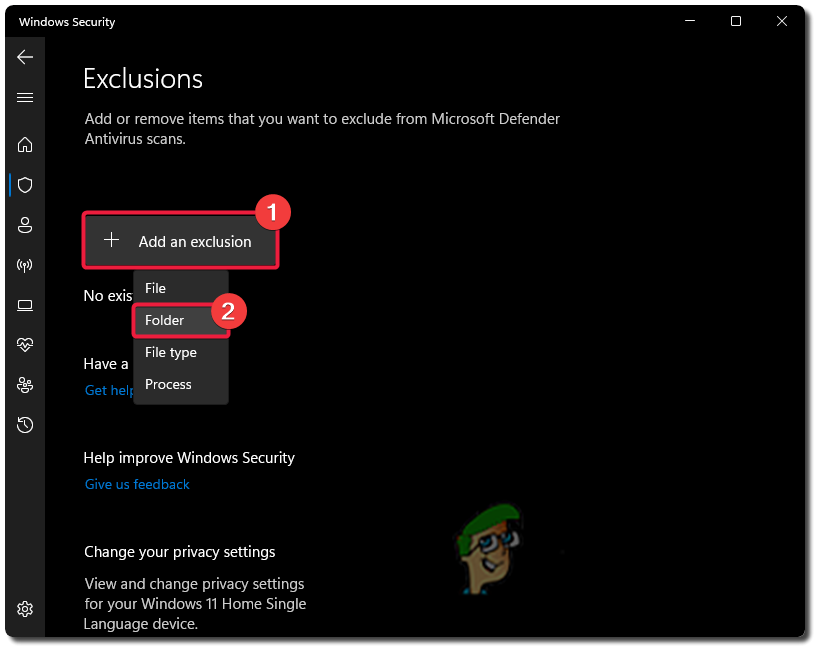
Windows Security – Add An Exclusion - Add the Valorant and Vanguard installation folders so Microsoft Security doesn’t scan or block them.
The default locations are:
Valorant: C:\Riot Games\VALORANT\
Vanguard Anti-Cheat: C:\Program Files\Riot Vanguard
9. Turn Off Any VPN
If you’re using the built-in Windows VPN or any third-party VPN while playing Valorant, you may face glitches and errors, including not being able to hear anyone in voice chat.
By default, Valorant doesn’t allow gameplay over VPNs, as they interfere with Riot Vanguard and can connect you to different regions/servers, causing network issues.
Many users reported that while using a VPN, they couldn’t use in-game voice chat. It’s best to turn off any VPN while playing Valorant.
- Click the Start Menu and type Settings
Start Menu To Settings Menu - Go to Network & Internet from the left panel and select VPN

Windows Settings To VPN Settings - Click Disconnect on any VPN that is connected
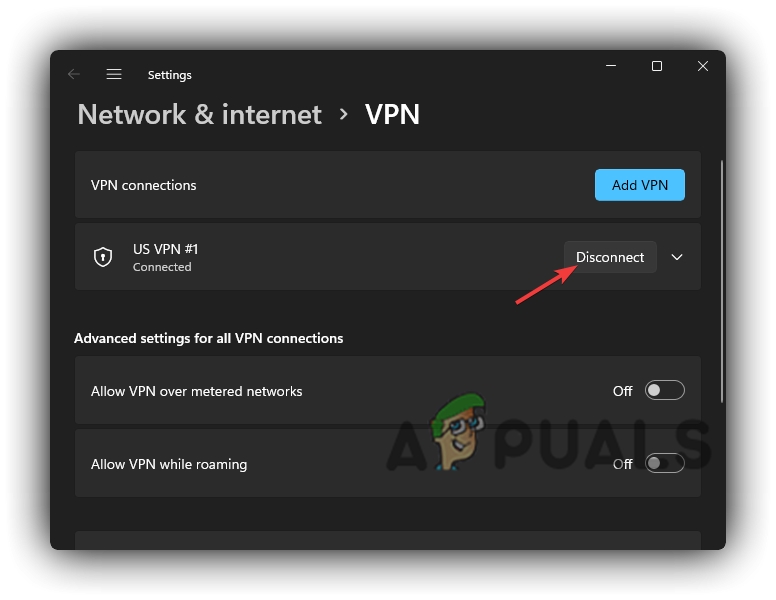
Disconnecting Windows Built-in VPN
10. Disable Windows Auto Proxy Settings
Proxy servers can help with stability and security when set up correctly. However, a misconfigured proxy can slow your Internet, break webpages, or cause disconnects.
For multiplayer games, it’s recommended to turn this off for the best stability.
- Click the Start Menu and type Settings
Start Menu To Settings Menu - Click Network & Internet from the left panel and select Proxy
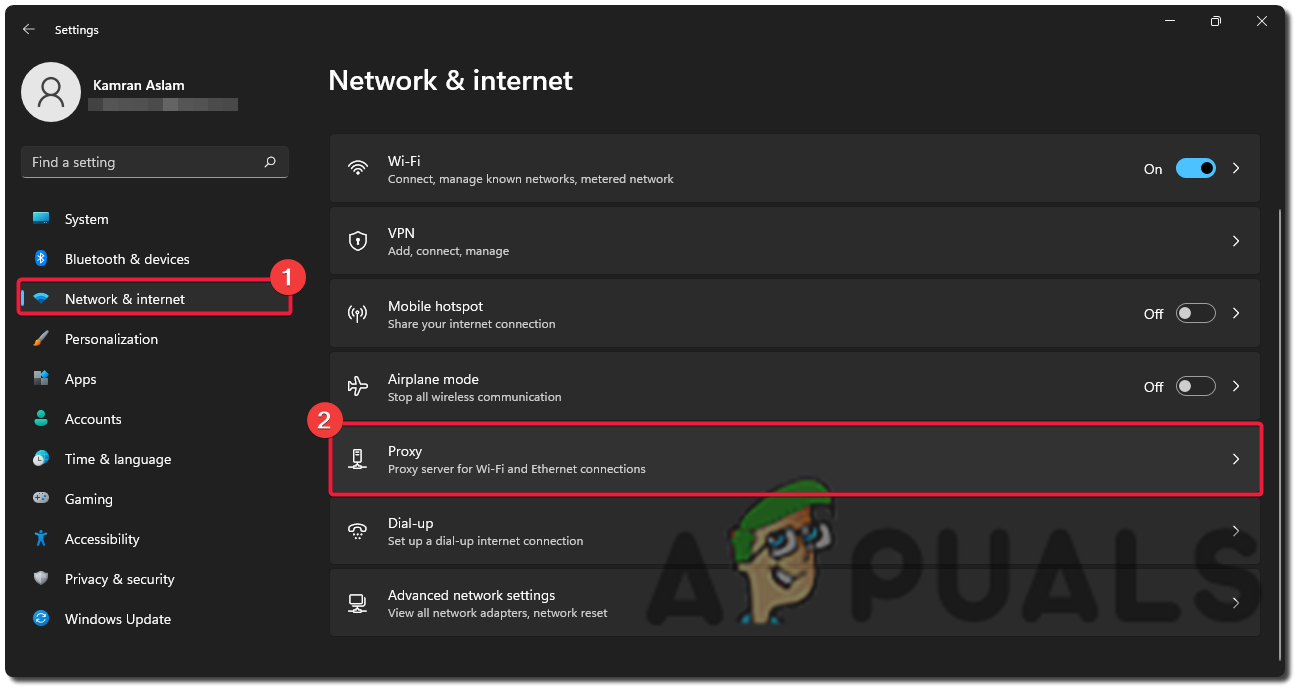
Windows Settings To Proxy Settings - Turn off Automatically detect settings
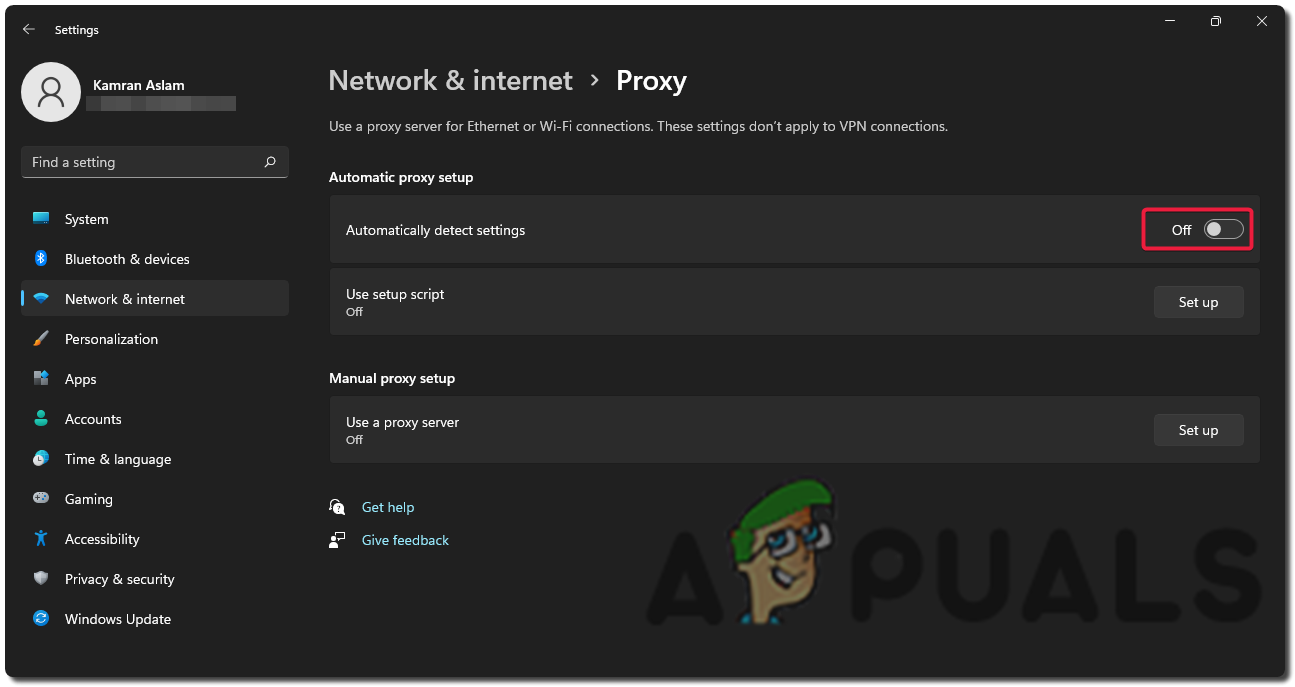
Turn Off Automatically Detect Proxy Settings
11. Allow Access Via Windows Firewall
Windows sometimes limits Internet access for unverified apps as a security precaution. This is good for privacy, but it can hurt online game performance if key game components are blocked.
- Click the Start Menu and type Windows Defender Firewall
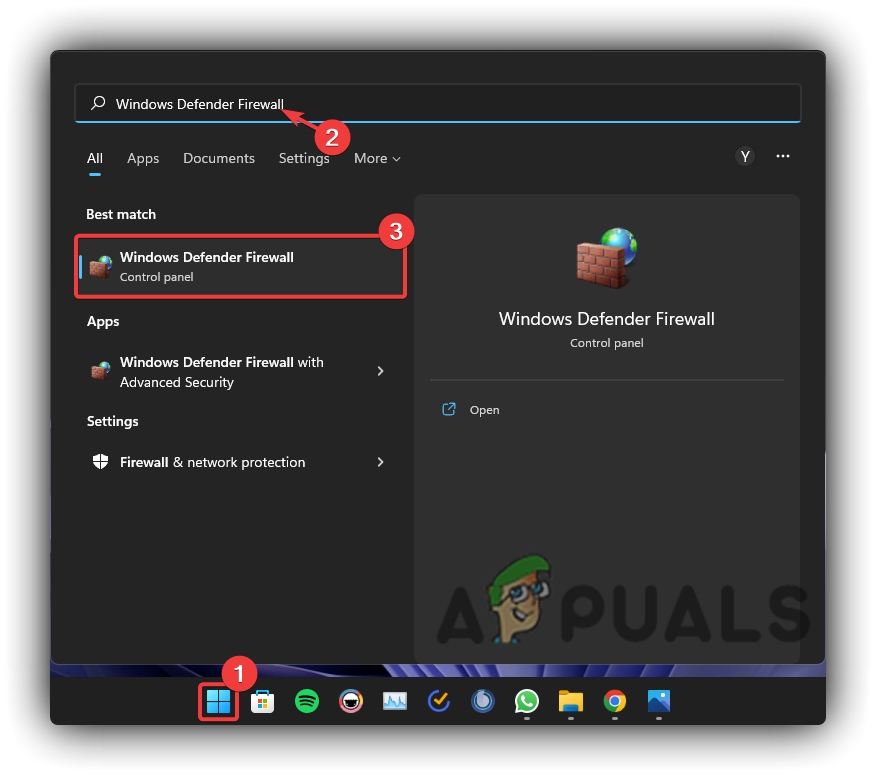
Start Menu To Windows Defender Firewall - Click Allow an app or feature through Windows Defender Firewall

Clicking Allow An App Or Feature Through Windows Defender Firewall - Click Allow another app
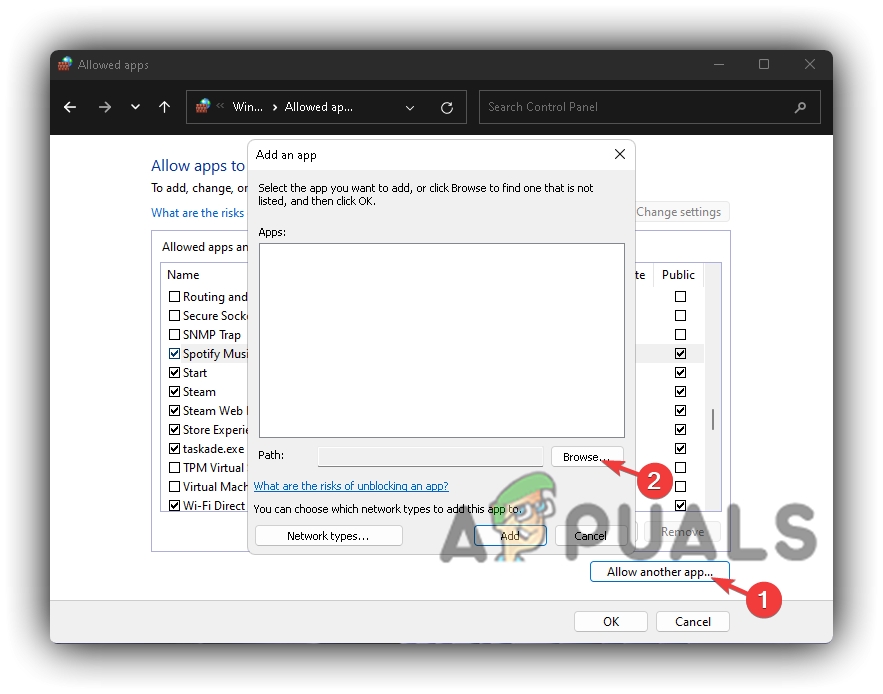
Allow Another App Through Windows Defender Firewall - Click Browse and add these 4 files:
– C:\Riot Games\Riot Client\RiotClientServices.exe
– C:\Riot Games\VALORANT\live\Valorant.exe
– C:\Riot Games\VALORANT\live\ShooterGame\Binaries\Win64\VALORANT-Win64-Shipping.exe
– C:\Program Files\Riot Vanguard\vgc.exe - Make sure both Private and Public boxes are checked for all four apps.
12. Change Default Network DNS Server
Changing your DNS from the default (usually your ISP’s) to Google or Cloudflare can improve Internet stability and access in daily use and gaming. The default DNS often works fine, but switching to a well-known DNS can help with voice chat and connection reliability. Here’s how:
- Click the Start Menu and type Settings
Start Menu To Settings Menu - Select Network & Internet from the left panel and click Advanced network settings
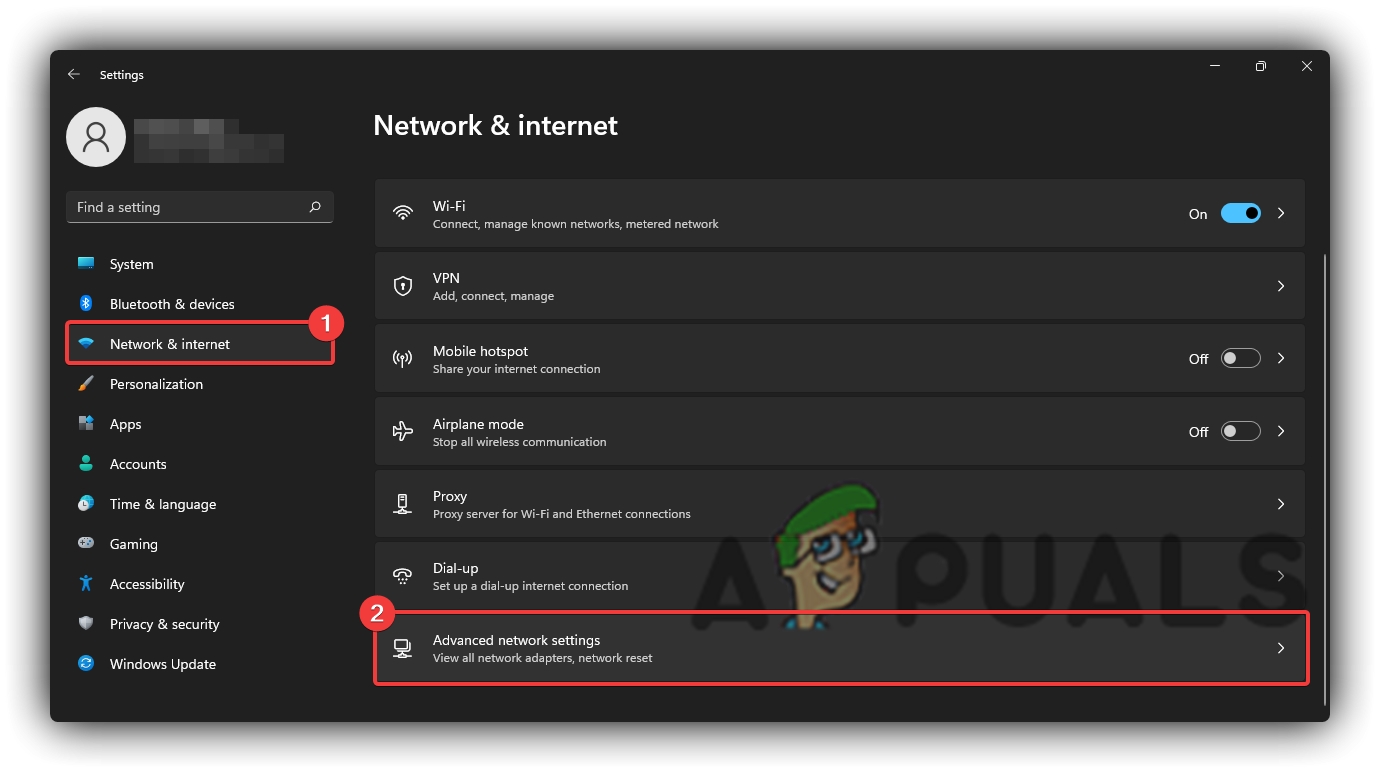
Network and Internet To Advanced Network Settings - Click More network adapter options under Related Settings
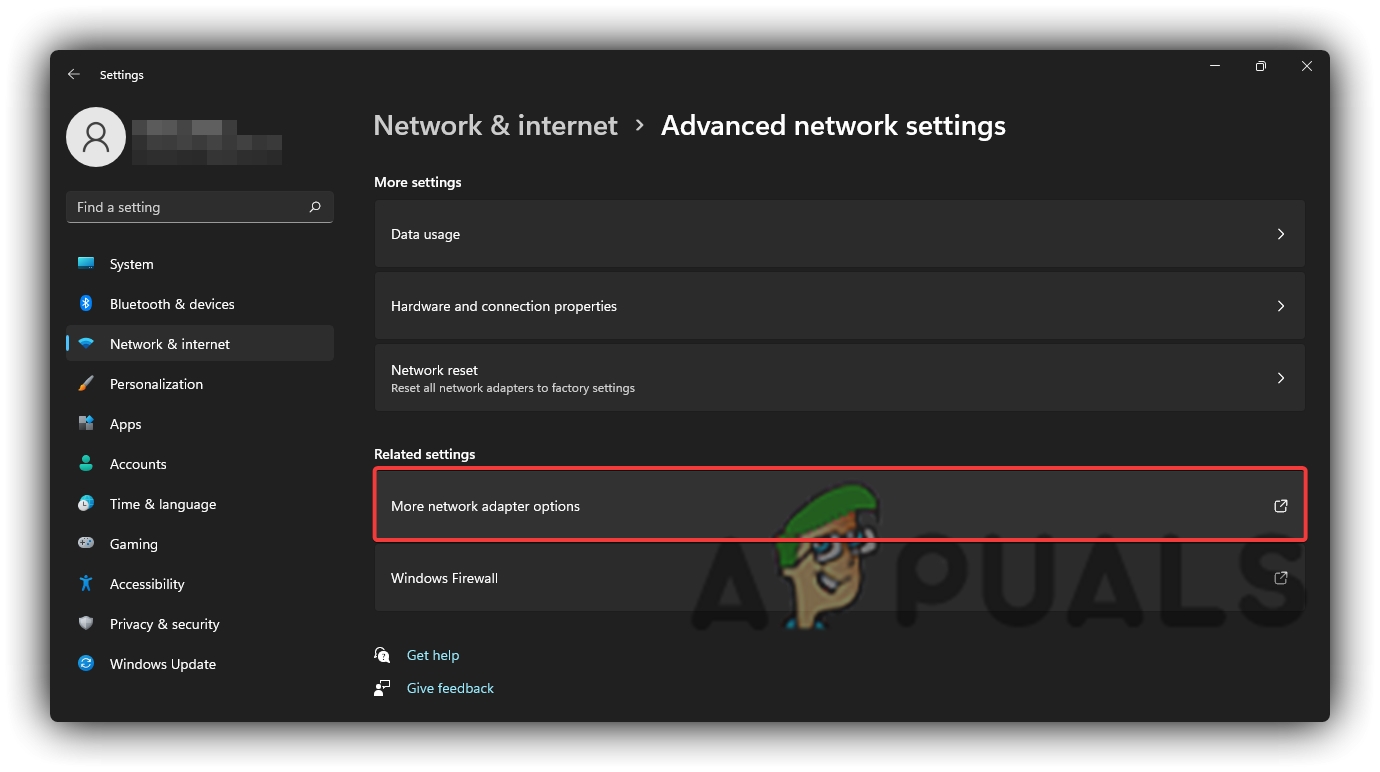
Opening More Network Adapter Options - Right-click your active network and select Properties
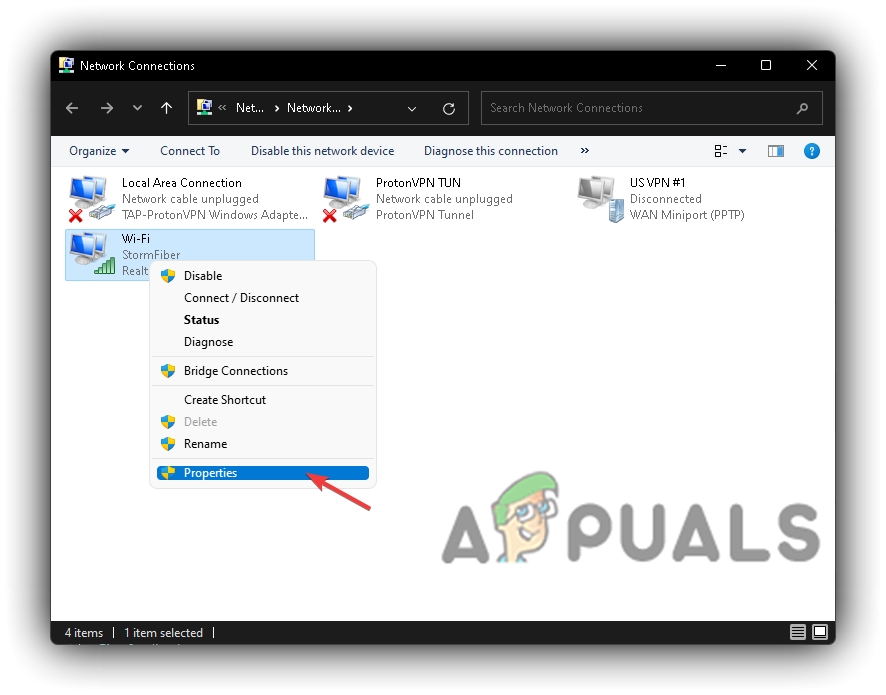
Opening Network Connections Properties - Click Internet Protocol Version 4 (TCP/IPv4) and select Properties
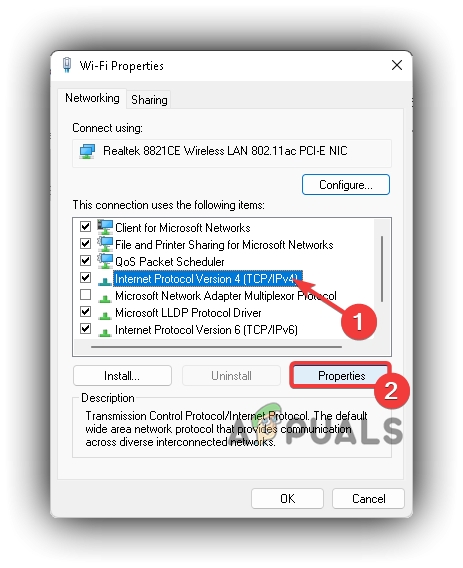
Opening Internet Protocol Version 4 (TCP IPv4) Properties - Check Use the following DNS server addresses and enter:
– Google DNS: 8.8.8.8 and 8.8.4.4
– Cloudflare DNS: 1.1.1.1 and 1.0.0.1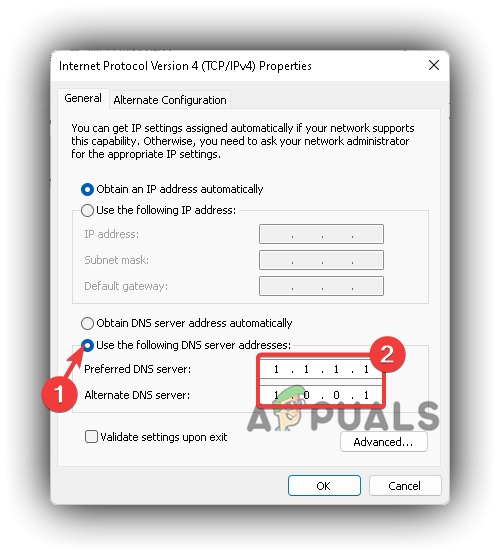
Change Automatic DNS Server To Cloudflare DNS Server - Press OK.
13. Reinstall Valorant And Vanguard
If nothing else works, uninstalling and reinstalling Valorant and Vanguard can help. A fresh install replaces any corrupted or missing files that may be causing the voice chat issue.
13.1. To Uninstall Vanguard Anti-Cheat
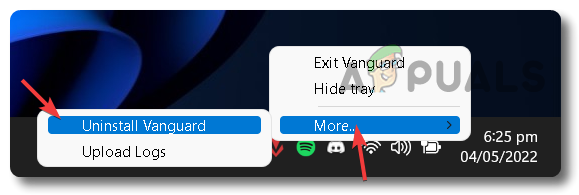
- Right-click the Vanguard icon in the taskbar notification area and click More > Uninstall Vanguard
Uninstall Vanguard from Tray Icon - Press Yes to confirm and uninstall Vanguard Anti-Cheat
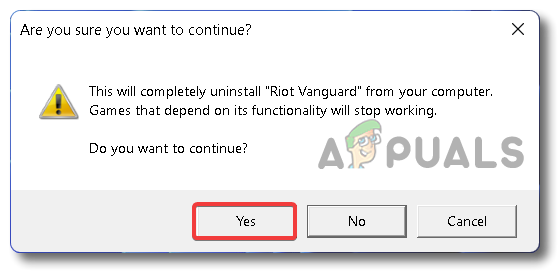
Press Yes to Confirm Vanguard Uninstall - Then go to the Vanguard installation folder and delete any leftover files.
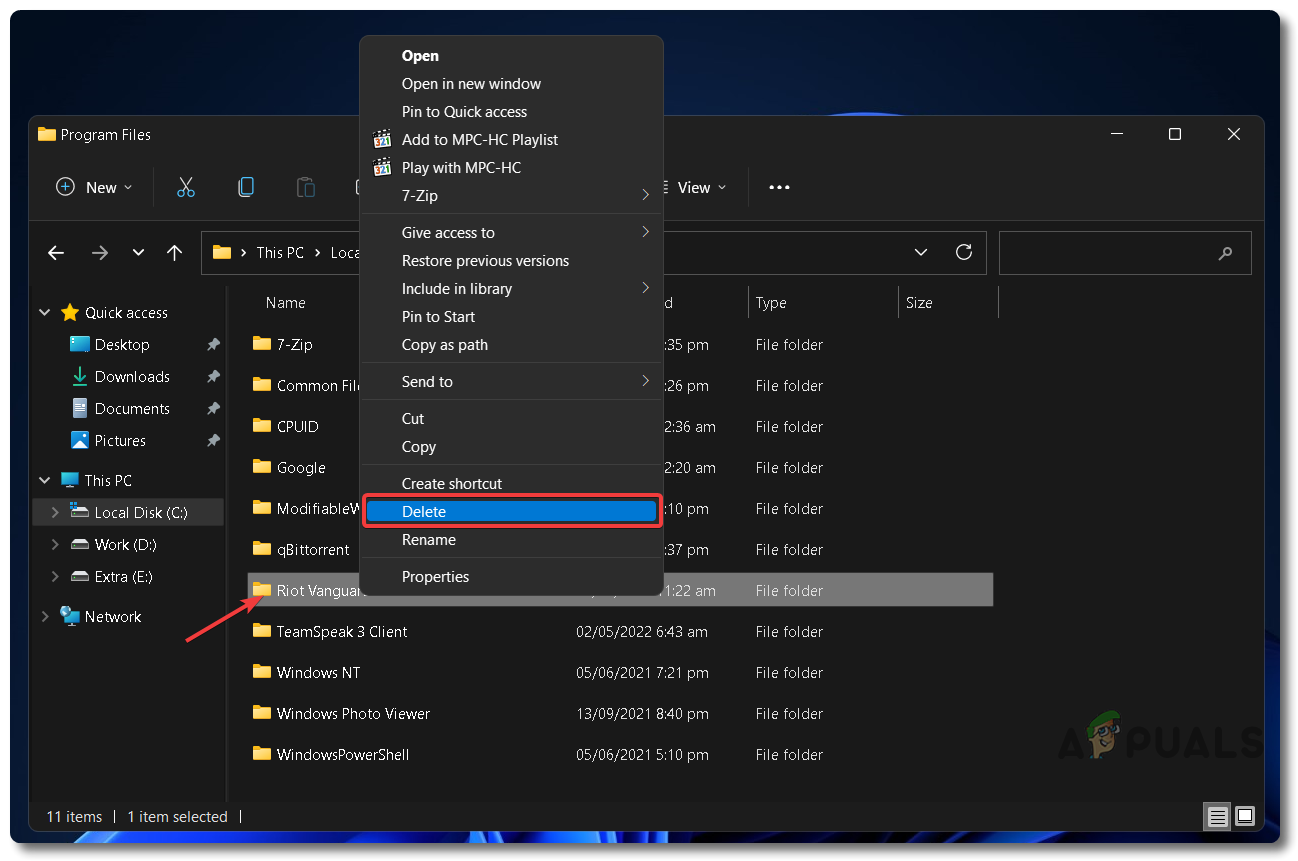
Confirm Deletion of Riot Vanguard Leftover Files
13.2. To Uninstall Valorant:
- Click the Start Menu and type Settings
Start Menu To Settings Menu - Click Apps from the left panel and select Apps & features
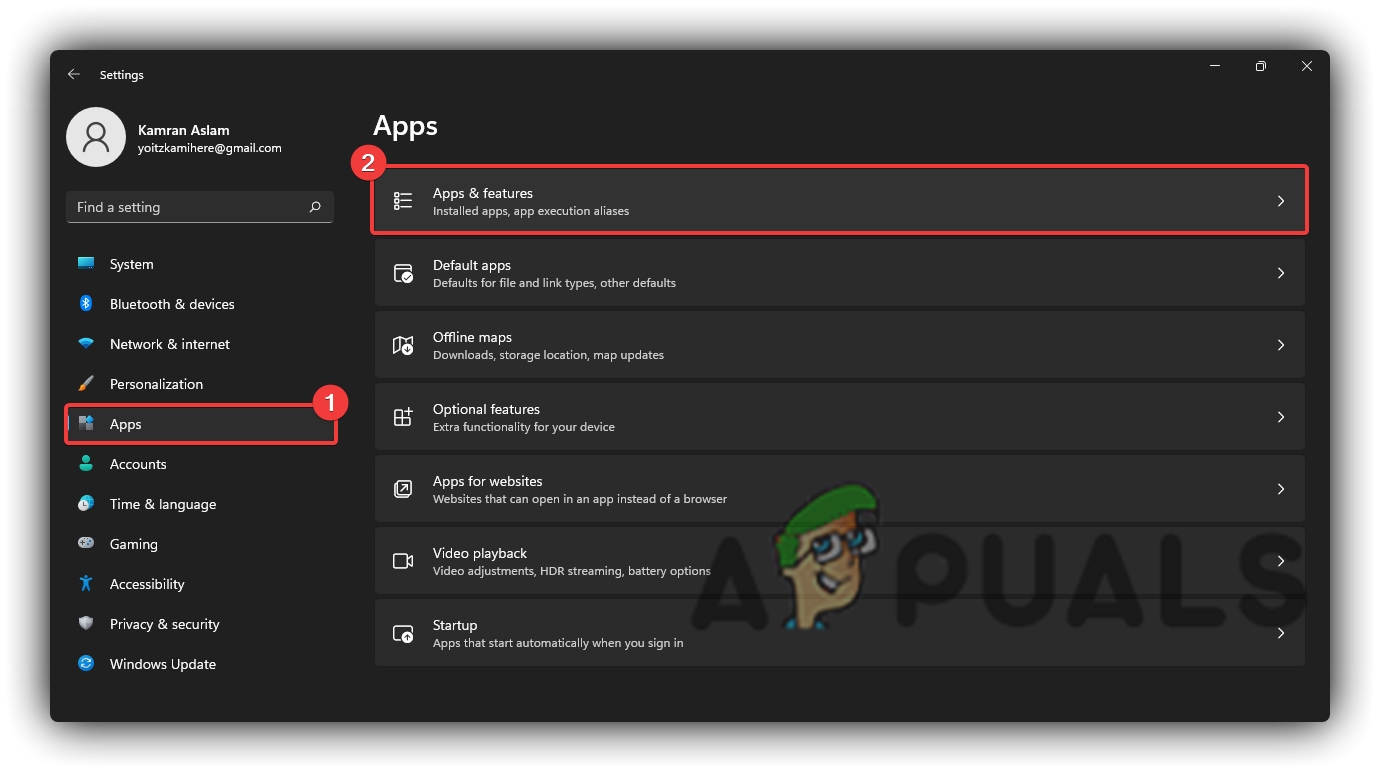
Windows 11 Apps and Features Settings - Type “Valorant” in the search bar, right-click the three-dot menu, and click Uninstall.
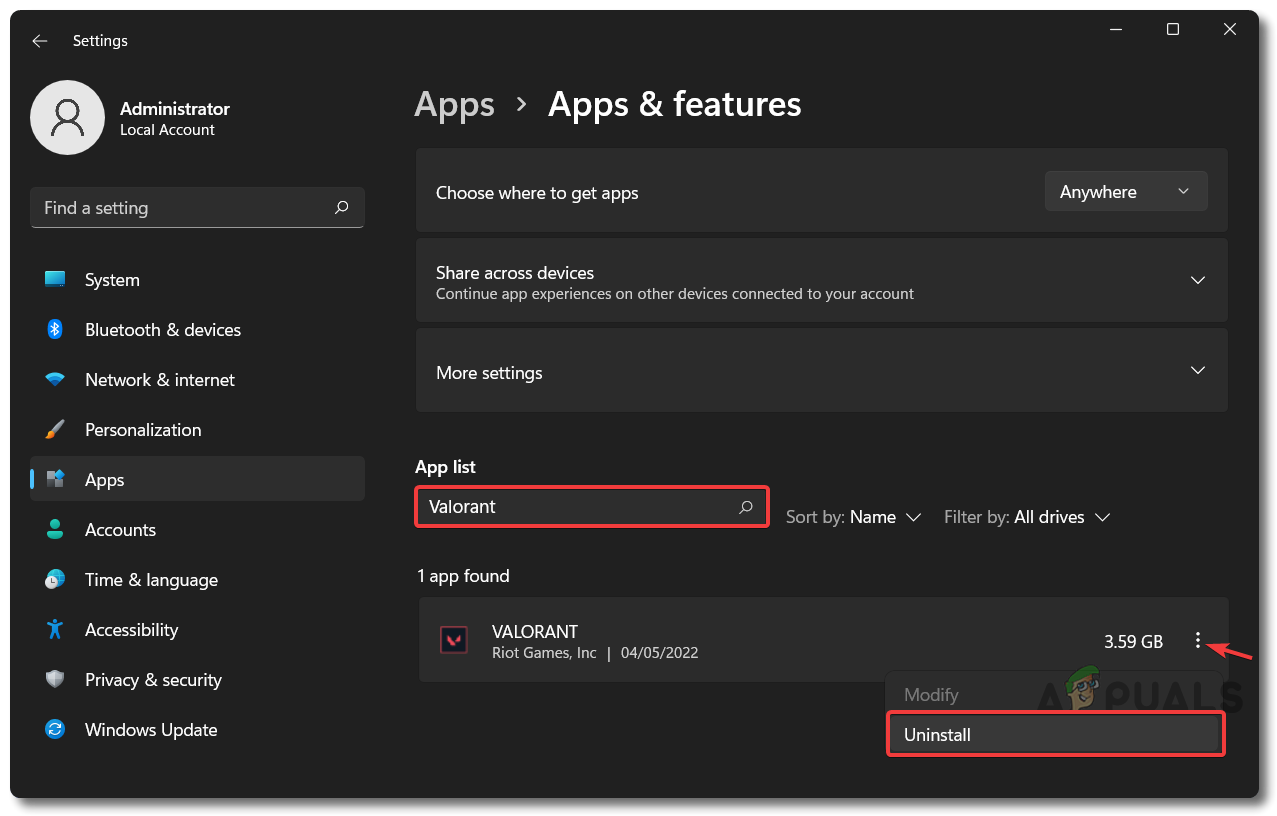
Uninstall Valorant


