Fix: Cannot Set a Default App For MP4 on Windows 11/10
MP4 files may keep asking for an app to open them even though a default is set in Windows settings. This shows that Windows can’t save or keep the link to a program for the “.mp4” file type.
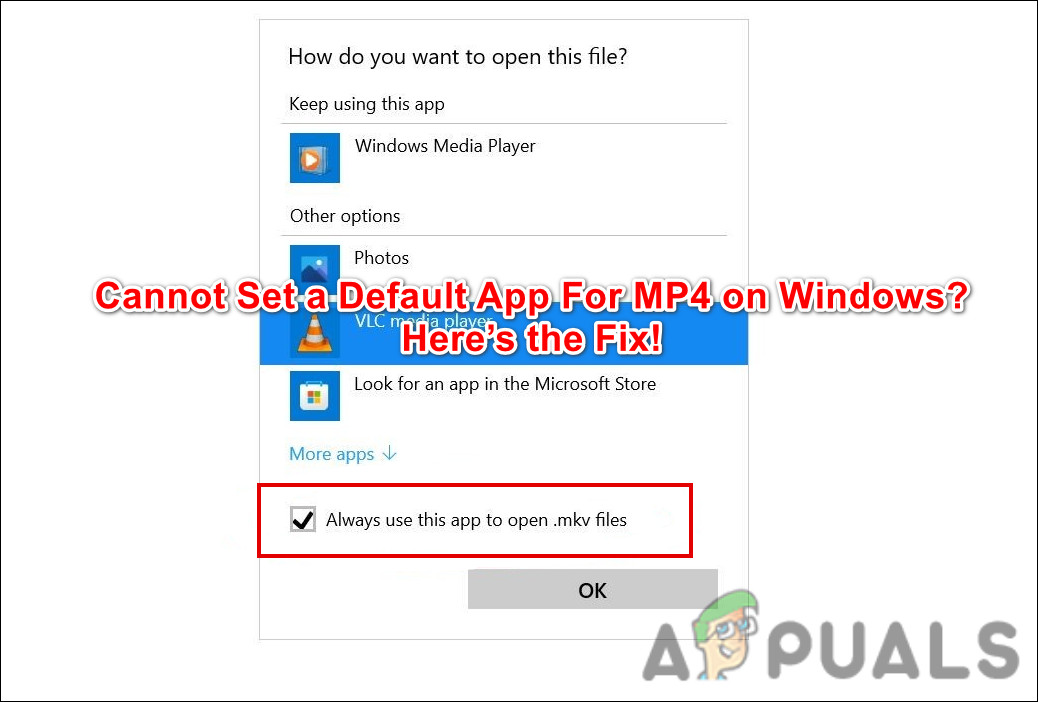
The most common reason is a missing or not registered .mp4 link in the Windows registry, with other reasons including a damaged Defaults cache or interference from software from other companies.
In this article, we will discuss different ways to solve this error.
1. Reset the Movies & TV App
One common reason for this issue is a corrupted Movies & TV app (also known as Films & TV). This corruption can prevent Windows from saving another app as the default.
If this applies to you, reset the Movies & TV app from Windows Settings.
- Press the Win + I keys to open Windows Settings.
- Choose Apps from the left pane and click Apps & features on the right.
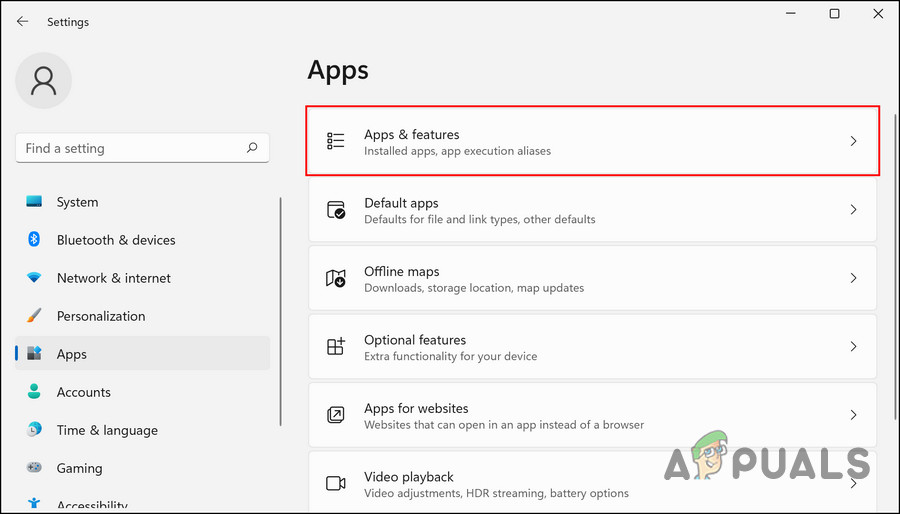
Choose Apps & features from the left pane - In the next window, scroll down to find Movies & TV.
- Click the three dots next to it and choose Advanced options.
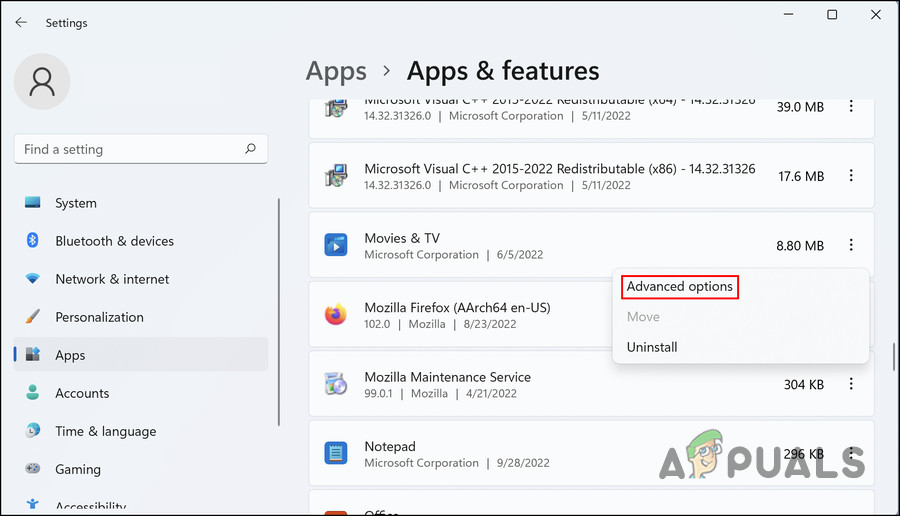
Choose Advanced options for Movies & TV - Scroll down to Reset and click the Reset button.
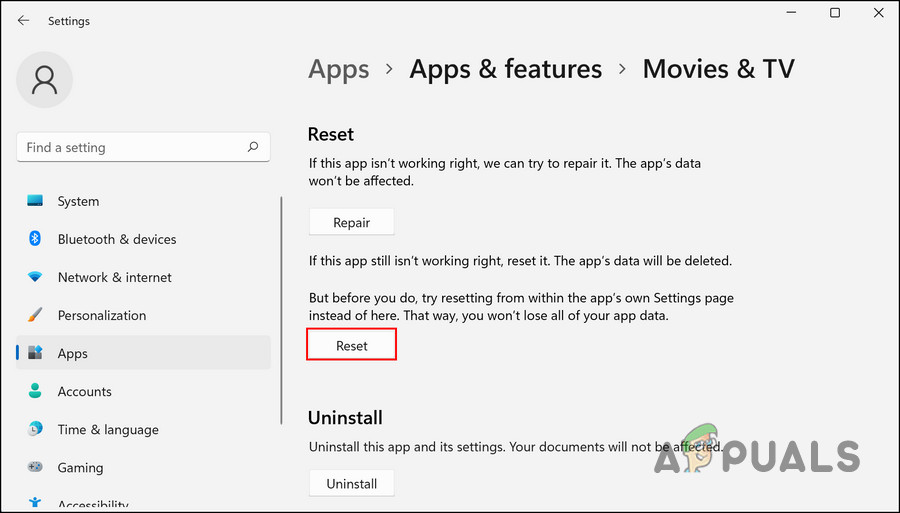
Click on the Reset button Note: You can also try uninstalling the app. Many users reported that removing it fixed their file association problem. You can reinstall it later from the Microsoft Store if needed.
- Follow the on-screen prompts and wait for the reset to finish.
- After the reset, open File Explorer and go to any video file (don’t open it).
- Right-click the file and choose Open with > Choose another app.
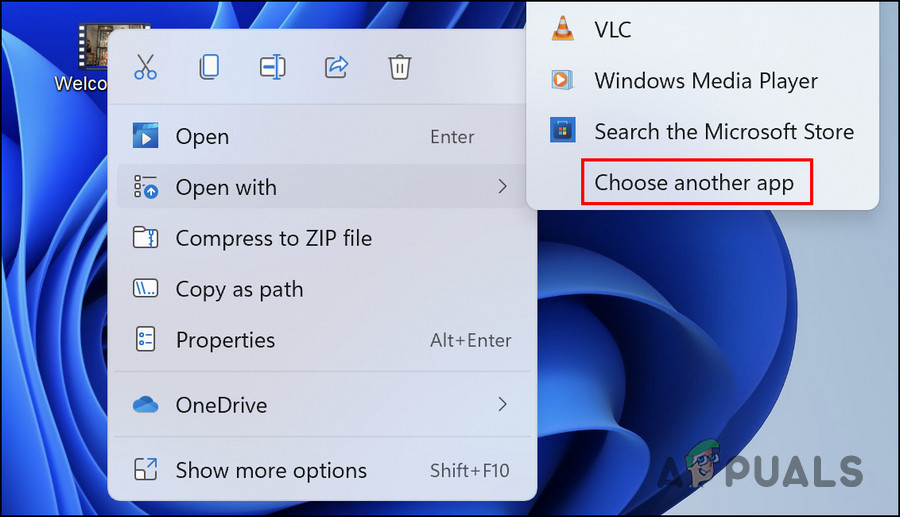
Choose an app to open the video file - Select the app you want to use as your default for MP4, then check Always use this app to open .mp4 files.
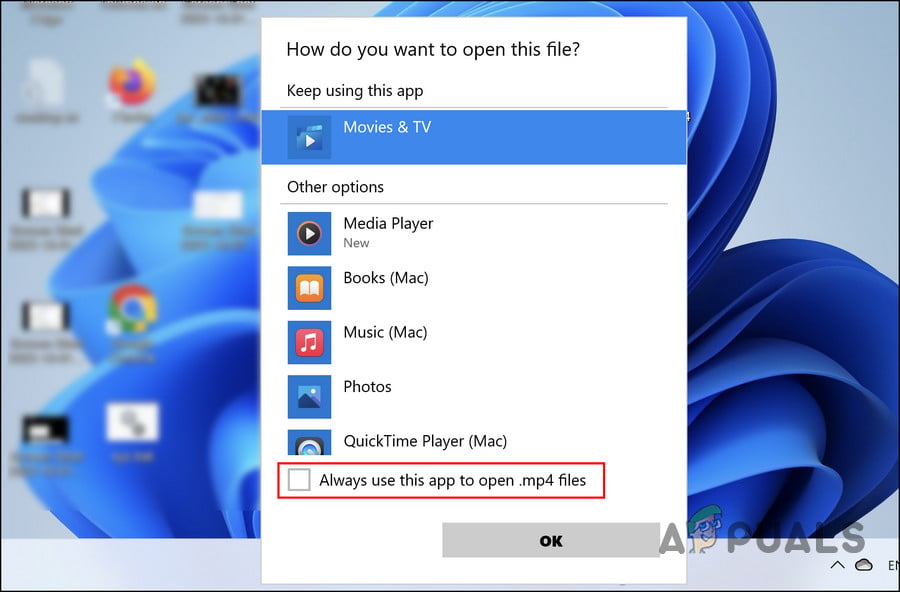
Set the app as the default option
That’s it! Your chosen app should now be the default for MP4 files on your Windows 11 PC.
2. Install the Missing File Extensions
This issue can also be caused by missing codecs or broken file associations. You can use a trusted third-party package to install the missing codecs. Once they’re registered in Windows, you should be able to set your default MP4 app normally.
- Open your browser and go to the K-Lite Codec Pack page.
- Click the Download button for the Standard codec pack.
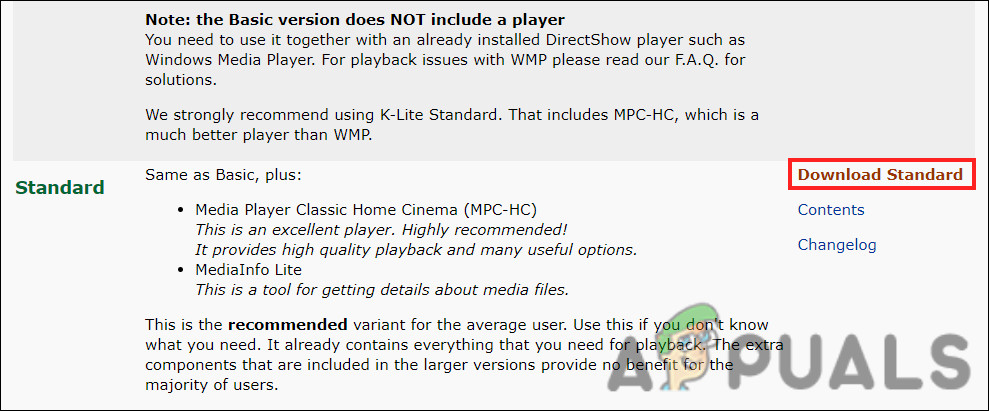
Click on the Download button - Next, pick a download server.
- Once the file is downloaded, double-click it to run the installer.
- Choose your preferred video player and click Next.
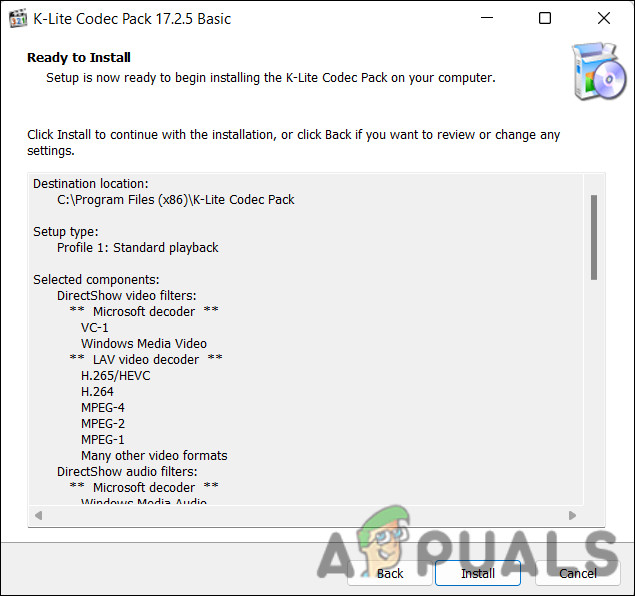
Install the codec - Keep the default settings and click Next.
- Follow the on-screen instructions and click Install.
- Wait for the installation to complete. After the codecs are installed and file associations are refreshed, try setting your preferred app as the default for MP4 and see if the issue is resolved.
3. Downgrade to Windows 10
If none of the methods above work for you, you can roll back to Windows 10 until Microsoft releases an official fix. Downgrading is simple and shouldn’t take long.
- Press Win + I to open Windows Settings.
- Choose System from the left pane.
- On the right, click Recovery.
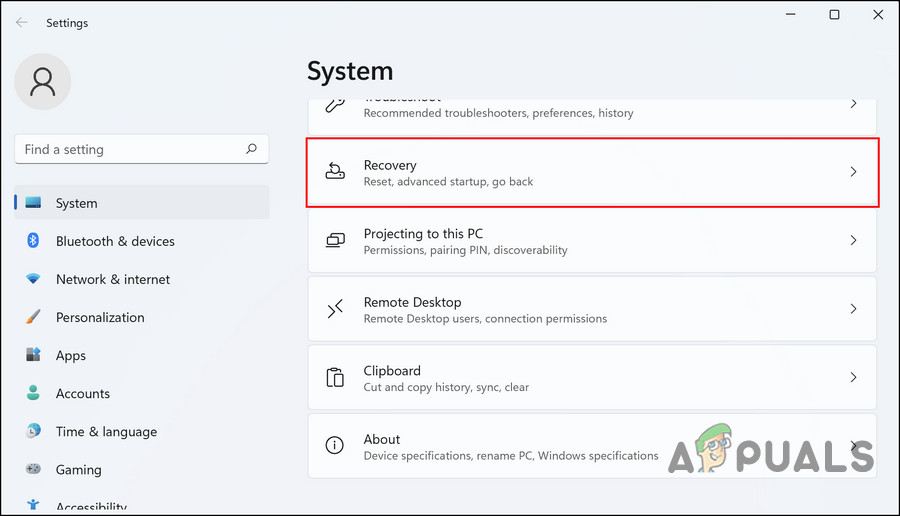
Access the Recovery option - In the next window, click the Go back button.
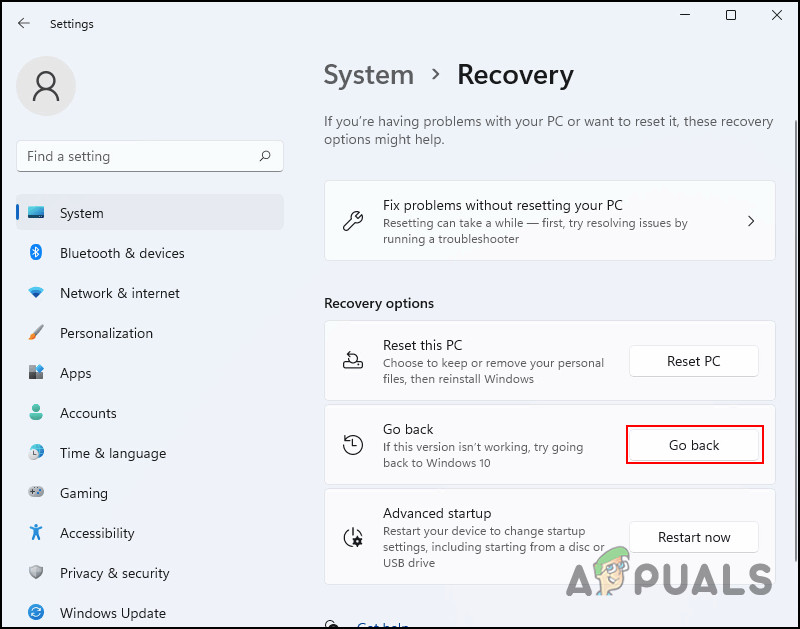
Click on the Go back button - Choose a reason for going back and follow the on-screen steps to complete the process. After the rollback, the problem should no longer occur.
Note: The “Go back” option is available for a limited time after upgrading (usually up to 10 days), and only if the old Windows files are still present.


