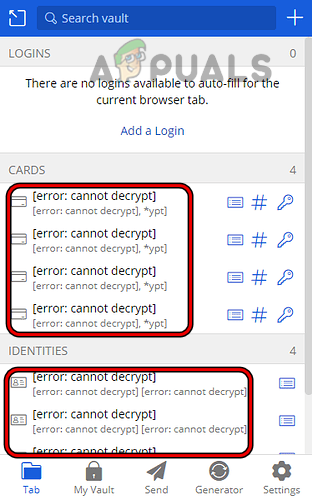
How to Fix “Error: cannot decrypt” in Bitwarden?
The “Error: cannot decrypt” message in Bitwarden appears across browser extensions, desktop applications, and sometimes the CLI, where it prevents the vault from displaying stored credentials entirely. This error indicates that Bitwarden is unable to locally decrypt the vault data, usually due to a mismatch between the encryption key in memory and the vault data.
The most frequent cause is an out‑of‑sync vault, often after updates or interrupted sessions, while other triggers include extension bugs, incomplete app updates, or operating system issues.
1. Update the Bitwarden Browser Extension and Bitwarden Desktop App to the Latest Version
If you are using an outdated Bitwarden extension or app, it may not work well with your browser or operating system. This incompatibility can cause the “cannot decrypt” error. Updating Bitwarden to the latest version often fixes the problem.
1.1. Update the Bitwarden Browser Extension
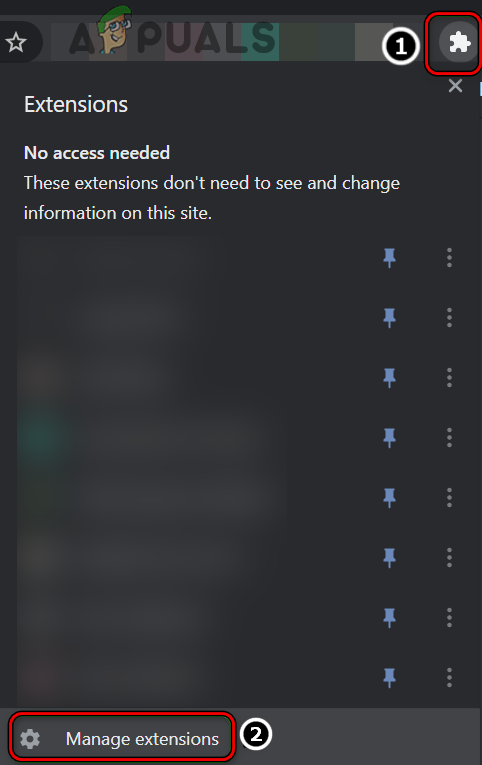
- Open the Chrome browser and click on the Extensions icon.
- Select Manage Extensions, then turn on Developer Mode by toggling the switch.
Open Manage Extensions in Chrome - Click Update. After Bitwarden (and all other extensions) update, check if the error is gone.
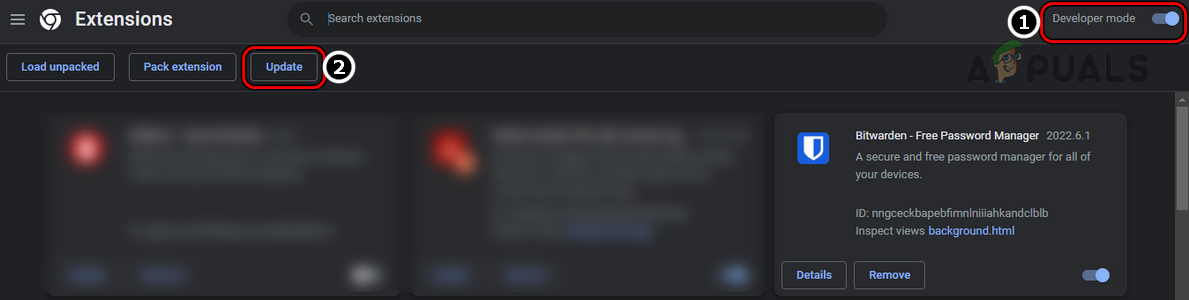
Update the Chrome Extensions to the Latest Builds
1.2. Update the Bitwarden Desktop App
- Open the Bitwarden Desktop app and go to its Help menu.
- Click on Check for Updates. If an update is found, download and install it.
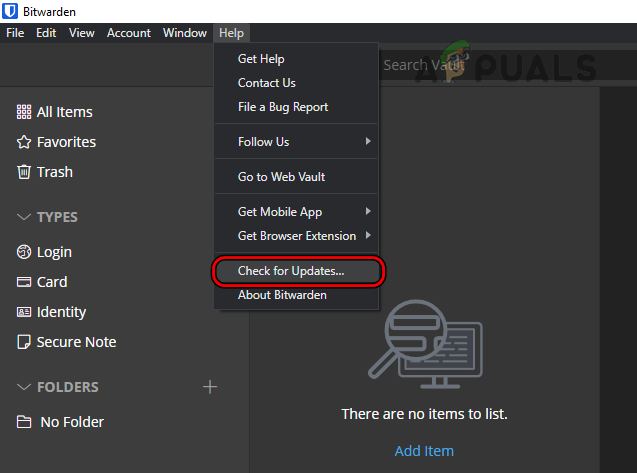
Check for Updates on the Bitwarden Desktop App - Once updated, open the browser where you had the problem and check if Bitwarden works without the error.
2. Lock and Unlock the Vault in the Bitwarden Extension
Sometimes, a temporary issue with the Bitwarden extension can cause the error. In many cases, simply locking and then unlocking the Vault in the extension can fix it.
- Restart your computer and open Chrome after it restarts.
- Click on the Bitwarden extension. If it’s locked, enter your master password. (If it’s already unlocked, skip to step 4.)
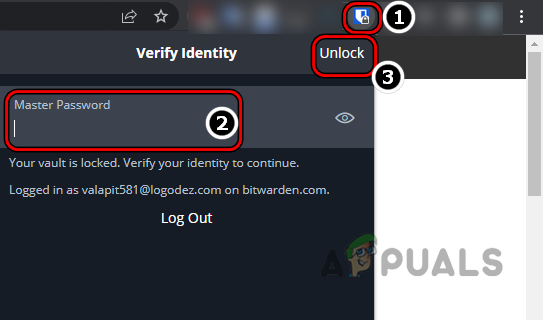
Unlock the Bitwarden Extension by Entering the Master Password - Click Unlock and see if Bitwarden works now.
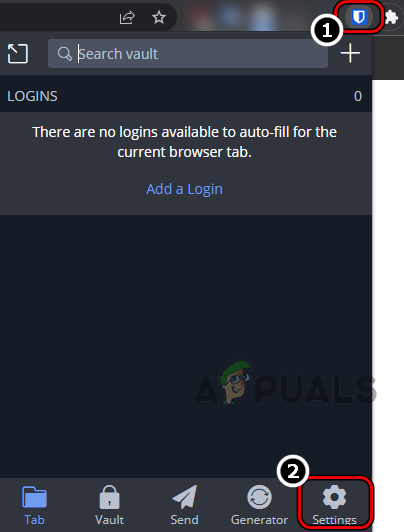
- If the Vault was already unlocked, go to Settings in the Bitwarden extension and click Lock Now. (You may need to scroll down to find this option.)
Open the Settings of the Bitwarden Extension - Restart your browser, click the Bitwarden extension, and enter your master password to unlock.
- Check if the error has gone away.
3. Disable the Auto-Fill Feature in the Bitwarden Extension
Because the Auto-Fill feature is still experimental, it might not work reliably in all situations and may cause errors. Disabling it could fix the problem.
- Open Chrome and click on the Bitwarden extension.
- Go to Settings and scroll down to the bottom.
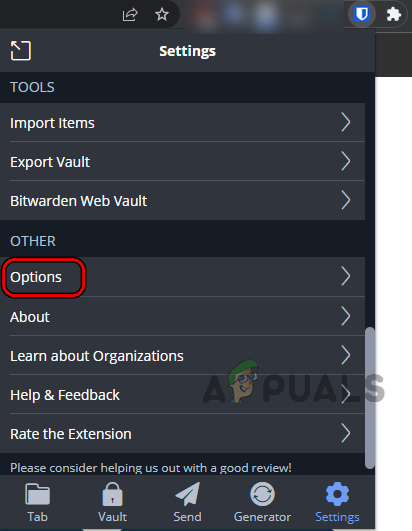
- In the Other section, click Options and scroll down again.
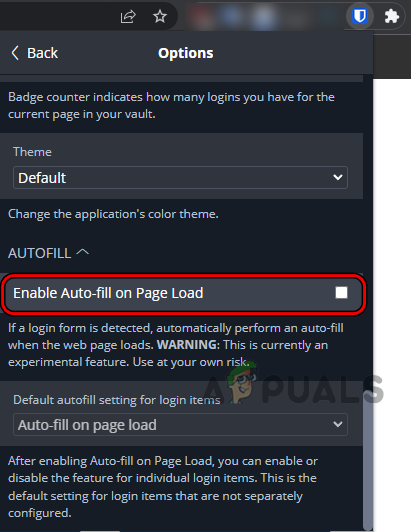
Open Options in the Other Section of the Bitwarden Extension - In the Auto Fill section, uncheck Enable Auto-Fill on Page Load. Restart your browser and see if Bitwarden works.
Untick Enable Auto-Fill on Page Load in the Bitwarden Extension Settings
4. Manually Sync the Bitwarden Vault
If the Bitwarden vault does not sync automatically (possibly due to a glitch), the error may appear. Try syncing it manually.
- Open the Bitwarden extension in your browser and go to Settings.
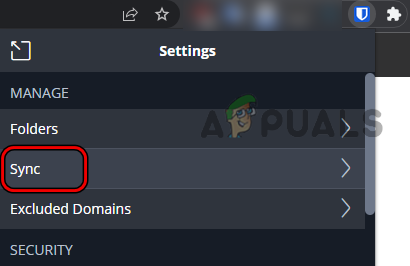
Open Sync in the Bitwarden Settings - Click on Sync, then select Sync Vault Now.
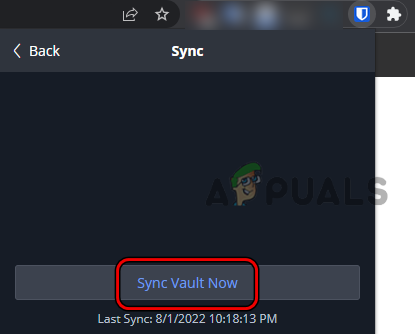
Click on Sync Vault Now in the Bitwarden Settings - Check if the error is fixed.
5. Set the Vault Timeout to Never
Vault Timeout tells Bitwarden when to automatically lock your vault after inactivity. If this happens too soon, Bitwarden might not work as expected and display an error. Setting Vault Timeout to “Never” can resolve this.
5.1. Set Vault Timeout to Never in the Browser Extension
- Open Chrome and the Bitwarden extension.
- Go to Settings and find the Vault Timeout dropdown.
- Under the Security section, set Vault Timeout to Never.
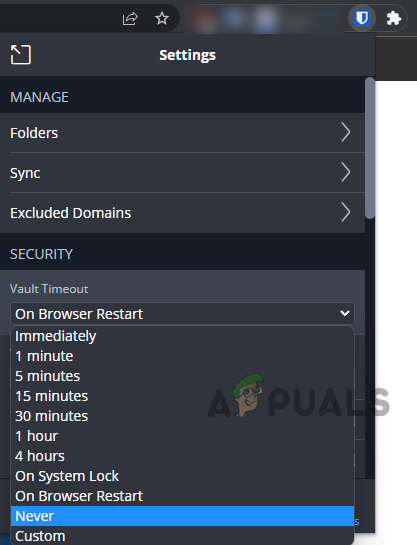
Set the Vault Timeout to Never in the Bitwarden Extension Settings - Confirm your choice. Then see if Bitwarden works without showing the error.
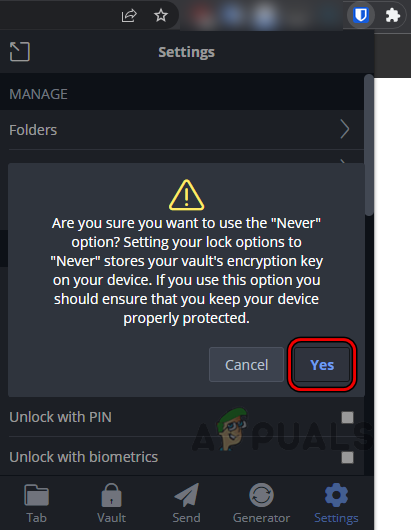
Confirm to Set the Vault Timeout to Never in the Bitwarden Settings
5.2. Set Vault Timeout to Never in the Mobile App
- Open the Bitwarden app and go to Settings.
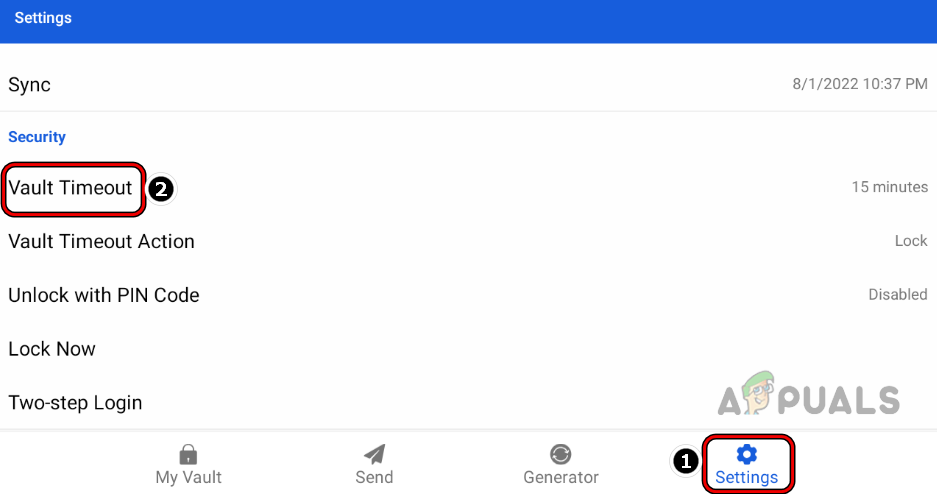
Open the Vault Timeout in the Bitwarden App Settings - In the Security section, tap Vault Timeout and choose Never.
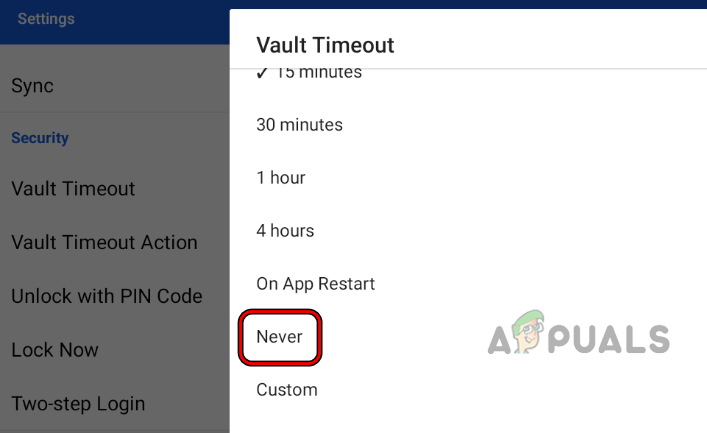
Set the Bitwarden App’s Vault Timeout to Never - Check if the app is working properly now.
6. Disable and Enable the Bitwarden Browser Extension
A temporary glitch between your browser and Bitwarden can cause the error. Disabling and then re-enabling the extension may resolve this by refreshing its components.
- Open Chrome and click the Extensions icon.
- Select Manage Extensions and find Bitwarden.
- Turn off the Bitwarden extension by toggling the switch, then close and reopen Chrome.
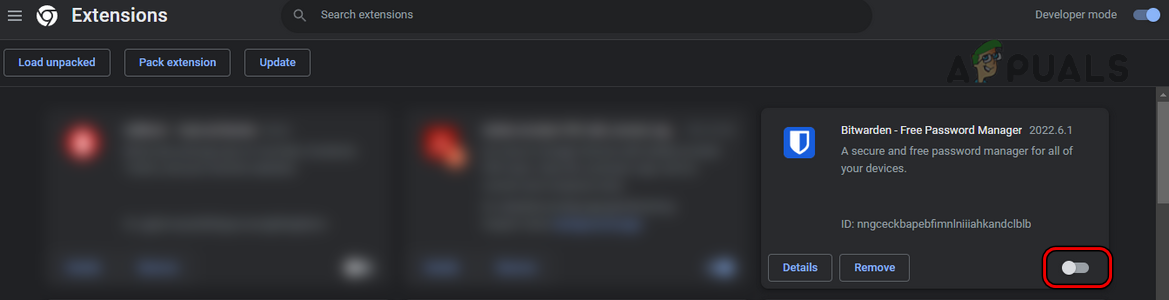
Disable the Bitwarden Browser Extension - Once Chrome restarts, turn the Bitwarden extension back on, then open it.
- Enter your master password to unlock.
- Check if the error is gone.
7. Logout and Login to the Bitwarden Browser Extension/App
Occasionally, a connection problem between your Bitwarden extension or app and the Bitwarden servers will cause this error. Logging out and then back in often helps.
7.1. Logout/Login on the Bitwarden Browser Extension
- Open your browser (e.g., Chrome) and the Bitwarden extension.
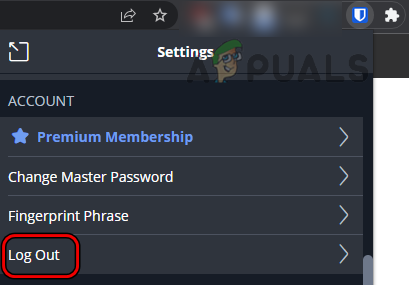
- Go to Settings and scroll down to the Account section.
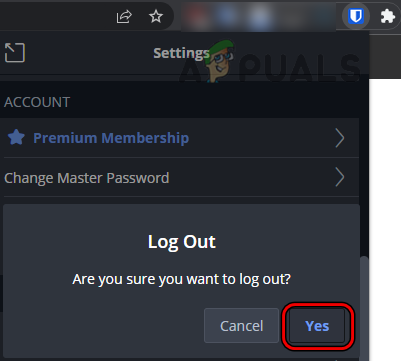
- Click Logout and confirm.
Logout of the Bitwarden Chrome Extension - Restart your browser and visit the Bitwarden website.
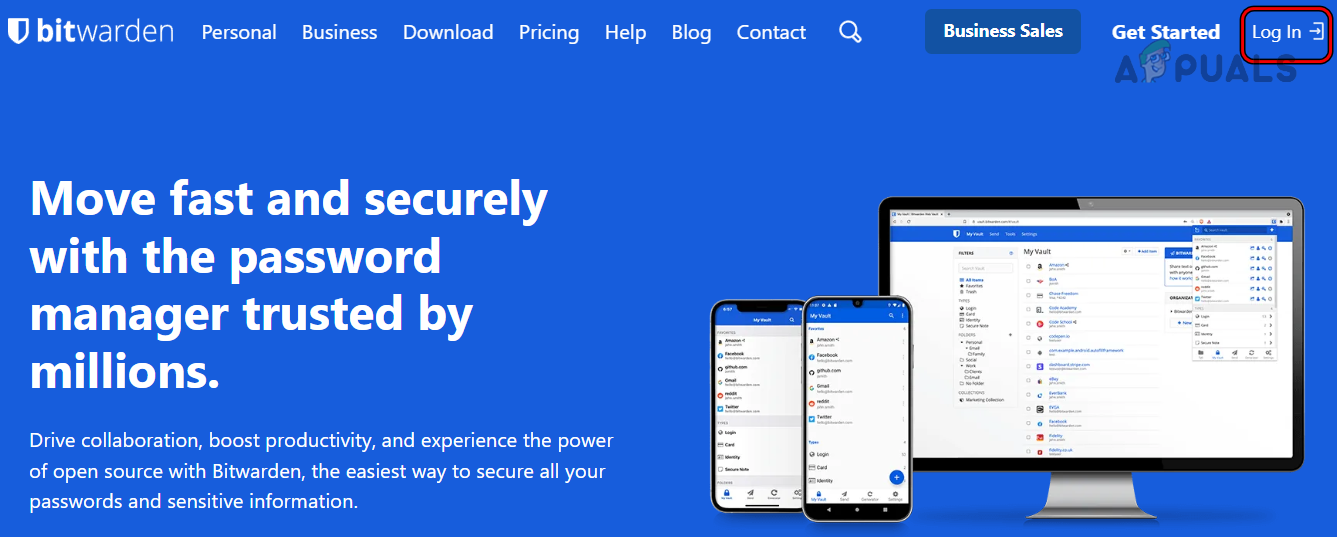
Confirm to Logout of the Bitwarden Chrome Extension - Click Log In and enter your credentials on the website.
- Open the Bitwarden extension and log in again.
Log into the Bitwarden Website - Check if the error has disappeared.
7.2. Logout/Login on the Bitwarden Mobile App
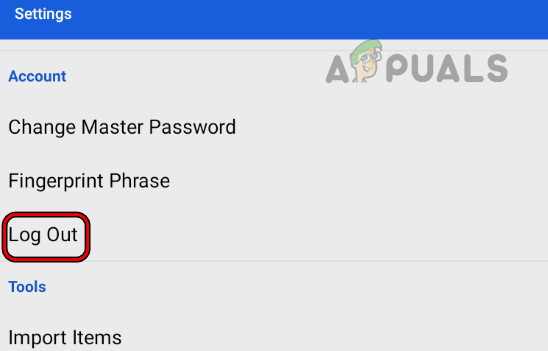
- Open the Bitwarden app and go to Settings.
- Scroll down and tap Logout (in the Account section).
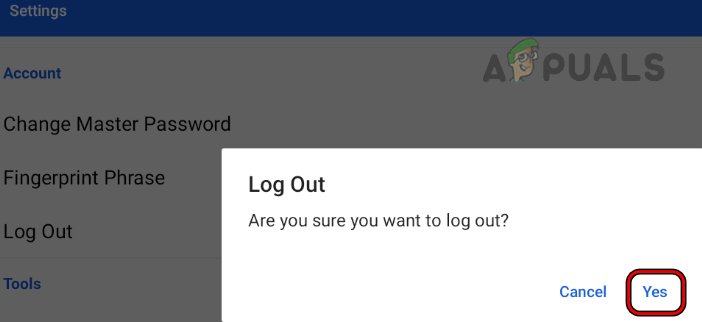
Logout of the Bitwarden Mobile App - Confirm to log out, then close the app.
Confirm to Logout of the Bitwarden Mobile App - Remove Bitwarden from your phone’s Recent Apps, then reopen the app.
- Log in again and see if the error is fixed.
8. Reinstall the Bitwarden Browser Extension
If the Bitwarden extension’s files are corrupted, reinstalling it may solve the issue. Before doing this, make sure you have backed up any important data or saved Bitwarden credentials.
- Logout of the Bitwarden extension and close it, along with Chrome.
- Open Chrome again and go to the Extensions menu.
- Select Manage Extensions and find Bitwarden (use search if needed).
- Click Remove beside Bitwarden, then confirm.
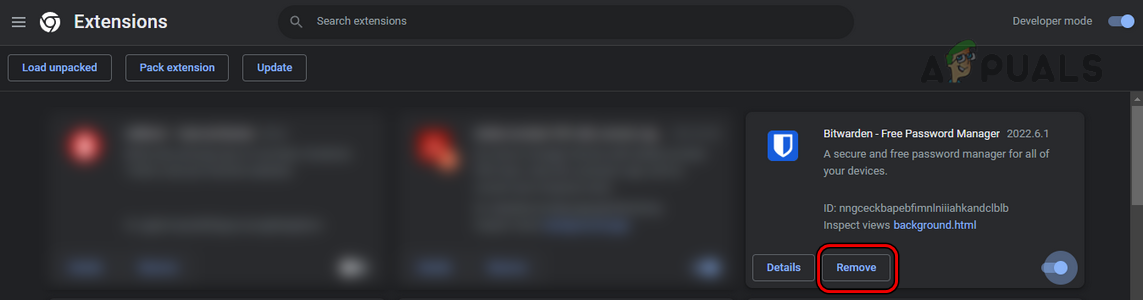
Remove the Bitwarden Extension of the Chrome Browser - Close Chrome and restart your computer.
- After restarting, open Chrome and install the Bitwarden extension from the Chrome Web Store.
- Open it and log in with your Bitwarden credentials to check if the error is gone.
9. Reinstall the Bitwarden Mobile App
If you see the error on the mobile app, your Bitwarden installation may be corrupted—usually due to an incomplete update. Reinstalling the app usually fixes this.
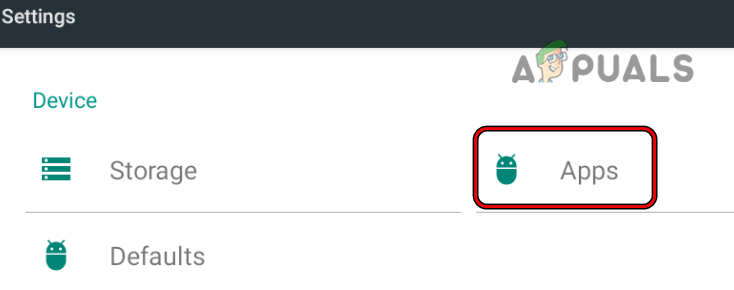
- Go to your phone’s Settings and tap on Apps or Application Manager.
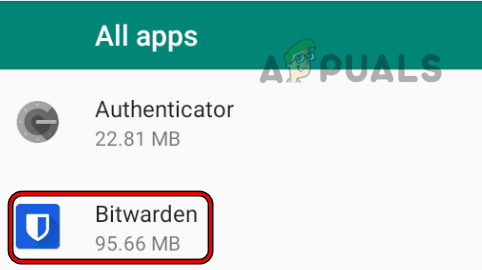
Open Apps in the Android Phone Settings - Find and open Bitwarden.
Open Bitwarden in the Android Phone Settings - Tap Uninstall and confirm.
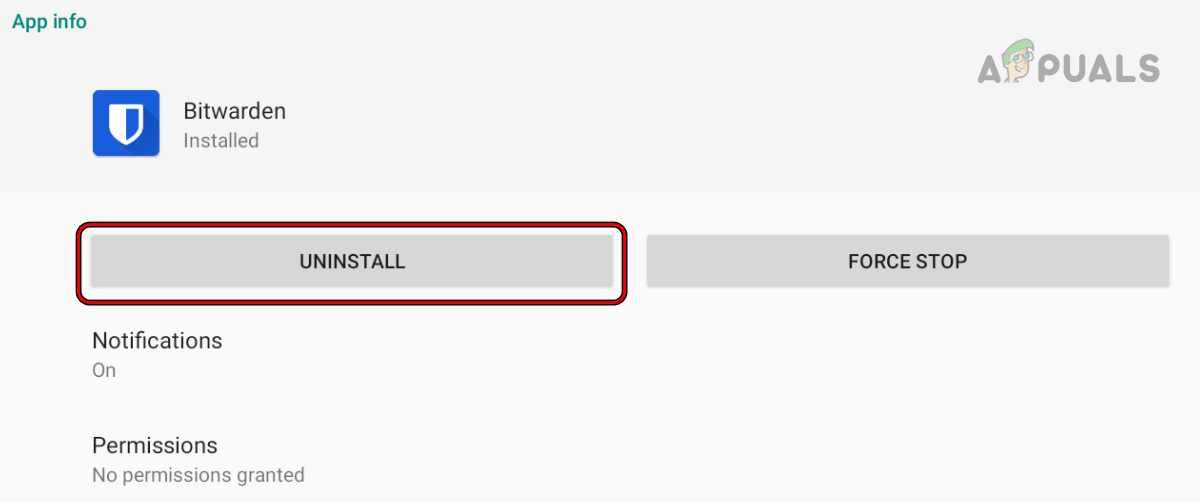
Uninstall the Bitwarden Android App - Restart your phone, then reinstall Bitwarden from the Play Store.
- Log in and hopefully, the error will be resolved.


