How to Cancel Kindle Unlimited Subscription the Easy Way
 Reviewed by Huzaifa Haroon
While Amazon Kindle Unlimited provides access to a vast collection of over 2 million titles across multiple genres—including many with audible narration for audiobook enthusiasts—it still stops short of becoming the definitive ‘Netflix of e-books‘. Although the library is impressive, subscribers do not gain permanent ownership of titles unless each is purchased individually.
If you have decided that it is time to end your Kindle Unlimited subscription, the cancellation process is straightforward when you follow expert guidance like ours. Before finalizing your decision, make the most of your remaining access period—ensure you finish reading any borrowed e-books, magazines, or audiobooks, as these will be removed from your Kindle library once your membership ends.
Prior to cancellation, it is important to understand that Amazon does not provide partial refunds for subscriptions canceled partway through a billing cycle. After cancellation, your membership will remain active until the end of your current billing period, and you can continue to access your borrowed books until that time. Afterwards, only purchased books will stay in your library.
Step 1: Go to Amazon Via Web Browser
Previously, you could cancel a Kindle Unlimited subscription through the Kindle or Amazon app. Due to recent policy updates, however, subscriptions must now be managed exclusively via a web browser.
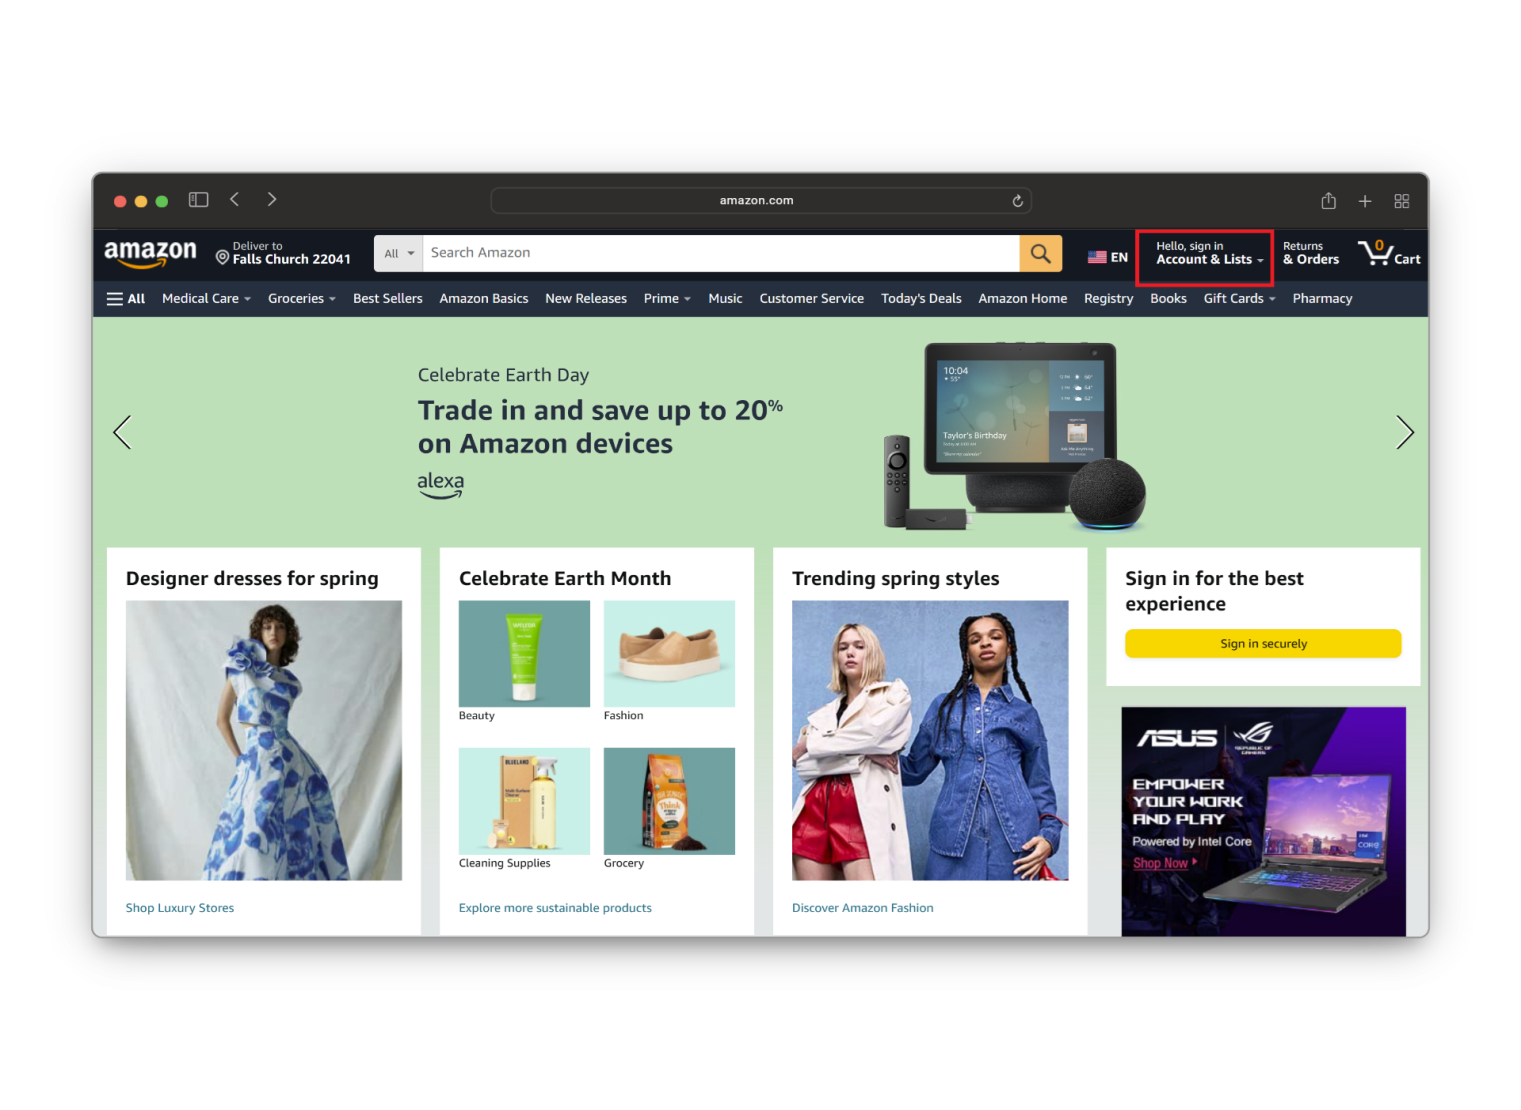
To begin, visit Amazon’s official website and click on the Hello, sign in Account & Lists option in the upper right corner of the homepage.
Step 2: Login to Your Account
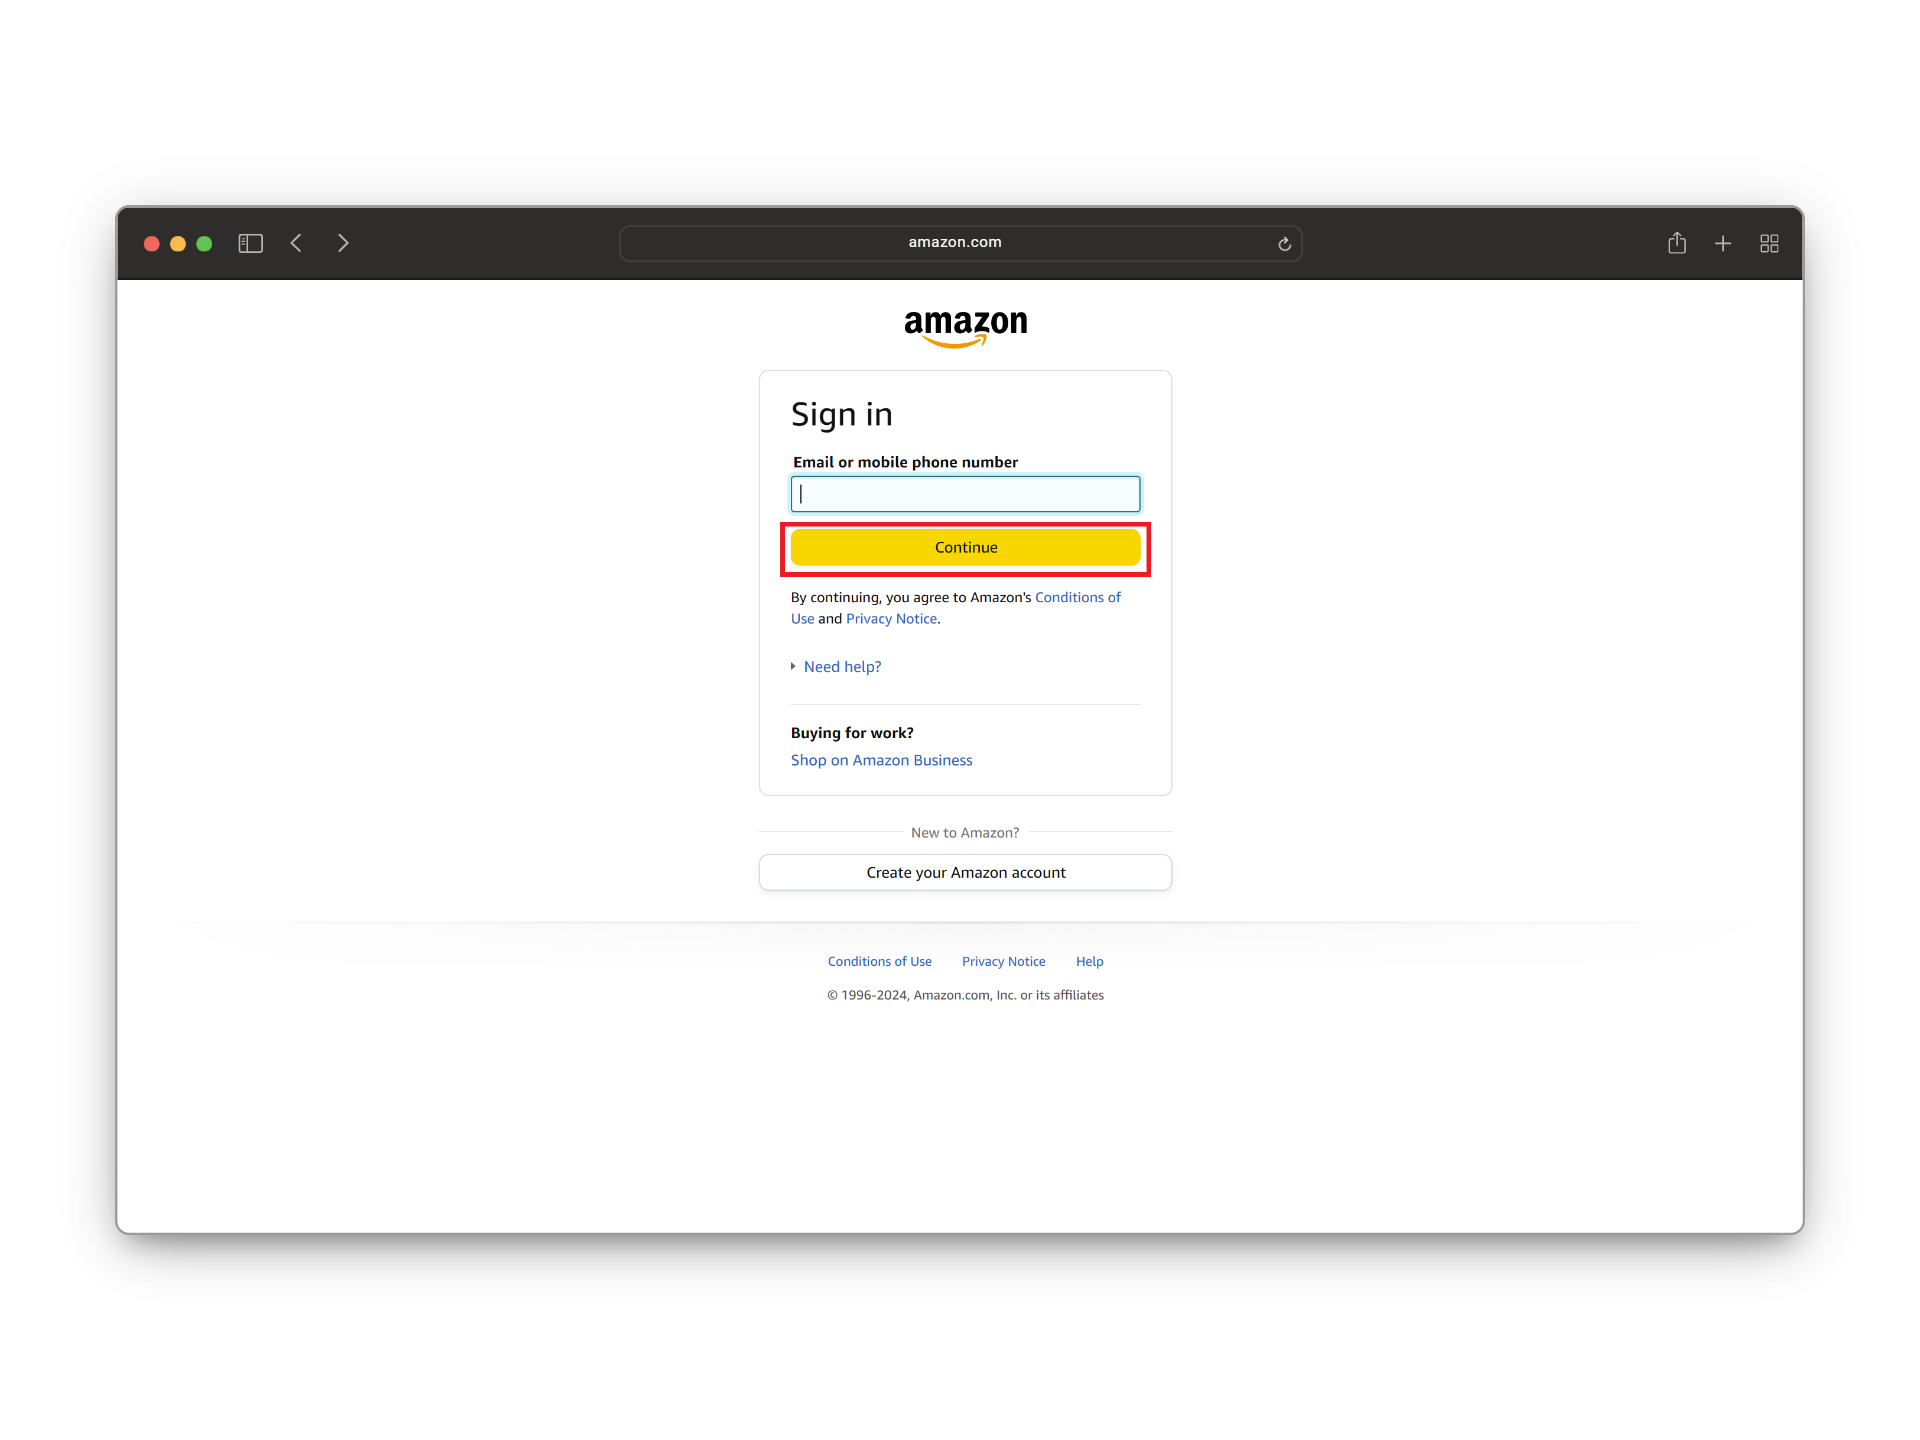
You will be directed to the Amazon Sign In page. Enter your Email or mobile phone number in the provided field and click Continue.
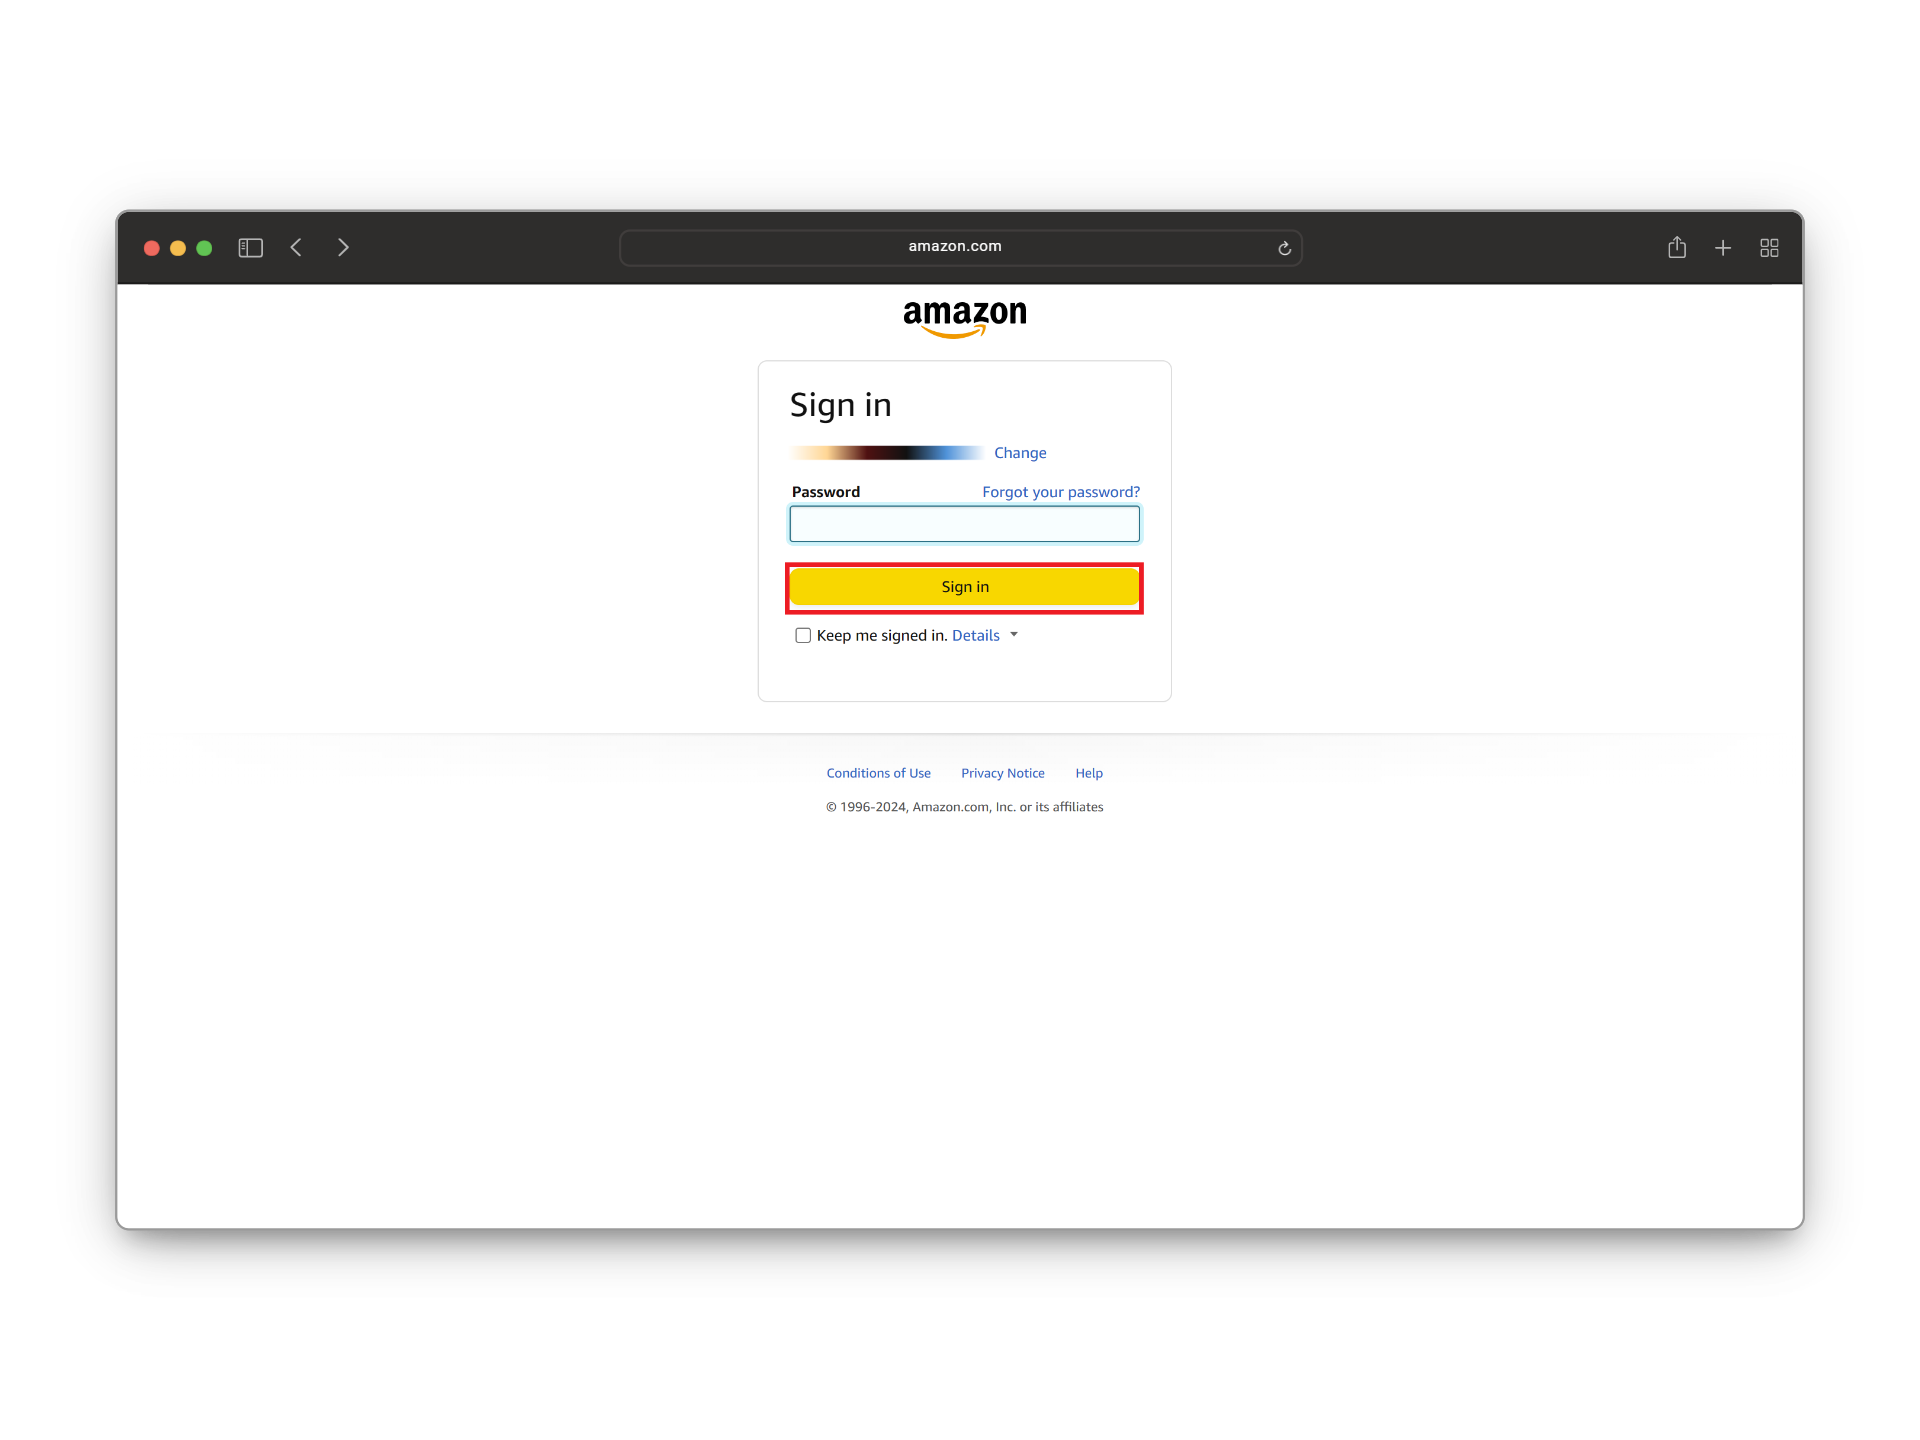
Next, input your Password and select Sign in to access your account.
Step 3: Launch Kindle Unlimited Settings
Once logged in, you will arrive at the Amazon homepage. To continue, hover over the Hello, User Account & Lists menu. This will reveal a drop-down list. Find and select Kindle Unlimited within the Your Account section to proceed.
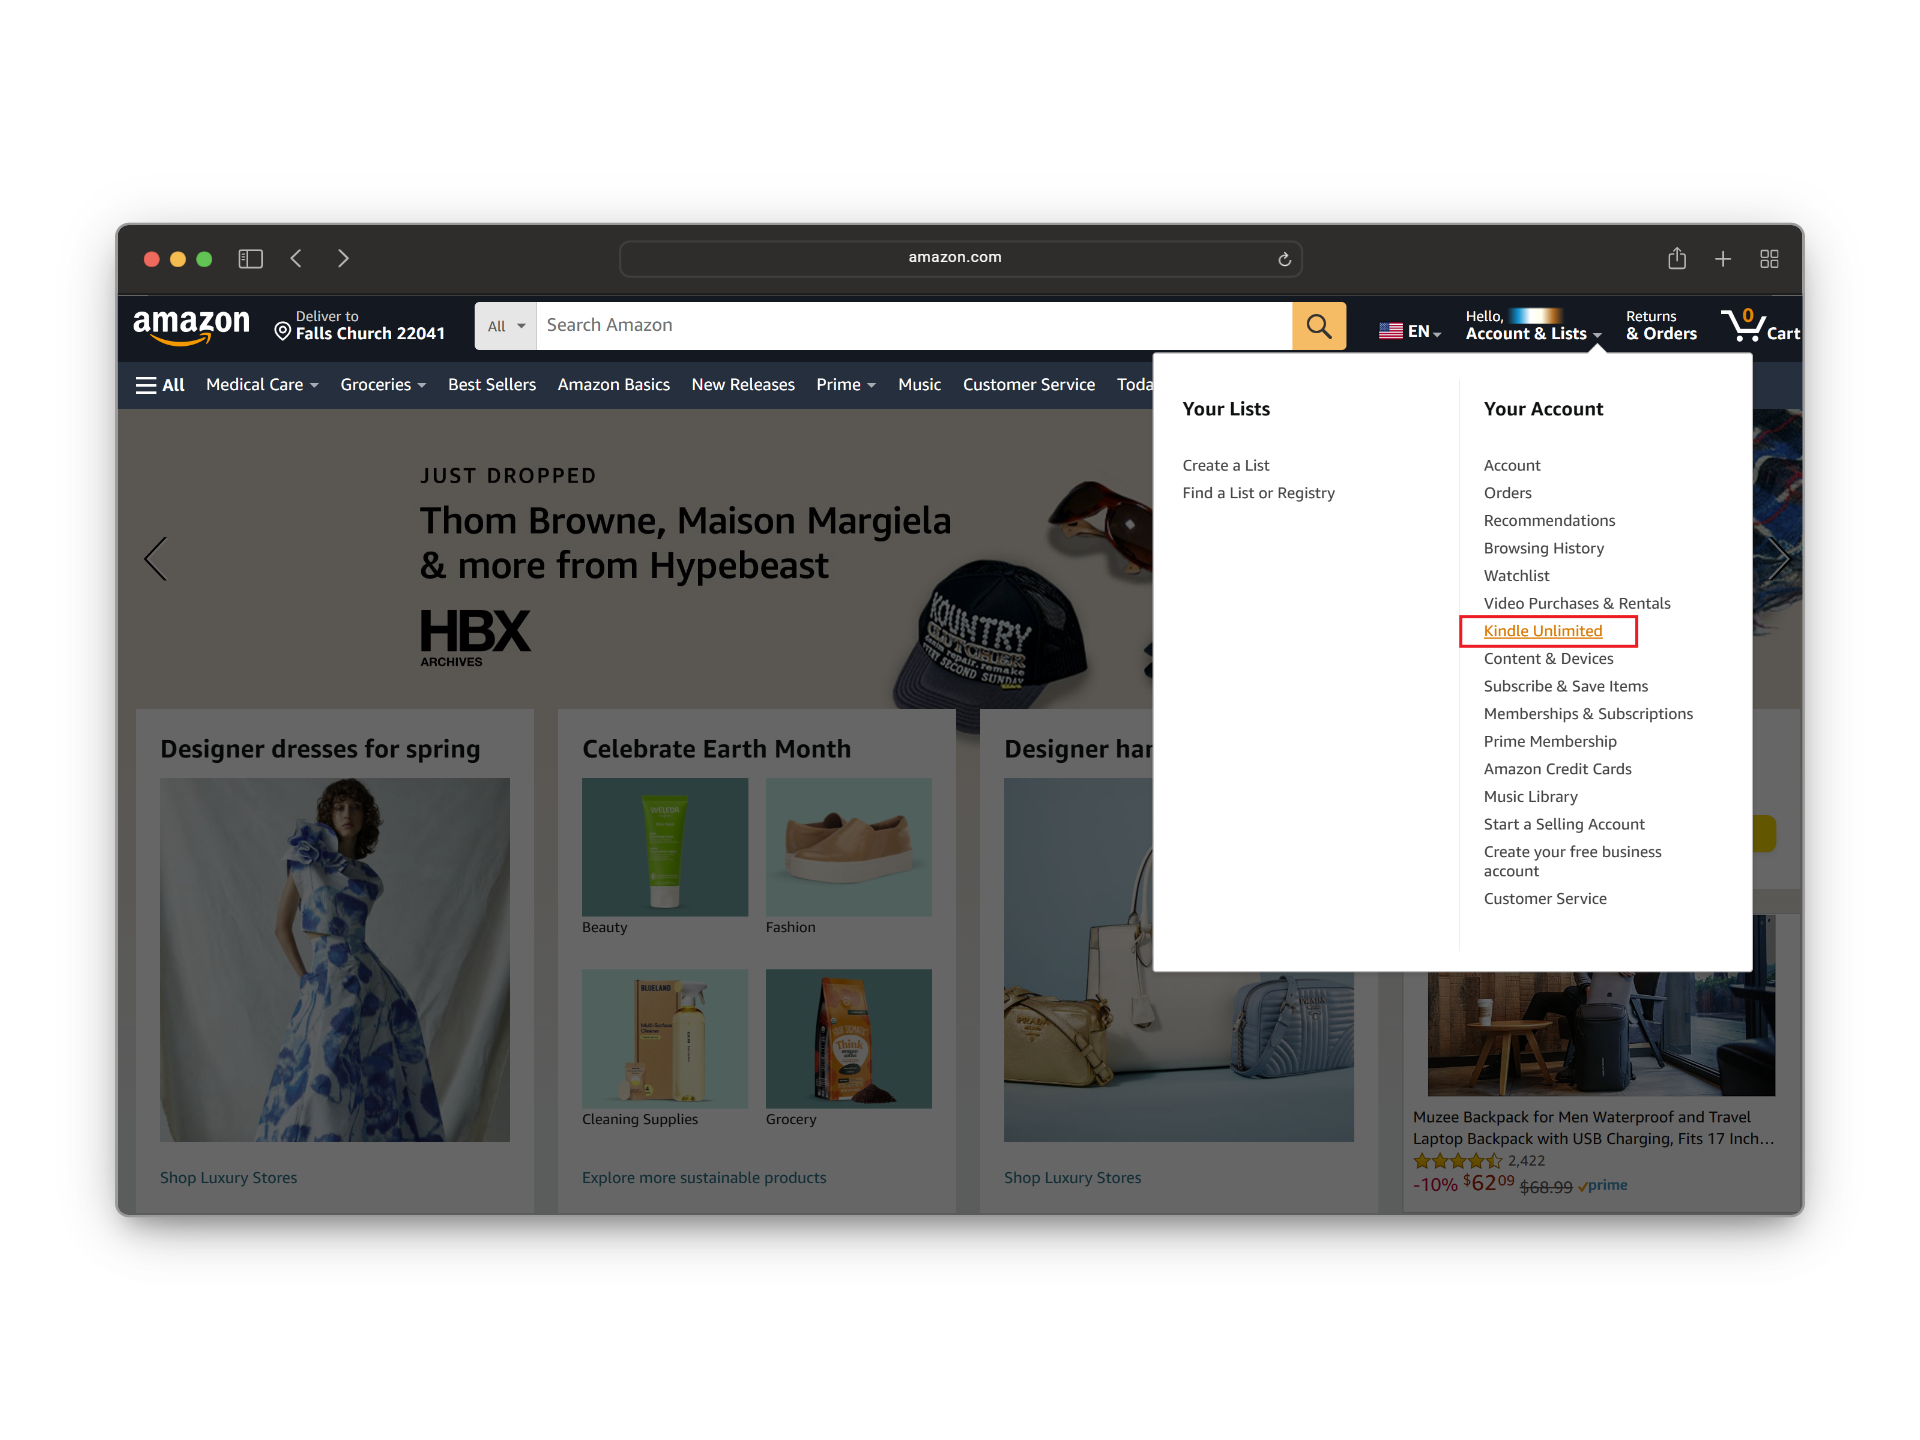
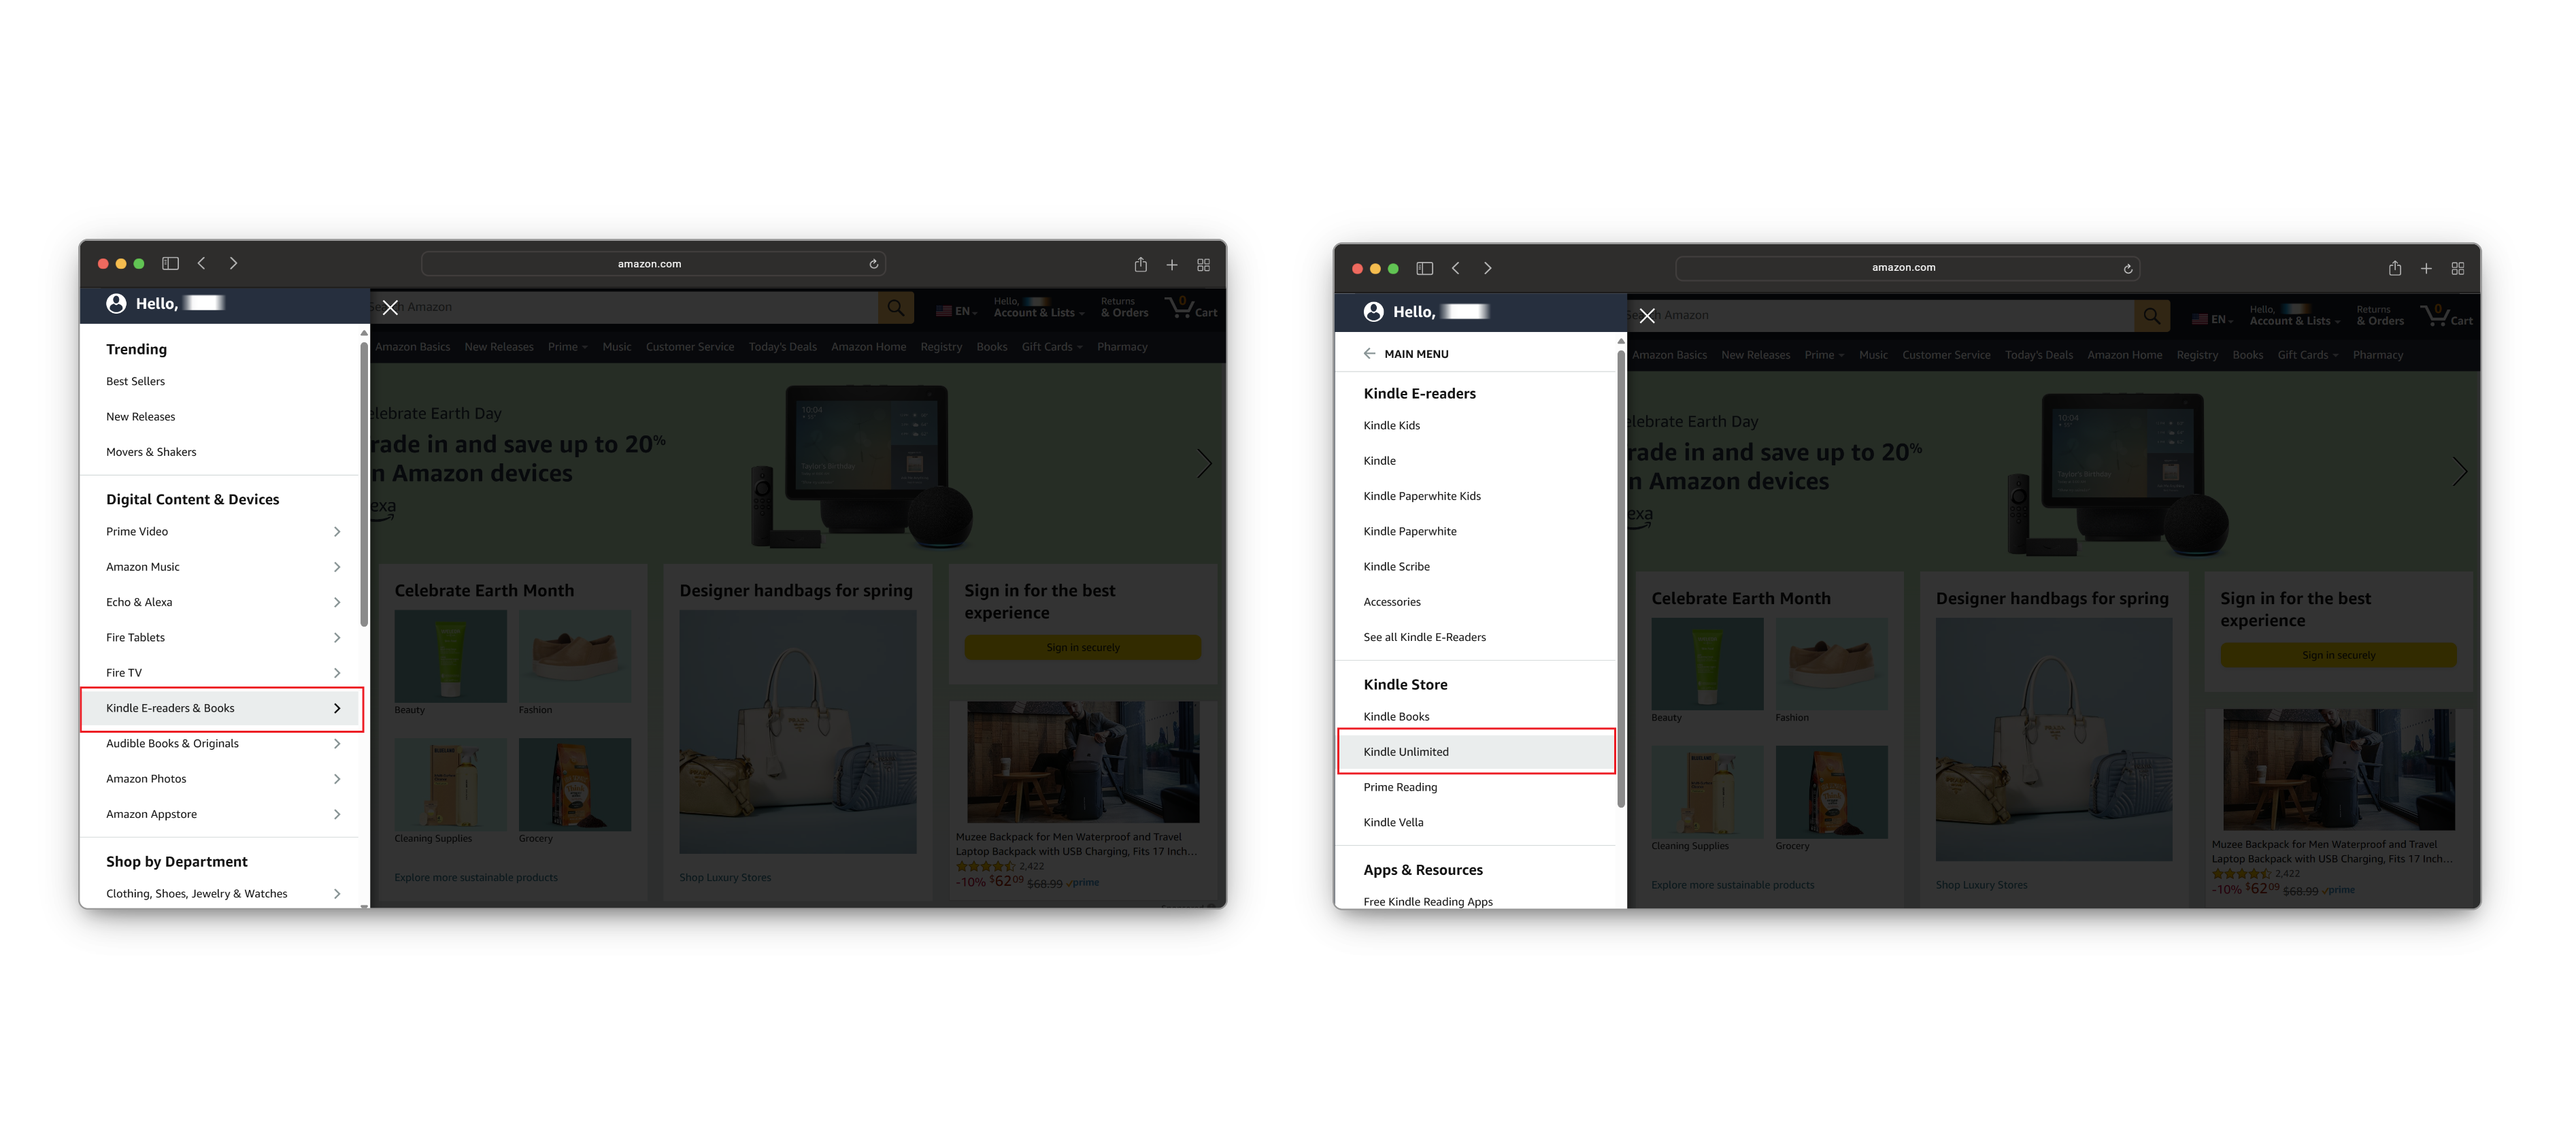
Alternatively, you can open the hamburger menu (three horizontal lines) in the top-left corner, select Kindle E-readers & Books under the Digital Content & Devices section, and then choose Kindle Unlimited from the Kindle Store section.
Step 4: Cancel Kindle Unlimited Membership
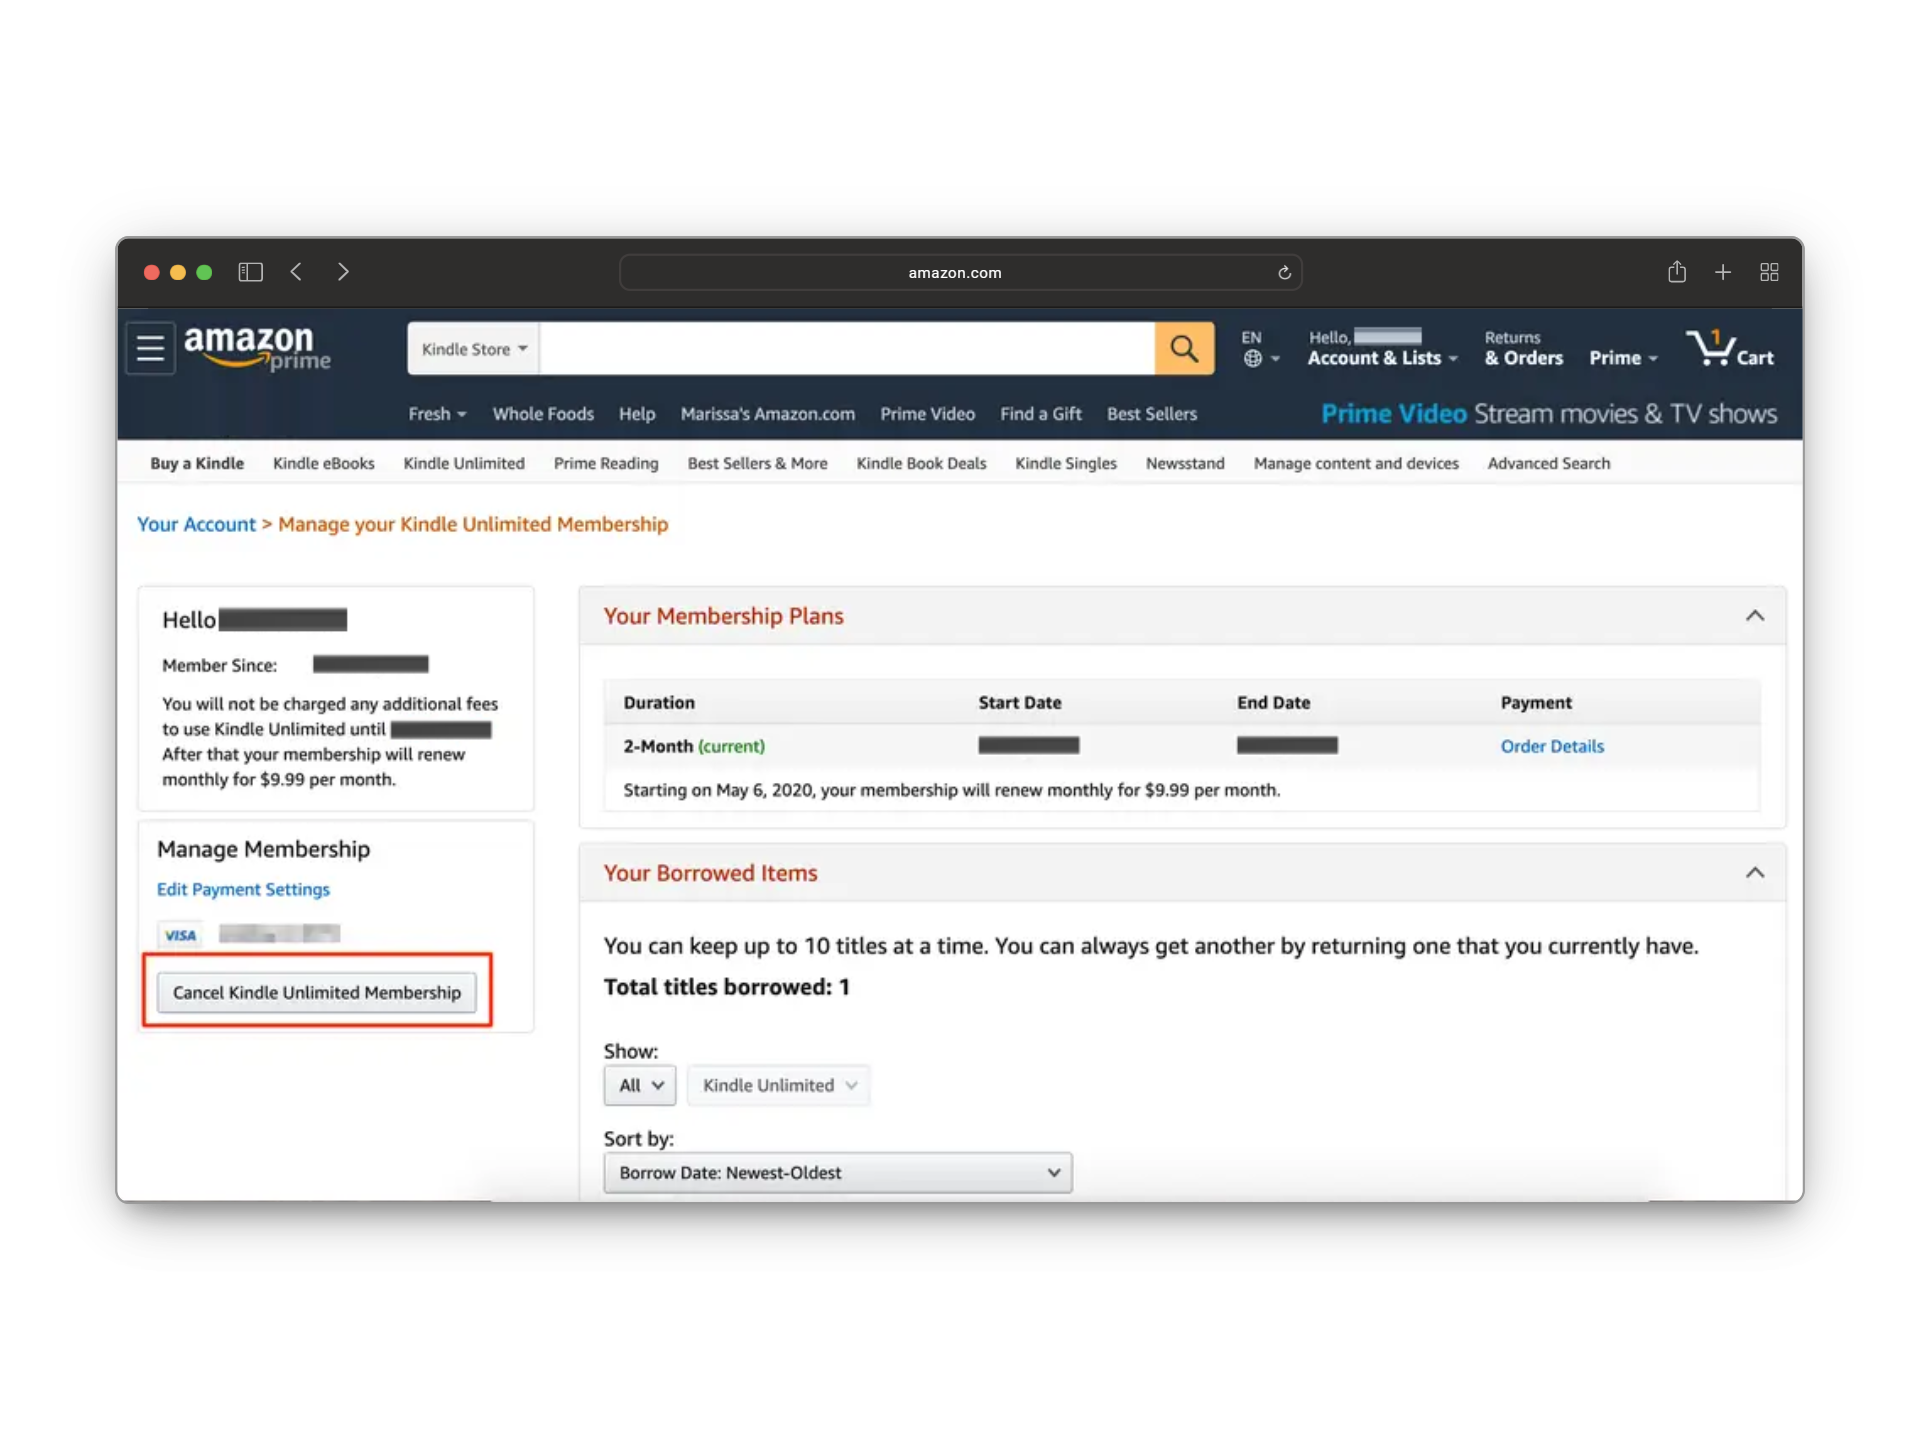
This page will display your Kindle Unlimited membership details, including your plan, borrowed items, and payment options. Within the Manage Membership section, click the Cancel Kindle Unlimited Membership button to initiate the cancellation process.
Step 5: Confirm Your Action
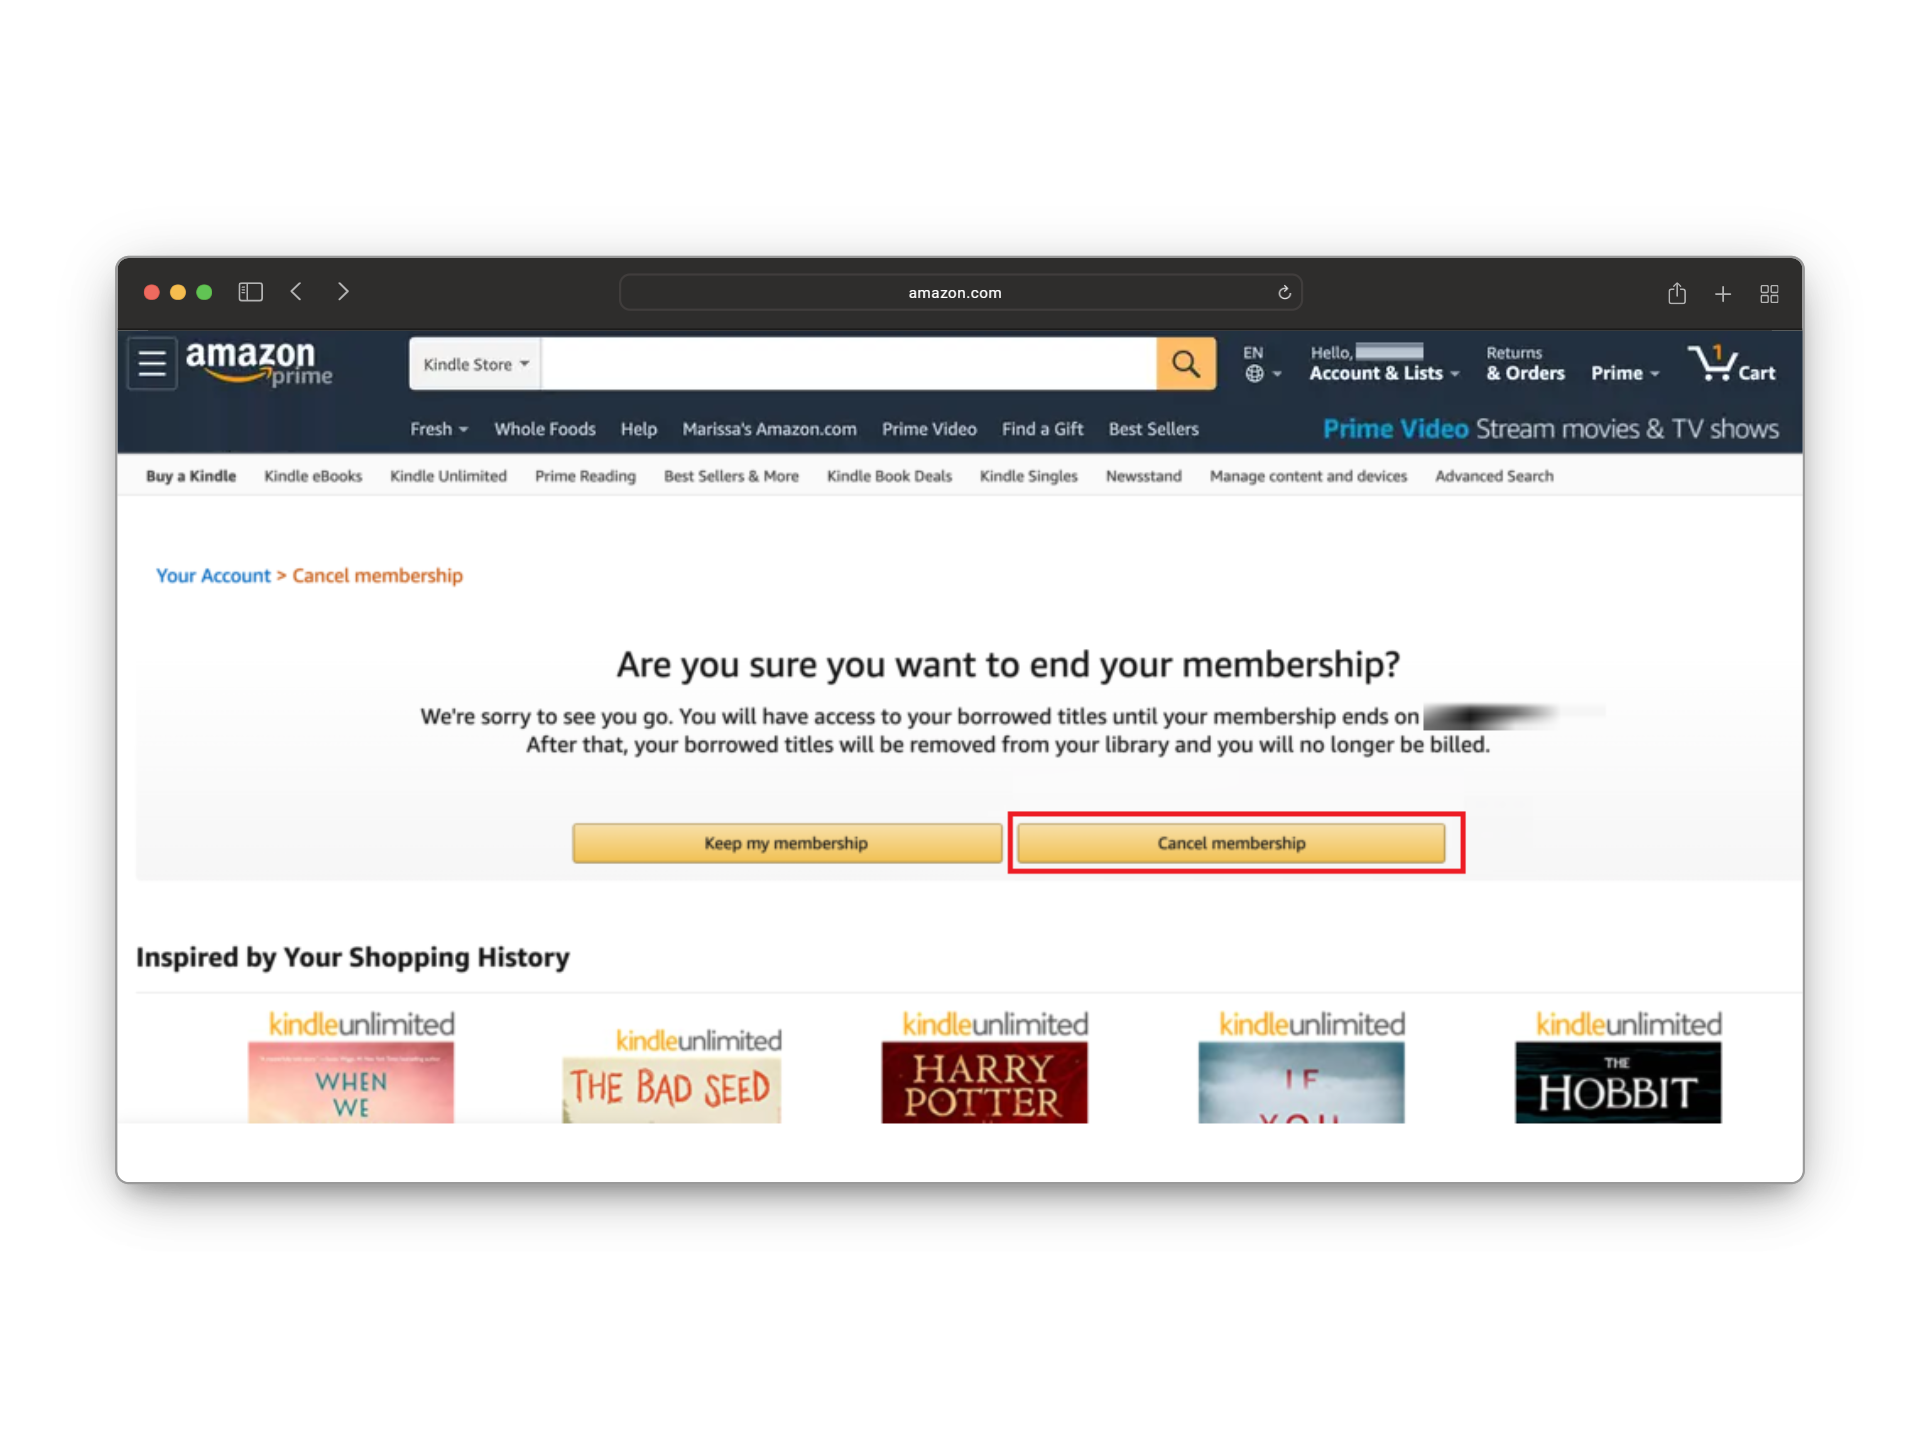
At this stage, Amazon will request your confirmation, displaying a summary of the titles you have currently borrowed and the date your access will end. This warning helps ensure you do not accidentally lose access to any content you wish to finish. To finalize, simply confirm your decision by selecting the Cancel Membership button.
 Reviewed by Huzaifa Haroon


