How to Fix Brightness Control Function Keys Not Working?
Sometimes, the brightness keys on your keyboard stop working, even though you can still change the screen brightness in the display settings. This usually happens because there is a problem with how the function keys communicate with the graphics or display driver.

The most common reason is an outdated or broken Intel or AMD graphics driver, especially after a Windows Update or a clean installation of Windows. Other possible causes include the generic monitor driver being disabled, the manufacturer’s hotkey software missing, or issues caused by the fast startup feature.
Below, we’ll walk you through several troubleshooting steps to help restore your brightness function keys quickly and easily. Try each method and see which one works best for your situation.
1. Make Sure the Fn Key is Enabled
On most keyboards, you need to press the Function (Fn) key together with the brightness key to change the brightness. Because of this, make sure the Fn key is enabled before you try to adjust your brightness using these keys.
You can also try locking the Fn key, so you won’t have to hold it down each time you want to use the function keys. On some keyboards, the Esc key doubles as the Fn lock key and is marked with a small padlock icon.
Press the Fn key and the Esc key together to lock or unlock the Fn key. If the lock icon lights up, you’ve successfully locked it. To unlock, just press both keys again.
2. Install the Required Driver
If you’re using an HP laptop, you may need to install the HP Hotkey Support Driver for your brightness function keys to work. Other laptop brands may require their own specific drivers, so it’s best to visit your device manufacturer’s official website and download any necessary drivers from there.
- Open your browser and go to this website.
- Enter your operating system details to see which drivers are available for your laptop.
- Download the relevant hotkey driver and run the installer.
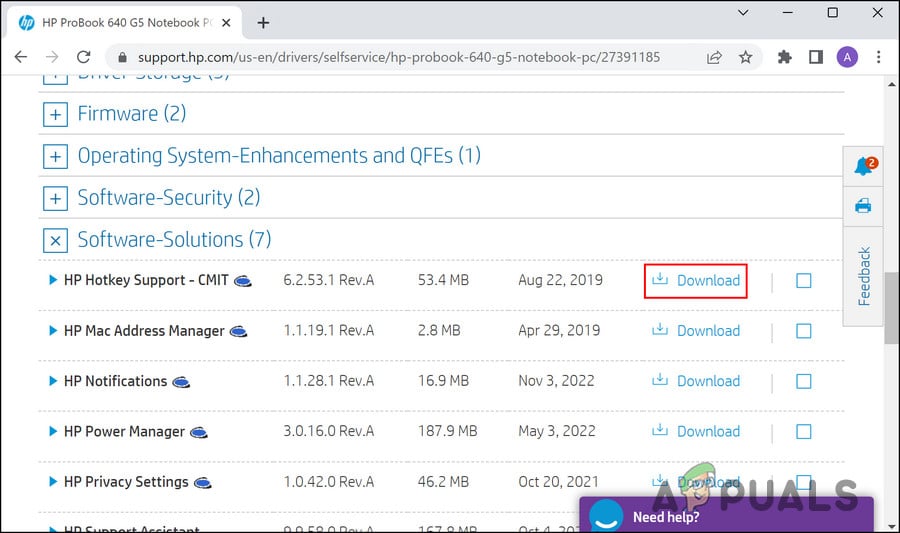
Click on the Download button - After installation, check if your brightness keys are working.
If you already have this driver installed, you should try updating it using Device Manager.
- Type Device Manager in Windows search and click Open.
- In Device Manager, look under the relevant sections (such as Keyboards or System Devices) to find your hotkey or keyboard driver.
- Right-click the driver and select Update driver.
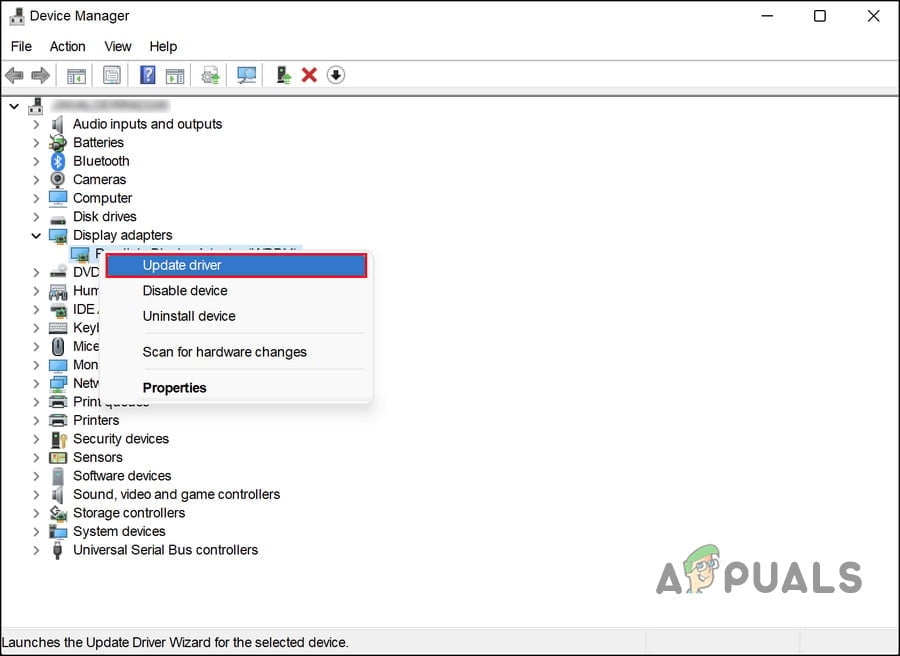
Update the graphics driver - Click Search automatically for drivers and follow the instructions on screen.
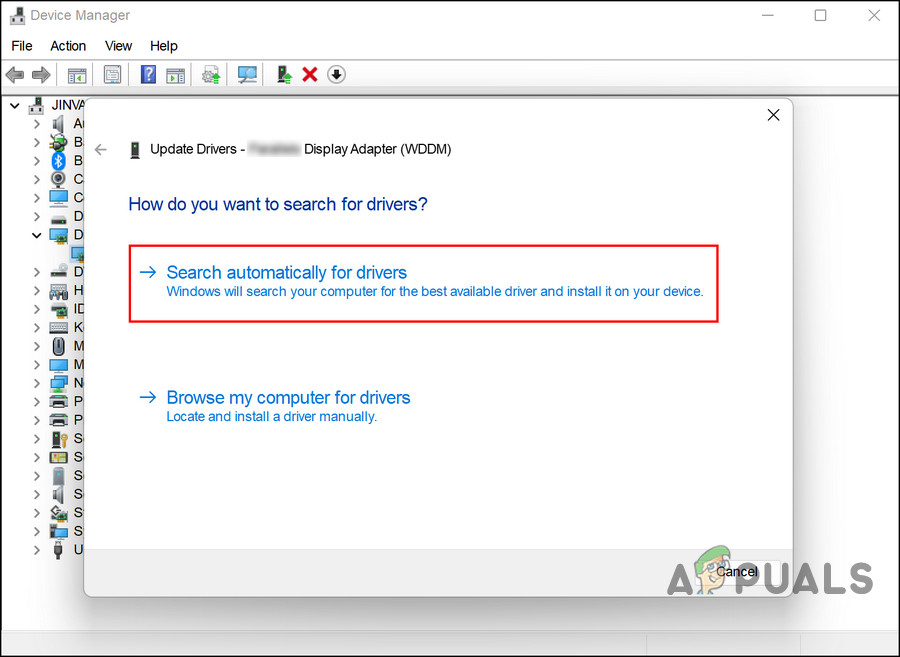
Click on the Search automatically for drivers button - After updating, restart your computer and check if the brightness keys are working.
- If updating doesn’t help, try installing the Standard PS/2 keyboard driver. Repeat steps 1–3 above, but this time click on Browse my computer for drivers.
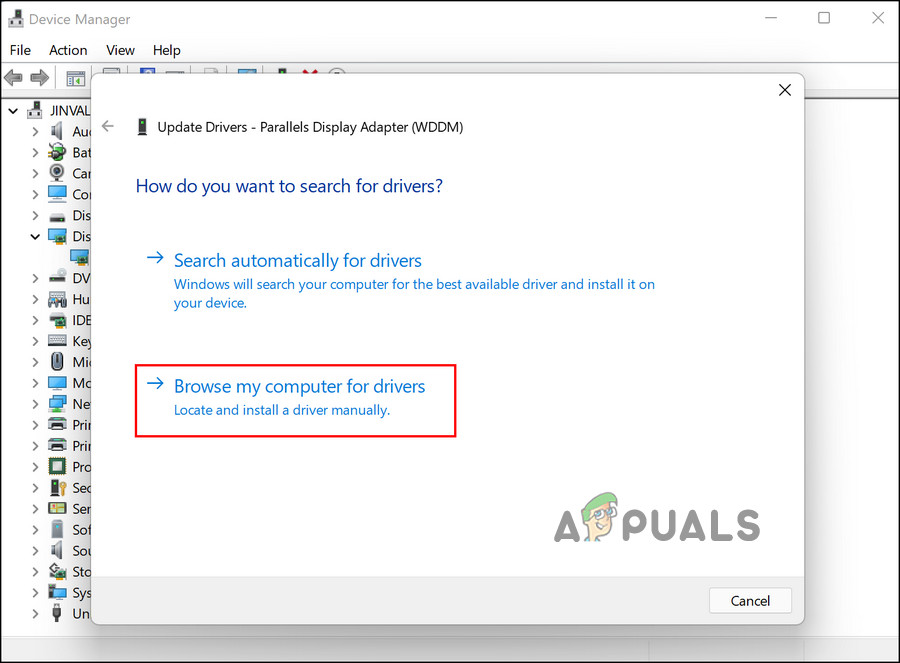
Browse Computer for Drivers - Select the Standard PS/2 keyboard driver and install it.
Hopefully, updating or changing the driver will fix the problem with your brightness keys.
3. Uninstall the Update
If your brightness keys stopped working right after a Windows update, the update itself might be the cause. You can uninstall the problematic update and wait for Microsoft to release a fix. However, if a .NET update caused the issue, it’s best to wait, as .NET updates usually cannot be uninstalled.
- Press the Win + R keys to open the Run dialog.
- Type control and click Open.
- In the Control Panel, click on Uninstall a program under Programs.
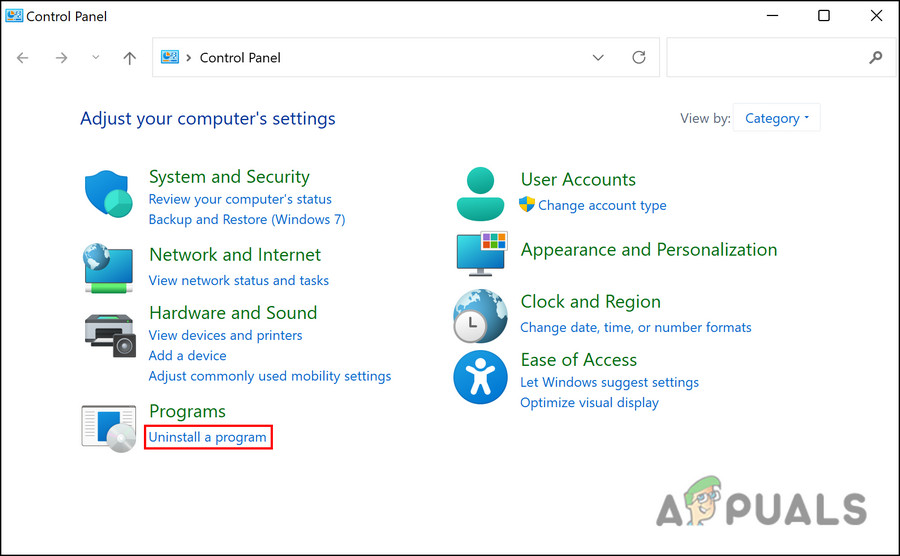
Uninstall a Program option in Control Panel - In the left pane, click View installed updates.
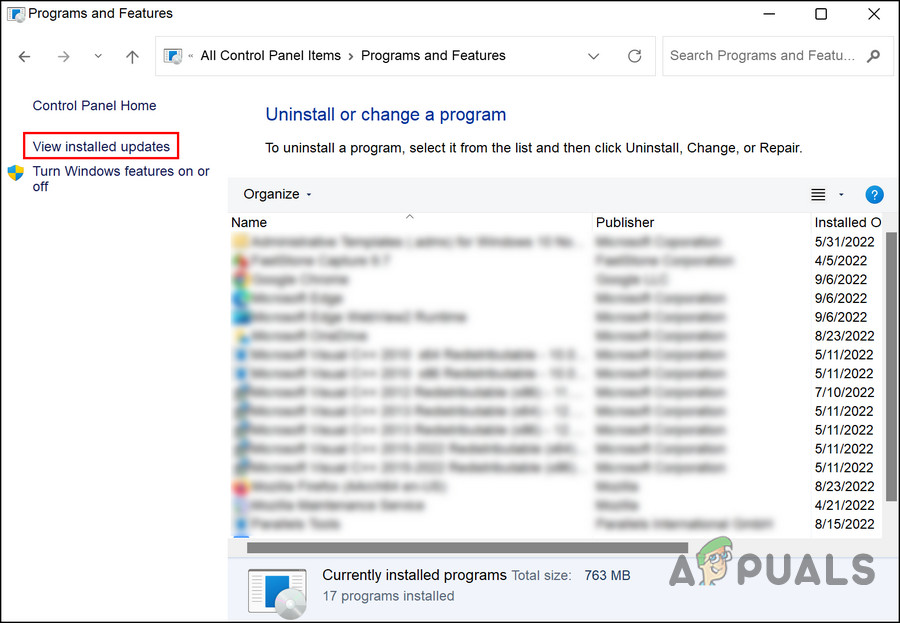
Click on the View installed updates button - You’ll see a list of installed updates. Right-click the update you want to remove and choose Uninstall.
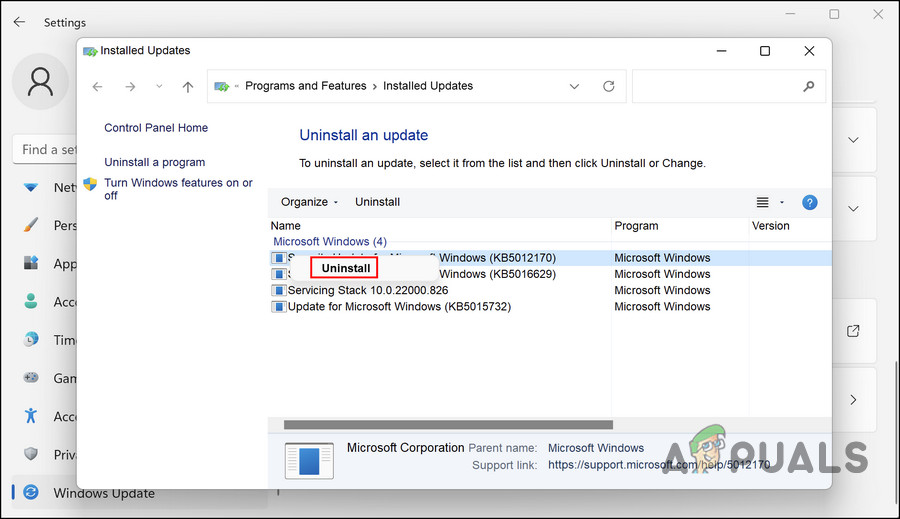
Uninstall the faulty update - Follow the prompts to complete the process, and then restart your computer.
- Check if the brightness key issue is fixed once your computer restarts.
4. Use the Brightness Slider
If none of the troubleshooting methods above work, you can adjust your brightness manually as a temporary solution using the brightness slider in your taskbar.
Just click on the battery icon in the taskbar to open the brightness slider. Move the slider left or right to adjust your brightness, then click anywhere outside the menu to close it.


