FIX: Boot Configuration Data File is Missing
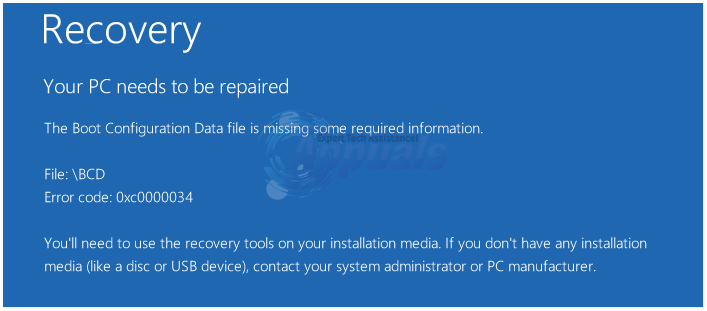
A blue screen with the message “The Boot Configuration Data file is missing some required information” usually shows up after restarting the computer, a failed Windows installation, or changes to the disk partitions. This means the Boot Configuration Data (BCD) file is missing or damaged.

It often comes with error code 0xc0000034. The main cause is the \Boot\BCD file getting deleted or corrupted by mistake. Other possible reasons include failed updates, problems with dual-boot setups, or incorrect BIOS/UEFI settings.
Access Advanced Recovery Options Using Installation Media
Since your computer can’t boot up normally, you’ll need your operating system’s bootable DVD or USB drive to access recovery options. Here’s how:
- Insert your Windows installation DVD into your DVD drive, or use a USB installation media if you have one.
- Enter your computer’s BIOS and set it to boot from the installation media (DVD or USB).
- Restart your computer to load the Windows setup from your installation media.
1. Automatic Repair
- When the Windows setup screen appears, choose your language, time and currency format, and keyboard/input method. Then click Next.
- On the “Install Windows” screen, click Repair your computer, then choose Troubleshoot. Make sure not to select the Install Windows option.
- Click Advanced options, then select Automatic Repair or Startup Repair.
- Windows will scan for installed operating systems. Select the one you wish to repair.
- If Automatic Repair finds and corrects the problem, you’re all set. If not, continue with the next method below. Once finished, remove the installation media before restarting or your computer will load the setup again.
2. Command Line Repair
Boot your computer from the installation media as described above. When the Windows setup screen appears, select your language, time and currency format, and keyboard or input method, then click Next.
- On the “Install Windows” screen, click Repair your computer, then choose Troubleshoot. On the next screen, select Advanced Options, then Command Prompt. Enter your username and password if asked.

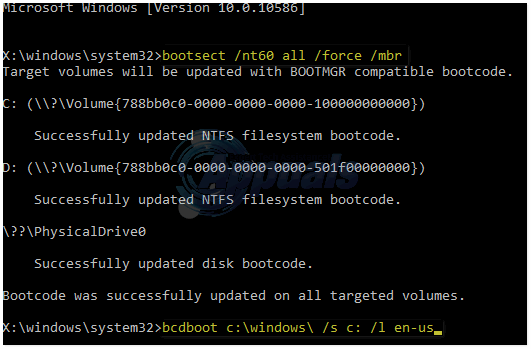
- A Command Prompt window will open. Type the following command and press Enter:
bootsect /nt60 all /force /mbr
- Once that command completes, type the next command and press Enter:
bcdboot c:\Windows /s c: /l en-us

- If your Windows installation is not on the C: drive, replace C: with the correct drive letter. For example, if Windows is on your D: drive, type bcdboot D:\Windows instead.
These commands will rebuild and repair your boot information. Now, restart your computer and remove the installation media. Your Windows should start normally without any boot issues.