How to Fix “OpenGL 3.3 or Higher is Required” Error in Blender
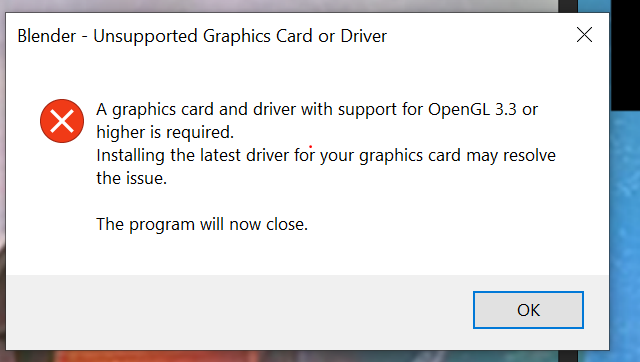
When launching Blender, you might encounter the error: “A graphics card and driver with support for OpenGL 3.3 or higher is required.” This issue typically occurs at startup and prevents Blender from opening. While it may appear to be a hardware failure, the root cause is often linked to driver problems, incorrect GPU configuration, or unsupported graphics hardware.
Blender requires a GPU that natively supports at least OpenGL 3.3 along with a compatible graphics driver that can fully expose this capability. If either the GPU or the driver falls short, Blender will be unable to start and display this error.
Common Causes of the Error
- Hardware Limitation: Some older or integrated graphics cards only support OpenGL 2.x or 3.0. In such cases, Blender won’t launch unless you either downgrade to a legacy version like 2.79 or upgrade your hardware.
- Outdated or Corrupted Drivers: Even if your GPU supports OpenGL 3.3, using outdated or incorrectly installed drivers may prevent Blender from detecting the correct version. This is common on OEM systems or when Windows installs a basic display driver.
- Incorrect GPU Assignment: On systems with both integrated and dedicated GPUs (especially laptops), Blender may default to the integrated GPU, which often lacks OpenGL 3.3 support.
- Missing System Files: In rare cases, missing or corrupted OpenGL runtime components can block Blender from launching properly.
Quick Tip Before You Begin
Try restarting Blender or your system. A simple reboot can resolve temporary GPU initialization issues or apply recent driver updates. If the problem persists, continue with the solutions below.
Check OpenGL Version Support
Ensure your graphics card supports the required OpenGL version for Blender. If you’re using an older GPU, it may not support OpenGL 3.3, which leads to this error. You can check your GPU’s supported OpenGL version by searching your model online. If your card doesn’t support the necessary version, your only options are to use an alternative API like Vulkan (if available) or upgrade the GPU.
Recommended GPUs for Blender:
- NVIDIA: RTX 3060, RTX 3070, RTX 4080
- AMD: Radeon RX 6800, RX 6900 XT
If upgrading or using Vulkan isn’t an option, you can switch to CPU rendering. Although slower, it serves as a practical temporary workaround.
Steps to enable CPU rendering:
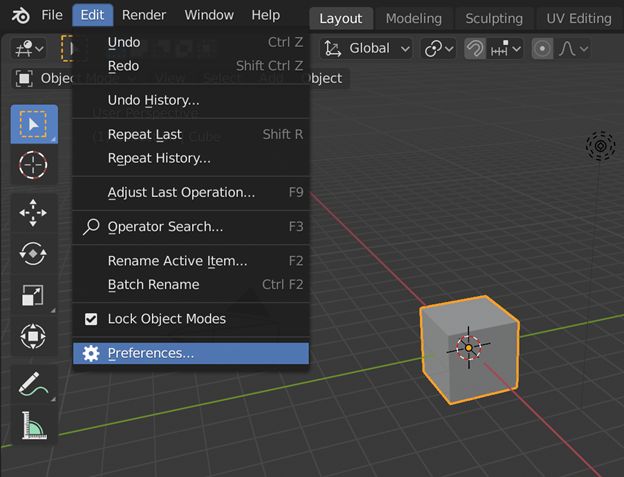
- Click on “Edit” in the top menu, then select “Preferences“.
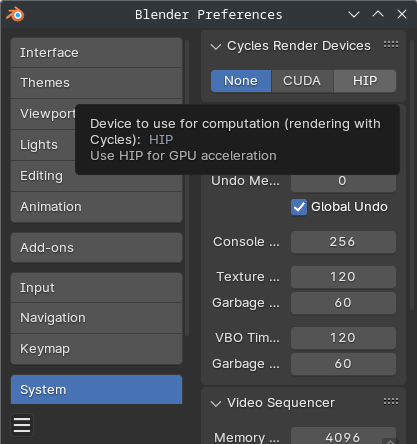
- In the Preferences window, select “System” from the left panel.
- Scroll to the “Cycles Render Devices” section.
- Select “None” from the dropdown menu for the render device.
Solution 1. Download the OpenGL32.DLL File
Blender depends on the OpenGL32.dll file to communicate with the graphics driver. If this file is corrupted, missing, or outdated, Blender won’t initialize correctly. Downloading a fresh copy can help restore this functionality.
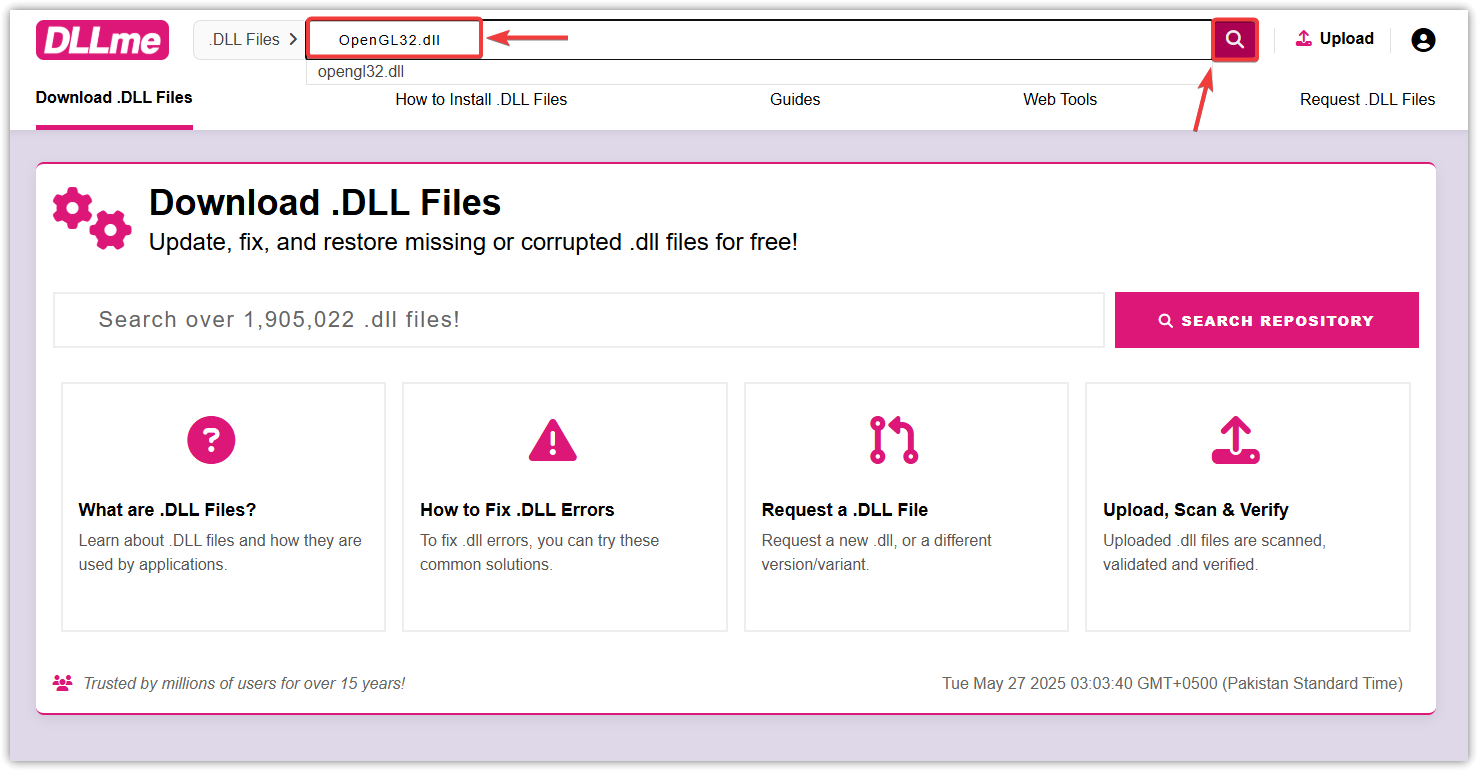
- Visit a trusted DLL download site, such as https://www.dllme.com.
- Search for OpenGL32.dll and press Enter.
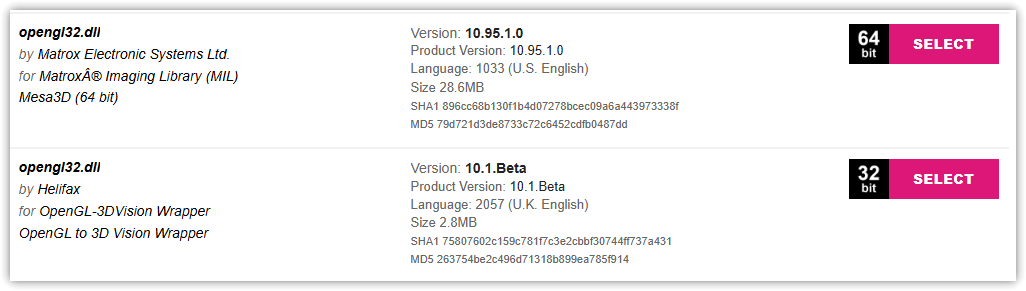
- Download the version that matches your system architecture (32-bit or 64-bit).
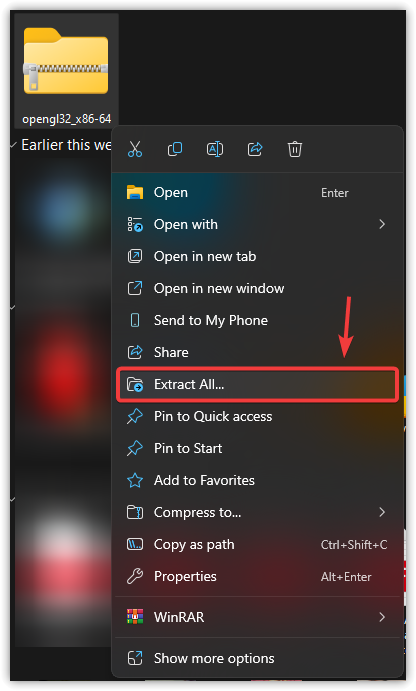
- Right-click the downloaded ZIP file and choose Extract All.
- Copy the extracted OpenGL32.dll file.
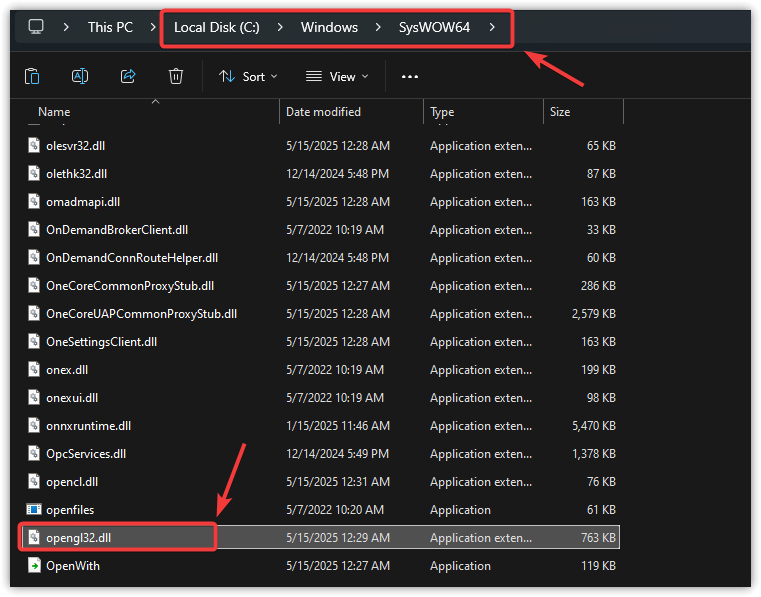
- Paste it into the appropriate system directory:
For 64-bit systems: C:\Windows\SysWOW64
For 32-bit systems: C:\Windows\System32
- Restart your system to apply changes.
Solution 2. Ensure Blender Uses the Dedicated GPU or Force Software Fallback
On systems with both integrated and dedicated GPUs, Blender may mistakenly launch using the integrated GPU, which might not support OpenGL 3.3. You can manually set Blender to use the dedicated GPU to avoid this issue.
Force Blender to Use the Dedicated GPU (NVIDIA Example)
- Right-click your desktop and select NVIDIA Control Panel.
- Click on Manage 3D settings in the left sideba
- Go to the Program Settings tab.
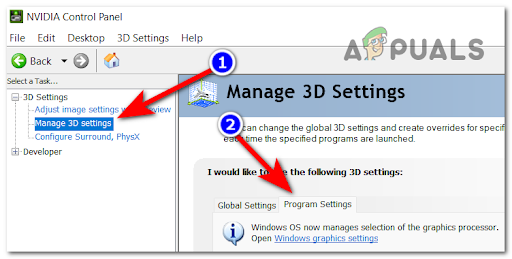
- Click Add and browse to select
blender.exe. - Under Select the preferred graphics processor, choose High-performance NVIDIA processor.
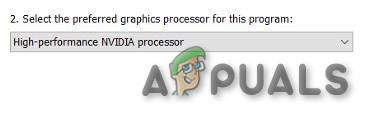
- Click Apply, then relaunch Blender.
If you’re using AMD, a similar option is available in the AMD Radeon Software. For systems with Intel+AMD combinations, use Windows Graphics settings to assign Blender to the high-performance GPU.
Temporarily Disable the GPU Driver to Force Software Rendering
If the dedicated GPU still causes issues or if both GPUs are problematic, you can disable them temporarily. This forces Blender to run using Microsoft’s basic display driver, which may bypass the OpenGL error. This method is useful for testing purposes but will result in lower performance.
- Right-click the Start button and choose Device Manager.
- Expand the Display adapters section.
- Right-click your GPU (NVIDIA, AMD, or Intel) and click Disable device.
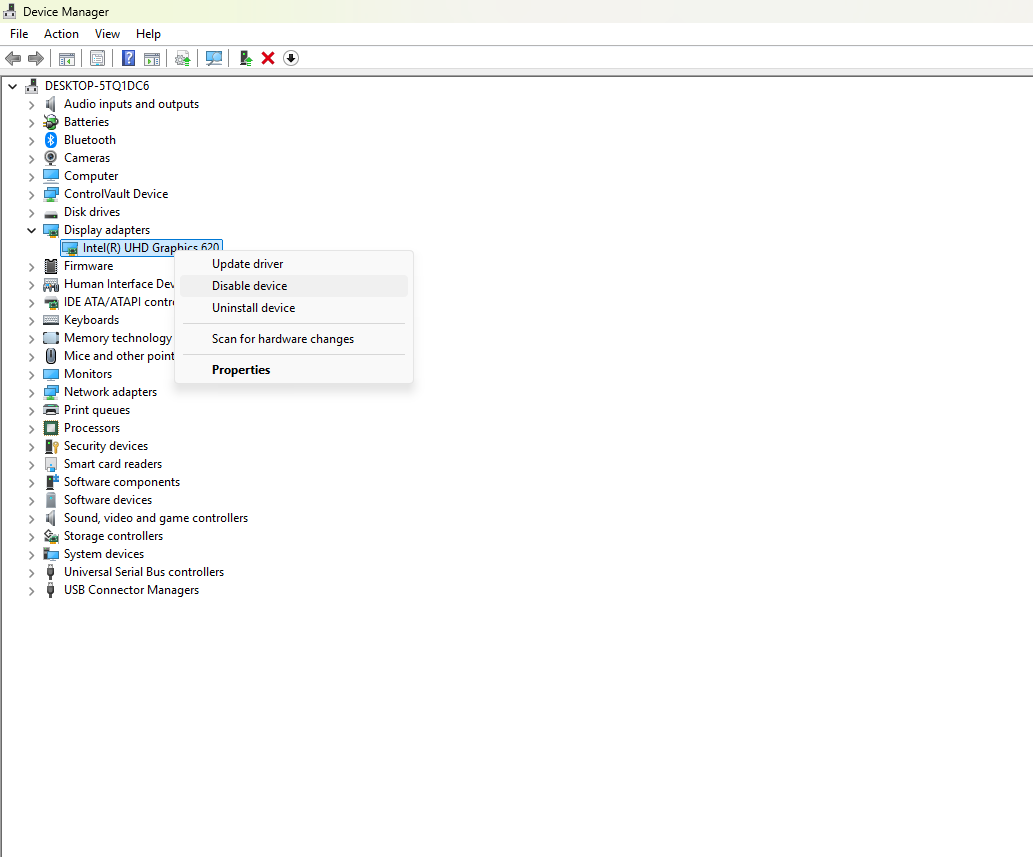
- Restart your PC and try launching Blender again.
Note: This is a temporary workaround and not suitable for long-term use. Performance may be degraded significantly.
Solution 3. Update Your Graphics Card Drivers
Outdated or generic GPU drivers are one of the most frequent causes of the OpenGL 3.3 error in Blender. Drivers installed via Windows Update may lack proper OpenGL support. To avoid such issues, always install drivers directly from the manufacturer’s official website.
Manufacturers like NVIDIA, AMD, and Intel frequently release driver updates that improve OpenGL compatibility and application stability.
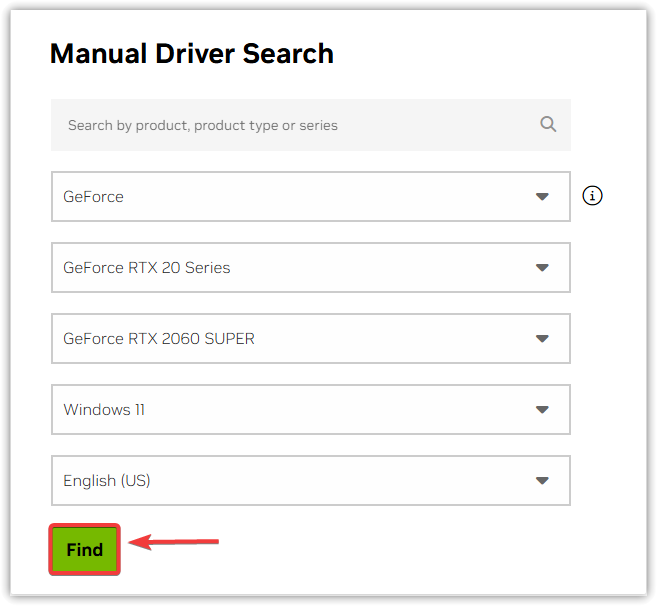
- Visit the official driver download page for your GPU brand:
- NVIDIA: nvidia.com/Download
- AMD: amd.com/en/support
- Intel: intel.com/support/detect
- Search or auto-detect your GPU model and click Find Drivers.
- Download the latest compatible driver.
- Run the installer and follow the instructions.
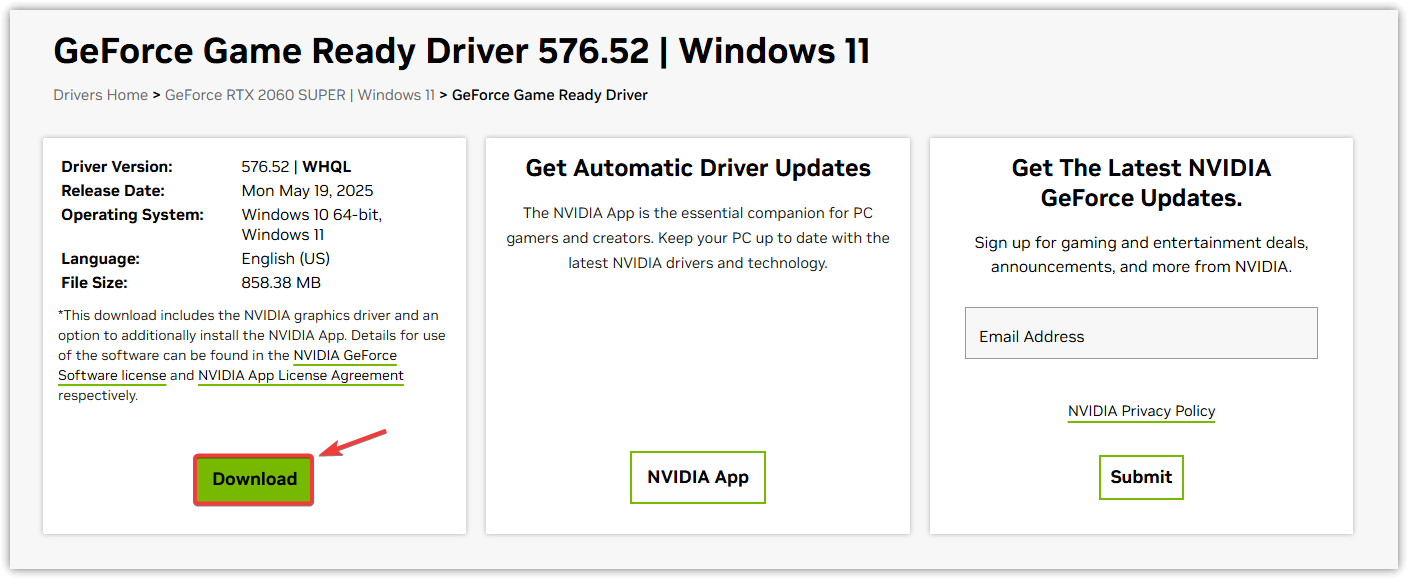
- Restart your PC and relaunch Blender to test.
This ensures Blender can fully utilize your GPU with proper OpenGL 3.3 support.
Solution 4. Use System File Checker (SFC) to Repair Corrupted Windows Files
In some cases, missing or corrupted Windows system files can interfere with OpenGL and driver functionality. The System File Checker (SFC) tool can detect and repair these files automatically.
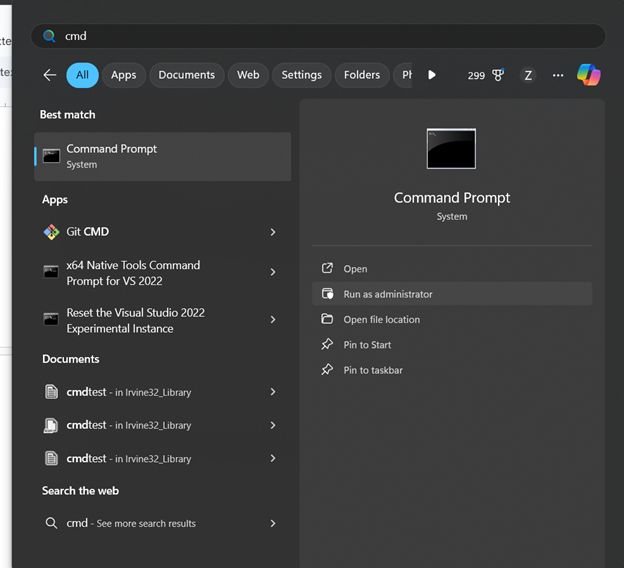
- Press Windows + S, type “cmd”, right-click Command Prompt, and choose Run as administrator.
- In the Command Prompt window, type: sfc /scannow and press Enter.
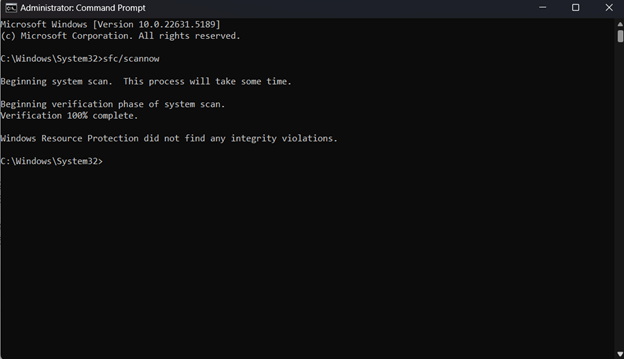
- Wait for the scan to complete. If any corrupted files are found, they will be repaired automatically.
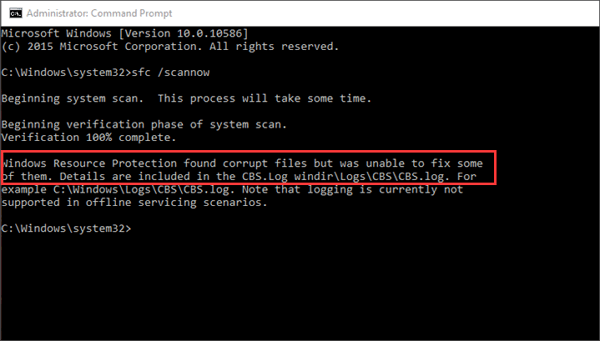
- Restart your computer after the scan finishes.
- Launch Blender to check if the issue is resolved.
If the error still isn’t resolved, your hardware may not meet Blender’s minimum system requirements. Refer to the official Blender requirements page to verify hardware compatibility.