FIX: Black Squares Behind Folder Icons in Windows 10
If your icons look strange or are stacked wrong, this is usually a display problem, not an error message. It mostly happens because the icon cache (where Windows stores icon images) is damaged. This can be caused by old system files, interrupted Windows processes, or third-party icon packs.

Other causes include custom folder icons or problems creating thumbnails.
1. Clear and Reset Your Computer’s Thumbnails Cache
Broken folder pictures usually mean the thumbnail cache is damaged. This cache saves small images for faster preview. Deleting and resetting the cache makes Windows create fresh previews, fixing any black boxes or picture problems on folder icons.
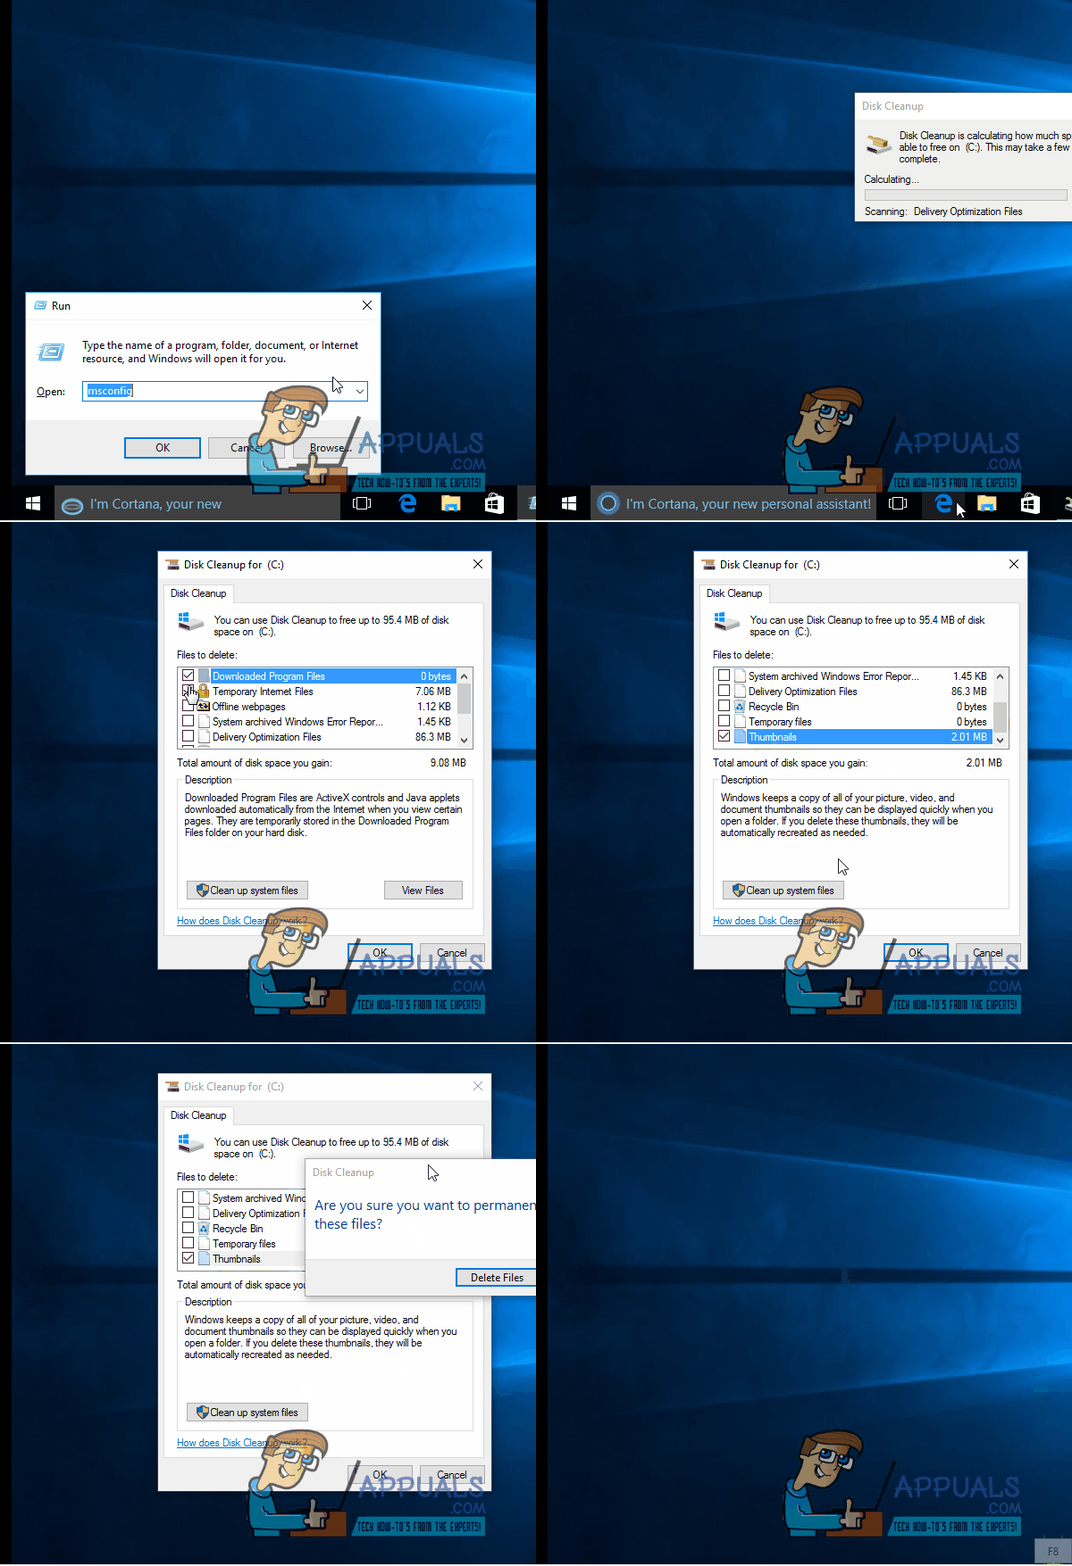
- Hold down the Windows Logo key, and while holding it, press R to open the Run dialog box.
- Type cleanmgr into the Run dialog and press Enter to launch Disk Cleanup.
- In Disk Cleanup, open the dropdown menu under Drives and select your root drive (usually the drive where Windows 10 is installed).
- Click OK.
- Wait for Disk Cleanup to analyze your drive and show a list of files that can be deleted.
- From the list, select Thumbnails by checking the box next to it. (If you want to free up more space, you can select other files as well.)
- Click OK.
- Wait for Disk Cleanup to remove the selected files. Once it’s done, restart your computer.
 After your computer restarts, check if the issue is gone.
2. Disable the Read-Only Attribute for Affected Folders
Sometimes folder pictures get messed up because the system marks them as “Read-Only.”
Turning off the Read-Only setting lets Windows update the folder’s icon and preview picture, which can fix the black square behind the folder icon.
- Right-click on a folder that has the black square problem.
- Click on Properties in the menu that appears.
- In the Attributes section, you’ll see the box next to Read-only with a small square in it. Click the box to uncheck it and remove the square.
- Click Apply.
- Click OK.
- Repeat steps 1–5 for any other folders that are affected.
- Restart your computer and check if the problem has been resolved.