FIX: Wireless Mouse Not Working
The cursor might suddenly freeze or stop moving, even though the wireless mouse still looks connected. Unplugging and plugging the mouse back in usually only helps for a short time. The main reason is a communication problem between the mouse receiver and the computer, even if the computer can detect the hardware.
The most common cause is interference from USB 3.0 ports, which can mess with the 2.4 GHz wireless signal. Other causes include a low battery, old drivers, or a damaged receiver.
1. Check the Battery Power of the Wireless Mouse
Check the status of your wireless mouse batteries and replace them if necessary. If the battery level drops too low, your mouse may stop working altogether. Most mice have a red light to indicate low battery, but if there’s no light or other signal, it’s still a good idea to try replacing the batteries.
- To check the battery of an Optical Mouse: Look for the red light shining from the bottom of the mouse.
- To check the battery of a Laser Mouse: Look for the power indicator or status light.
- To check the battery of a Bluetooth Mouse: Go to Start > Control Panel > Mouse > Bluetooth and review the “Total Battery Power Remaining” status.
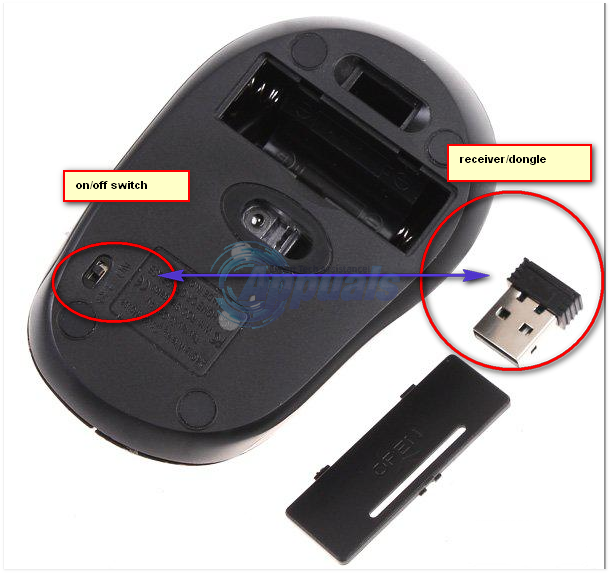
2. Remove and Reconnect the USB Receiver and Mouse Batteries
In many cases, simply removing the USB receiver and the wireless mouse batteries for about 5 seconds and then reconnecting them fixes the problem. After doing this, try using your mouse again.
3. Scan for Hardware Changes
Although most devices are plug-and-play and are detected automatically by Windows, it’s worth manually scanning for hardware changes if your mouse isn’t working. The Device Manager allows you to prompt your system to look for connected devices again.
To open Device Manager, hold Windows + R and type “hdwwiz.cpl”, then click OK. Find and expand “Mice and other pointing devices”. Click Action from the top menu, then select Scan for hardware changes.
4. Re-Sync Your Wireless Mouse with the USB Receiver
Press the Connect button on the USB receiver (if your device has one)—a blinking light should appear when it’s ready to sync. If a dialog box appears on your screen, just follow the on-screen instructions. Otherwise, press and release the Connect button underneath your mouse. Some mice use a small switch you might need to press with a pen or pin. The mouse should sync with the receiver if the blinking stops or you see a steady green light on the receiver.
5. Try a Different Port or Computer
If none of the methods above work, try connecting your wireless mouse to a different USB port on your computer, or even test it on another computer. If you see the same issue elsewhere, it’s likely that your mouse is faulty and may need to be replaced.