How to Eject a CD/DVD Stuck in a Macbook
MacBooks are reliable in terms of software, it’s stable and fast and is secure to viruses due to the darwin based distribution it uses. However, the hardware side especially the CD/DVD has no additional benefits compared to Windows based systems therefore it doesn’t take much time for things to go south in the electronic world. Many users have been experiencing this one particular issue of CD/DVD getting stuck in the optical drive of their MacBook, also known as SuperDrive. Most of the time, you can get it out by dragging its icon to the trash can or selecting eject from the file menu or pressing Command button + E. But if it’s not working, follow this guide for the most effective methods to get the CD/DVD out of your MacBook without damaging the optical drive.
1. Eject Using Eject Disk Hole
You may have noticed a hole next to your SuperDrive. You can use that hole to forcefully eject a disk out of your MacBook. Before you do it, make sure that your Mac is turned off to avoid any damage.
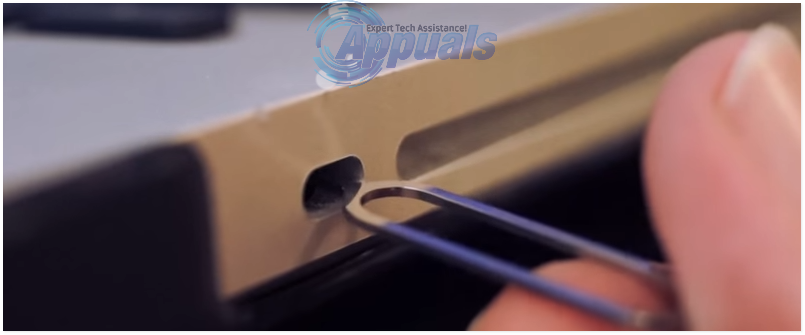
Shut down your MacBook. Unfold a paper clip and press it unto the hole. And your disk should eject. If it does not have a pin hole, then you can use the other Solutions below.
2. Eject Using Mouse
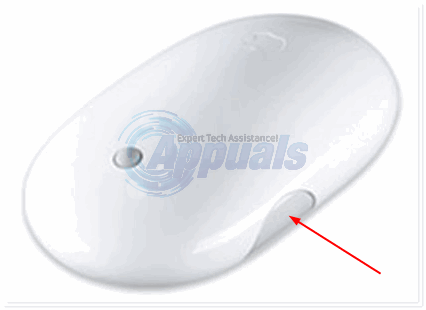
Reboot your MacBook while holding down the left button of your mouse or might mouse. If you don’t have a mouse connected, simply hold down the touchpad/trackpad button. This simple solution should work most of the time. If not, then try the next solution.
3. Eject Disk using a Software
ForcEject is a nice little software that can forcefully eject a disk from your MacBook. Simply download it from this link and then go to Finder -> Downloads. Locate the app called “Forceject Tool”, hold the CTRL/CONTROL key and click on it, then choose Open.
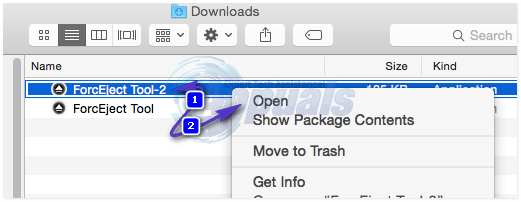
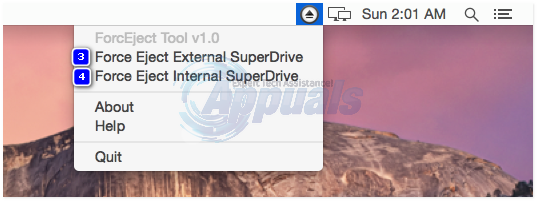
Click Open again, if prompted by the security warning. You will then see the EJECT icon in the top bar. Click on it, and choose to Eject the disc.
4. Using The Terminal
- Open Finder, then Go to Utilities.
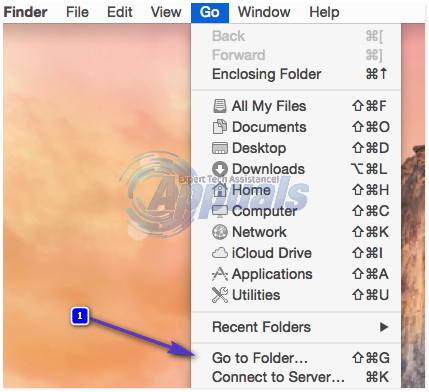
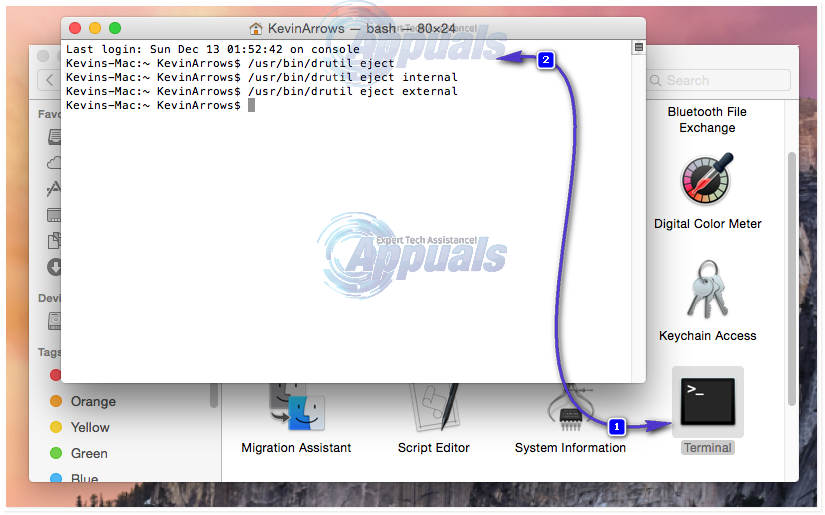
- From Utilities, locate Terminal and open it. A new window will appear. Type the following code in it and press Enter to execute it.
- For One Optical Drive
/usr/bin/drutil eject
- For Internal and External Drive
/usr/bin/drutil eject internal
/usr/bin/drutil eject external
- After each command, press ENTER so the command can be executed.
5. Getting The Disk Out Physically
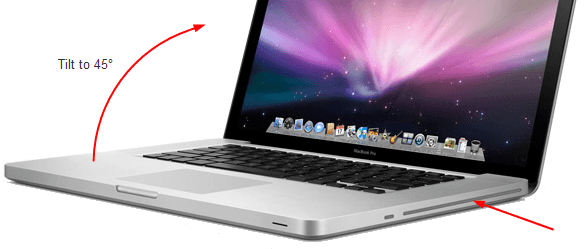
If the disk is being read again and again in an infinite loop, preventing the MacBook from ejecting it, then to get it out of loop, take a piece of thin cardboard, credit card or any material of that sort. Insert it carefully into the opening of the optical drive until it touches the disk for a few seconds and stops the CD/DVD from reading it. Then press the eject button continuously. If that doesn’t work, tilt the MacBook to a 45 degree angel in a way that the opening of optical drive faces downwards, and then press the eject button continuously.
6. Ejecting the Disk at Boot time
- Reboot your MacBook and hold down the options key.
- Wait for the Boot Drive options to appear. Once they appear, press the eject key on the keyboard.
- When the disk is out, select your boot disk and click the arrow button to boot.
7. Ejecting in Open Firmware
- Reboot your MacBook while pressing and holding down Command + Option + O + F to enter into Open Firmware prompt.
- Once in it, type the following code and press enter to execute the code.
eject cd
- To continue booting into OS X, type the following code and press enter.
mac-boot