How to Backup Your iPhone on iTunes for the First Time
Apple offers two different ways to back up your iDevices: iTunes backup and iCloud backup. If you’d like to use iCloud backup, you can check out this helpful guide. iCloud gives you the option to back up your device even without Wi-Fi or a computer.

However, if you’d like to back up your device for the first time using iTunes, just follow the steps in the next section.
Before You Start
Make sure you have the latest version of iTunes installed on your computer.
- If you already have iTunes installed, check if it’s updated to the latest release.
- Windows:
- Open iTunes.
- Click Help on the menu bar at the top of iTunes.
- From the drop-down menu, select Check for Updates.
- Follow the on-screen instructions to install the latest version.
- Mac:
- Open the App Store.
- Click Updates at the top of the window.
- If there are iTunes or macOS updates available, click Install.
- Windows:
- If you don’t have iTunes on your Mac or PC, go to apple.com. Then, download and install the latest version from their website.
Note: The latest version of iTunes requires Windows 7 or later, or Mac OS X 10.9.5 or later. If your operating system is older, you will need to update it first.
Steps to Back Up Your iPhone on iTunes for the First Time
Step 1.
Before connecting your iPhone to your computer, open iTunes, go to Preferences, and turn off automatic device synchronization. This will prevent your computer from automatically syncing and potentially overwriting your device’s data.
- Windows: Click Edit on the menu bar at the top of iTunes and then choose Preferences.

- Mac: Click iTunes on the Mac menu bar and select Preferences.
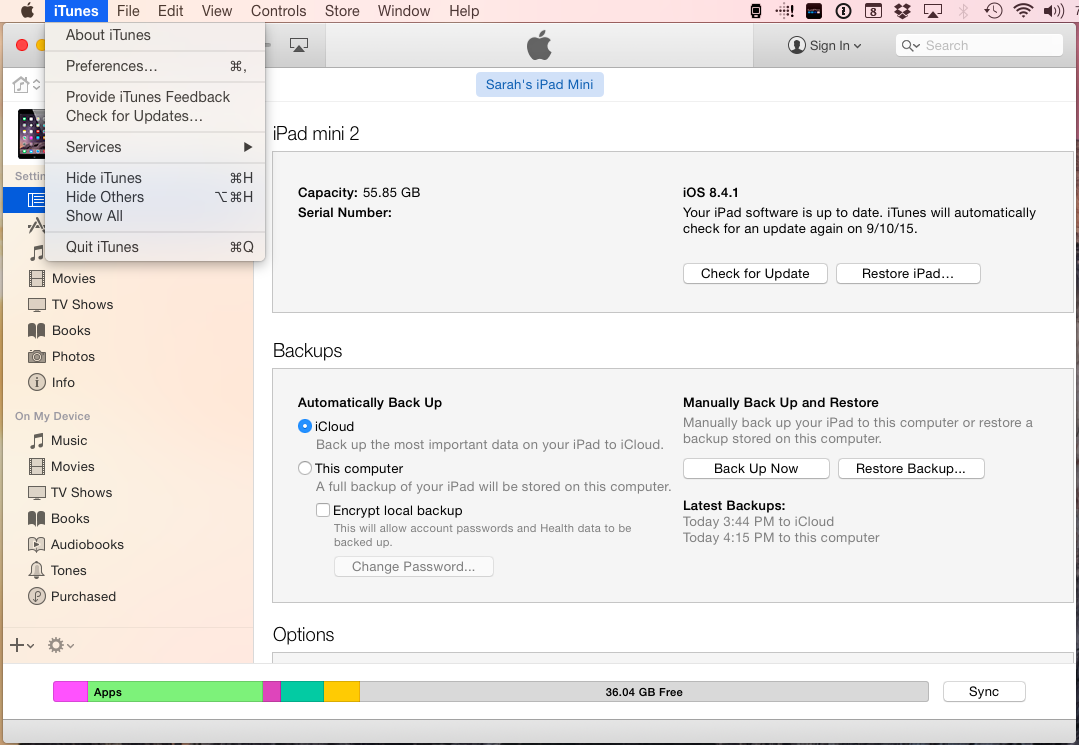
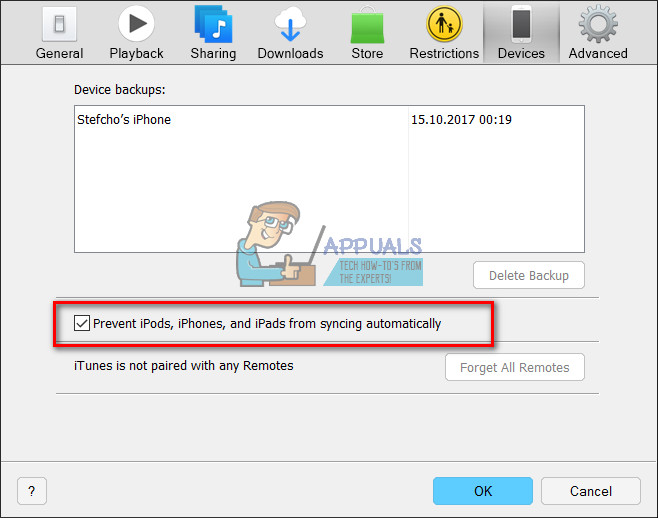
Now, open the Devices tab and check the box that says “Prevent iPods, iPhones, and iPads from syncing automatically”.
Step 2.
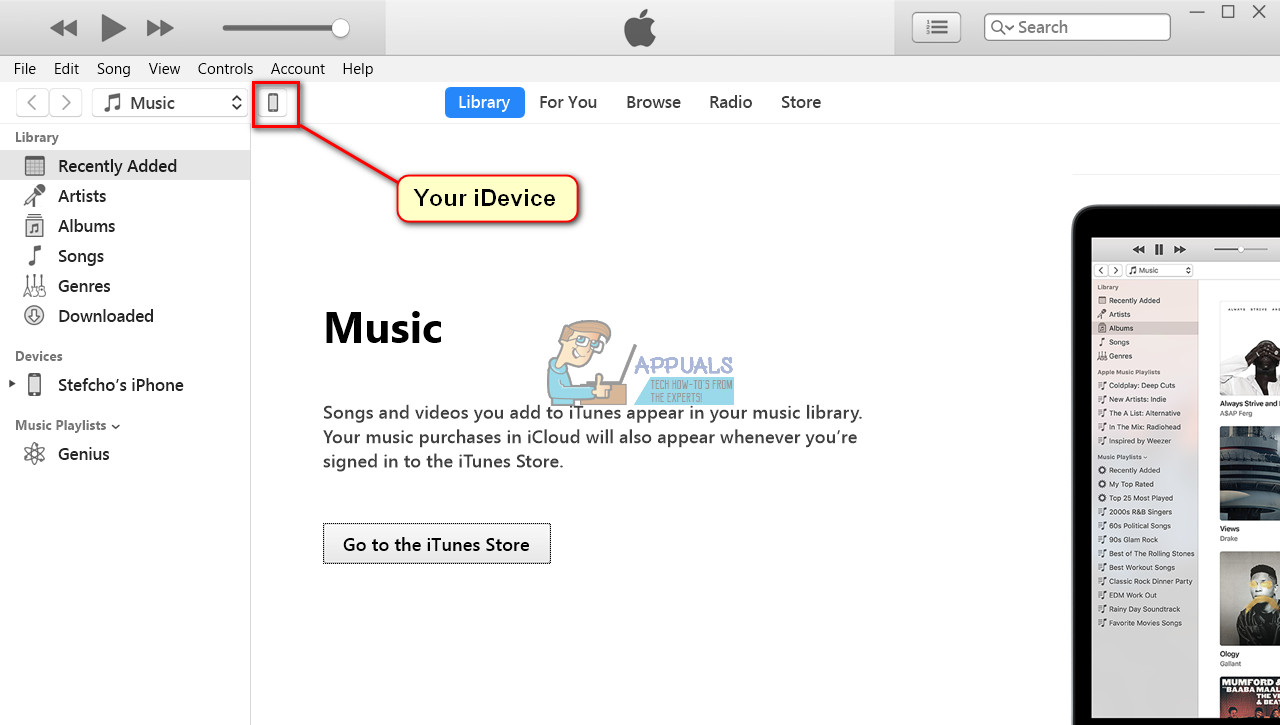
Once you’ve set up iTunes, connect your iPhone (or iPad or iPod Touch) to your computer with the original Lightning USB cable. Your device should now show up in iTunes.
Note: If your iDevice doesn’t appear in iTunes, try using a different USB port (avoid USB hubs), and make sure you are using a certified Lightning USB cable.
Step 3.
When your device’s icon appears in iTunes, click on it and then select the Summary section from the sidebar.
Step 4.
In the Manually Back Up and Restore section, click “Back Up Now” and wait for the backup process to finish.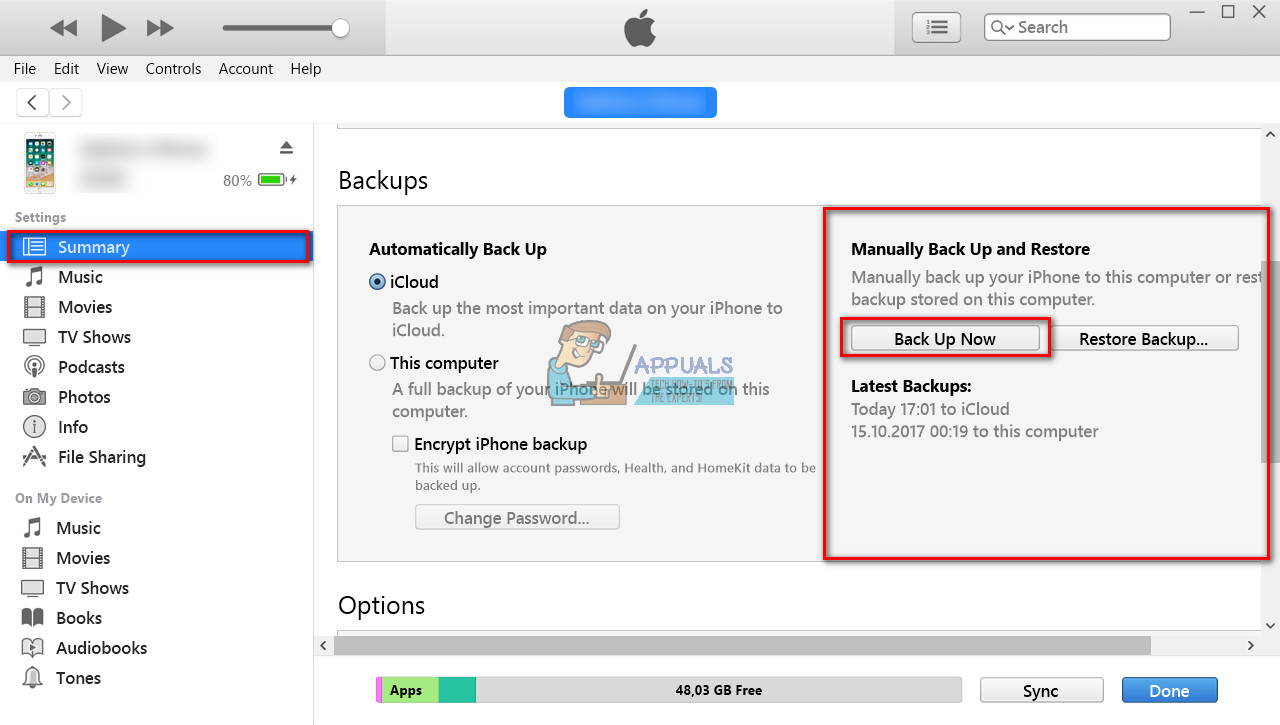
If you’d like your devices to back up automatically in the future, you can choose your preferred backup option here. You can also enable encryption for your device backups if you want added security.