How to Install Autotune Plugin in Audacity?
Autotune is a type of software that can measure and adjust the pitch in vocal recordings. It’s commonly used to correct a singer’s off-key notes and help smooth out any minor pitch issues. Many users want to use an Autotune feature in Audacity, but it doesn’t come built-in with the program. In this article, we’ll walk you through how to install and use Autotune plugins in Audacity, so you can easily fine-tune your vocals.

1. Install Autotune Plugins in Audacity
Audacity does not have its own built-in Autotune feature. However, you can add third-party plugins to Audacity to get this functionality. Installing plugins is straightforward: you just need to copy the plugin’s files into the Audacity plugins folder. There are several free Autotune plugins that work well with Audacity. Below, we’ll show you the steps to install some of the best free options.
2. Install the GSnap VST Pitch Correction Plugin in Audacity
GSnap is a free Autotune plugin that can be used in audio editing programs like Audacity. With GSnap, you can correct the pitch of vocals or even create fun robotic voice effects. GSnap works best with simple vocal recordings and may take longer to process more complex audio tracks. GSnap is available as a zip file that includes a single DLL file, which you will need to copy to the Audacity Plugins folder as described below:
- Open your web browser and download the GSnap Free VST pitch-correction plugin for Audacity.
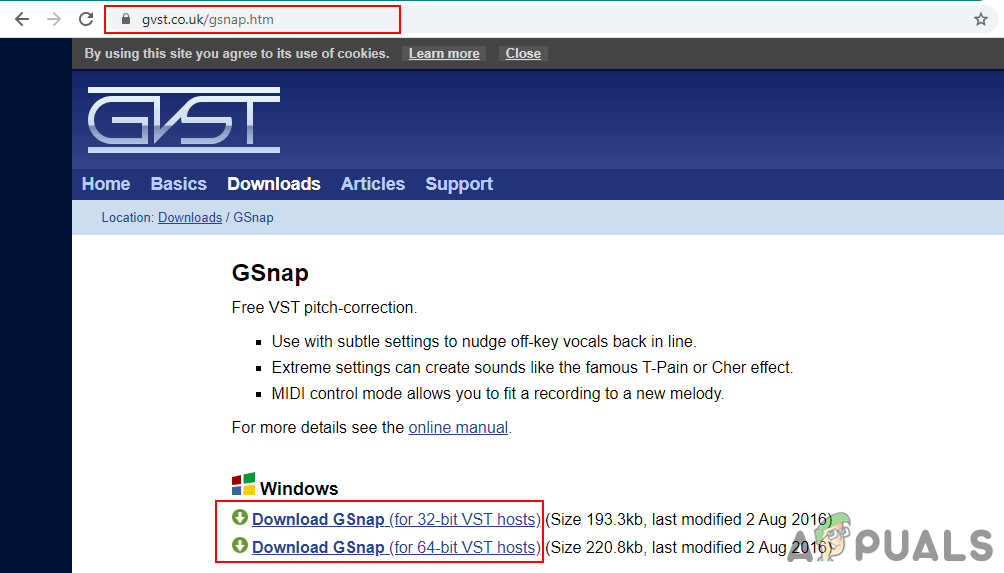
Downloading GSnap for Audacity - Extract the zip file and open the extracted folder.
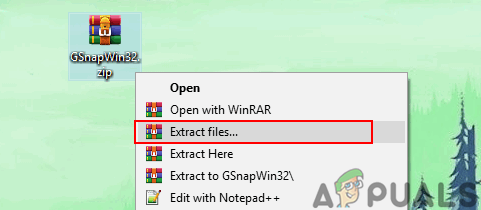
Extracting the GSnap zip file - Copy the GSnap.dll file and paste it into the Audacity Plugins folder as shown below:
C:\Program Files (x86)\Audacity\Plug-Ins
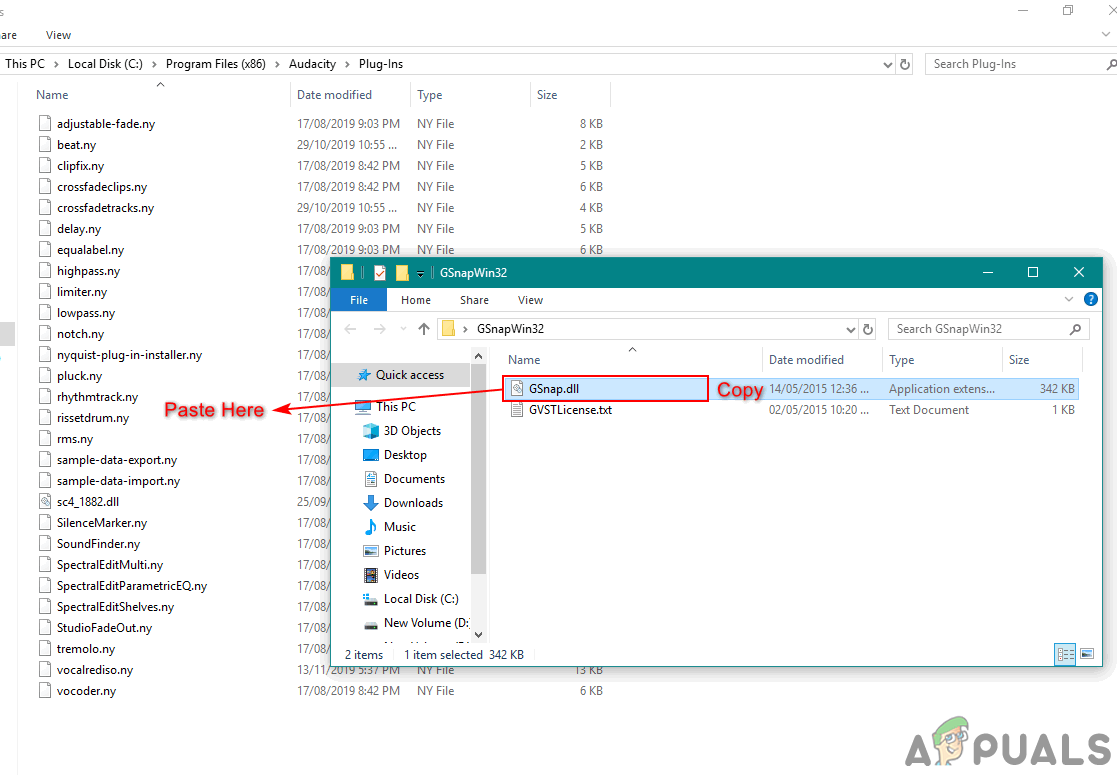
Copying the GSnap file to the Audacity Plugin folder - Open the Audacity application by double-clicking its shortcut. If Audacity was already open, close and restart it so it can detect the new plugin.
- In Audacity, click on the Tools menu and select Add / Remove Plug-ins. Scroll down, select GSnap from the list, and click Enable. Then, click OK.
Note: If you get a “fails to register” error, make sure you downloaded the 32-bit version of GSnap.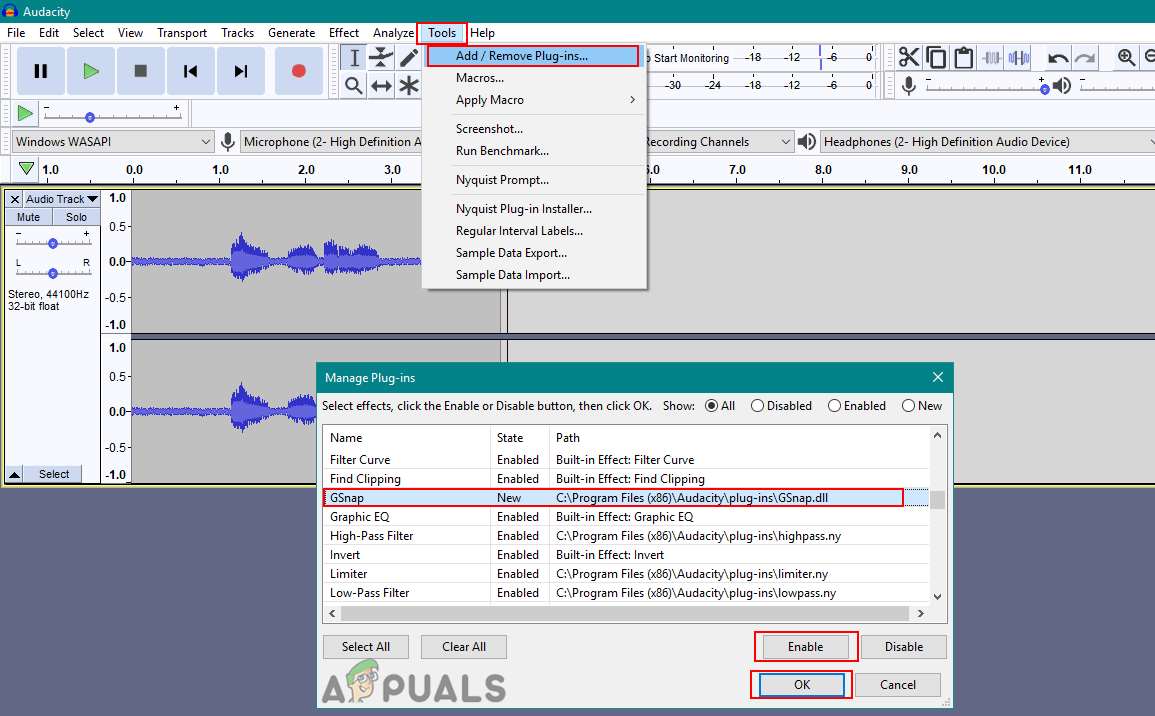
Enabling GSnap plugin in Audacity - To use GSnap, open any audio file by clicking the File menu and choosing Open. You can also record a new track. When you’re ready, go to the Effect menu and choose GSnap.
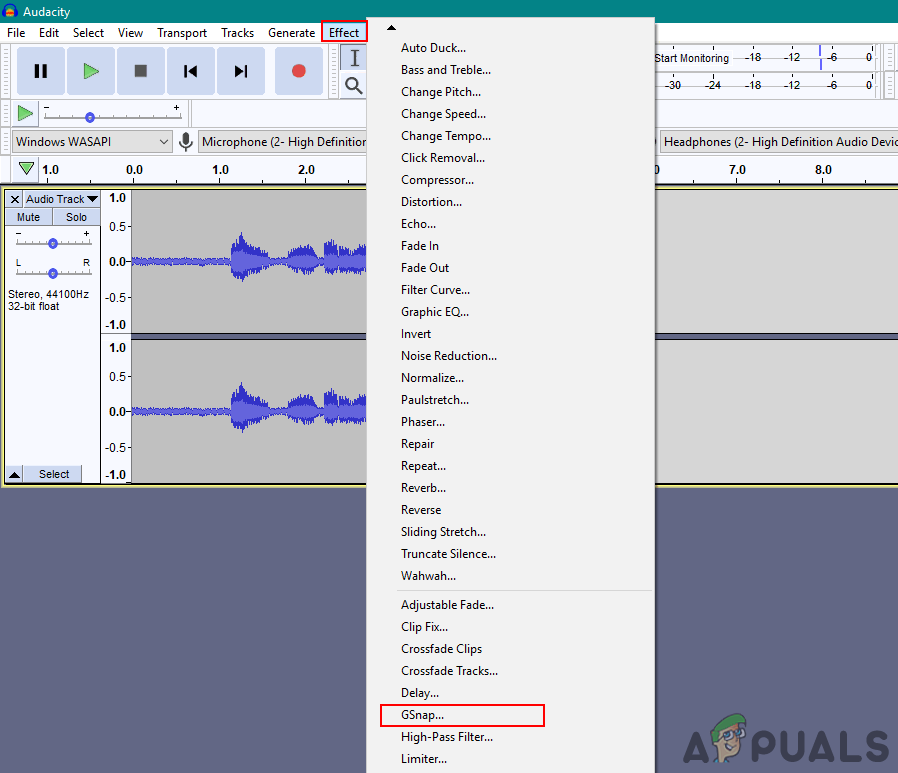
Opening GSnap effect - Now you can adjust the plugin’s settings to Autotune your vocals as needed.
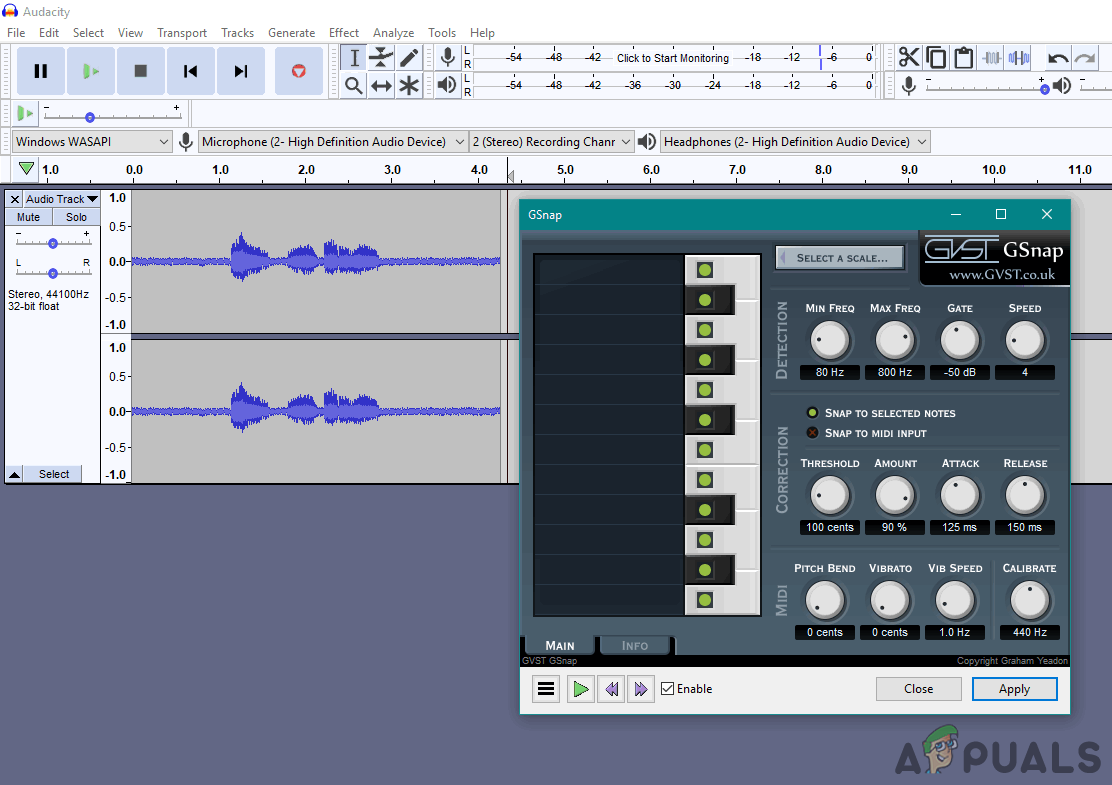
Using GSnap to autotune vocals in Audacity
3. Install the Auto-Tune Evo VST Plugin in Audacity
Auto-Tune Evo VST is a popular Autotune plugin developed by Antares Audio Technologies. Please note: this plugin is not free, and you will need to purchase it to use the full features. However, there is a trial version available, or you can use an older version for testing purposes in Audacity. Installing this plugin is similar to others — you just need to copy the plugin file into the Audacity Plugins folder as shown below:
- Open your web browser and download the Auto-Tune Evo VST for Audacity.
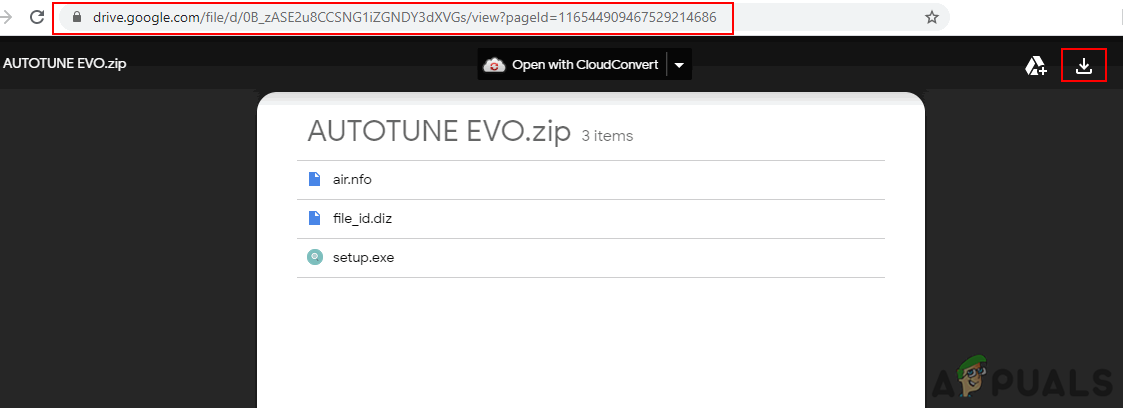
Downloading the Auto-Tune Evo old version - Extract the zip file and install the plugin. During installation, choose Desktop as the destination for the VST Plugin.
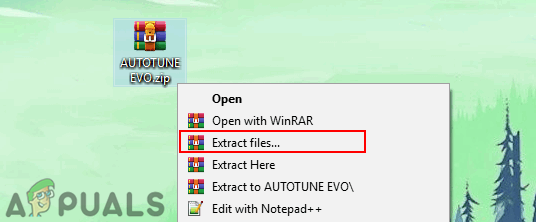
Unzipping the Auto-Tune zip file - Once installed, you’ll find the Auto-Tune Evo VST file on your desktop. Copy this file and paste it into the Audacity Plugins folder:
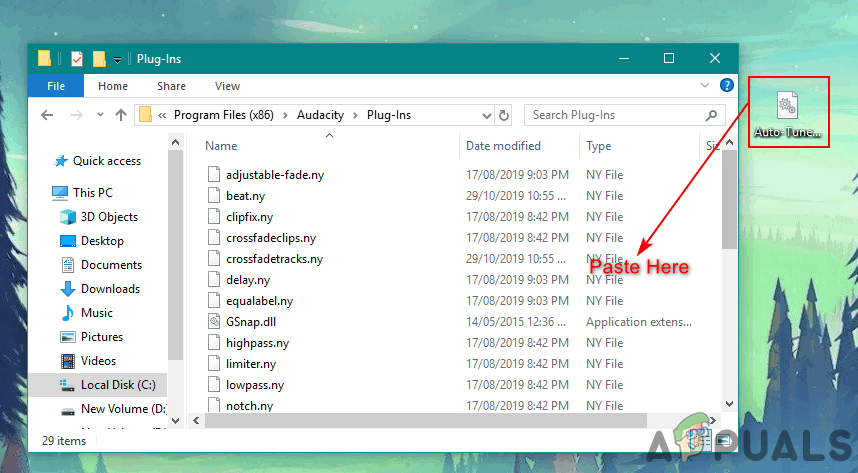
Copying the DLL file and pasting it into the Audacity Plugins folder - Open Audacity by double-clicking its shortcut. Then, click on the Tools menu and choose Add / Remove Plug-ins.
- Find Auto-Tune Evo VST in the list and click Enable. Confirm by clicking OK.
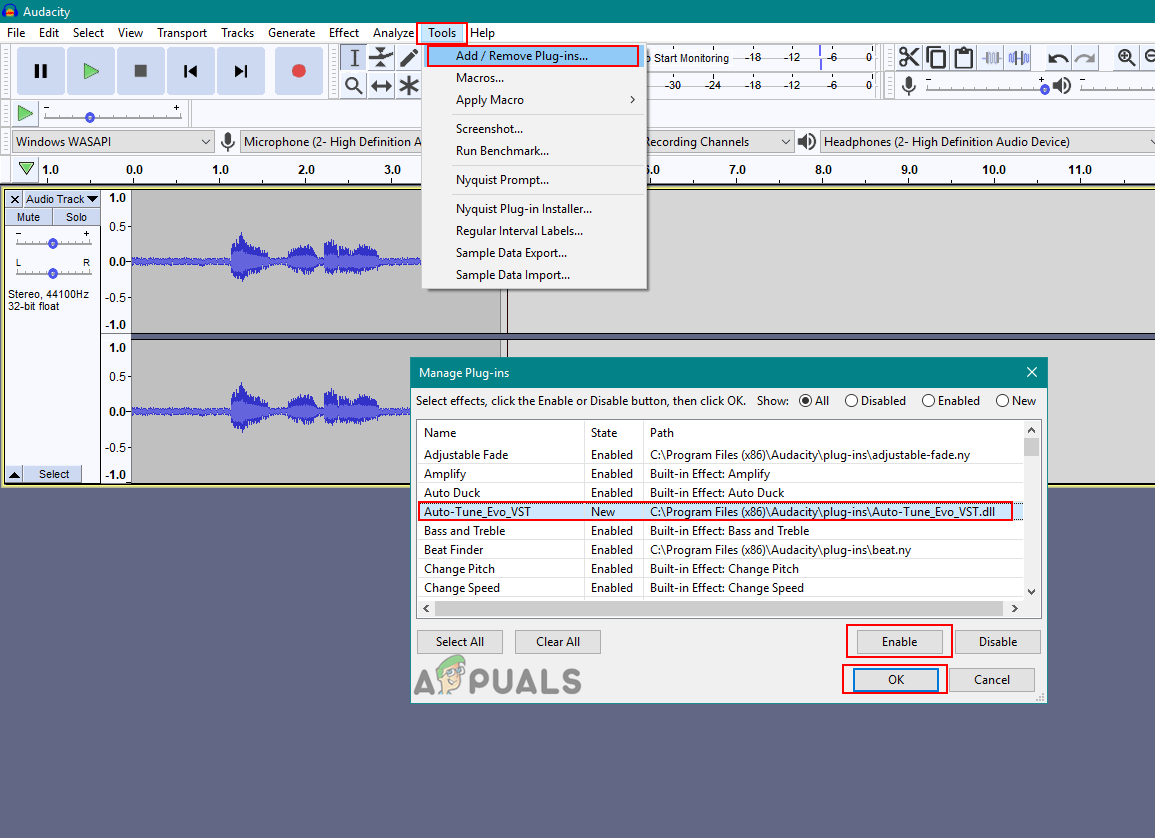
Enabling the Auto-Tune Evo VST plugin - Go to the Effect menu and select Auto-Tune Evo VST from the bottom of the list.
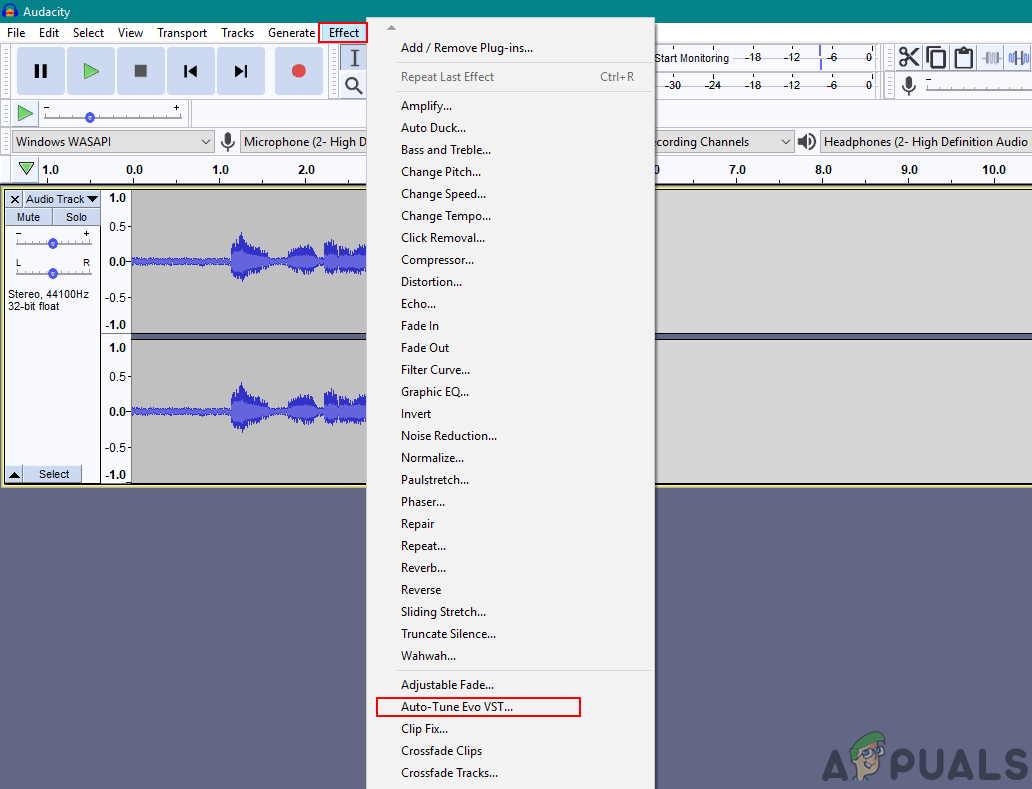
Opening Auto-Tune Evo VST effect - Now you can autotune your voice and vocals in Audacity just as you need.
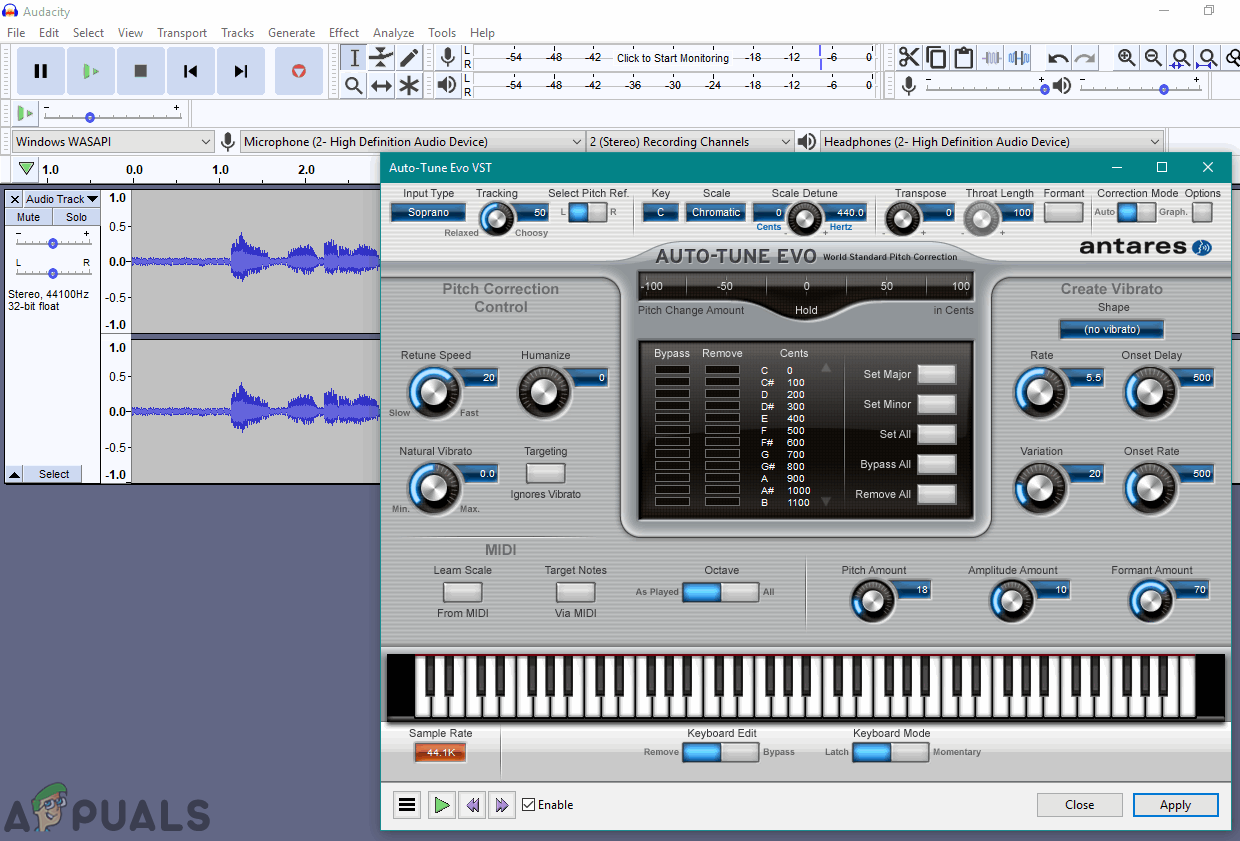
Using Autotune to adjust the pitch of vocals


Hmm. I followed your instructions with Gsnap, got it set up, but I flip the switches and stuff and there is no difference