FIX: AutoPlay Not Working on Windows
AutoPlay not working on Windows usually becomes obvious when you plug in an external device like a USB drive, SD card, or DVD and nothing happens—there’s no prompt or automatic action. This problem happens when Windows doesn’t start the AutoPlay feature, which is meant to detect your device and do a set task, like opening a folder or playing media.

The main cause is often that the “Shell Hardware Detection” service is turned off. Other possible reasons include changes in group policy settings, wrong registry values such as NoDriveTypeAutoRun, or AutoPlay being switched off by hand.
1. Manually Edit Your Computer’s Registry
One of the main reasons AutoPlay stops working is because the registry settings that control how Windows handles external devices are incorrect or missing. By editing the registry, you can fix entries like NoDriveTypeAutoRun. If this setting is wrong, it can turn off AutoPlay completely. Updating these settings makes sure Windows reacts correctly when you connect a device and starts AutoPlay like it should.
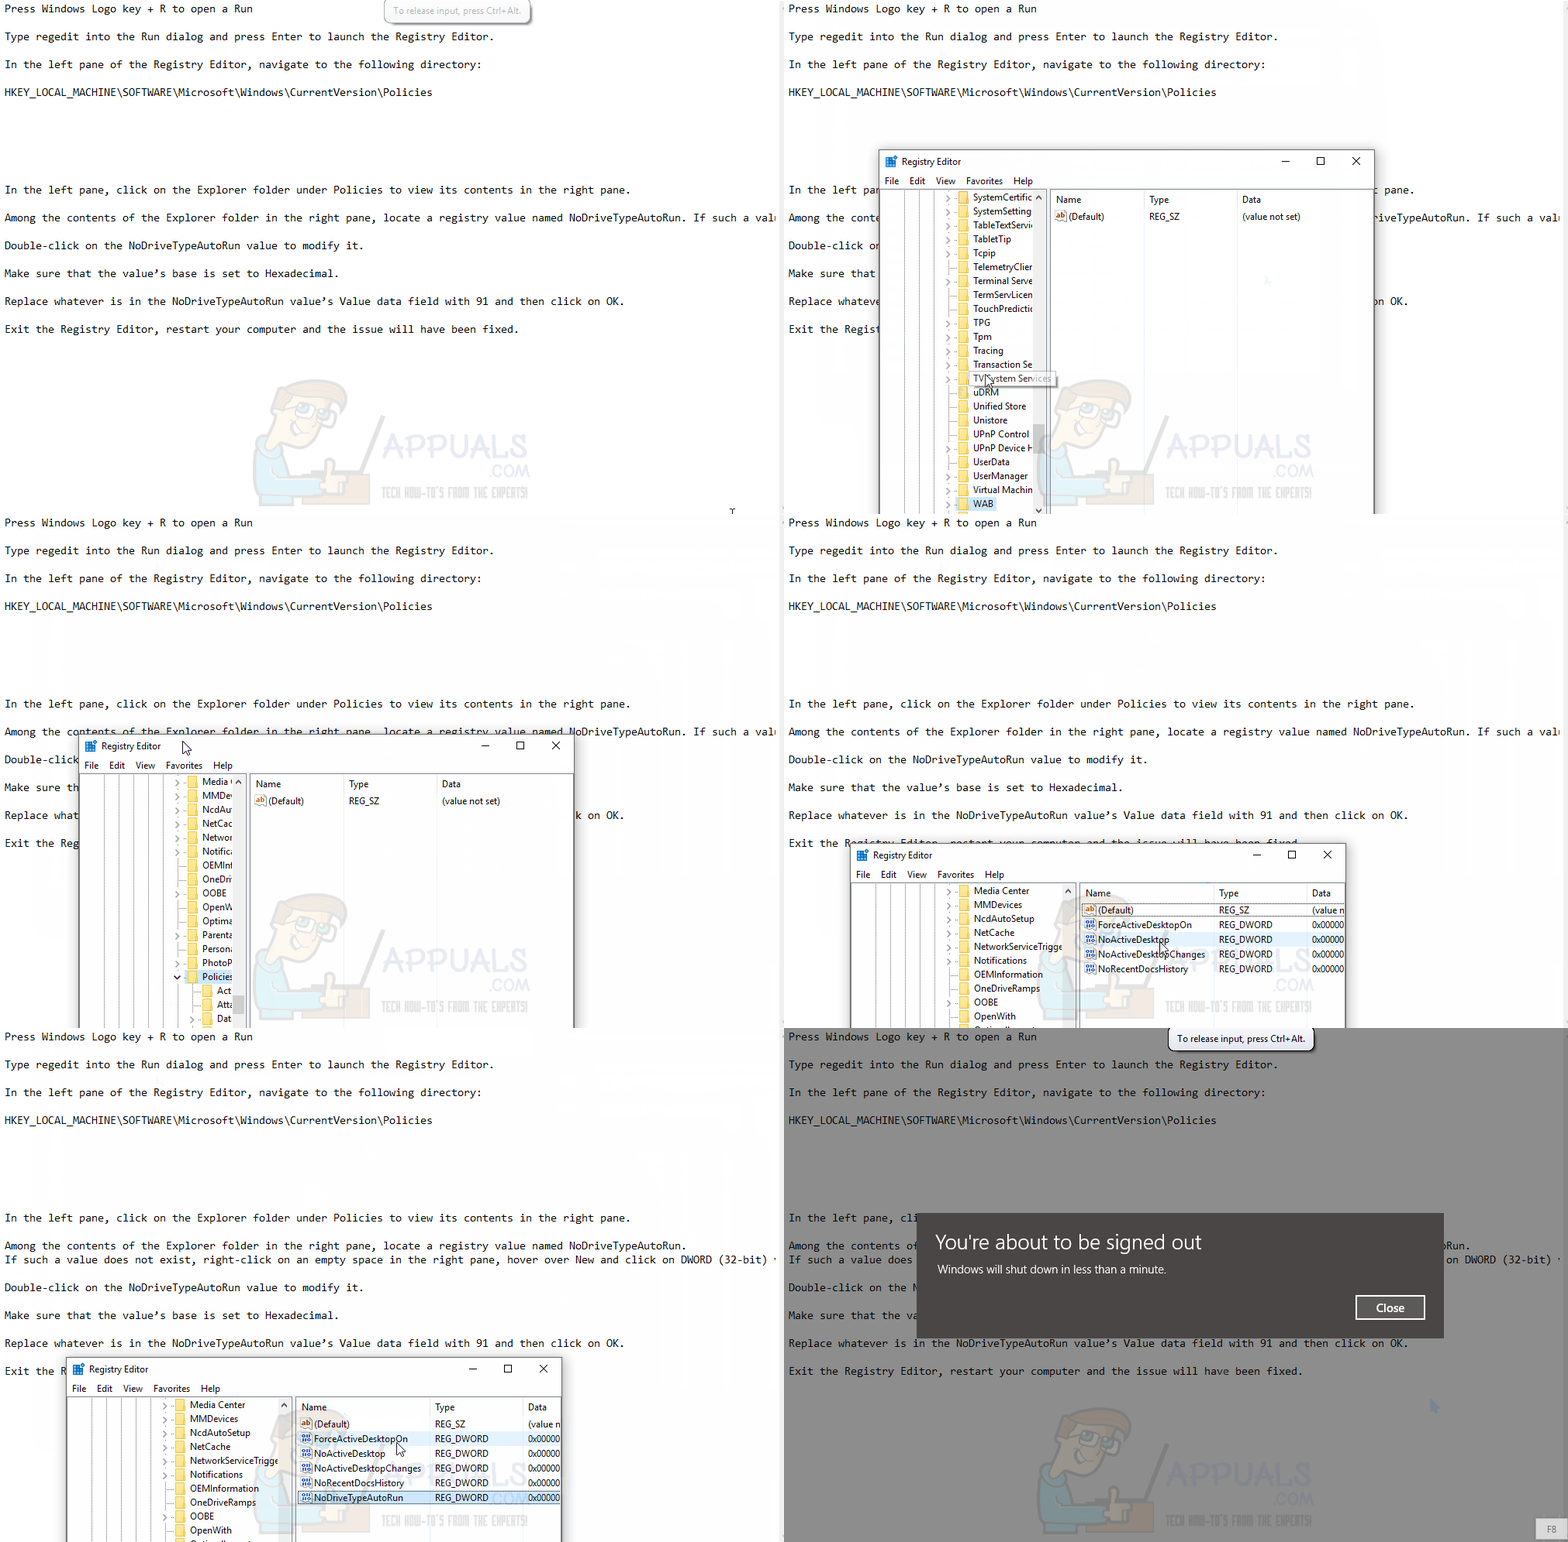
- Press the Windows Logo key + R to open the Run dialog box.
- Type regedit into the Run box and press Enter to open the Registry Editor.
- In the left pane of the Registry Editor, navigate to the following directory:
HKEY_LOCAL_MACHINE\SOFTWARE\Microsoft\Windows\CurrentVersion\Policies
- In the left pane, click on the Explorer folder under Policies to see its contents in the right pane.
- In the right pane, look for a value named NoDriveTypeAutoRun. If you don’t see it, right-click on an empty area in the right pane, hover over New, and click on DWORD (32-bit) Value. Name the new value NoDriveTypeAutoRun.
- Double-click the NoDriveTypeAutoRun value to edit it.
- Make sure the Base option is set to Hexadecimal.
- Replace whatever is currently in the Value data field with 91, then click OK.

- Exit the Registry Editor, restart your computer, and the issue should be resolved.
2. Use a .REG File to Automatically Fix This Issue
If you’d prefer not to edit the registry manually, you can use a .REG file that will make these changes for you. Here’s how:
- Download the .REG file designed to fix this AutoPlay issue.
Set Default NoDriveTypeAutoRun for Current User

Set Default NoDriveTypeAutoRun for Local Machine
- Go to the folder where you downloaded the .REG file, find it, and double-click to run it.
- When Windows asks for permission to make changes to your registry, click Yes to allow it

- After the .REG file has finished making changes, simply restart your computer. AutoPlay should now work the way you’ve set it up. Once you’re sure everything is working, you can delete the .REG file from your computer.