How to Fix Audio Not Working in Ghost of Tsushima PC?
Audio randomly cuts out during important scenes or gameplay moments in Ghost of Tsushima on PC, making it hard to hear dialogue or enemy sounds and breaking immersion. This problem usually happens because the game’s audio system isn’t working properly. Sometimes, important sounds—like voices or sound effects—don’t play, while other sounds keep working.
The most common reason is a conflict with your computer’s audio settings, spatial audio features, or connected devices (such as the DualSense controller’s built-in audio). Other causes can include switching DLSS settings or changing your audio device in Windows while the game is running.
In this article, we will discuss different ways to solve this error.
1. Switch Audio Output Devices
If your audio device isn’t working in Windows, make sure you’ve selected the correct device. If it works in Windows but not in the game, your in-game audio settings might not be set up correctly.
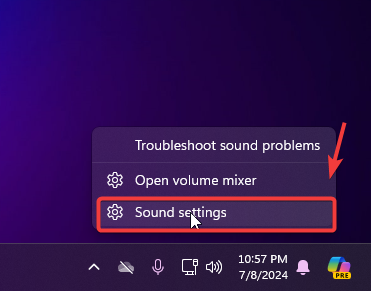
- First, right-click the speaker icon in your system tray and select Sound Settings.
- Make sure the correct audio output device is selected in Windows if you have no sound outside the game.
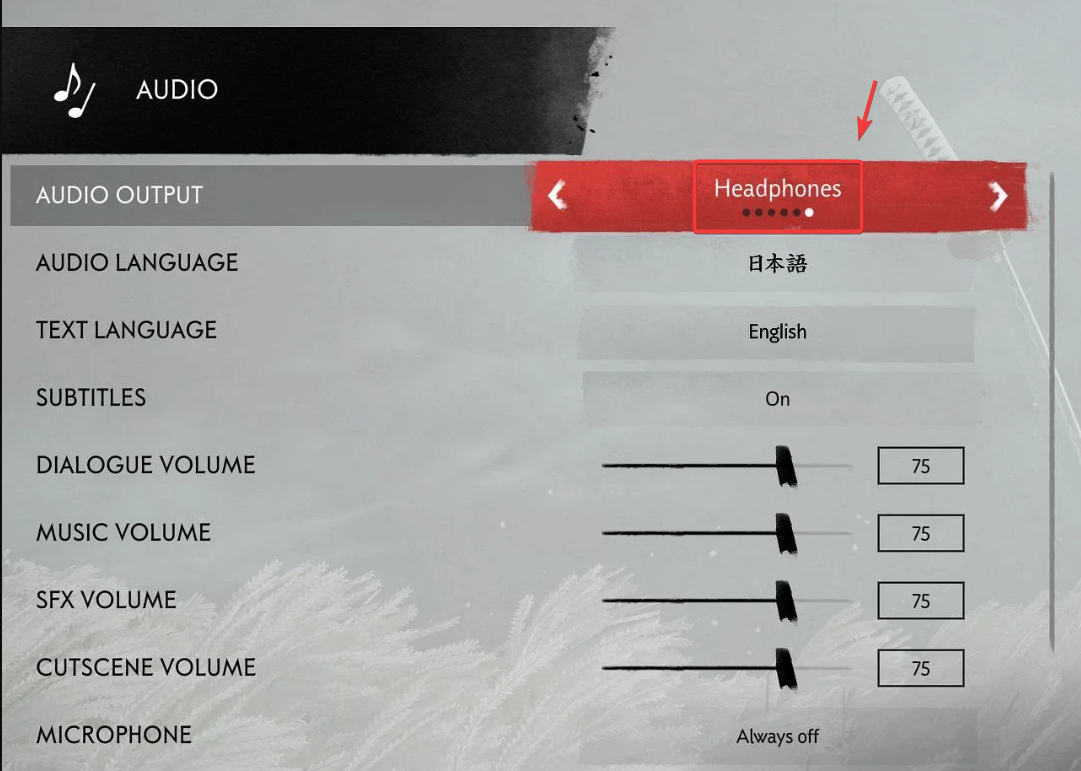
- If sound works outside the game, launch Ghost of Tsushima and open the Audio settings. Change the Audio Device option to Headphones.
- Check to see if your audio issue is fixed.
2. Turn Off Audio Enhancements
Audio Enhancements are intended to improve your sound quality, but sometimes they can interfere with game audio. Turning off these enhancements makes sure your audio signal passes through without unnecessary changes.
- Right-click the Sound Icon and select Sound Settings.
- Scroll down and click More Sound Settings.
- Right-click your Speaker device and select Properties.
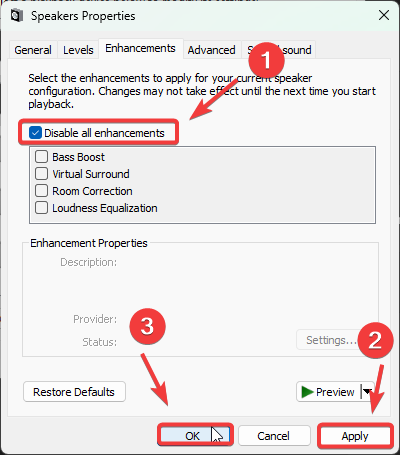
- Go to the Enhancements tab and select Disable All.
- Click Apply and then OK to save your changes.
- Test your audio again to see if the issue is solved.
3. Set Bitrate to DVD Quality
Selecting DVD quality ensures better compatibility and helps avoid problems that can affect game sound. By setting the bitrate to DVD quality (16-bit, 48000 Hz), you reduce the risk of audio errors and improve your overall sound experience. If you’re still having trouble, try this step next.
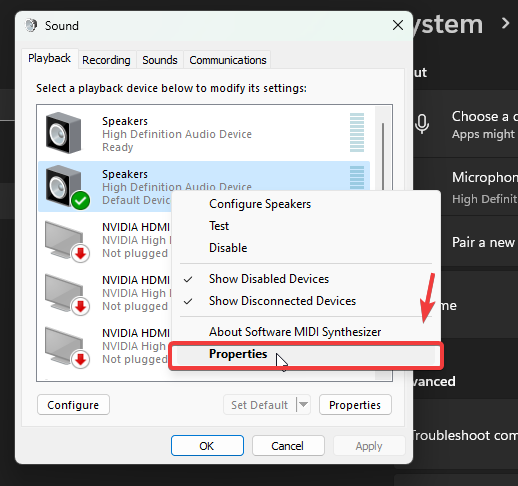
- Right-click the Sound icon and select Sound Settings. Scroll to the bottom and click More Sound Settings.
- Under the Playback tab, right-click your Speaker and choose Properties.
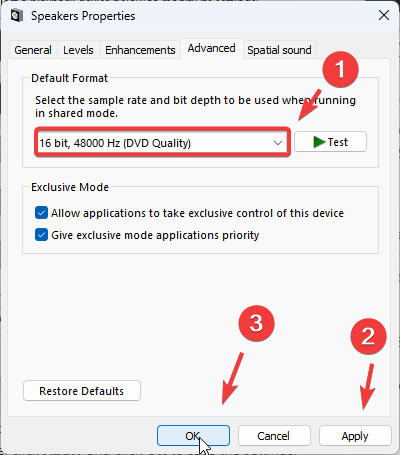
- Go to the Advanced tab.
- Select DVD Quality (16-bit, 48000 Hz).
- Click Apply and then OK to save changes.
- Restart the game and check to see if your audio works.
4. Reinstall Audio Drivers
If you’re still experiencing issues, you might need to reinstall your audio driver. Sometimes, drivers can become outdated, corrupted, or incompatible with updates. Reinstalling the driver ensures you have the latest version and can fix hidden audio problems.
- Press the Win key and type Device Manager.
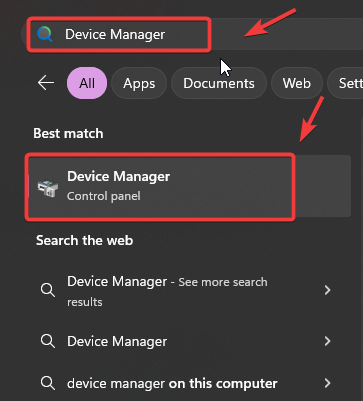
- Press Enter to open Device Manager.
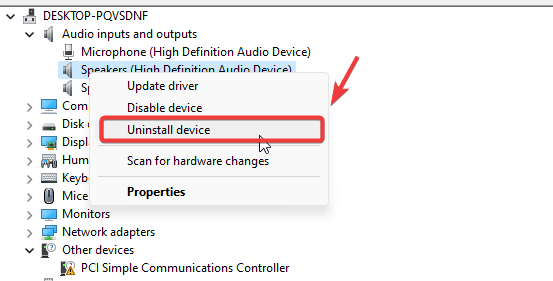
- Expand the Audio, inputs, and outputs section. Right-click your speaker device and select Uninstall device.
- In the pop-up, click Uninstall to confirm.
- Restart your PC. Windows should automatically reinstall the correct driver, or you can download the latest driver for your audio device (for example, Realtek) and install it manually.
- Once done, test your game audio again.


