How to Archive Emails Across Outlook 2013, 2016, 2019, 2021 and Outlook 365
Email overload is a common challenge for individuals who frequently engage in digital communication. Archiving emails is an effective solution to declutter your primary inbox and help maintain the performance of your email application. Microsoft Outlook offers a range of archiving options for its users, whether on desktop versions such as Outlook 365, Outlook 2021, Outlook 2019, Outlook 2016, and Outlook 2013, or when accessing your mail via the web or on a mobile device.
Outlook’s desktop versions come with both manual and automatic archiving features, such as the AutoArchive function, which aren’t available on the web or mobile platforms. Meanwhile, Outlook for the web and mobile offers different ways to manage your emails, including customizable inbox rules and swipe actions that can streamline the archiving process.
By default, Outlook stores archived emails indefinitely, though your organization’s retention policies or personal settings might dictate otherwise, leading to automatic deletion after a certain period.
This article outlines several methods to efficiently archive unimportant emails across various Outlook platforms, enhancing the organization and tidiness of your digital workspace. Let’s look at how we can leverage these features depending upon whether we’re using Outlook 365, Outlook 2021, Outlook 2019, Outlook 2016, Outlook 2013, the Outlook web version, or Outlook on mobile devices.
Method 1: Archive Emails Manually
To archive emails manually in Outlook for Web, you can follow a few straightforward steps. This method enables you to curate and organize your emails selectively, resulting in a more organized inbox. Users can archive multiple emails simultaneously and access them later from the Archive folder or by searching for the specific email.
- Visit Outlook.com and log in to your account.
- In the left pane, select the folder containing the emails you intend to archive.
- Select the email(s) you want to archive. Multiple selections can be made on a single page.
- Click the Archive button on the top bar to move selected emails to the archive. Alternatively, you can press E on your keyboard as a shortcut.
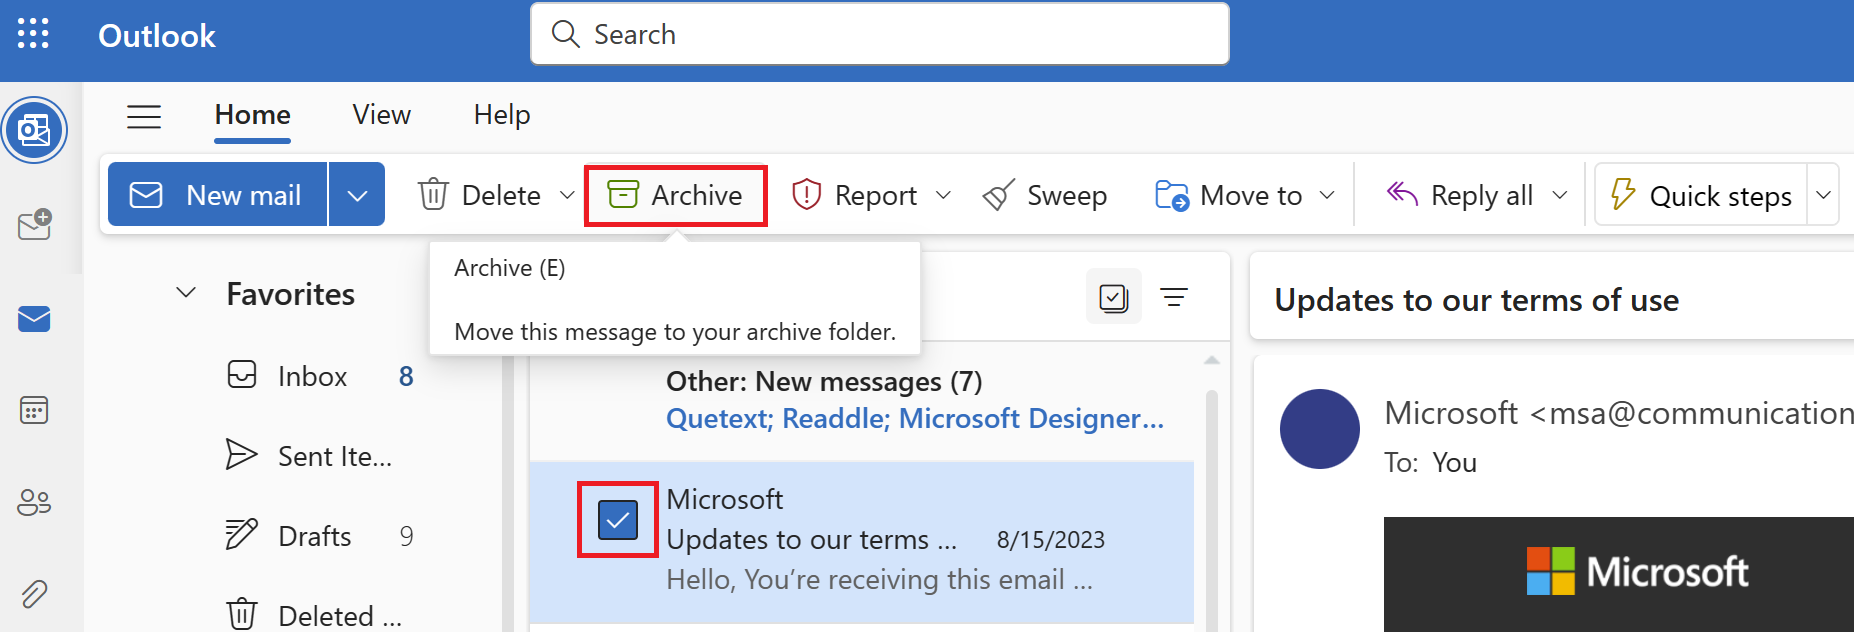
- For archiving a single email, right-click on it and choose Archive from the context menu.

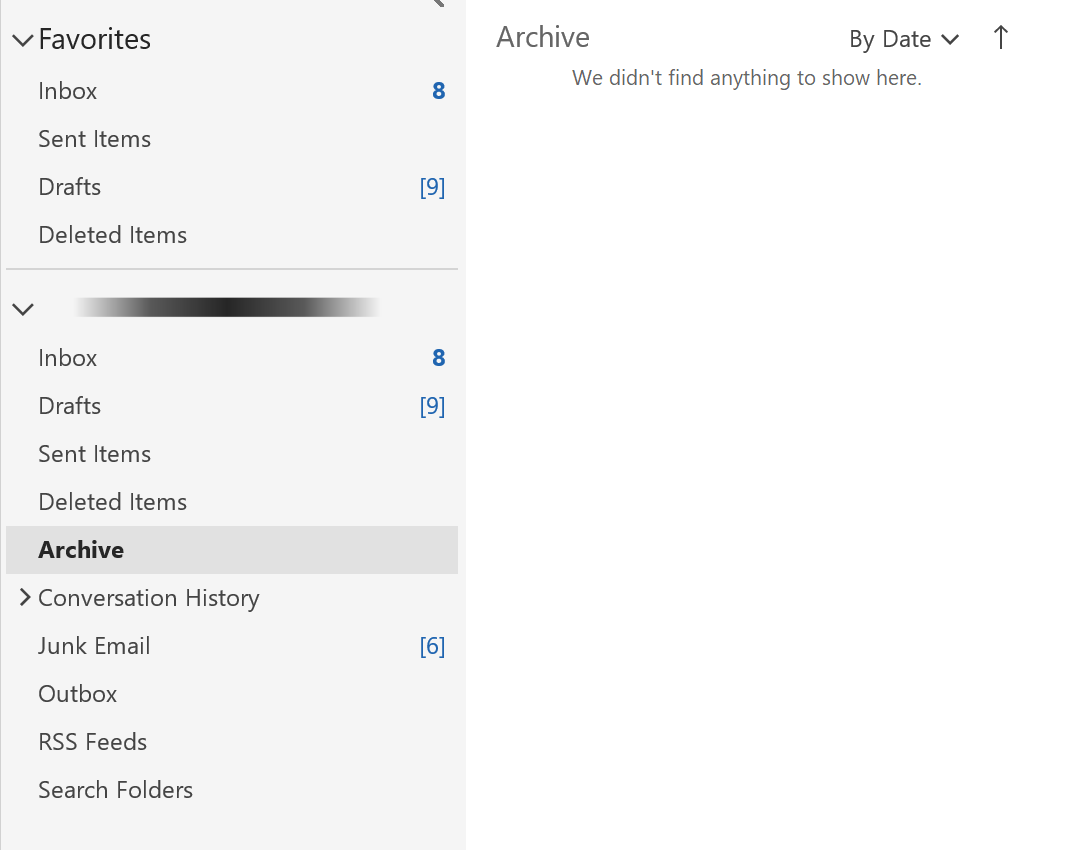
- To view archived emails, navigate to the Archive folder in the left pane.
Method 2: Enable AutoArchive Feature (Desktop Only)
Outlook’s desktop application offers not only manual but also automatic email archiving. AutoArchive is off by default, so you will need to enable and configure it to suit your preferences, such as determining the frequency of archiving or whether to permanently delete old Archive emails.
Once enabled, it will automatically send your emails to the Archive folder at specified intervals, where they’re saved in a separate Archive PST file, distinct from your main PST file. This consolidation into a singular file aids in managing space and organizing Outlook data files.
- Start the Outlook app on your computer.
- Click on the File tab at the top.
- Select Options from the left panel.
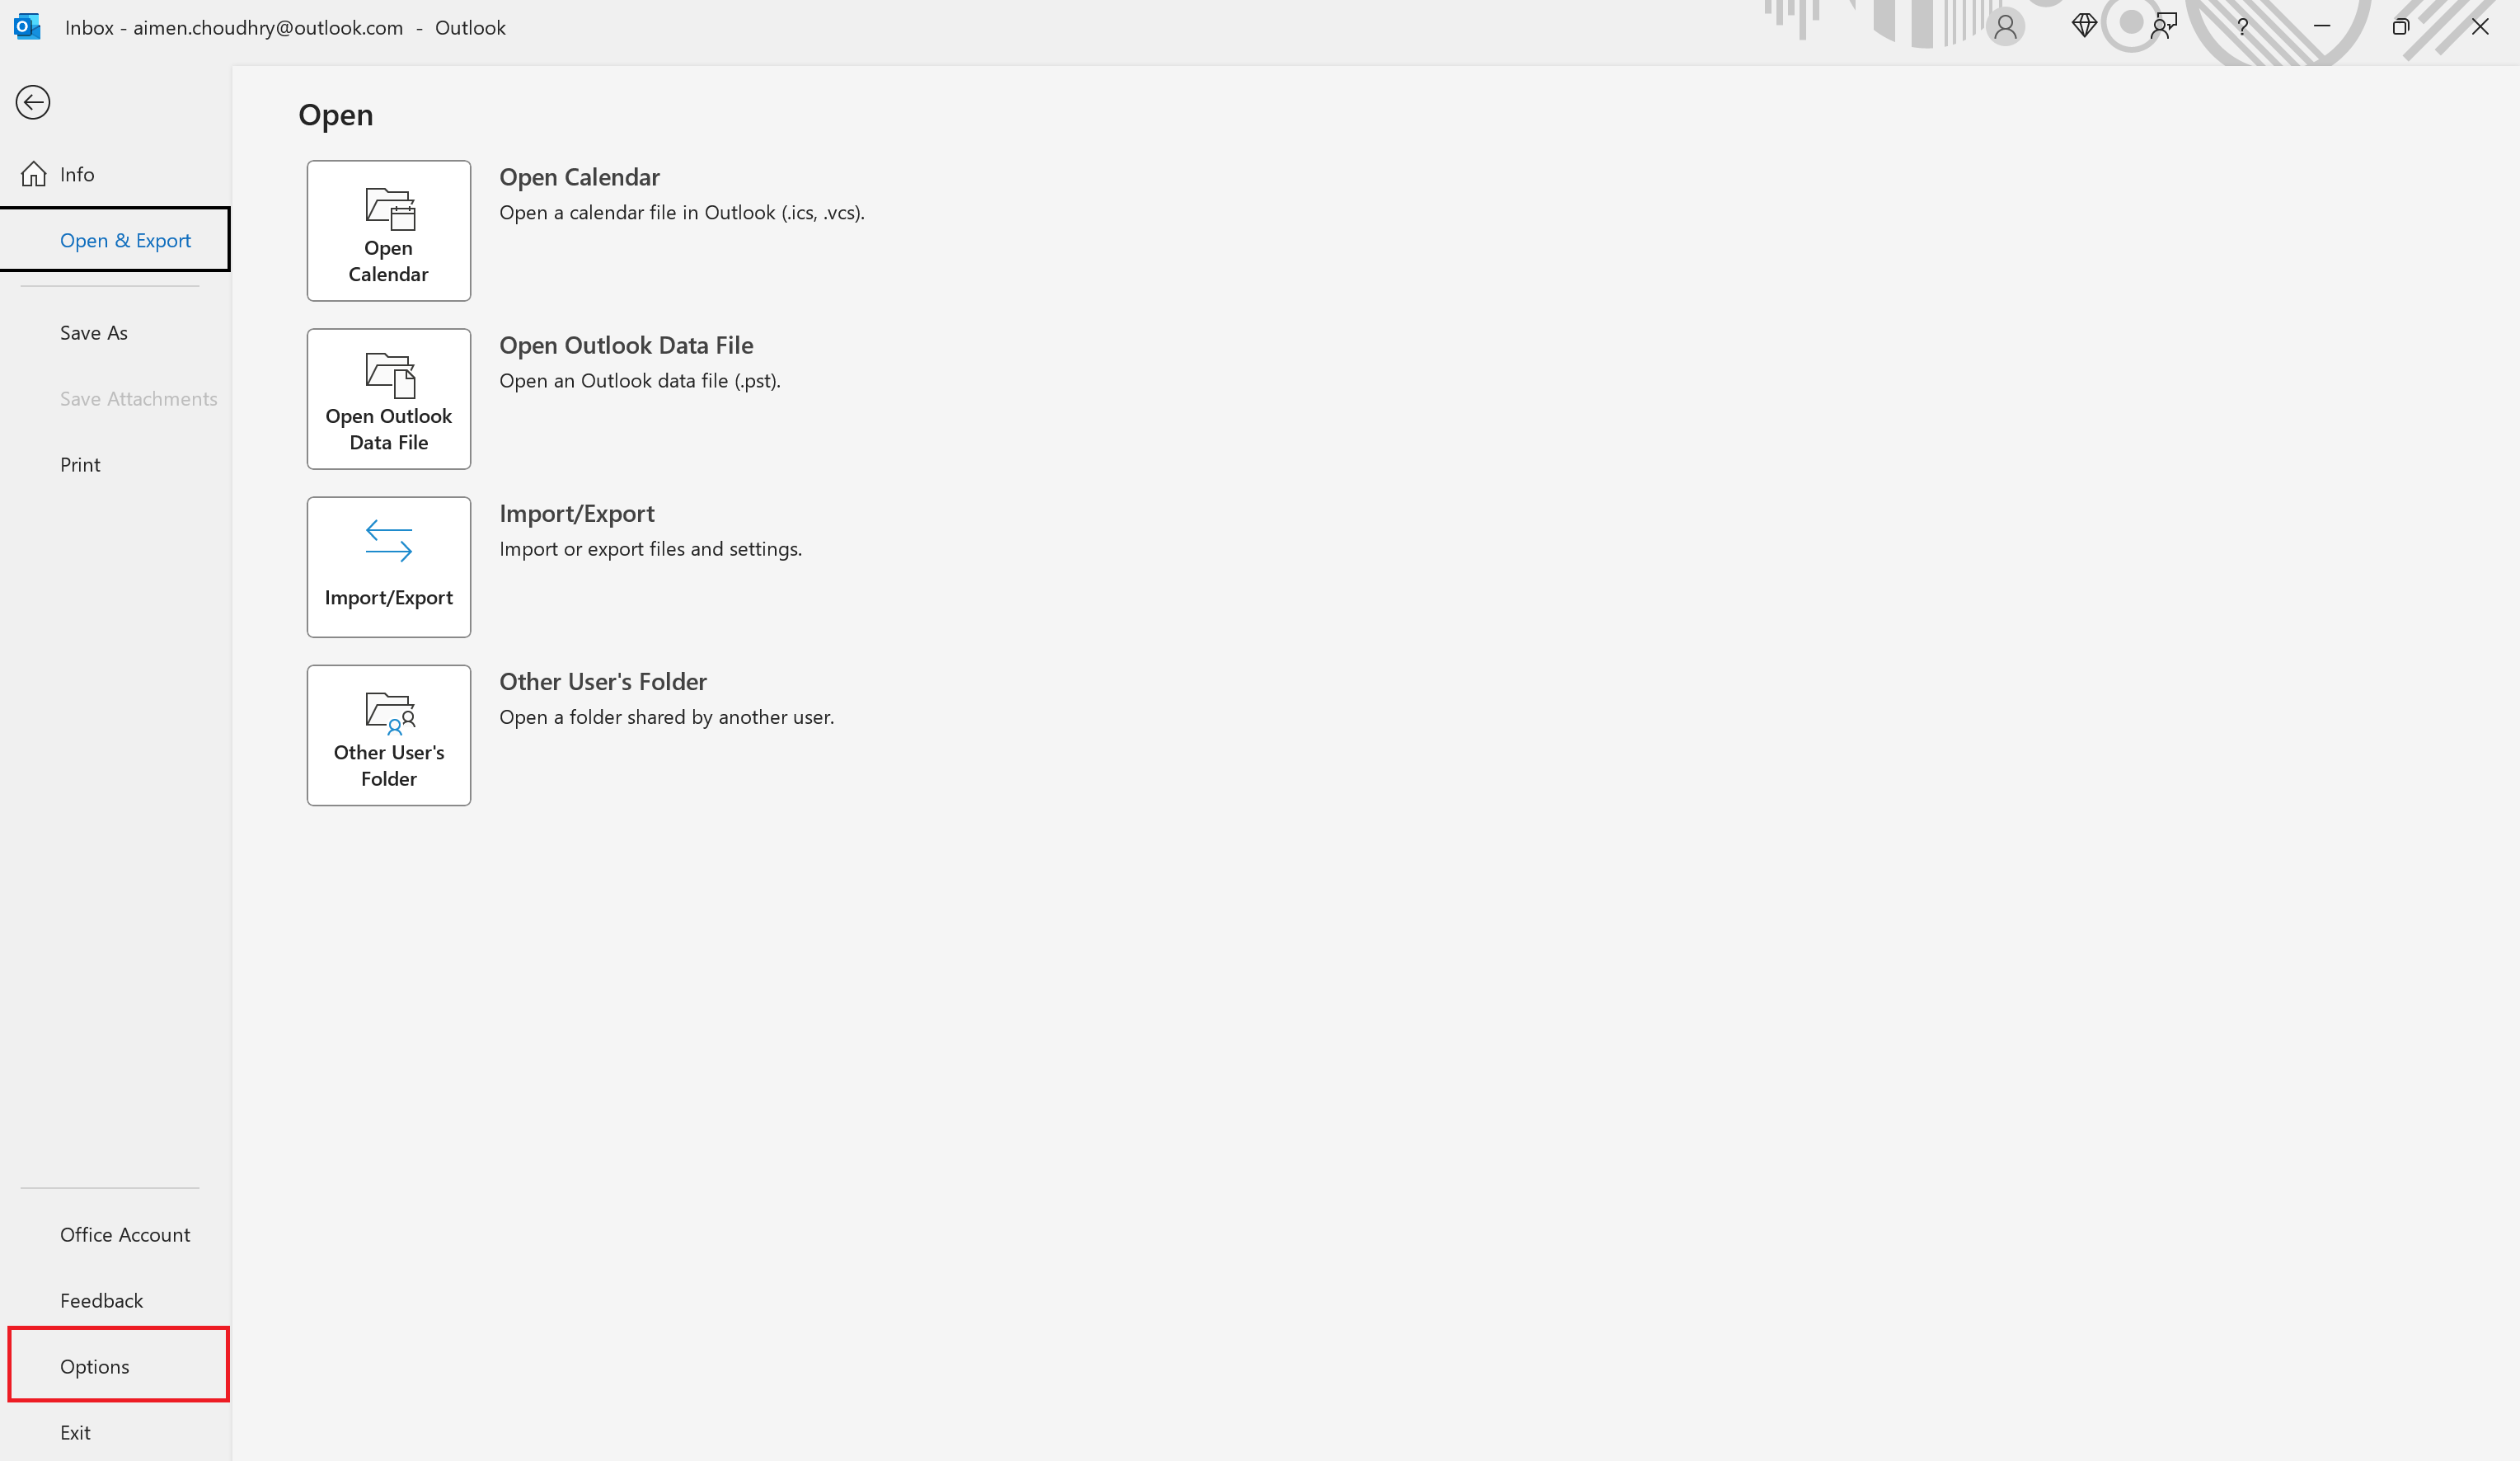
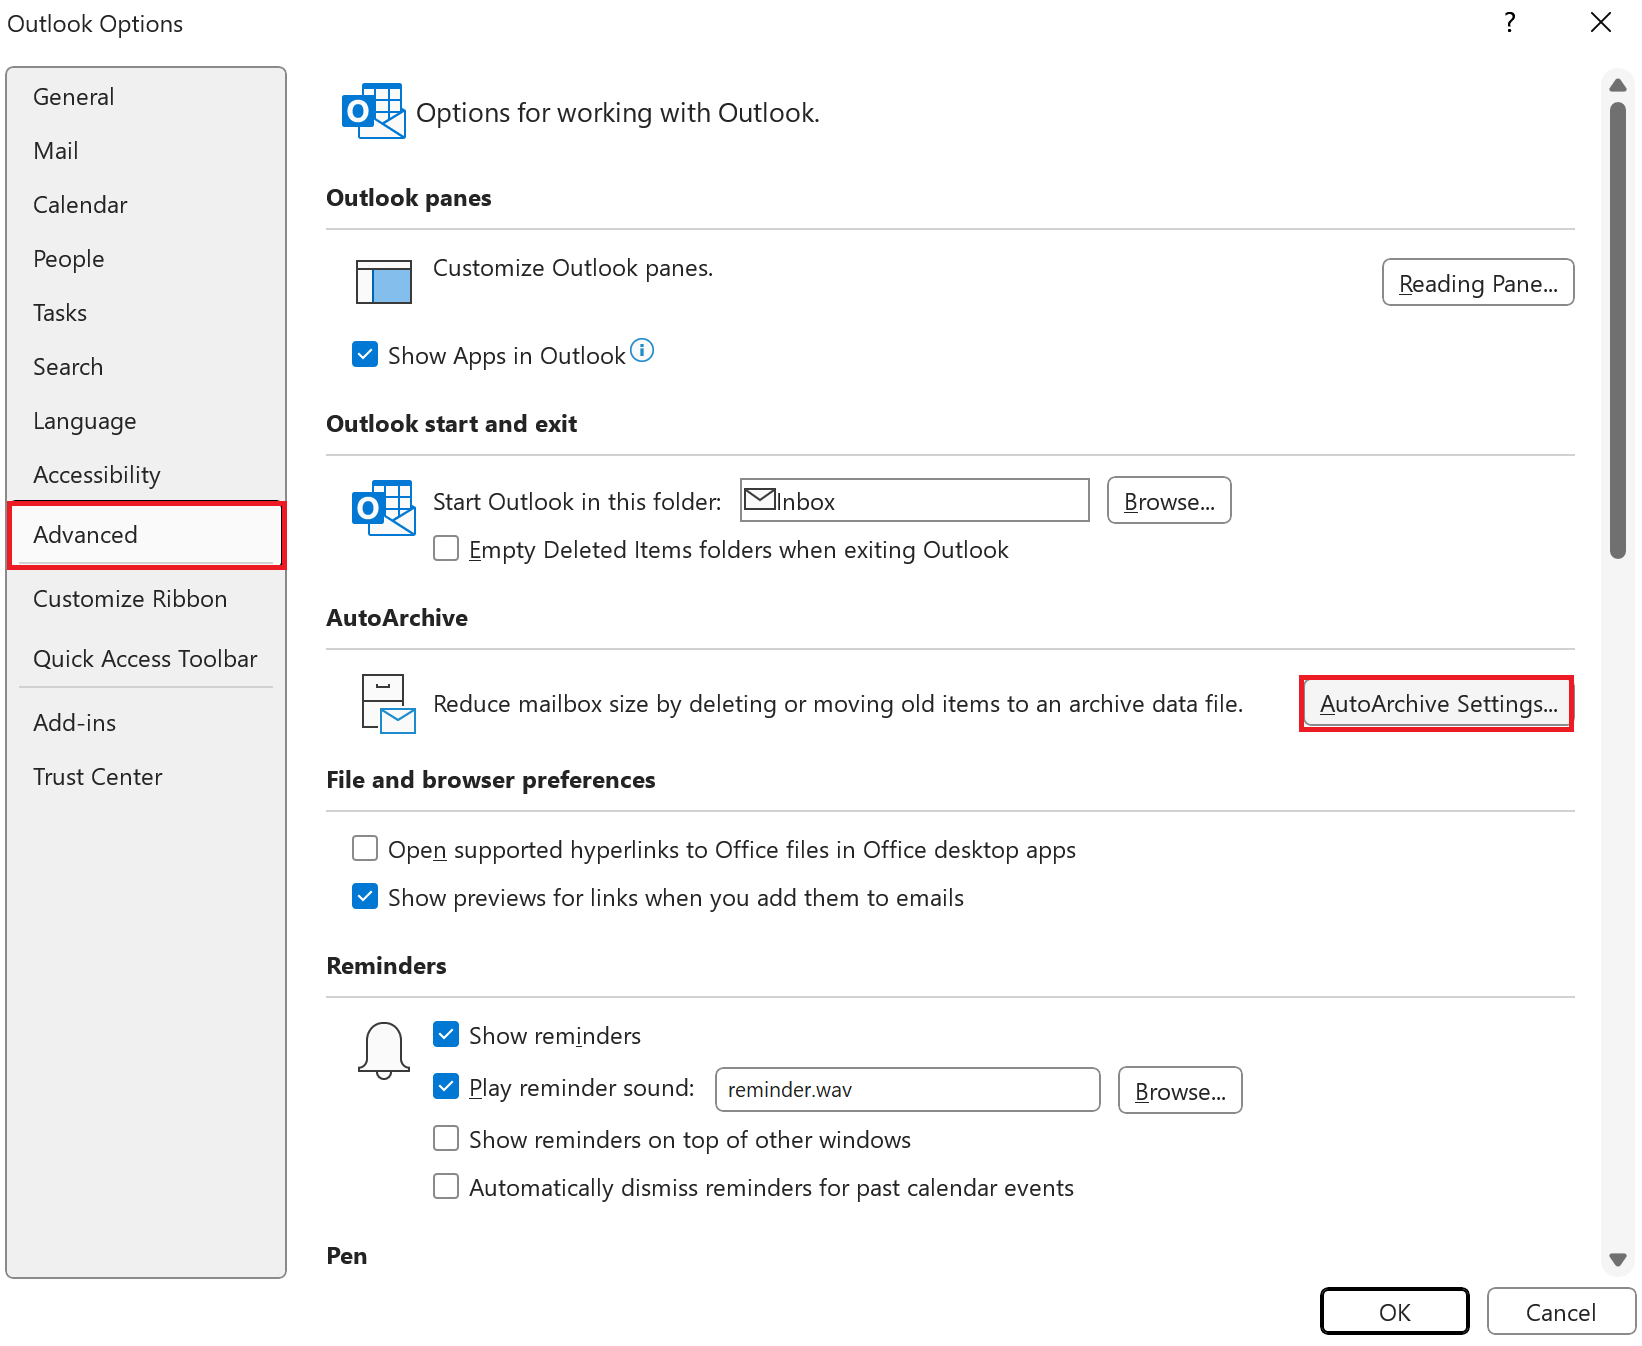
- In the resulting Outlook Options dialog box, choose Advanced from the left panel.
- Next, click the AutoArchive Settings button within the AutoArchive section.
- Tick the box next to the Run AutoArchive every option and determine the schedule for this feature.
- In the Default folder settings for archiving option, set when the items should be archived.
- Click on Browse to indicate where you want to save your archive files.
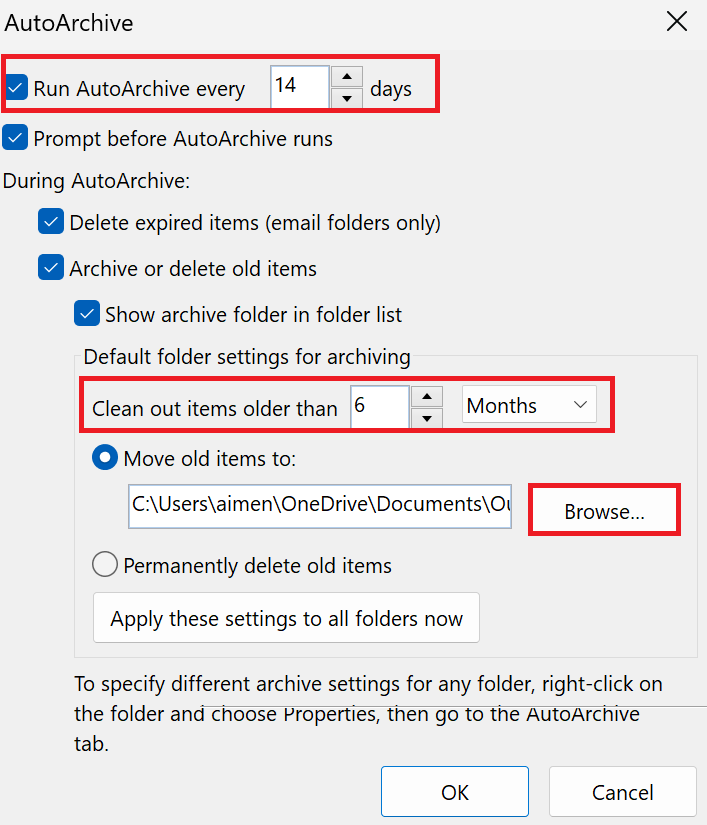
- Click OK to conclude the process.
To modify the settings for a specific folder, here’s what you can do:
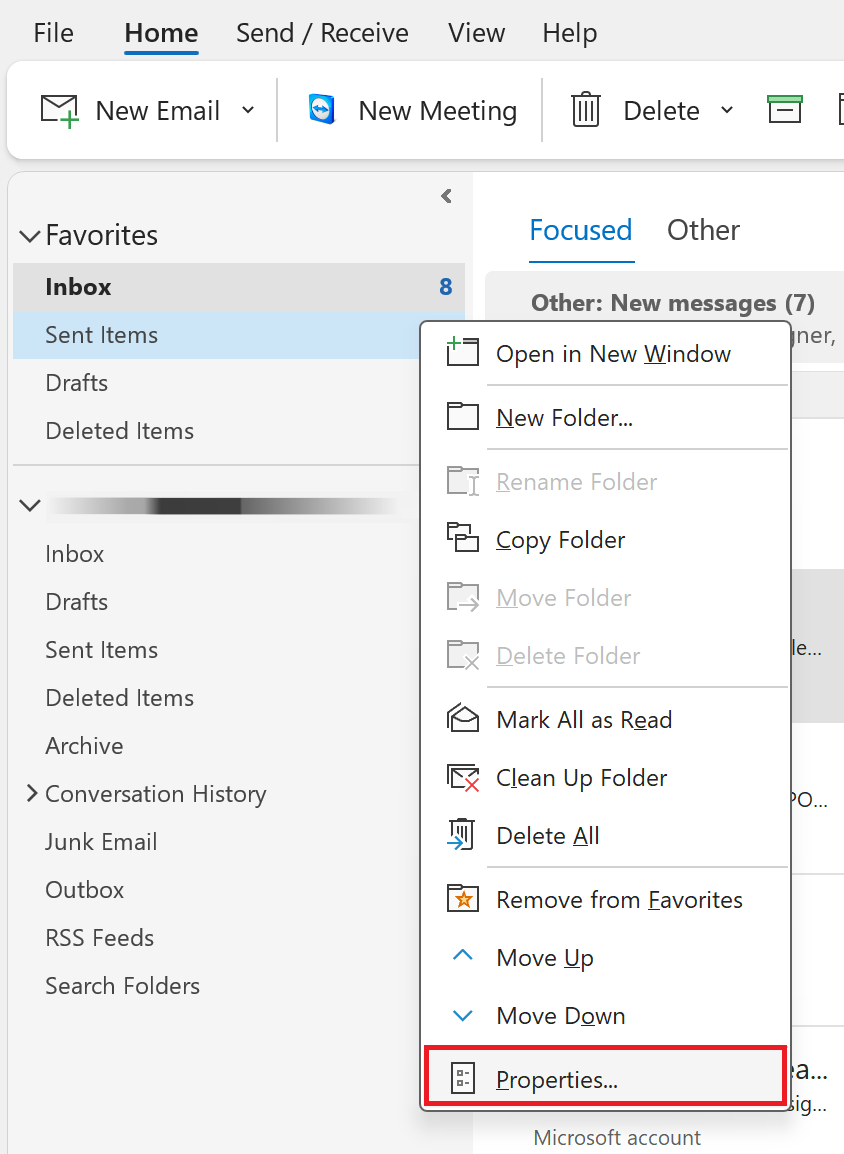
- Right-click on the desired folder and select Properties from the context menu.
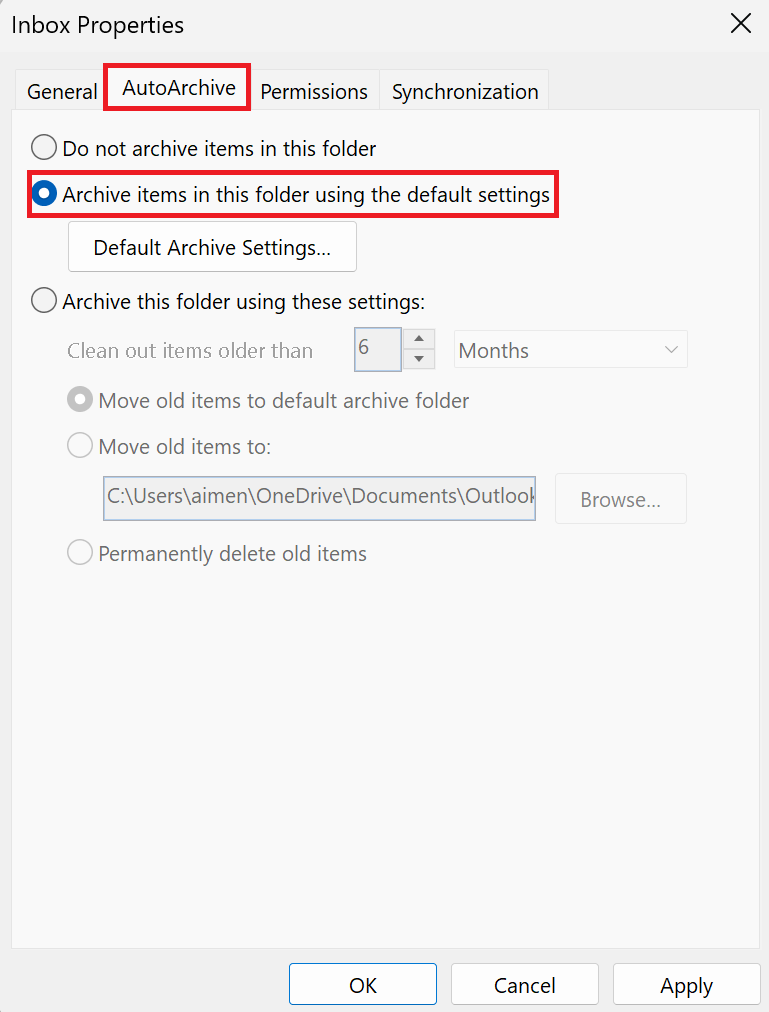
- Switch to the AutoArchive tab. The default option Archive items in this folder using the default settings is selected by default. Leave it unchanged if you want the folder to adhere to the global AutoArchive settings.
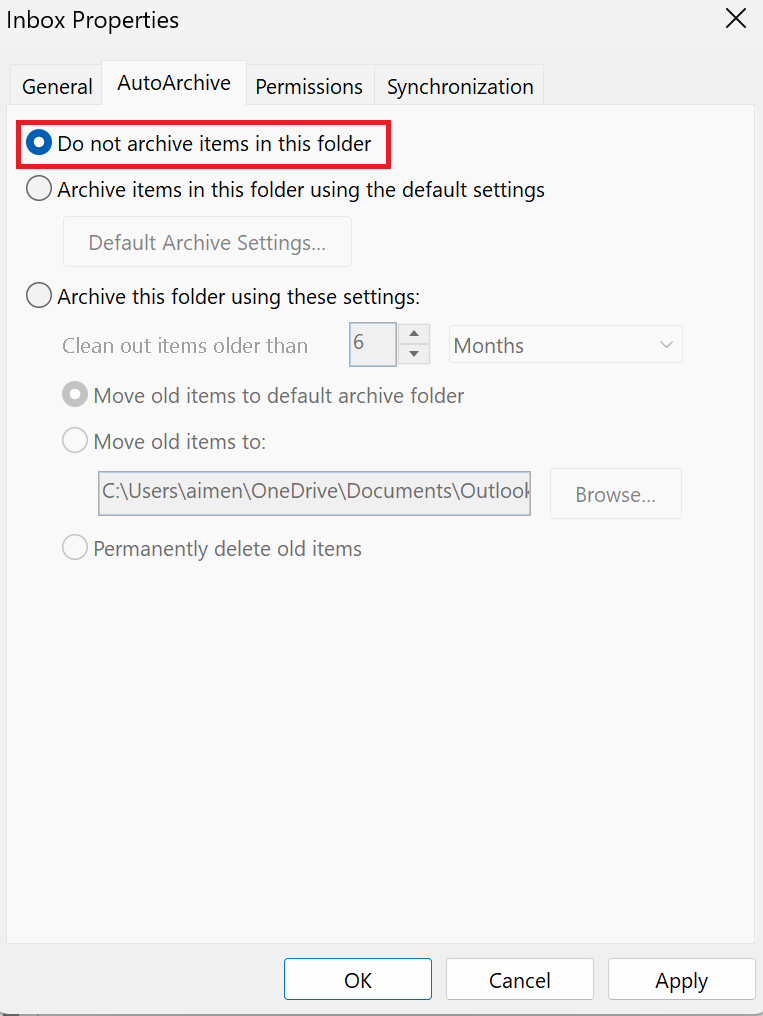
- If you prefer that items remain unarchived unless done manually, choose Do not archive items in this folder.
- To apply different settings exclusively for this folder, select Archive this folder using these settings and adjust as needed, then click Apply and OK to save the changes.

Web and mobile users will need to resort to different strategies for automatic email archiving since the AutoArchive feature is only available on the desktop version.
Method 3: Configure Swipe Actions to Archive on Outlook Mobile
Although the mobile version of the Outlook app doesn’t have the AutoArchive feature, it does support configurable swipe actions to expedite the archiving of emails. This efficient method enables mobile users to archive messages effortlessly with a simple swipe.
- Open the Outlook app on your device.
- Tap the Outlook icon in the top left corner to reveal a panel, then tap the Settings gear icon at the bottom left.

- Scroll to the Mail section and select Swipe options.
- Choose either Swipe left or Swipe right and set the action to Archive.

You can now archive emails using this gesture rather than selecting each email individually.
Method 4: Create an Inbox Rule
For those who use Outlook Web to receive and send emails and prefer a single-click approach to archive older messages, creating an inbox rule can be advantageous. This process allows you to add tailor-made actions with specific conditions so that the rule targets certain emails only.
- Access your inbox by visiting Outlook web.
- Select the View tab, and click on View Settings.
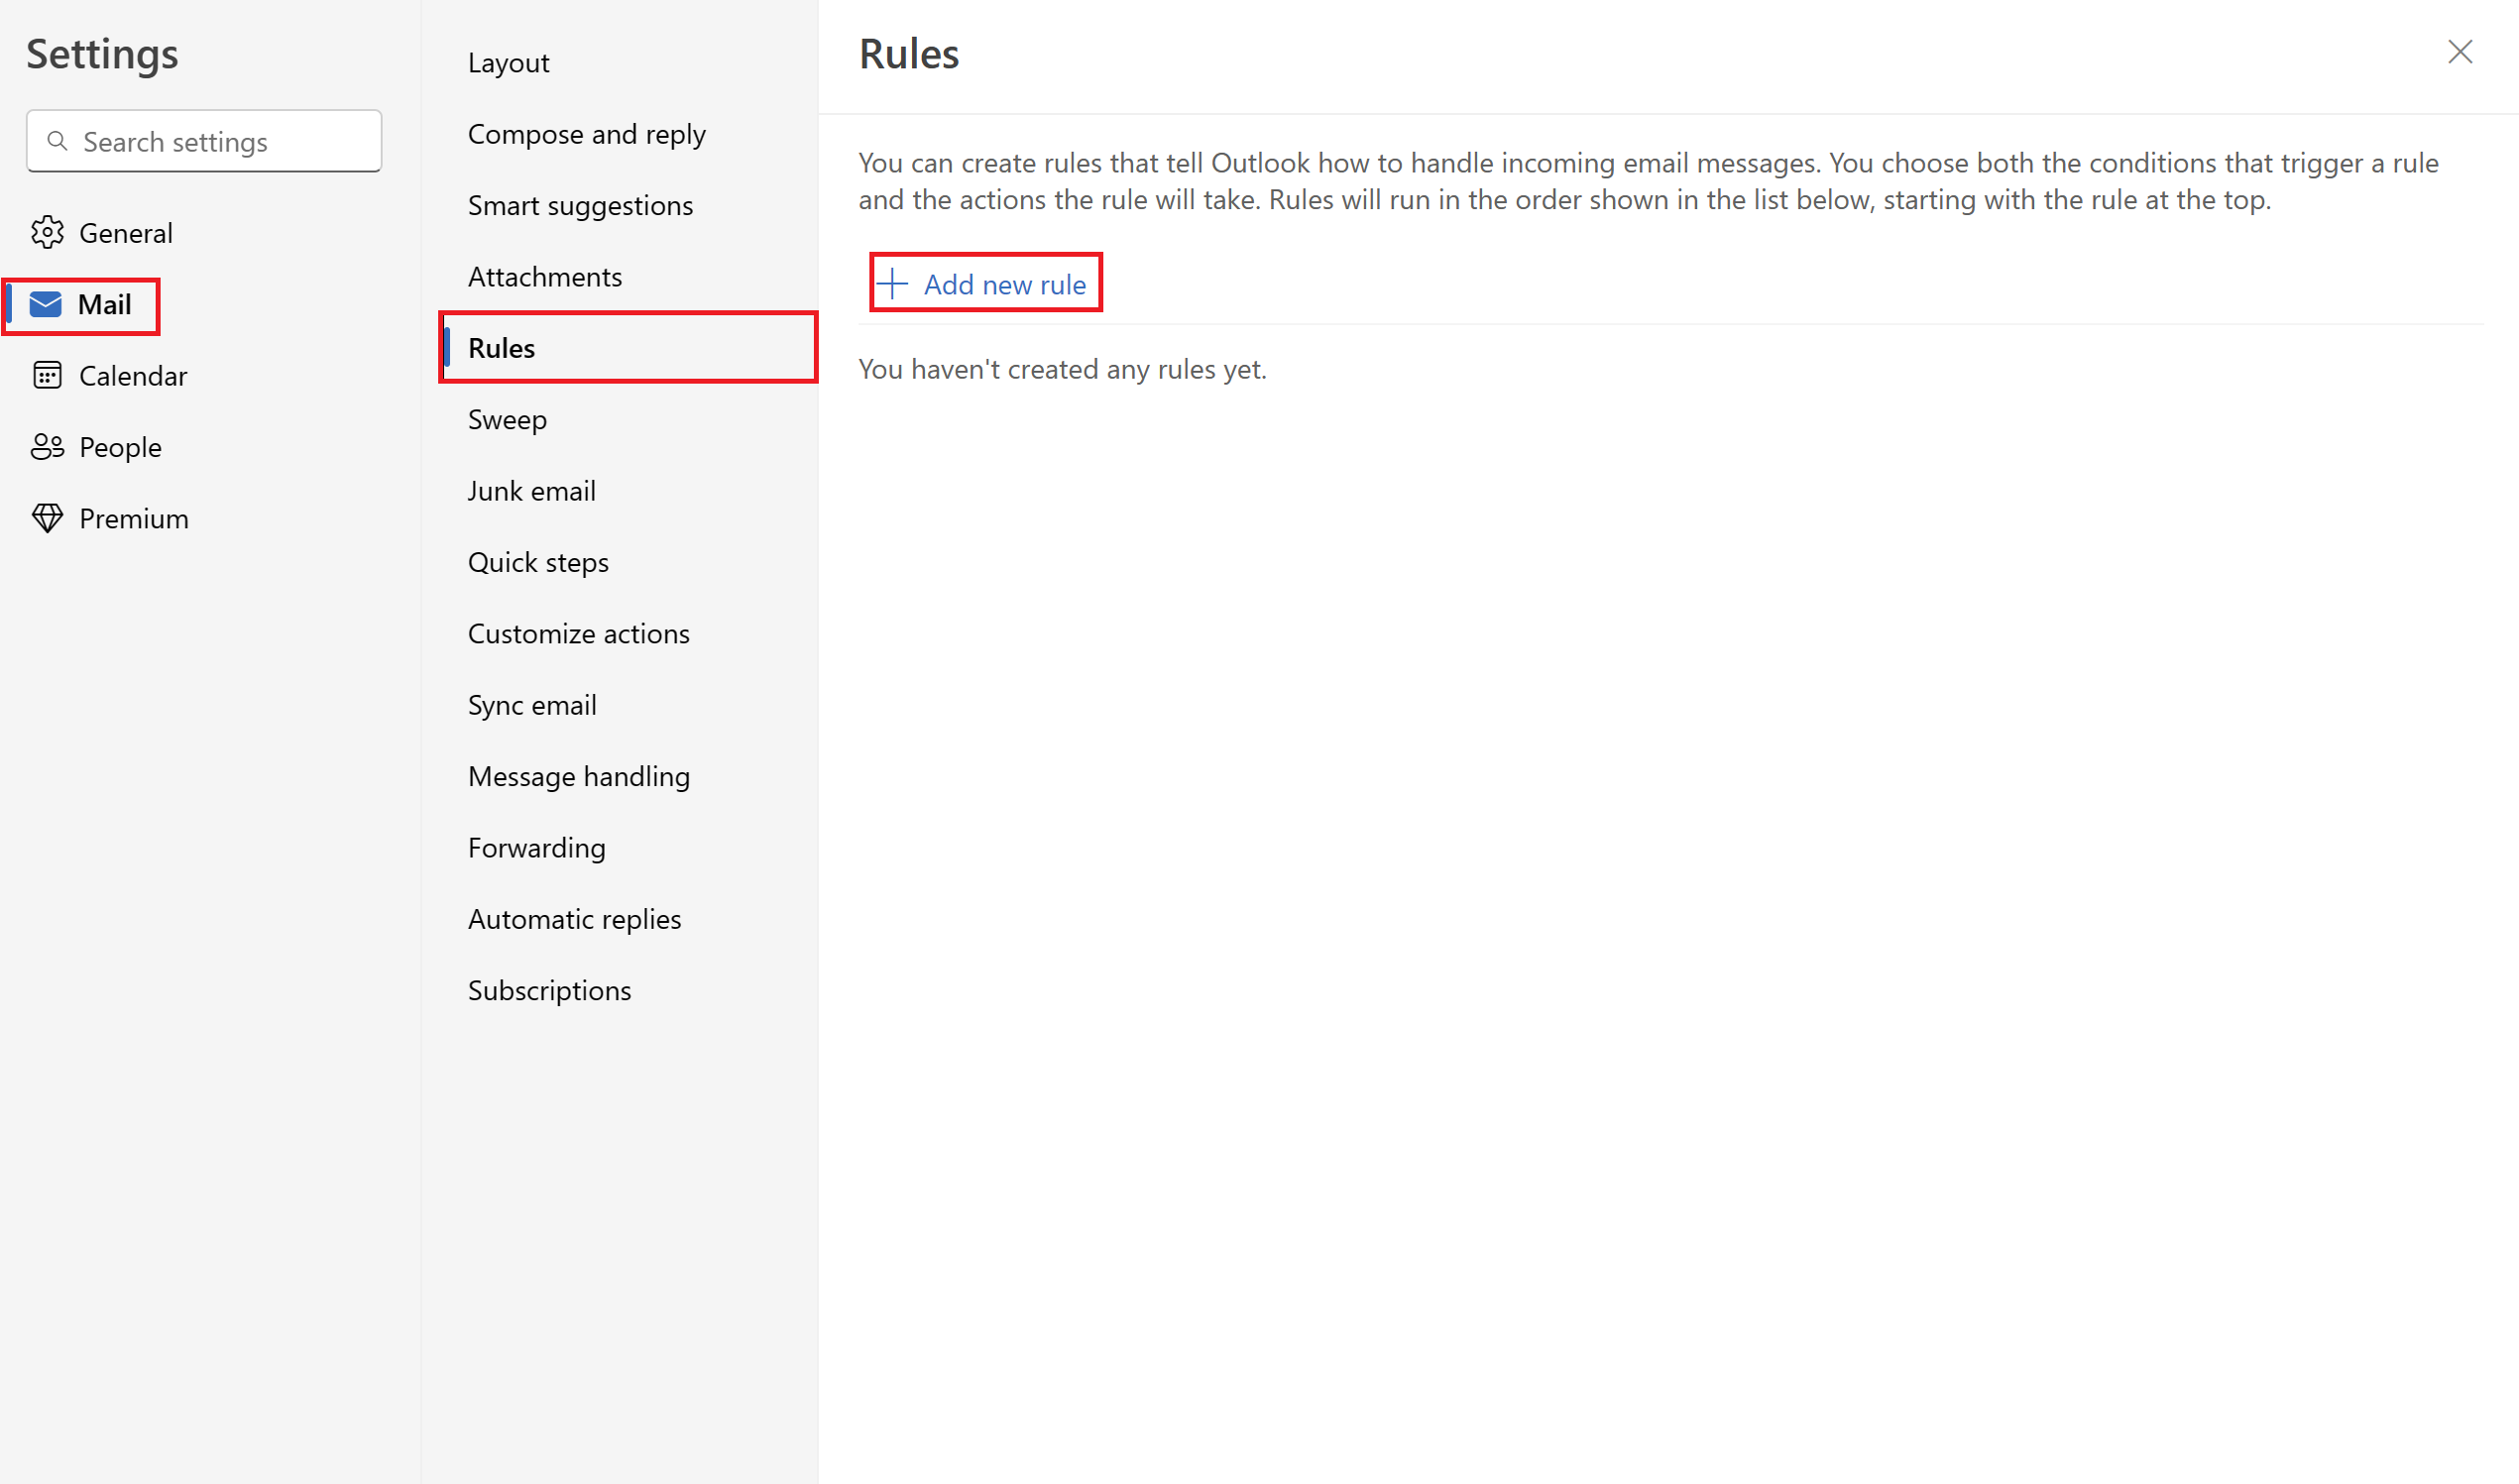
- Click on Mail and then on Rules.
- In the right panel, click on Add new rule.
- Give your rule a name. Select Add an action followed by Move to. Then choose a folder by clicking on Select a folder and pick the Archive folder.
- Specify the emails to which this rule will apply in the Add a condition field, or select Apply to all messages. To define an exception, click on Add an exception.
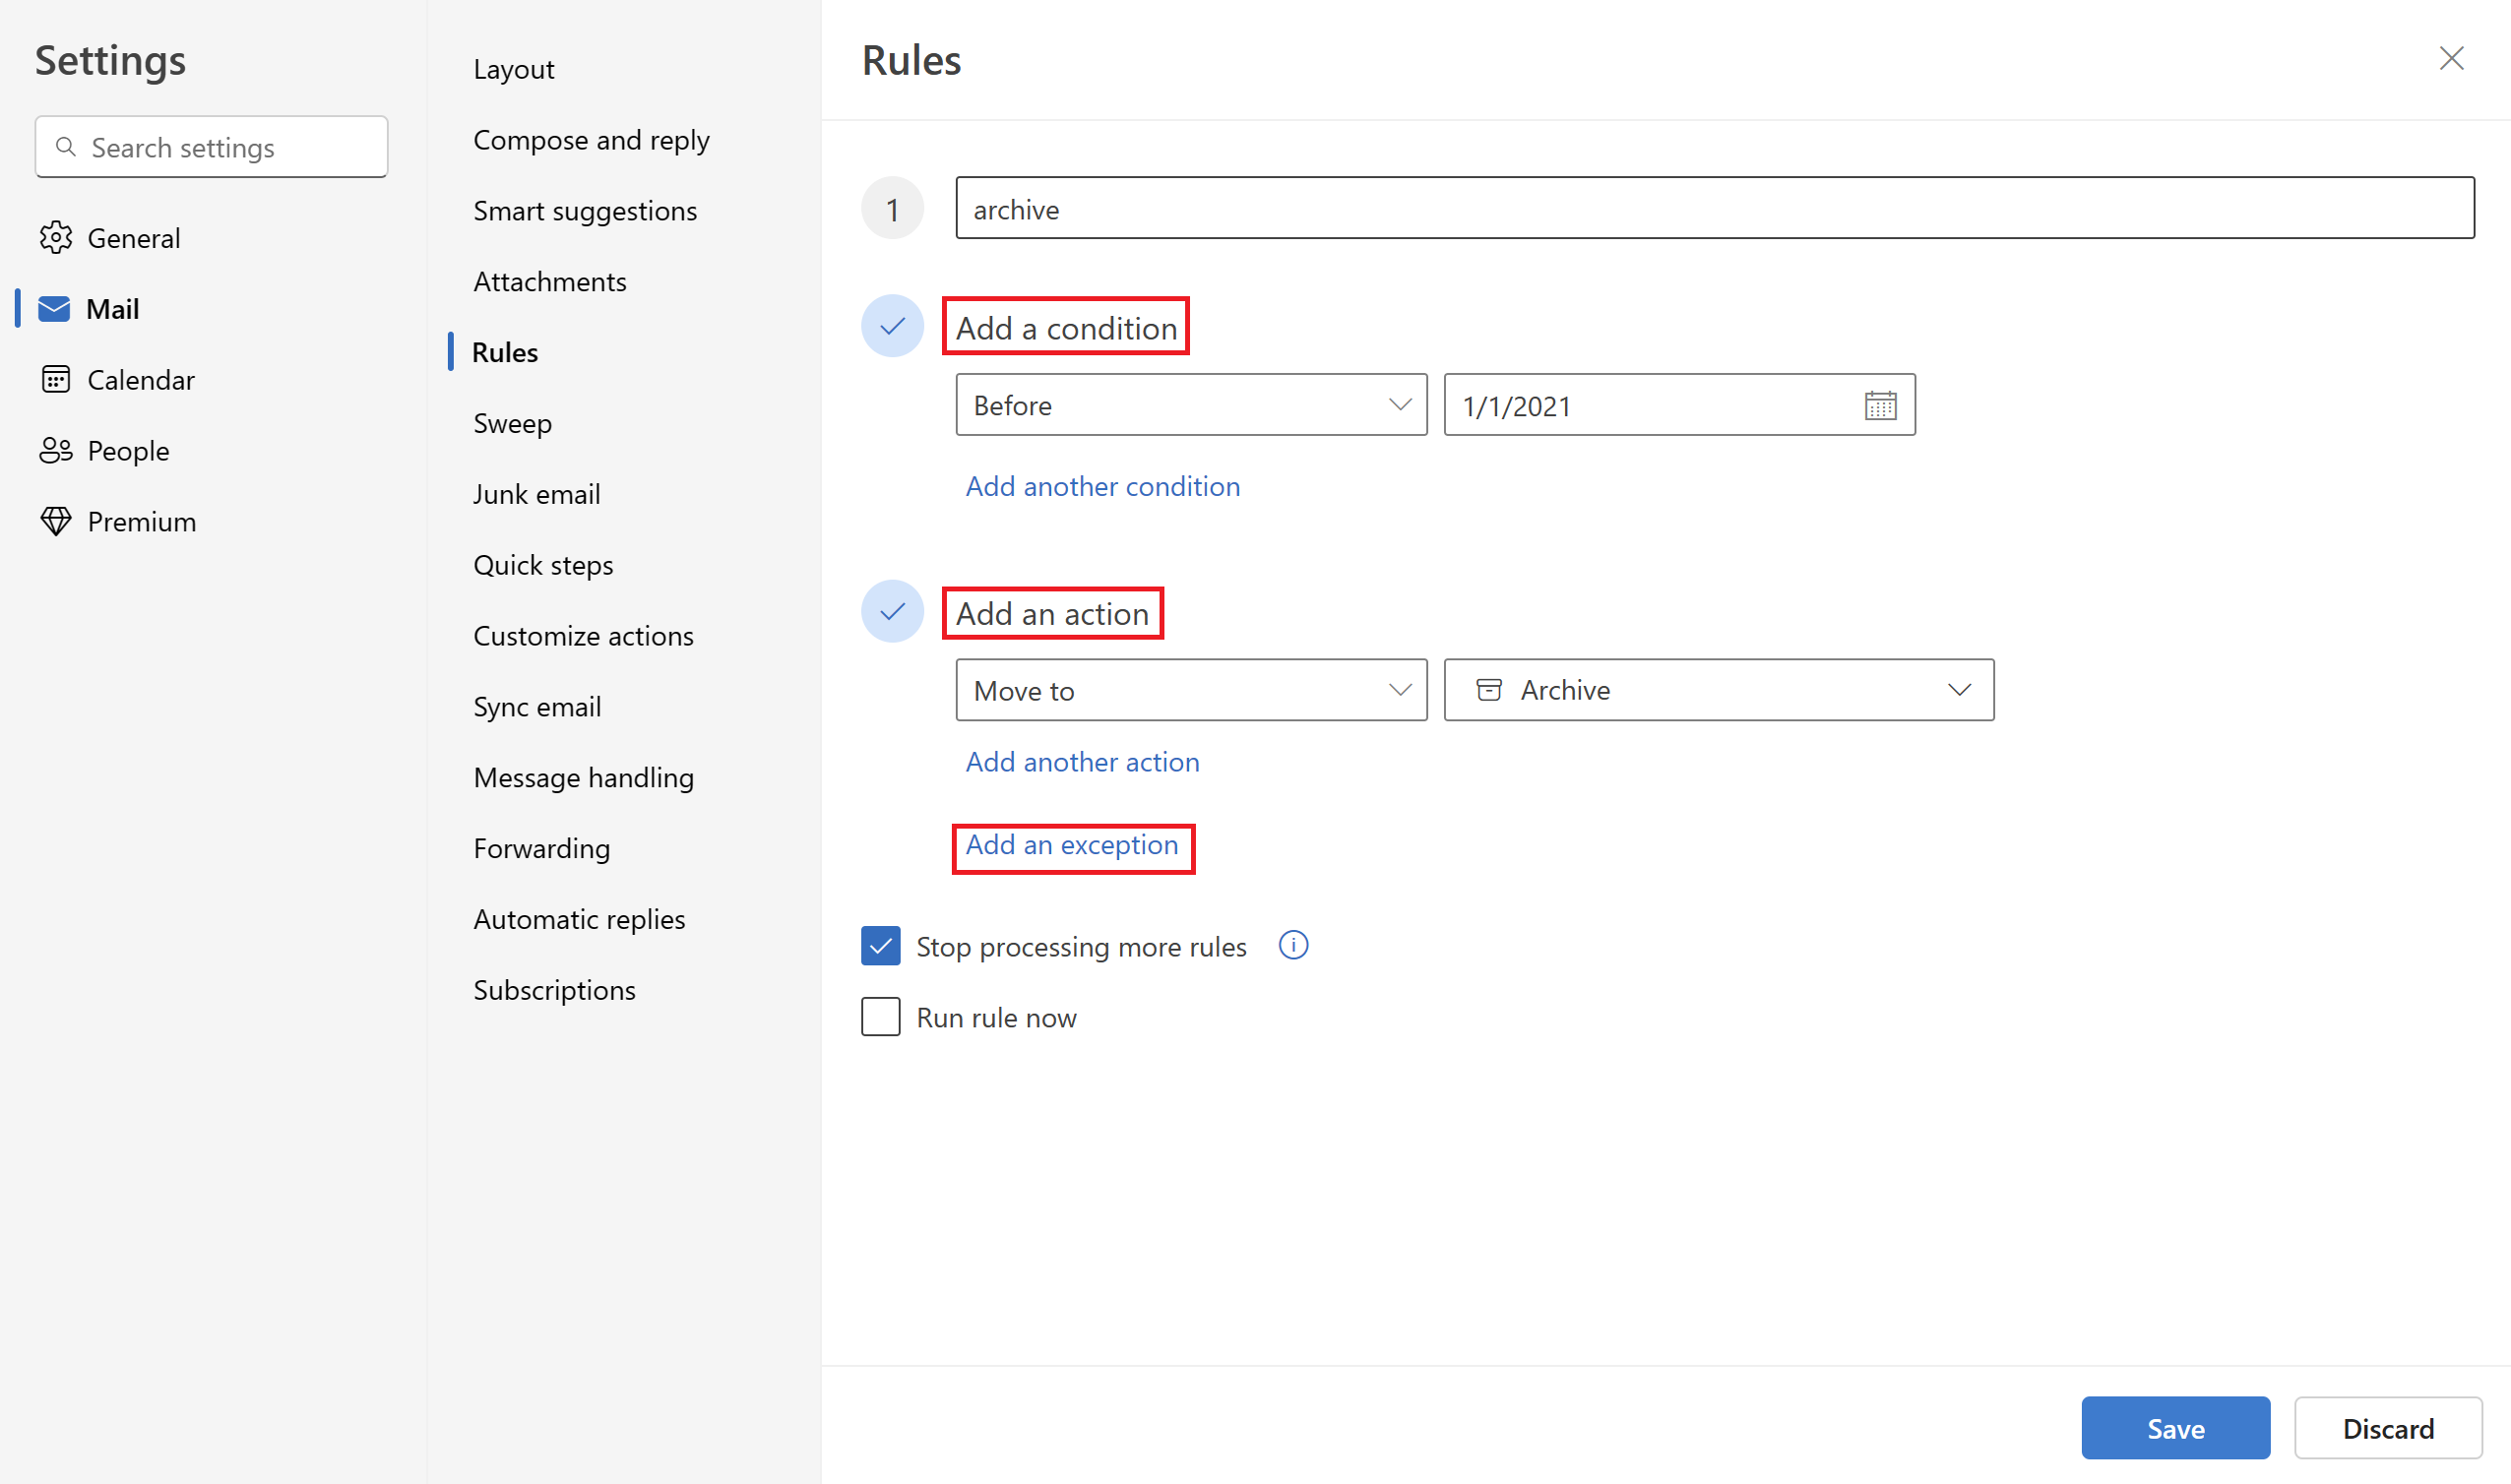
- Click Save once you’ve configured the rule.
Additionally, you can add an inbox rule in the Outlook desktop app, although the steps may slightly differ.
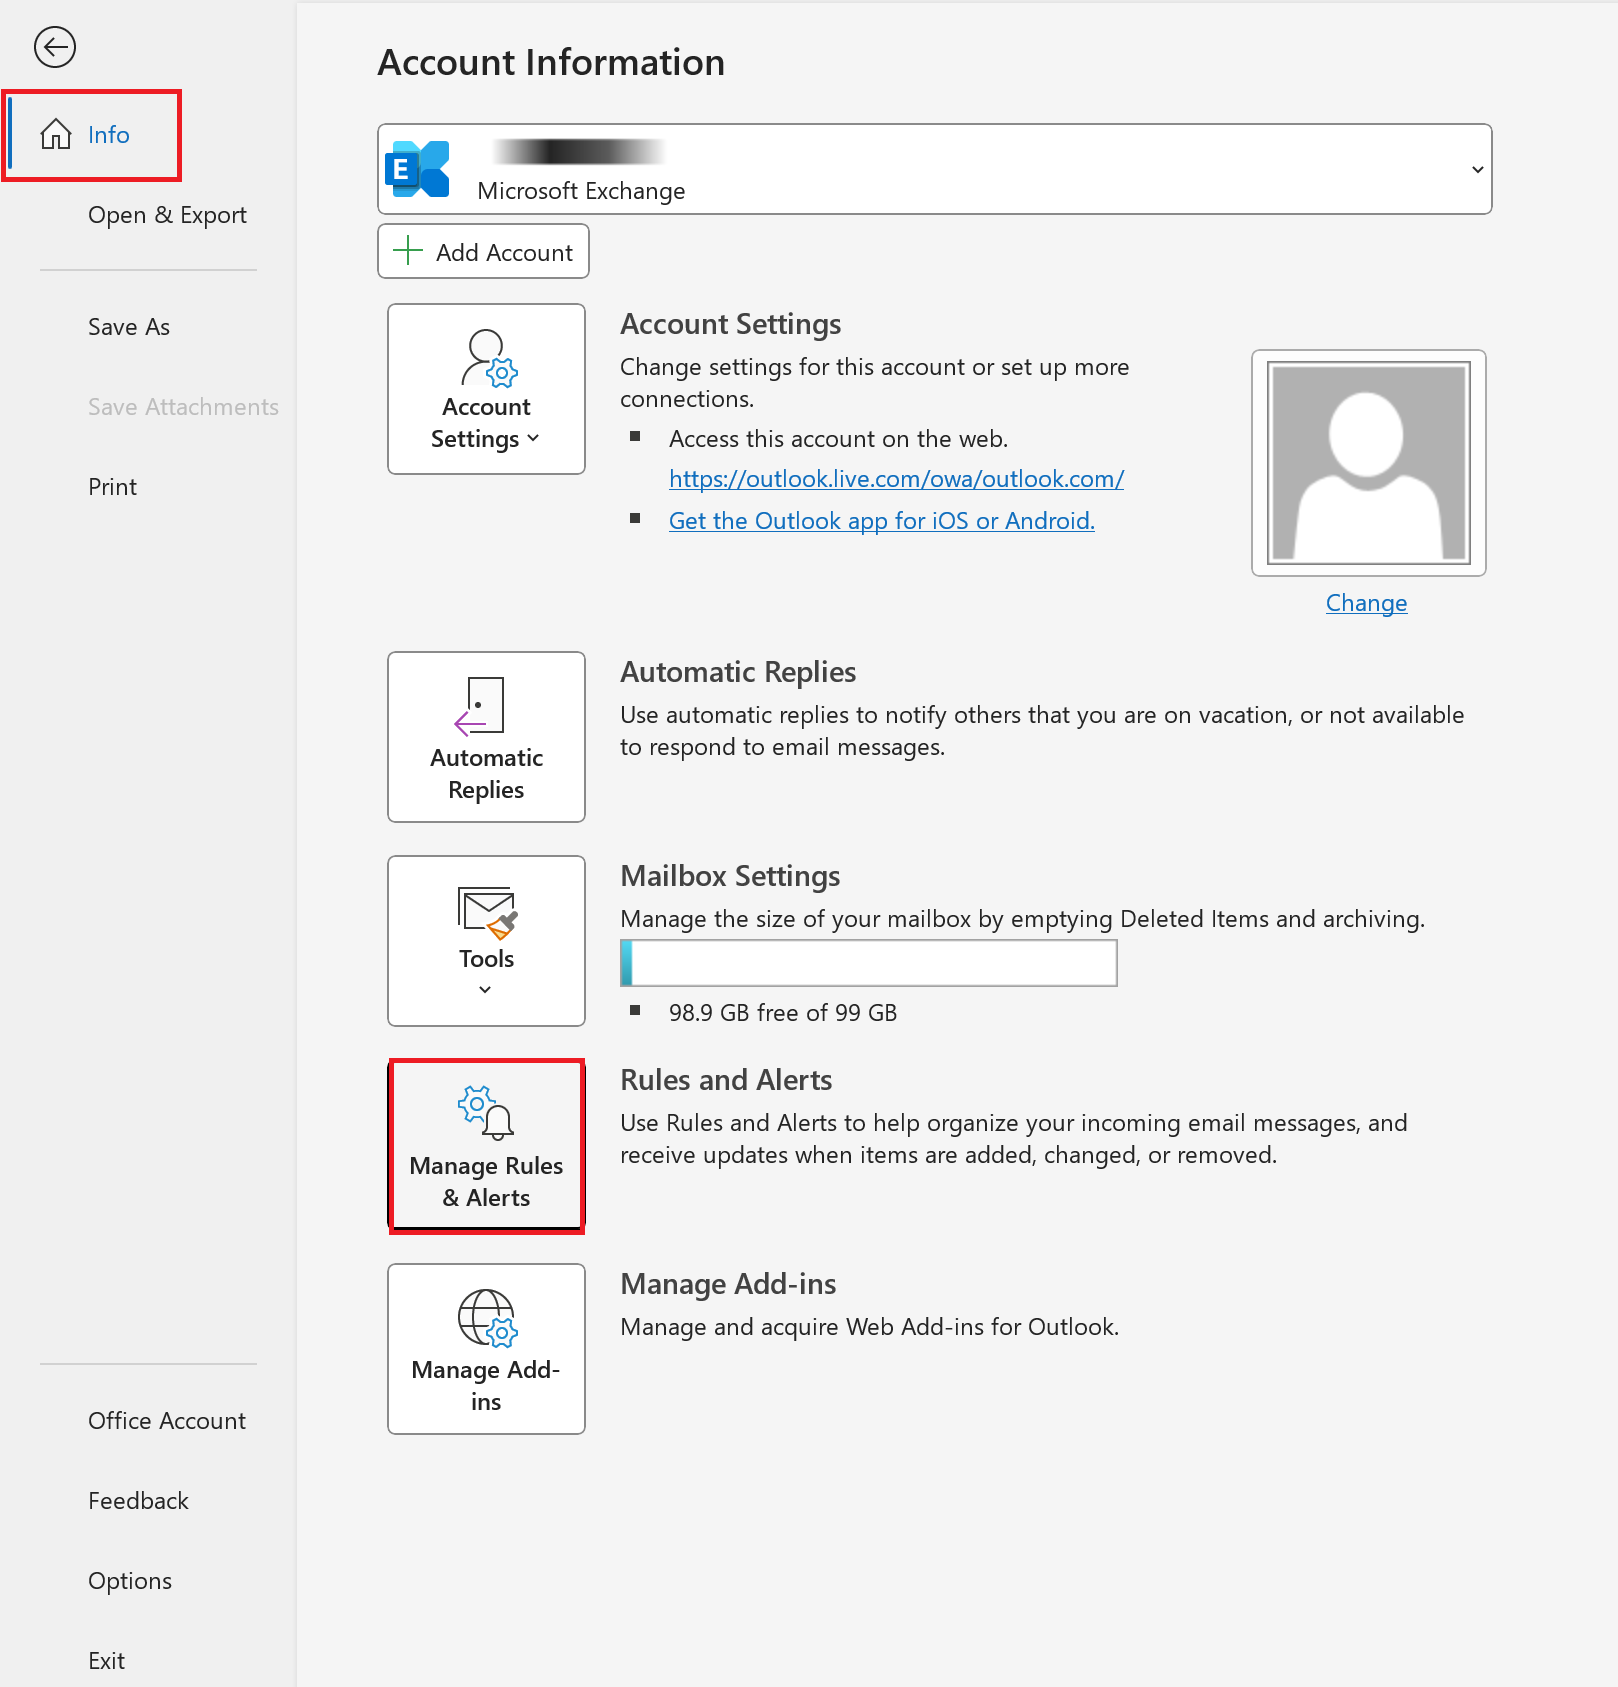
- Within the Outlook application, select File then go to Info.
- Choose Manage Rules & Alerts from the right panel.
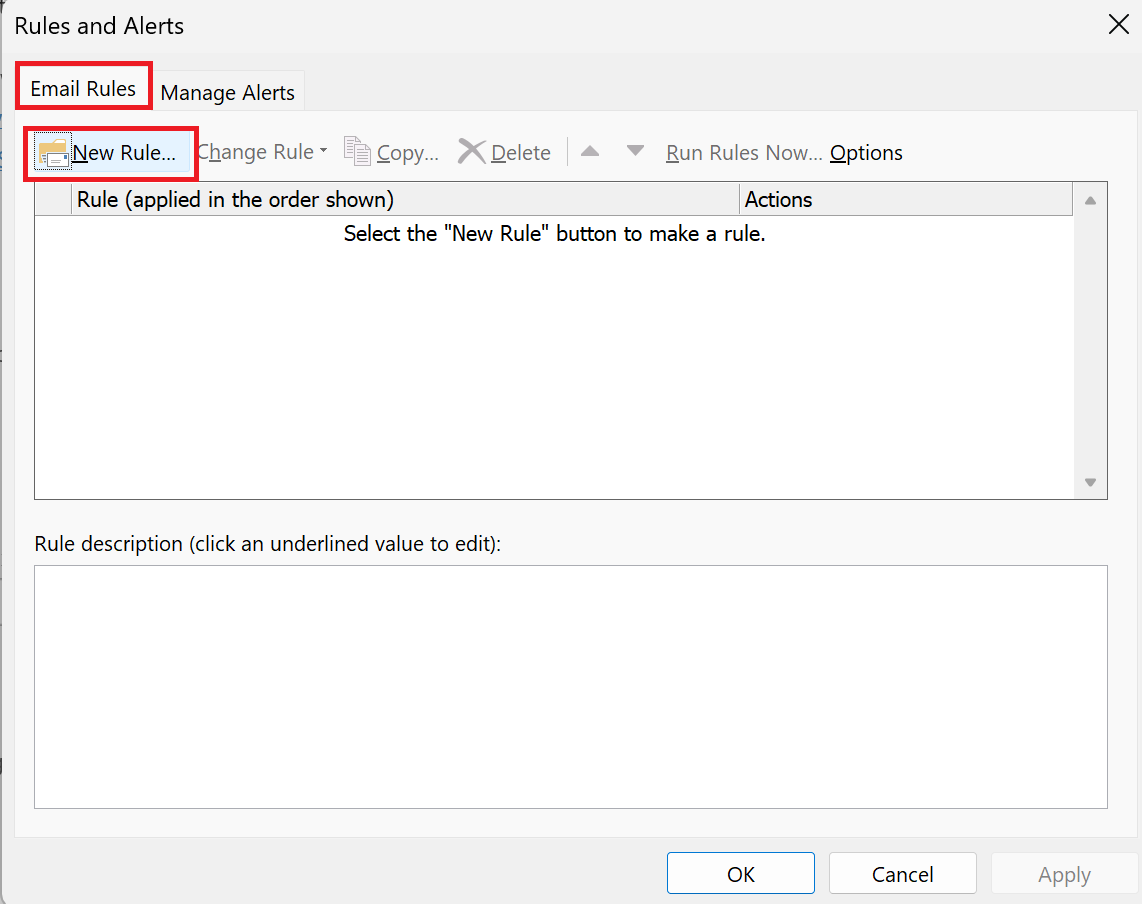
- Click on New Rule under the Email Rules tab.
- In the Rules Wizard, choose Apply rule on messages I receive and click Next.
- Pick a condition from the provided list and detail the necessary condition in the Step 2 box. Click Next after.
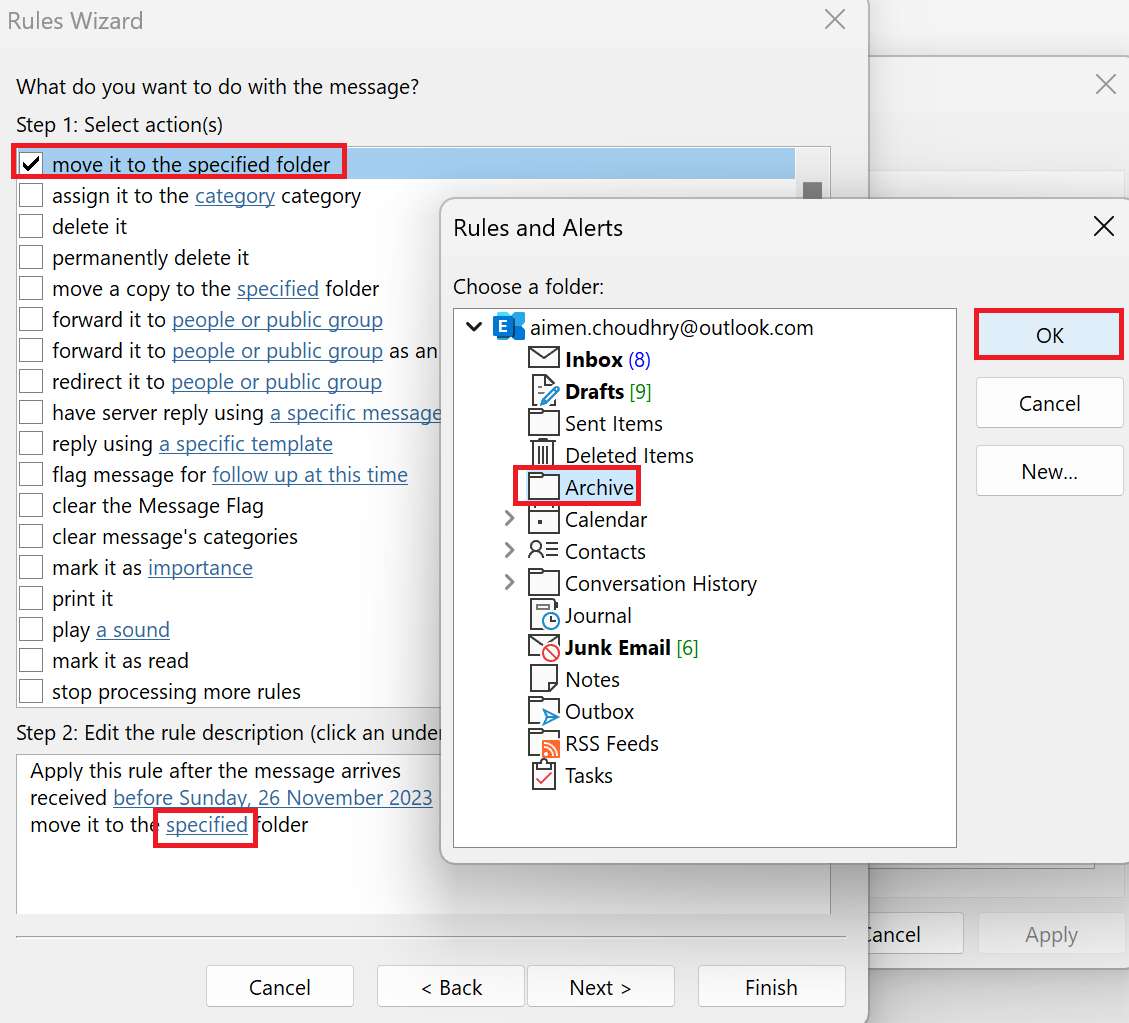
- Select Move it to the specified folder, click on the specified hyperlink in the Step 2 box, and choose the Archive folder.
- Proceed with Next, add any exceptions if required, and then click Next again.
- Name your rule and select Finish to apply it.
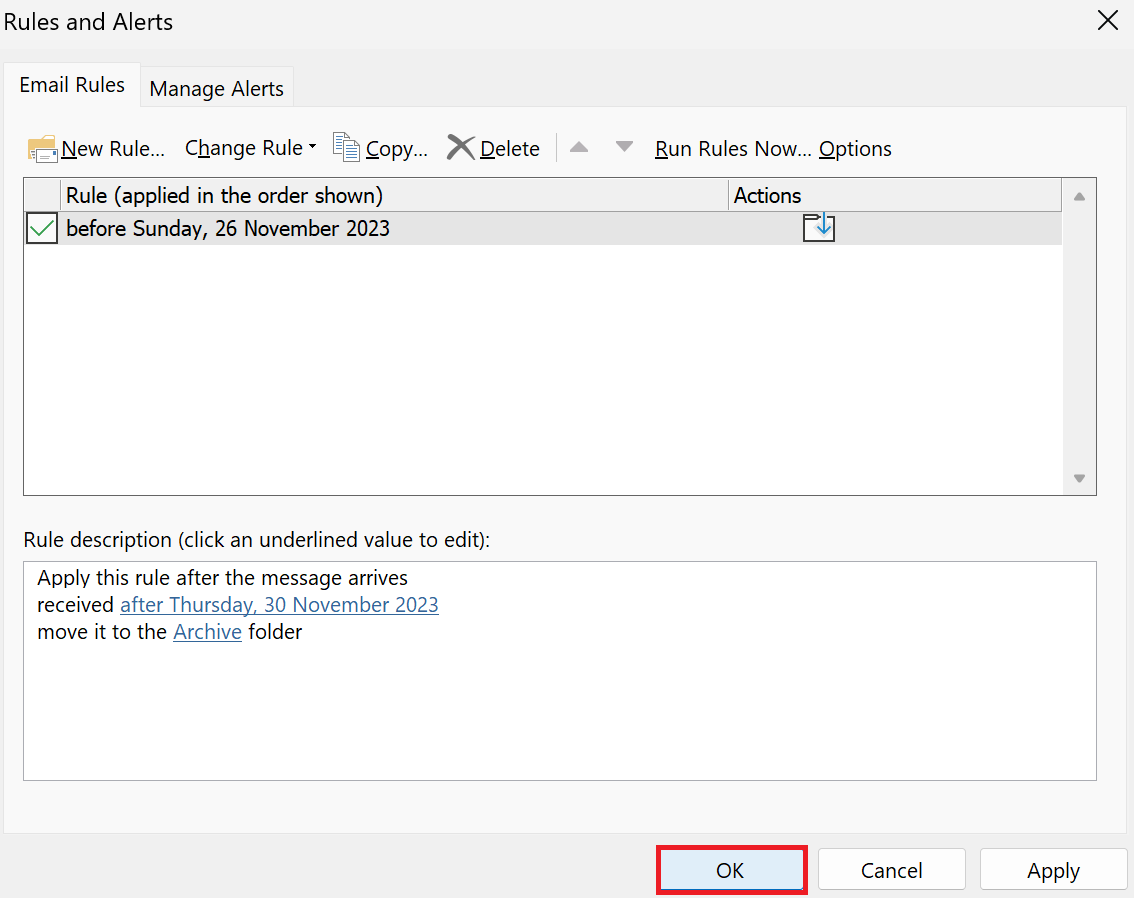
- Click OK to save your newly created rule.
Method 5: Manually Archive Using the Clean Up Old Items Tool
Besides automatic options, Outlook’s desktop version presents a manual archiving tool known as “Clean Up Old Items,” often confused with the “Clean Up” feature, which aims to minimize redundancy in message threads.
This tool allows you to choose which items to archive based upon their age.
- Open Outlook on your computer.
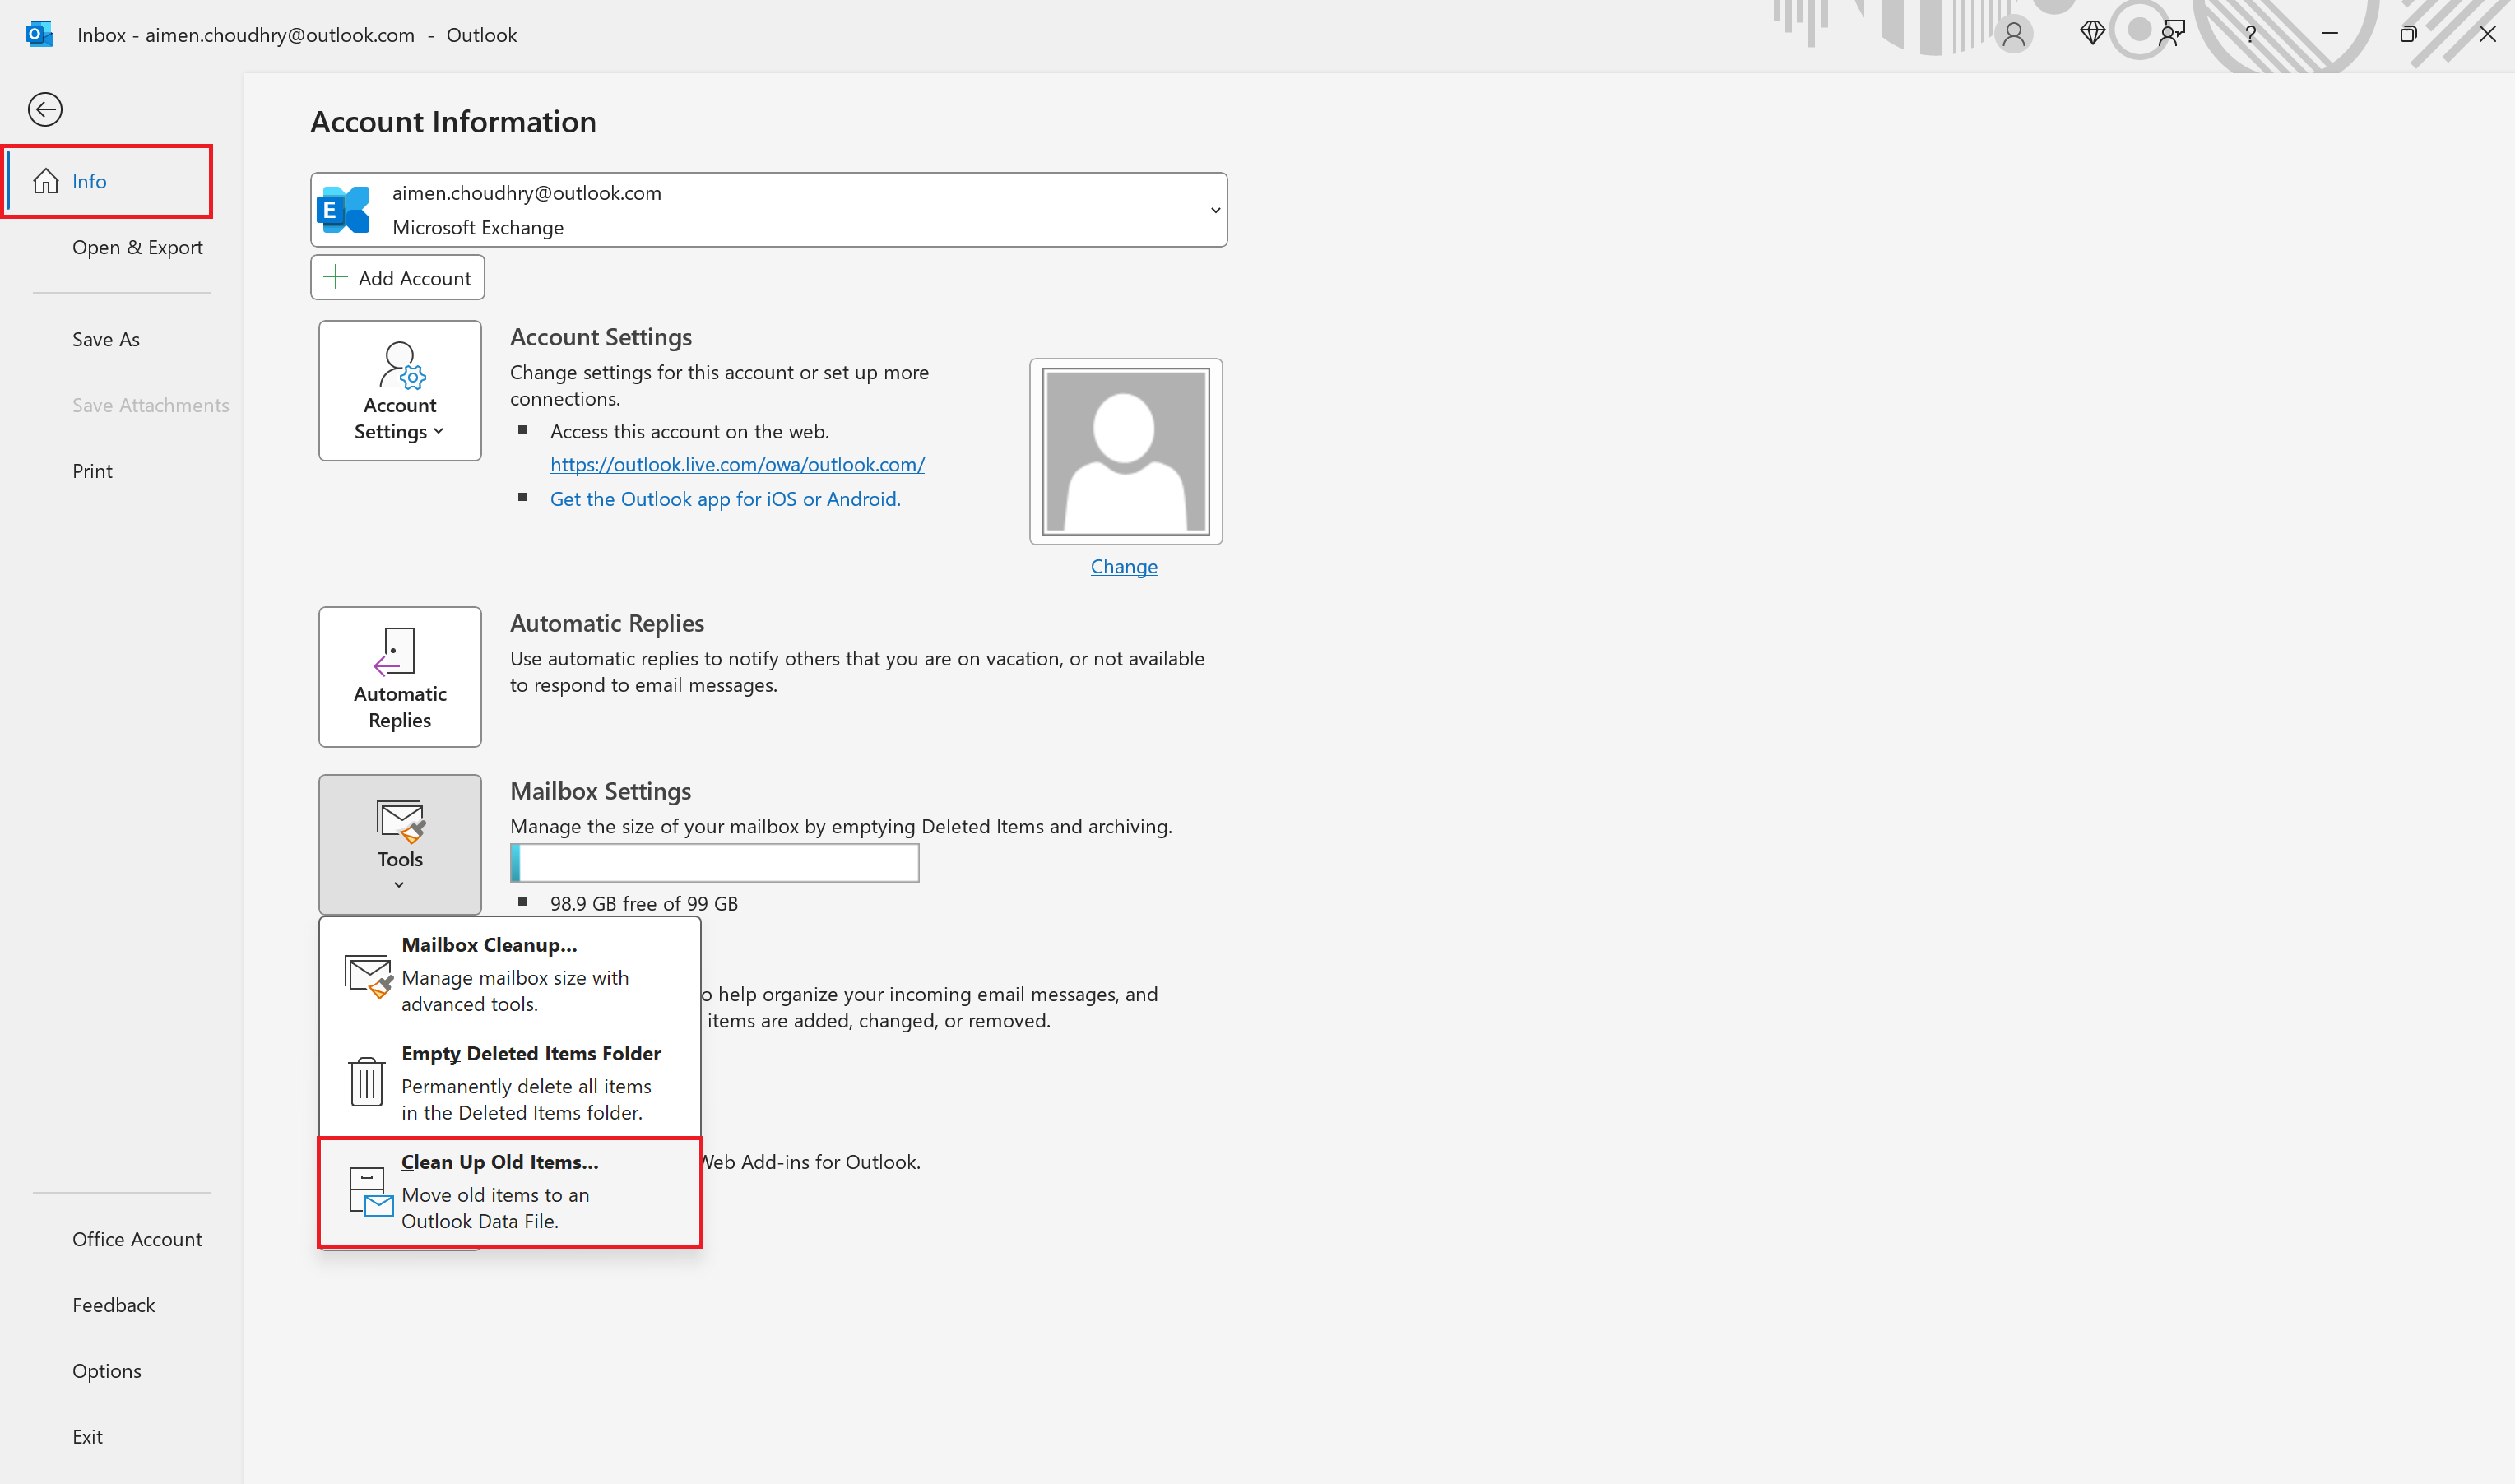
- Click the File tab at the top and select Info from the menu on the left.
- Click on Tools and choose Clean Up Old Items from the displayed options.
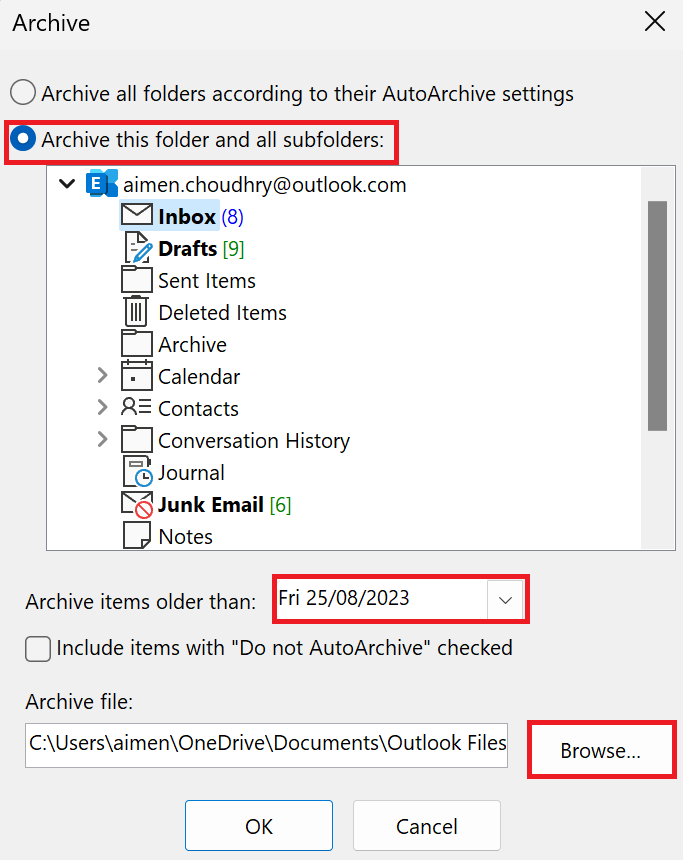
- In the Archive dialog box, pick the folders to archive under the Archive this folder and all subfolders section.
- Select a date by using the Archive items older than field.
- Click Browse to designate the location for the Outlook archive file to be saved.
 .
. - Click OK to confirm and apply the changes.
Remember, manual archiving provides an alternative way of freeing up space in your mailbox, by moving older items that you no longer need on a regular basis to a separate file, as opposed to using automatic archiving features.
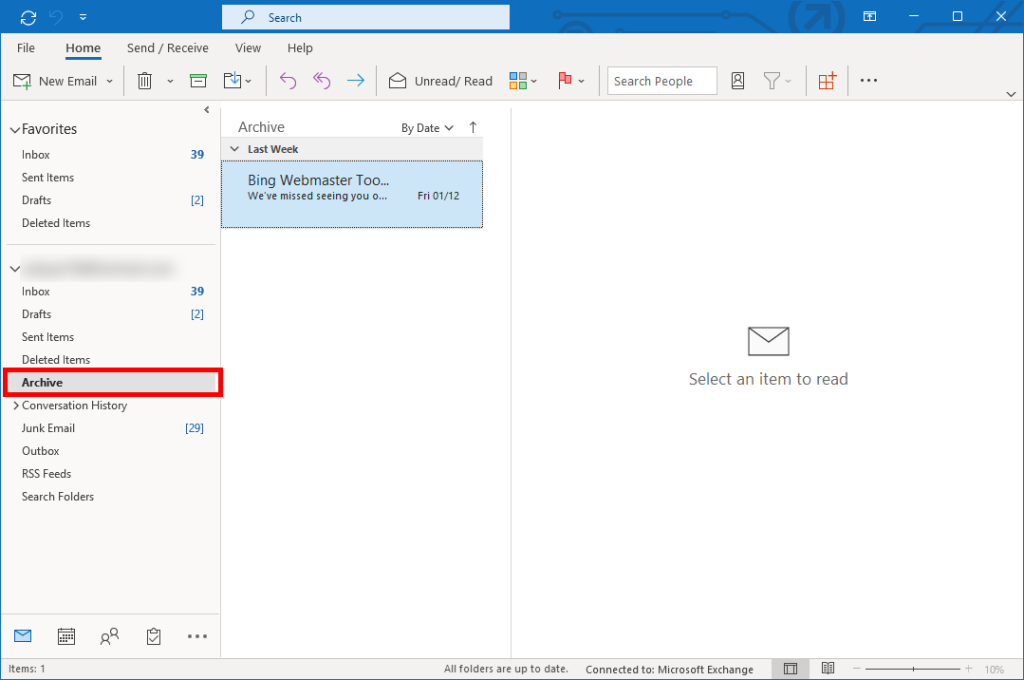
If you want to unarchive emails after they have been archived
It’s important to know how to retrieve emails once they have been archived, should you need to access them again. Outlook makes it relatively straightforward to find and restore archived messages.
- Open the Outlook application on your computer.
- In the left navigation pane, scroll down to find the Archive folder and click on it. This folder contains all the emails you have archived.
- To find a specific email, use the search bar at the top of Outlook. Make sure the Archive folder is selected to search within all archived messages.
- Once you have located the email, you can either open it to view its contents or move it back to your inbox or any other folder. To move it, simply drag and drop the email into the desired folder, or right-click on the email, select Move, and then choose the destination folder.

If you are using the Outlook web application, the steps to access and recover archived emails are similar. Just look for the Archive folder in the online interface and follow the same procedures as above.