How To Setup Any Web Project Using Pre-Built Templates
Prioritising your business’s ideas, goals and making sure that the resources are put to use efficiently is an integral part of any plan. These tried and tested methods and practices are there to ensure that the odds of achieving the best-desired outcome remain high while carefully analysing how the project has to move forward. There’s a limit to how far spreadsheets are going to take you. Even if the business plan is that of a small one, it is just incredibly hard and tedious to remember to update the coloured boxes every so often. With time, technology has evolved to a stage where every tool is at our disposal. And these tools are there to make our lives easier by letting us not worry about the tedious stuff and instead, helping us focus our attention to the tasks that matter.
Project management tools have evolved and we have moved past the stage of having to punch in cards to mark time slots. Now, even the most complex tools are available in the most minute of devices and you can easily keep track of the to-do list that you need to check off. A downside to this can be the fact that there is a bit of a learning curve when it comes to matters such as this. Keeping track of a web project can be a tricky task, but not an impossible one. One very helpful and easy to use tool that lets you do that is BeeWits.
What is BeeWits?
BeeWits is a project management tool designed to aid web designers and digital marketers by giving all the members one unified platform to work on. Assign tasks, update the list as things progress and so much more is made possible by BeeWits. For someone who is just starting out in this, having to navigate BeeWits might seem to be a little off-putting. But you shouldn’t let that discourage you because the reward is going to be a much more efficient system and thus, greater odds of you delivering a finished and refined product.
BeeWits makes project management very easy for web designers and freelancers, helping them focus on the work instead. They offer three different packages for pricings, part-timer, freelancer and agency. The good thing about all three of these packages is that whether you’re just a single user or are a team of many people working on a project, the prices remain the same. All you need to do is sign up and pay the monthly fee. BeeWits also offers a free trial with all the features unlocked. This can help you test the waters and get a feel of how BeeWits operates and improves your work.
Starting a new web project using BeeWits
First thing you’ll want to do is either go for a trial or buy a package of BeeWits via (this link). Once you’re logged in to your BeeWits account, the first thing that you’ll want to do is start a new project. BeeWits gives you all the possible project factors that can come into play. Clicking on, “Start a new project” will lead you to a window where you’ll have to describe the project that you’re making.

Write out the name of the project and the description of what it is, is going to be and what it will entail. All of these things are essential baby steps that help you keep your primary objective in mind when working further down the line.
In the description, you can also insert a link for a video, URL or a picture, format the description into numbered or bullet points and much more. These things are going to help you and your team keep things organized and go at the work in a manner that is organized and thus, efficient. BeeWits makes sure that it assists you in ways that are proven to increase the overall outcome of the project.
The next step is choosing and setting some tasks for your project. Blank Project, Design, Online Marketing and Web Design as the four options that BeeWits provide you. You can choose the ones that rightly correspond to what your project is and BeeWits will show you the options that fit the category.
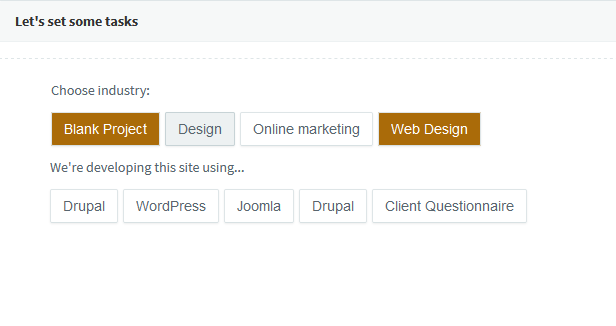
The options that you choose help BeeWits give you further ones to select. For example, choosing Blank Project and Web Design gives you the different tools that can be used to develop such a project.
BeeWits then goes a step ahead and give you templates of task that you can simply drag and drop onto your project board. These tasks, like the tools provided above, correspond to the type of web project that you’re making. If you’d like to customize these tasks or choose some that are not available in the presets, you can always customize your own.

In the end, you can see another section which is reserved for helping you invite and organize your team and the clients. You can assign roles to the people you have invited. This lets you keep track of your team and distribute the tasks that said roles must perform in a very organized and orderly fashion. We’ll be getting into more of that in just a few.
Managing the tasks
The next step in managing your project via BeeWits is entering the tasks that need to be finished. Once you choose the task template, BeeWits provides you with a couple of pre-built tasks and puts them on your project dashboard. These pre-built tasks may not be exactly so you can edit and create new ones. I found these tasks to be pretty accurate as to what the web project should contain in correspondence to the task template that BeeWits provides in the first stage.
In the top section, you’ll find a button for adding a new task. You can click on that and BeeWits will take you to a screen where you can enter all the necessary details about the task that you need to enter. You can also add in a list of people who will be working on this specific task and they can update it as time and work progress forward.

In the dashboard, you can see all the pending task arranged in a very orderly manner. 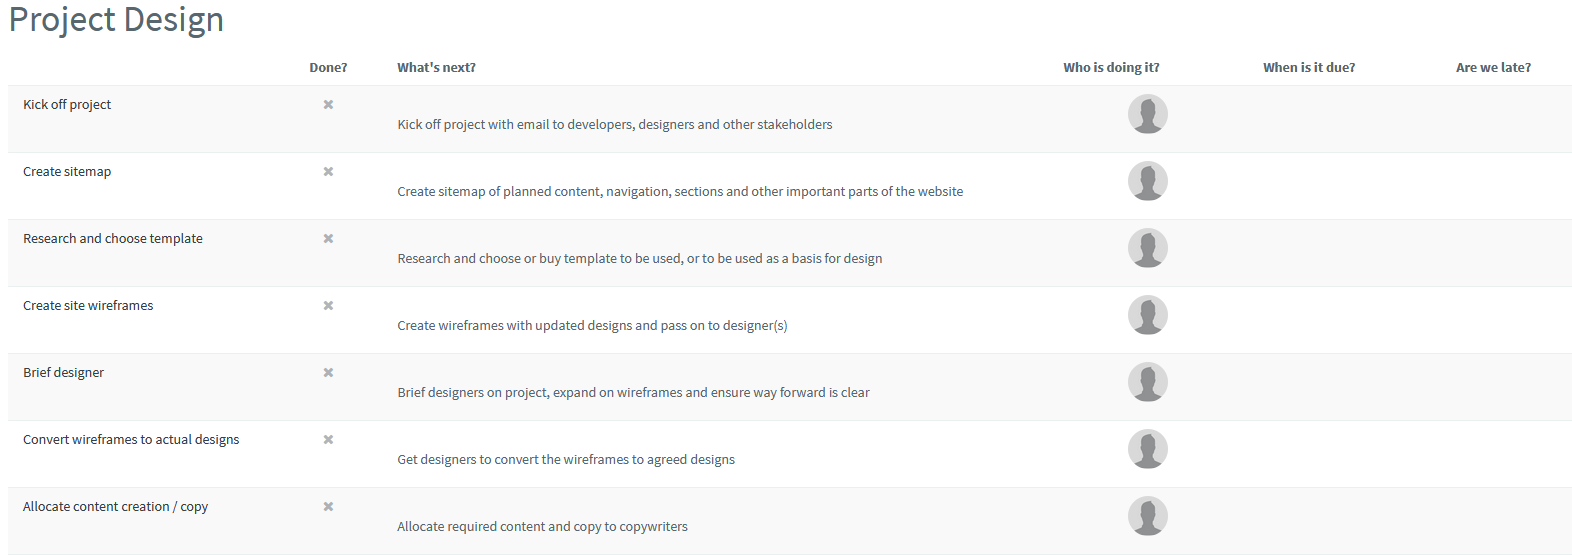
Managing Content, Resource and Design libraries
An important part, as well as an advantage of having a web project, is that everyone on the team can have access to the resources anytime and anywhere. BeeWits categorizes these into content, resource and design libraries. With each project and task, you can store all the important files easily into one accessible location.
Uploading files in these three libraries is quite simple but it is also different. In the top bar, you’ll see three different tabs for each of these categories. Clicking them will take you to their respective page where you can upload files that may be of use.

Once you select and then upload the file, they’ll be accessible to all those who may want it.
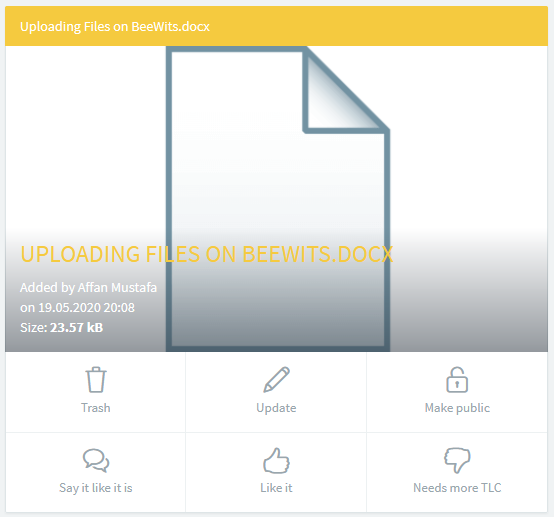
From here, others can like and dislike the uploaded file as well as give their constructive feedback as to what’s good and what’s bad. Because of this, everyone can stay in the loop and all the feedback can be entertained so that the best outcome for everyone can be achieved.
BeeWits allows you to upload and share resources through different ways. But one thing that turns out to be incredibly helpful is the fact that you have a single location for them. Files uploaded in these libraries can be attached to the task that they closely resemble to. If not, you can have one unified link so that there is no hassle of having to dig through multiple files in order to try and find the latest one that you need for the task that you’re working on.
Finalizing The Tasks
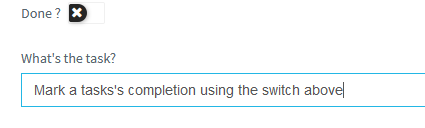
Once the said task is completed, you can click on “Done” to mark its completion. BeeWits lets you keep track of the due dates and gives cues if you and your team are falling behind on a task. All of the tools that BeeWits provides are guaranteed to increase and boost productivity.


