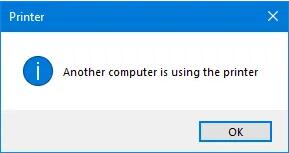
Fix: Another Computer is using the printer
The error, “Another computer is using the printer,” usually shows up after you turn on your computer or try to print over a shared network. When this happens, your print job gets stuck and doesn’t move forward. This message means that Windows thinks another computer is using the printer, even if the printer is actually idle or only connected to your computer.
Most of the time, this happens because the print spooler (the tool that manages print jobs) is stuck, there are leftover print jobs, or a printer driver problem is locking the printer. Old spooler data, shutting down the computer the wrong way, or fast startup settings can also cause this error—especially if you’re using a shared or wireless printer.
1. Reset the Print Spooler
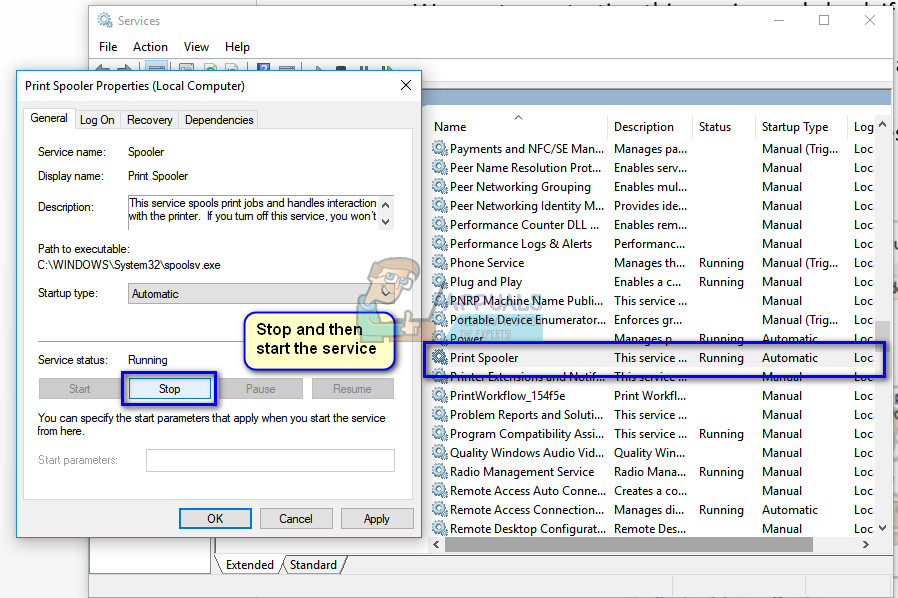
The print spooler service is a software program responsible for managing all print jobs sent to your printer. The print spooler is accessible to users, and you can cancel or manage print jobs that are being processed or waiting in line. Let’s try restarting this service to see if it solves the problem.
1.1 Using Service
- Press Windows + R to open the Run dialog. Type “services.msc” and press Enter.
- Find “Print Spooler” in the list of services. Double-click it to open its properties. Click the “Stop” button under the Service status section, then press “OK” to save changes.
- Once the service is stopped, you can delete any leftover printer files. Press Windows + E to open File Explorer and click on “This PC” in the left navigation pane.
- Navigate to the following path:
C:\Windows\System32\spool\PRINTERS

You may be asked for permission to access this folder. If prompted, click Continue.
- Once inside the PRINTERS folder, delete all the files you find there, then close the window.
- Restart your computer and check if the printer connects and works as expected.
1.2. Using Batch File
- Press Windows + E to open File Explorer. Click View, then click Options and select Change folder and search options.
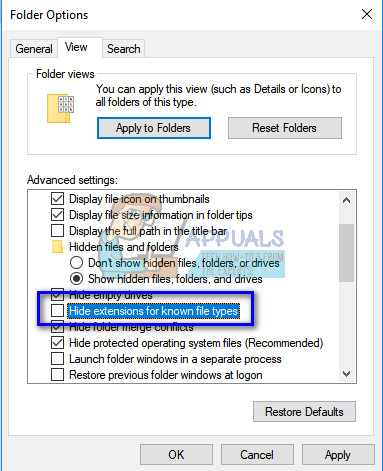
- Uncheck the option ‘Hide extensions for known file types’. This will allow you to change the text file into a batch file later.
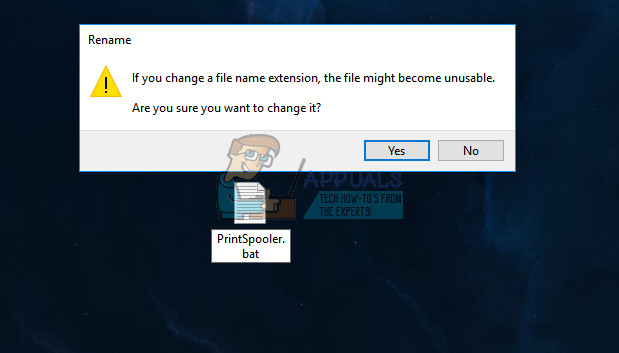
- Create a new text file on your desktop and enter the following commands as shown below. Save the file when finished.
net stop spooler
net start spooler
exit
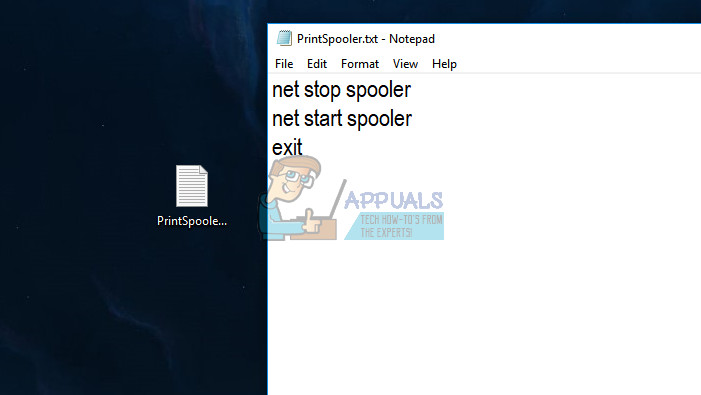
- Rename the file by changing ‘.txt’ to ‘.bat’. If you see a pop-up warning, simply click Yes.
- Now, any time you double-click this new icon, the print spooler will be restarted automatically. No need to repeat all the previous steps.
2. Perform a Full Power Cycle
Another solution that works for many users is to power cycle your computer, printer, and Wi-Fi router. Power cycling means turning off a device completely and then turning it back on. This process can help reset the network and reinitialize the devices, which often fixes unresponsive states or network conflicts.
Turn off your printer, Wi-Fi router, and computer. Then, unplug their main power cables and let them sit for about five minutes. After that, plug the cables back in, turn everything on, and try connecting your printer again.
3. Conenct to the Printer Without “—WS”
Canon printers, in particular, sometimes show two printer names instead of one. One is the regular printer, and the other has ‘WS’ at the end. If you are using the ‘WS’ version, it may cause the issue where your printer isn’t printing. The ‘WS’ generally stands for Web Services.
Here are examples of the different printer names you might see:
Canon MG5300 series Printer
Canon MG5300 series Printer WS
Canon MG5300 series Printer XPS
Cancel all print jobs and restart the print spooler service as described earlier. Then, select the regular printer option (the one without WS or XPS in its name) and try printing again.
4. Install the Latest Drivers for Your Printer
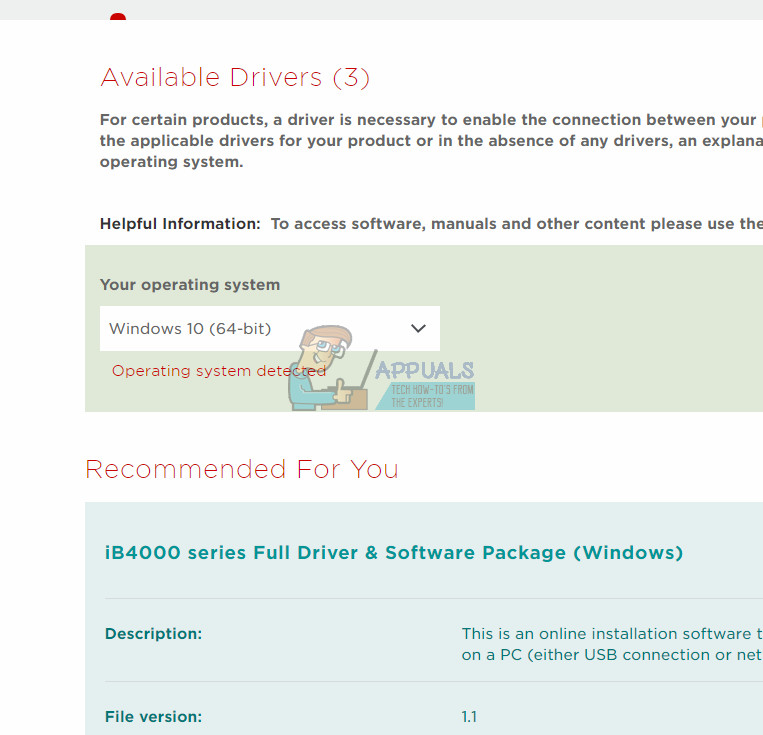
If none of the solutions above work, the issue may be with your printer drivers. Outdated drivers can create compatibility issues and prevent your printer from working properly. Visit your printer manufacturer’s website and download the latest drivers specific to your printer model. The model number is usually found on the front of your printer or on its packaging.
Note: In a few cases, the latest driver may not work. If that happens, try downloading and installing an older version instead by following the same instructions below.
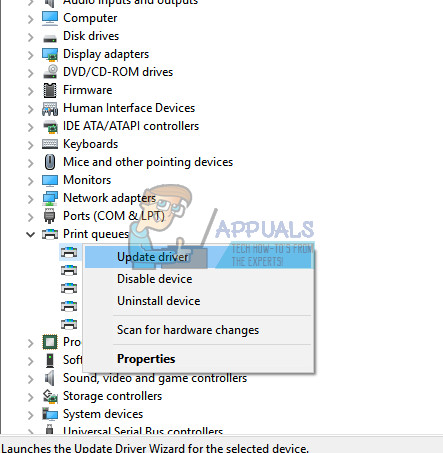
- Press Windows + R to open the Run dialog. Type “devmgmt.msc” and press Enter to open Device Manager.
- Expand the “Print queues” section, right-click on your printer’s name, and select “Update driver”.
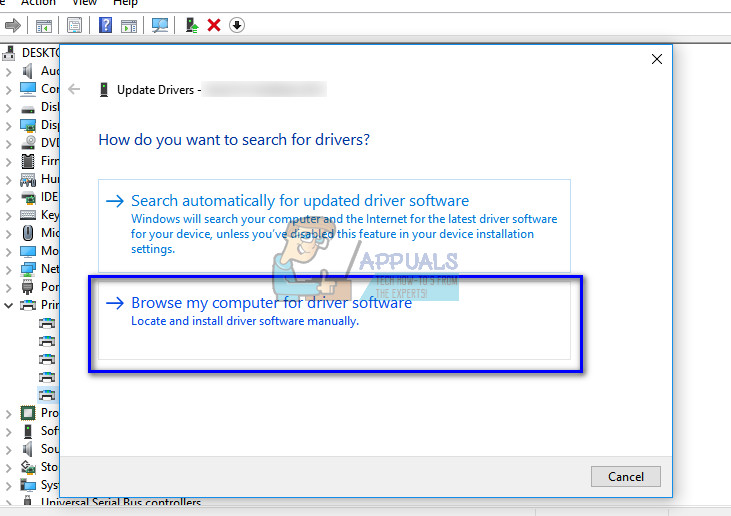
- Windows will ask how you want to search for drivers. Choose the option “Browse my computer for driver software.”
Select the driver file you downloaded by clicking Browse, then follow the prompts to complete the installation.
- Restart your computer and see if the issue is resolved.
Note: If updating the drivers does not work, you can try uninstalling the current driver first. After uninstalling, simply double-click the downloaded driver file to install it automatically.
5. Change the WSD Timeout Setting (Advanced Users)
WSD (Web Services for Devices) is a protocol that helps computers and printers find and connect to each other automatically. There is a known issue with the WSD Timeout setting that can affect printing. Changing this setting may help.
There are two main ways to change the WSD Timeout Setting:
- If your printer has a web interface (you can access it by typing your printer’s IP address in a web browser), open it and look for the WSD Timeout setting. Change it from the default to 10 minutes. Save changes and exit. Make sure you cancel all pending print jobs before making any changes.
- If your printer allows, you can also adjust this setting from its onboard menu. The option may be found here (exact menu steps may vary by model):
Menu > Set up > Device Setting > LAN Settings > Other Settings > WSD Settings > Timeout Setting > 10 Minutes
After saving the changes, perform a power cycle as shown earlier, then try printing again.