How to Fix Android Phone Not Showing Up on PC
Connecting an Android phone to a PC and getting no response—no sound, no message, and no device showing up in File Explorer—is a common problem for many users. This usually means that the phone’s Media Transfer Protocol (MTP) isn’t being detected by Windows, which stops you from accessing files or syncing data.
Most often, the phone is set to “Charging only” mode by default. Other common reasons include using a USB cable that only charges but doesn’t transfer data, missing MTP drivers on your computer, or a faulty USB port.
Now that you know what might cause the issue, let’s review solutions you can try.
1. Restart Both Devices and Try Another Port
Restarting your phone and PC can fix temporary glitches that could be blocking your device from being detected. Using a different USB port is also helpful, as the original port might not be working properly. Refreshing both devices and switching ports often fixes minor issues and allows the MTP connection to work as expected.
- Disconnect the USB cable and restart both your phone and your computer.
- After rebooting, plug the cable back in using a different USB port on your PC.
2. Use a Different USB Cable
A damaged or incompatible USB cable can interrupt the connection between your phone and PC. Some cables only support charging and do not allow data transfer, and internal or visible damage can also stop data transfer. Use a good quality USB cable that supports data—this ensures your phone is recognized for both charging and file transfer.
- Connect your phone with another USB cable and check if it now appears in My Computer or This PC.
- If it still doesn’t show up, change the USB port and listen for the Windows sound that means a new device was recognized.
- If you hear the sound, the problem is likely related to drivers rather than hardware.
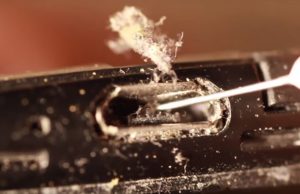
3. Clean the Micro-USB or USB-C Port
Dust, lint, or other debris in your phone’s charging port can block data connections (but still allow charging). Cleaning the port helps ensure a solid connection between your phone and USB cable, which can make your phone detectable by your PC.
- Use a flashlight to look inside the phone’s charging port for dirt or lint.
Note: If you see debris, follow the next steps. If the port is clean, skip to Step 4. - Turn off your phone. Use tweezers, a needle, or a toothpick to carefully remove any lint or debris.
- Dampen a cotton swab with a small amount of rubbing alcohol, gently insert it into the port, and turn it to clean out any remaining dirt.
- Allow the port to dry for at least 2 hours before turning your device back on.
If you’ve completed the steps above, most possible hardware problems are now fixed. Let’s move on to software-related solutions.
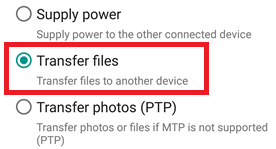
4. Connect as Storage
If your device isn’t showing up in My Computer (or This PC), your phone may be connected in the wrong mode. Android phones offer several connection options—like “Charging only,” “MTP (Media Transfer Protocol),” “PTP (Picture Transfer Protocol),” and “MIDI.” For sharing files, you need to use MTP. Here’s how:
- Connect your Android device to your PC.
- On your phone, swipe down the notification panel and tap the USB notification. Choose MTP, which may appear as Transfer Files or Device File Manager depending on your phone’s brand.
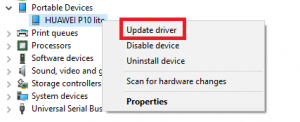
5. Update the MTP Driver
Keeping the MTP driver updated is very important for your PC to detect your Android device for data transfer. An outdated or corrupted driver might make your PC charge the phone but not allow file transfer. Updating the MTP driver can fix this.
- Right-click My Computer (or This PC) and choose Device Manager (or Manage on Windows 10).
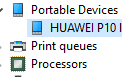
- Expand Portable Devices and find your phone. If you see a generic name or a yellow exclamation mark, right-click it and select Update Driver.
Note: If Portable Devices doesn’t appear, check for any entry that mentions “ADB“. - In the Update Driver window, choose to browse your computer manually.
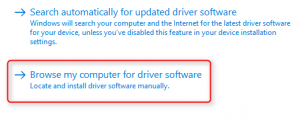
- Click “Let me pick from a list of device drivers on my computer”.

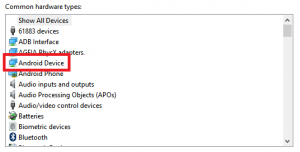
- Select Android Device from the list.
- Choose MTP USB Device and click Next.

Wait for the new driver to install. Your Android device should now appear as a multimedia device in File Manager.
6. Reinstall Android Drivers
Sometimes the Android drivers on your computer can become corrupted, stopping your phone from being recognized. Reinstalling these drivers gives your PC a fresh start with your device connection, often fixing the issue.
- Connect your Android phone to your PC and open Device Manager.
- Look for your device under Portable Devices or Other Devices.
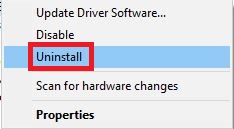
- Right-click on your device and choose Uninstall.
- Once the device disappears from the list, disconnect the USB cable and reconnect it.
- Wait for Windows to automatically reinstall the Android drivers.
- Open My Computer (or This PC) to see if your device is now showing up.
7. Connect as a USB Mass Storage
Switching your Android to “USB Mass Storage” allows your PC to see the phone as a regular USB drive, which can bypass any issues with MTP drivers. This is useful if you need to access your files and MTP just isn’t working.
- On your Android phone, open Settings > More Settings.
- Select USB Utilities and tap Connect Storage to PC.
- Tap Turn on USB Storage.
- Wait while the drivers load.
- On your PC, check My Computer (or This PC) to see if the phone now appears as a storage device.
8. Enable USB Debugging
Turning on USB Debugging makes it easier for your PC to connect with your Android phone, especially for data transfer. It overrides some of Android’s default USB restrictions, which can help your device get detected.
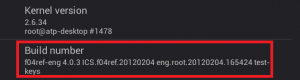
- On your phone, go to Settings then About Phone.
- Tap Build Number seven times to unlock Developer Options.
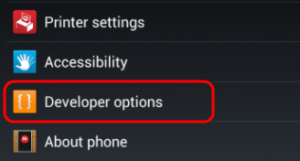
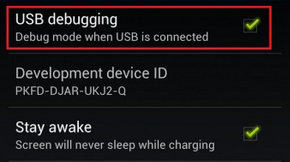
- Open Developer Options and enable USB Debugging.
- Connect your device to your PC and agree to Allow USB Debugging on your phone.
The fifth (5th) method solved my problem.
Tanx a bunch