How to Fix Adobe Error Code 131 in Creative Cloud?
Adobe Error Code 131 is a common error that appears when users try to install, update, or uninstall Adobe applications through Creative Cloud. When this error occurs, the installation process fails to start and typically shows one of the following messages:
- “Installation Conflict.”
- “Uninstallation Conflict” or
- “Update Conflict.”
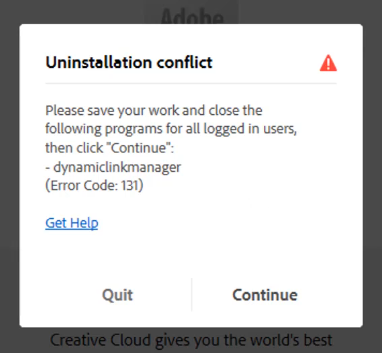
This error is usually caused by conflicting Adobe background processes that interfere with the installer. In some cases, it may also result from corrupted installation files or misconfigured system settings that block the installer from running correctly. Thankfully, this is a well-known issue and can be resolved by following the step-by-step solutions provided below.
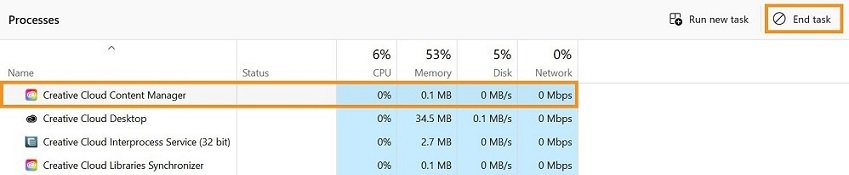
1. Terminate Conflicting Processes [1]
This error indicates that certain Adobe-related background processes are interfering with the installer, causing the installation to fail entirely. According to Adobe, the most common conflicting processes include:
- Creative Cloud Content Manager
- Creative Cloud Libraries Synchronizer
- Adobe Content Synchronizer
- Node
However, the list of processes may vary depending on which Adobe application you’re trying to install or update. To stop them:
- Press Ctrl + Shift + Esc to open Task Manager immediately.
- In the Processes tab (default view), locate and select:
- Creative Cloud Content Manager
- Click End Task in the bottom-right corner.
- For specific Adobe apps (like Elements):
- Find the process name matching your Adobe application.
- Repeat the End Task process.
- Continue this process for all remaining Adobe-related processes.
- Now try installing again and check if the error persists.
2. Utilize Creative Cloud Uninstaller [1] [2]
Installation errors often stem from issues within the Adobe Creative Cloud desktop application. These can include corrupted installation files, an outdated version, or misconfigured settings—all of which may interfere with new installations or updates. You can repair the Creative Cloud app using the Adobe Creative Cloud Uninstaller tool, which is designed to detect and fix these problems.
2.1 Reset
- Open the Creative Cloud desktop app and bring it to focus.
- Press Ctrl + Alt + R simultaneously to trigger a reset.
- Click Relaunch when prompted and wait for the app to restart.

- If issues persist, download the Adobe Cleaner Tool.
2.2 Repair
- Run the downloaded Creative_Cloud_Uninstaller.exe as administrator.
- Select the Repair option from the available choices.
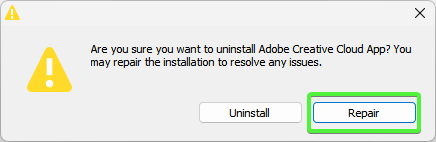
- After completion, sign back in and test the application.
2.3 Reinstall
- Run the Uninstaller again and choose Uninstall this time.
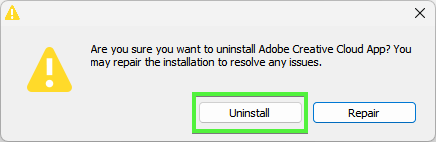
- Restart your computer to clear any residual files.
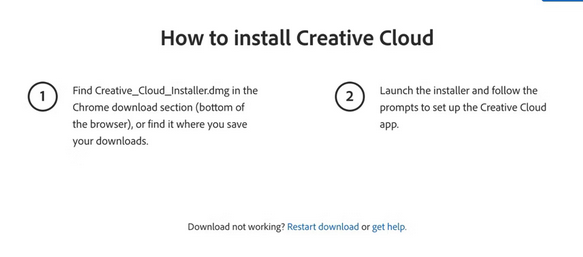
- Download a fresh copy from the official Adobe site.
- After installation, test installing multiple applications to confirm if the issue is resolved.
If the error still persists after applying the solutions listed above, it may require deep troubleshooting. In that case, we recommend contacting Adobe support directly.


