Fix: Adobe Configuration Error 16 ‘uninstall and reinstall’
The “Configuration Error 16” message shows up when you try to open an Adobe app and stops you from using it. A pop-up usually tells you to uninstall and reinstall the software. This problem happens because Adobe can’t read the license information saved in the SLStore or Adobe PCD folders.
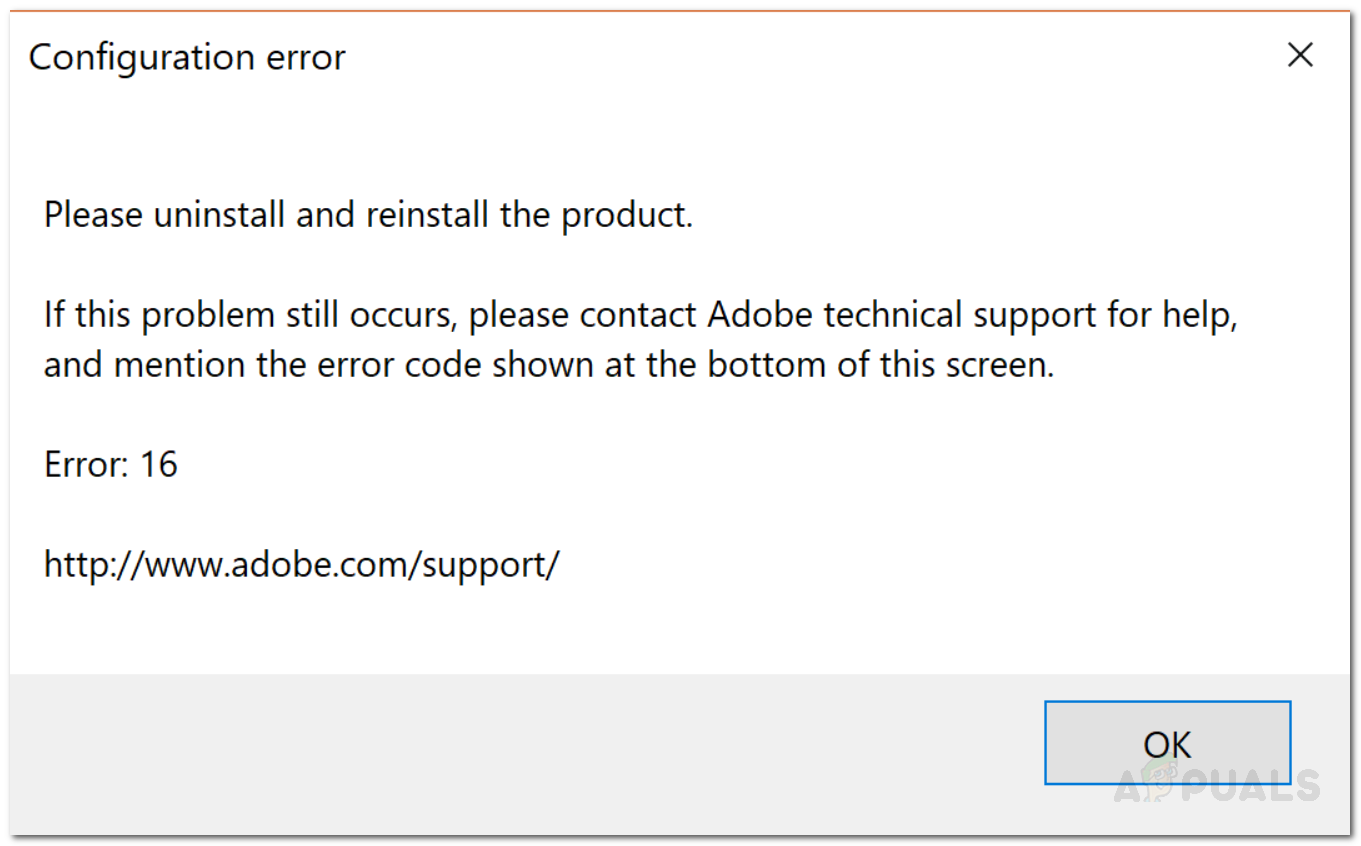
Most of the time, this is caused by incorrect folder permissions—often after updating your operating system, installing an Adobe update, or changing file permissions.
With that explained, let’s move on to the solutions.
1. Change Permissions for Adobe PCD and SLStore Folders
To fix the error, you’ll need to adjust the permissions on two important folders: Adobe PCD and SLStore. First, make sure Windows is set to show hidden files and folders.
- Open Windows Explorer.
- Click the View tab at the top. Then click Options and select ‘Change folder and search options’ from the drop-down menu. Alternatively, you might switch to the View tab directly when the Options window opens.
- Scroll down until you see the ‘Show hidden files, folders, and drives’ option.
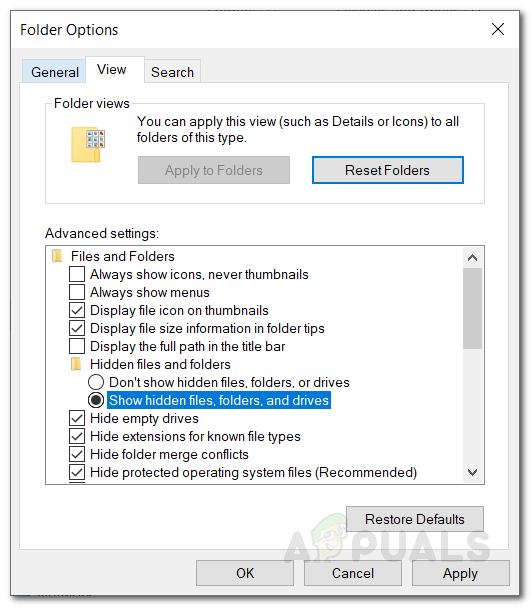
Showing Hidden Folders - Click this option, then hit Apply and OK to save your changes.
- Alternatively, you can select the ‘Hidden items’ checkbox under the View tab. This option might look a little different, depending on the version of Windows you are using.
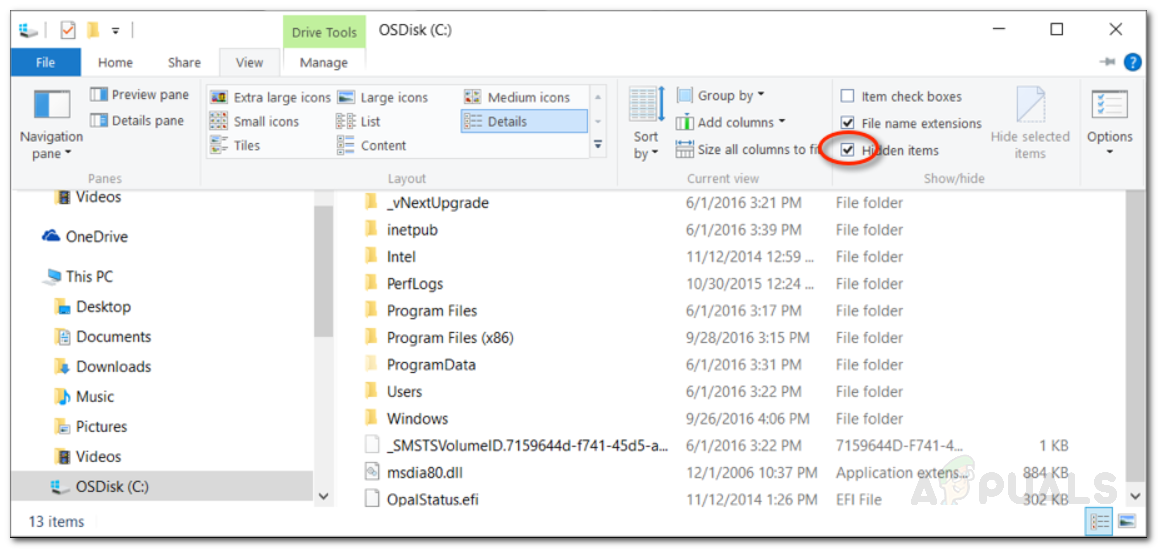
Showing Hidden Folders
Now that hidden folders are visible, you’ll need to find the Adobe PCD and SLStore folders. Use these paths:
Adobe PCD:
Windows 32-bit: Program Files\Common Files\Adobe\Adobe PCD\

Windows 64-bit: Program Files (x86)\Common Files\Adobe\Adobe PCD\
SLStore:
ProgramData\Adobe\SLStore
If you use macOS, open Finder and go to:
SLStore:
Library/Application Support/Adobe/SLStore
Adobe PCD:
Library/Application Support/Adobe/Adobe PCD
Once you’re at these locations, follow these steps to change permissions:
- Right-click the Adobe PCD or SLStore folder and choose Properties.
- Go to the Security tab, then click Edit to adjust permissions.
- For Adobe PCD, select the administrator user and give it Full Control.
- For SLStore, select both the SYSTEM and administrator user groups, and give them Full Control.
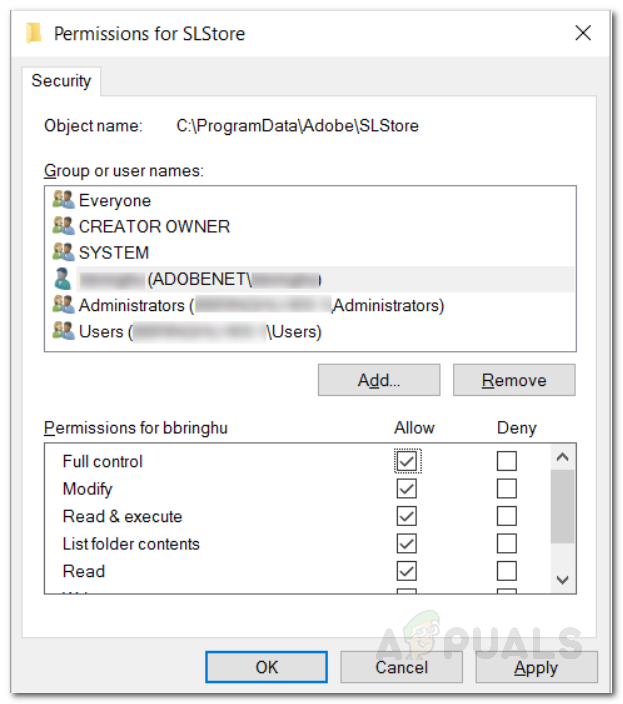
Changing Permissions - Next, select the Users group and give it Read and Special permissions.
- Click OK to close the permissions window so the changes are saved.
- Back on the Security tab, click the Advanced button.
- Here, you need to change the owner. Click Change, type in your user account name, and click Check Names to make sure it’s recognized. Then click OK.

Changing Ownership - At the bottom, check the box marked ‘Replace all child object permission entries with inheritable permission entries from this object’, and click Apply.
- Click OK to close the window.
- Repeat these steps for both the Adobe PCD and SLStore folders.
For macOS
- Control-click the folder and select Get Info.
- Click the ‘Sharing and Permissions’ section to expand it.
- Unlock permissions by clicking the lock icon in the lower-right corner. Enter your administrator username and password if prompted, then click OK.
- For SLStore, set these permissions:
System: Read/Write

Admin: Read/Write

Everyone: Read/Write
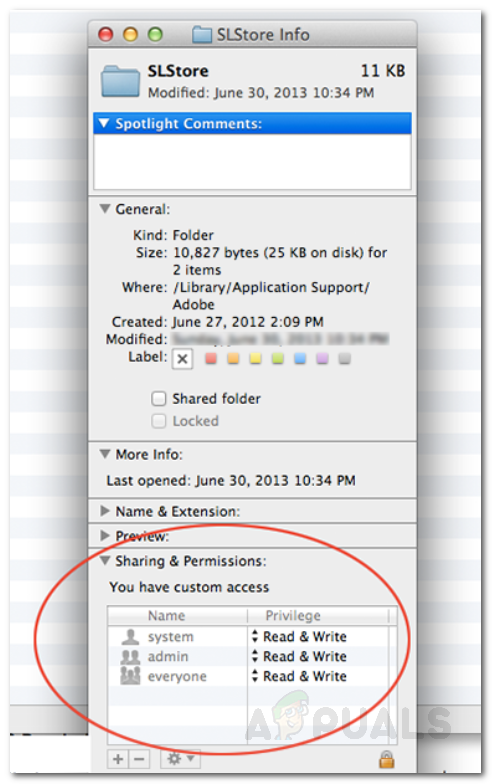
- For Adobe PCD, set these permissions:
System: Read/Write

Admin: Read-only

Everyone: Read-only
- Click the Gear icon in the lower-left and select ‘Apply to enclosed items’.
- Close the Get Info box when you’re done.
2. Run Creative Cloud as an Administrator
Another way to fix the problem is to make the Creative Cloud application run as an administrator every time. First, test if this solves the issue: right-click the Creative Cloud app and select ‘Run as administrator’. If this allows the program to start without errors, you can set it to always run this way.
- Right-click the Creative Cloud application and choose Properties.
- Go to the Compatibility tab.
- Check the box for ‘Run this program as an administrator’ and click Apply.
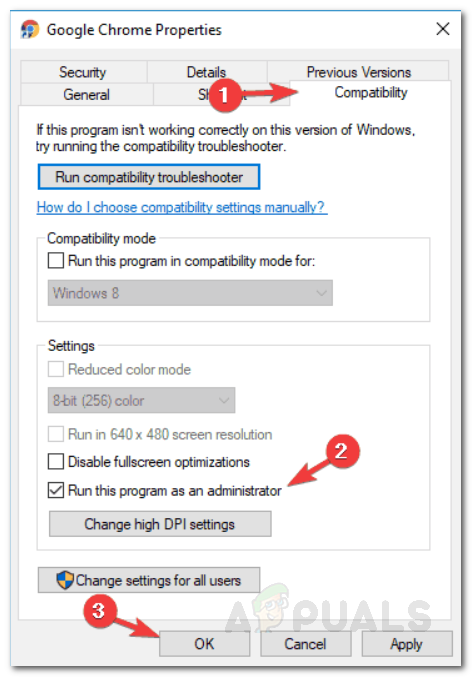
Running as an Administrator – Adobe CC - Finally, click OK to save your settings.


