How to Add or Remove Microsoft Print to PDF
Microsoft Print to PDF is a built-in tool in Windows that lets you turn documents into PDF files by “printing” them, rather than saving them in their original format. This way of making PDFs often leads to bigger file sizes and might not keep things like clickable links or text you can highlight, because it just creates an image of your document.
Some users find it hard to get Microsoft Print to PDF back after accidentally removing it, since it doesn’t always show up in the usual printer list or Windows Features. People also notice that PDFs made with this tool can be much larger than those made with other free programs like CutePDF, which do a better job of shrinking file size.
Knowing about these limits is important for anyone who needs PDF files that are easy to search or share online. This article will walk you through how to add or remove Microsoft Print to PDF, and cover common problems you might face along the way.
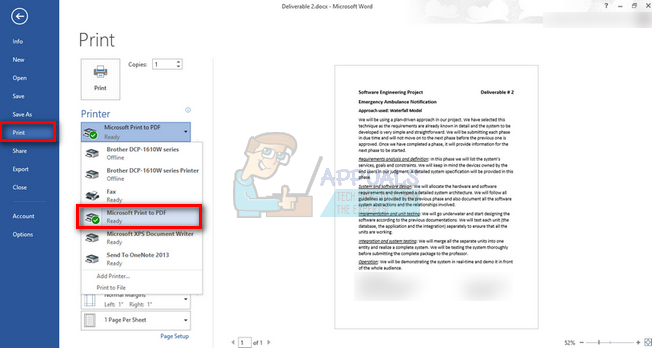
- Open the document you want to convert. Click the File tab (highlighted in blue) at the top left corner of the screen.

- A new menu will appear. Click on the Print option from the left sidebar, select the printer called “Microsoft Print to PDF” from the drop-down menu, and then click Print.
- Windows will now prompt you to choose a file location to save the new PDF. Enter a name for the file, choose where you want to save it, and then click Save.
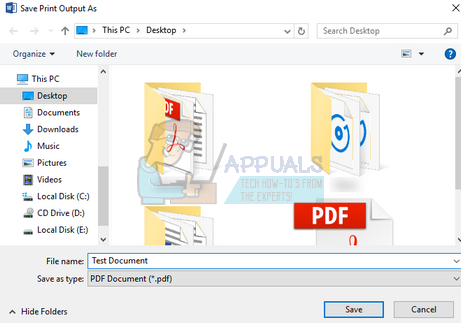
- Go to the folder where you saved the file. Your document will now be available in PDF format.
Removing Microsoft Print to PDF Printer
Sometimes, you might want to remove Microsoft Print to PDF from your printers list. This could be because you have many printers installed and want to avoid confusion, or you simply don’t use this feature. There are a few easy ways to remove it, and these methods work for all users.
1. Use Settings
You can quickly remove the printer using Windows Settings. This is perfect if you prefer not to use the command line or PowerShell.
- Press Windows + S to open the search bar on your Start menu. Type “Settings” and press Enter. Click on the first result that appears.
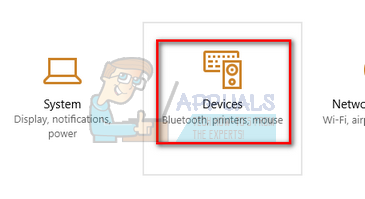
- Click on Devices from the top left menu.
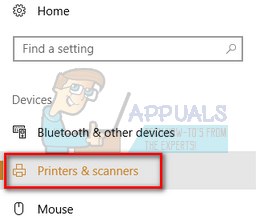
- Choose “Printers and scanners” from the left sidebar.
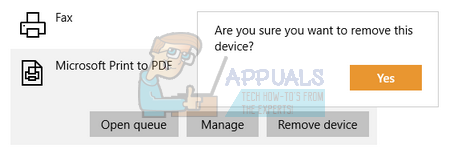
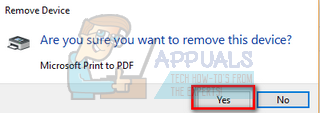
- Under the Printers and scanners section, find “Microsoft Print to PDF.” Click on it once, then click “Remove device”.
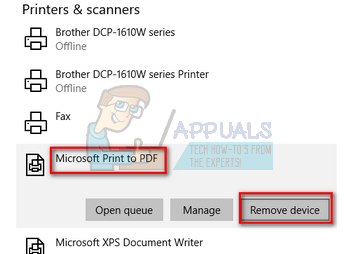
- A confirmation box will appear. Click Yes to confirm. Microsoft Print to PDF will be removed from your list of printers.
2. Remove through Control Panel
You can also remove the printer from the Control Panel. This method is straightforward and quick.
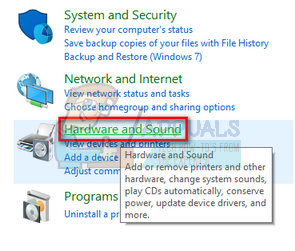
- Press Windows + R to open the Run dialog box. Type “control panel” and press Enter to open the Control Panel.
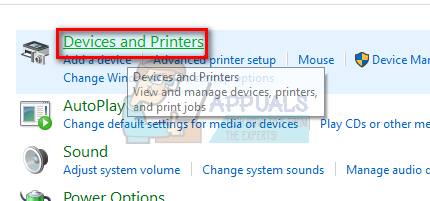
- Click on Hardware and Sound from the available options.
- Next, select Devices and Printers at the top of the list.
- Find “Microsoft Print to PDF” under the Printers section. Right-click on it and choose Remove device.
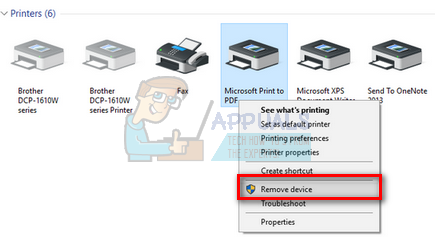
- Confirm your choice by clicking Yes when prompted.
3. Use Command Prompt
You can remove the printer faster by using Command Prompt. This is the quickest way, especially if you are comfortable with basic commands. You’ll need to open Command Prompt as an administrator.
- Press Windows + S to open the search bar. Type “command prompt”, right-click the result, and select “Run as administrator”.

- Type the following command and press Enter to remove Microsoft Print to PDF from your printers list:

4. Use PowerShell
You can also remove the printer using PowerShell—a more advanced tool, but still very easy to use for this task.
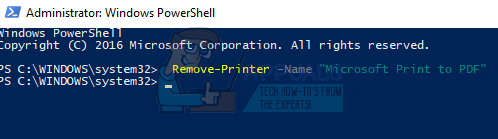
- Press Windows + S to open the search bar. Type “PowerShell”, right-click the result, and choose “Run as administrator”.

- In PowerShell, copy and paste the following command, then press Enter:
Remove-Printer -Name “Microsoft Print to PDF”
- This will automatically remove Microsoft Print to PDF from your system.
Adding the “Microsoft Print to PDF” Printer Back
If you removed Microsoft Print to PDF by mistake, or if you want to add it again for any reason, you can do so easily by following these steps:
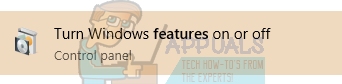
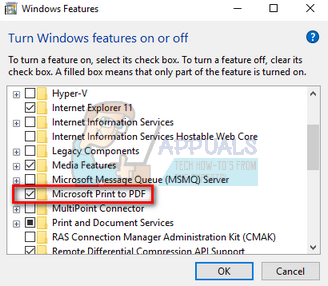
- Before adding the printer, make sure the feature is enabled in Windows Features. Press Windows + S to open the search bar, type “features”, and open the first result that appears.
- Check that “Microsoft Print to PDF” is enabled (it should have a checkmark).
- Press Windows + S to open the search bar. Type “Settings” and press Enter, then select the first result.
- Click on Devices from the left sidebar.
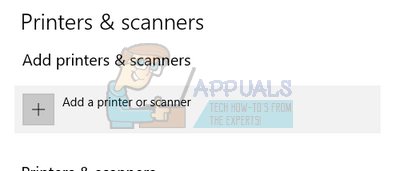
- Click on “Printers and scanners” on the left side.
- Click on “Add a printer or scanner” at the top of the window.
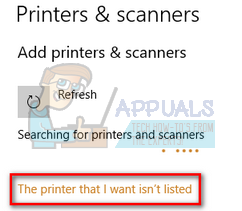
- Windows will search for printers. When “The printer that I want isn’t listed” appears, click on it.
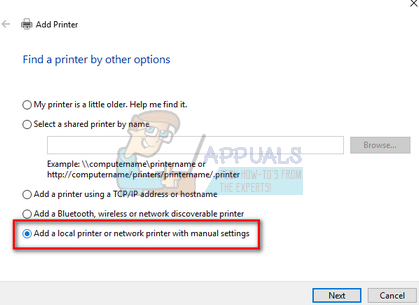
- Check “Add a local printer or network printer with manual settings” and click Next.
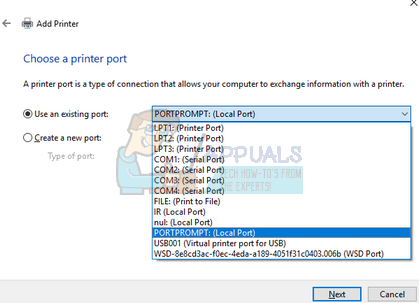
- Choose “Use an existing port”. From the drop-down list, select “PORTPROMPT: (Local Port)”, and then click Next.
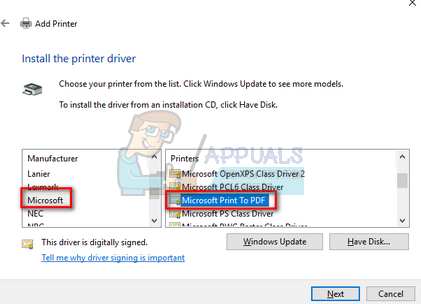
- Select Microsoft from the left panel, then find and select “Microsoft Print to PDF” on the right. Click Next.
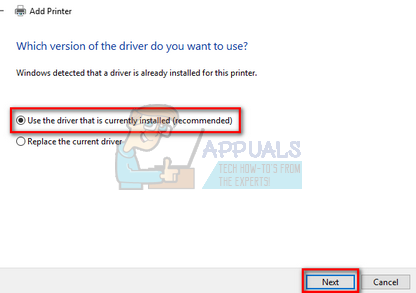
- Choose “Use the driver that is currently installed (recommended)” and click Next.
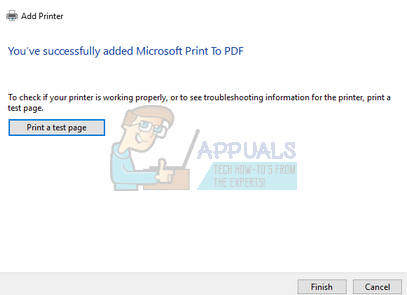
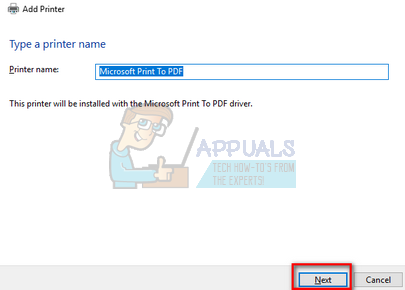
- Keep the default printer name and click Next.
- Windows will now install the printer. Once done, it will notify you. Click Finish to exit the setup and confirm the printer has been added.