How to Add Midourney Bot to Discord in 3 Easy Steps
- The Midjourney Bot on Discord aids in creating images via AI technology. Users generate images using text prompts through the /imagine command. To use it, one needs an active Midjourney subscription and can then add the bot to their Discord server.
- Adding the bot involves joining the Midjourney community, inviting the bot to your server, and adjusting permissions. This allows for a more private and controlled creative environment, avoiding the crowded nature of the main server.
- For effective use, craft intelligent prompts, experiment with different styles, and engage the community with AI-generated images. Monitor resource usage, particularly GPU time, to manage your subscription effectively.
The Midjourney Bot is a popular AI-driven image creation tool available on Discord. With recent upgrades enhancing its capabilities, it’s no surprise that this tool is highly sought after, often leading to crowded servers. Fortunately, users can add the Midjourney Bot to their own Discord servers for private use or to share among friends or team members.

This guide outlines the steps to seamlessly integrate the Midjourney Bot into your Discord server and provides strategies to enhance your image creation experience.
The Midjourney Bot is a tool on Discord that employs advanced text-to-image AI technology to create unique images from text prompts. By facilitating collaborative creativity and project organization, it plays a valuable role on the Discord platform.
To utilize the Midjourney Bot, you will need an active Midjourney subscription. The bot can be integrated into any Discord server and utilized within specific channels. Initiating the image generation process is simple with the primary /imagine command, followed by a relevant text prompt.
Before proceeding with adding the Midjourney Bot to your server, let’s explore the advantages it offers.
Benefits of the Midjourney Bot:
- Enhance your server with captivating images: The Midjourney Bot can generate stunning AI-crafted images that will engage and delight your community.
- Stimulate creativity and conversation: Inspire your community to create AI art, encouraging a dynamic exchange of innovative ideas.
- Maintain privacy and control: By hosting the Midjourney Bot on your server, you ensure that only your community members see and interact with the images created.
Follow these steps to add the Midjourney Bot to your selected server:
Step 1: Join the Midjourney Community
To begin using the Midjourney Bot, join the Midjourney community on Discord. This process is quick and straightforward, taking just a few minutes.
If you do not have a Discord account, register for one first. Existing users may proceed by logging in.
- Navigate to the official Midjourney website and click the “Join the Beta” link to be directed to the Midjourney Discord server.
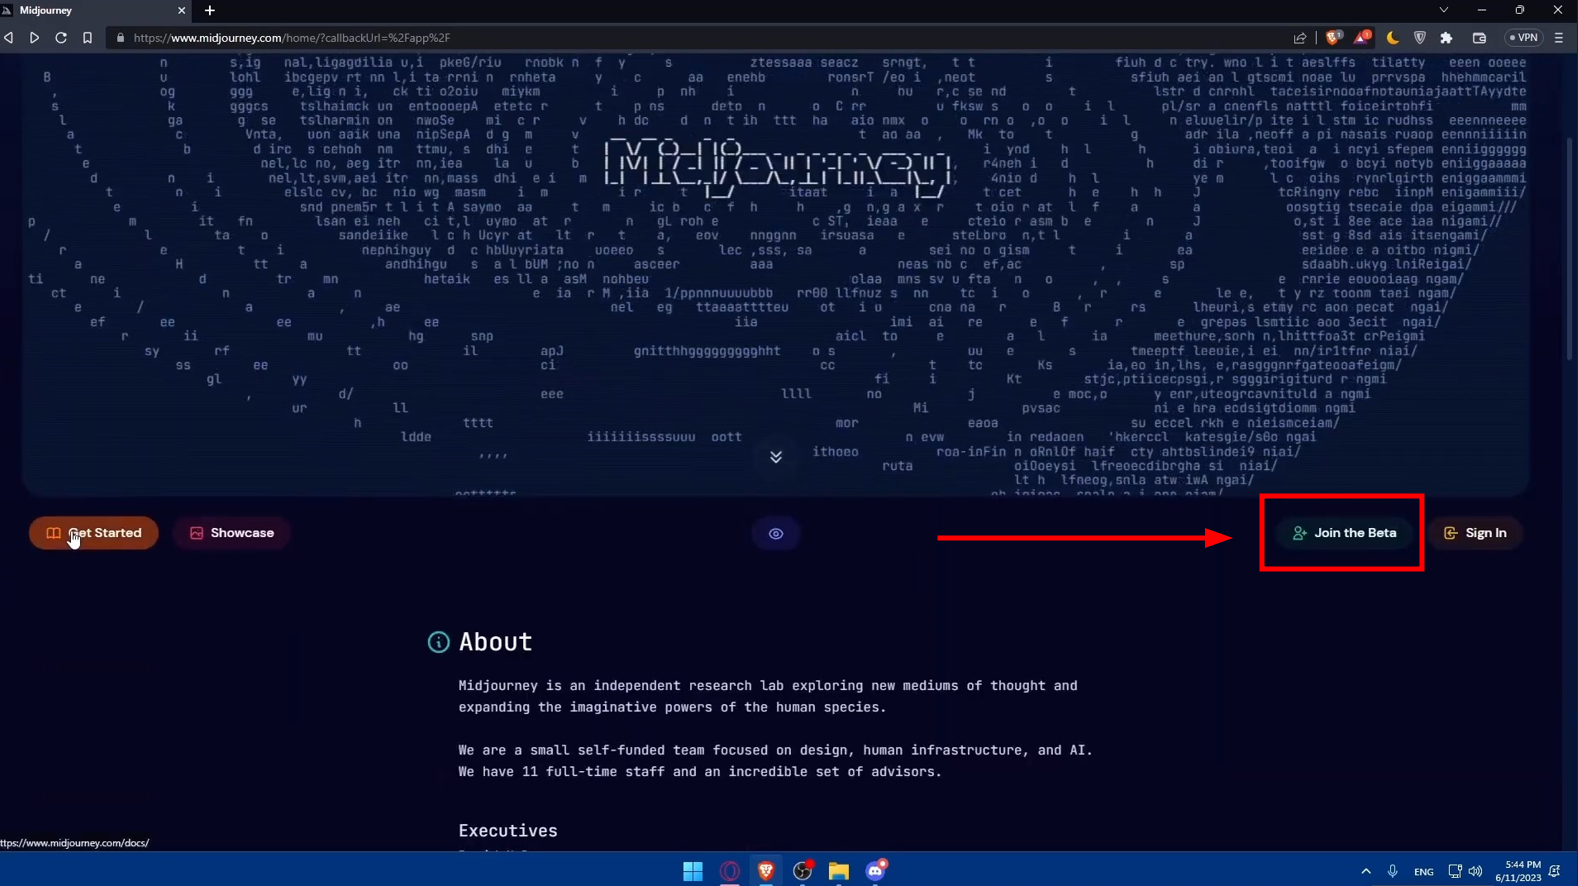
Click on the Join the Beta - Enter your Discord username and click “Continue” to join the Midjourney Discord server.
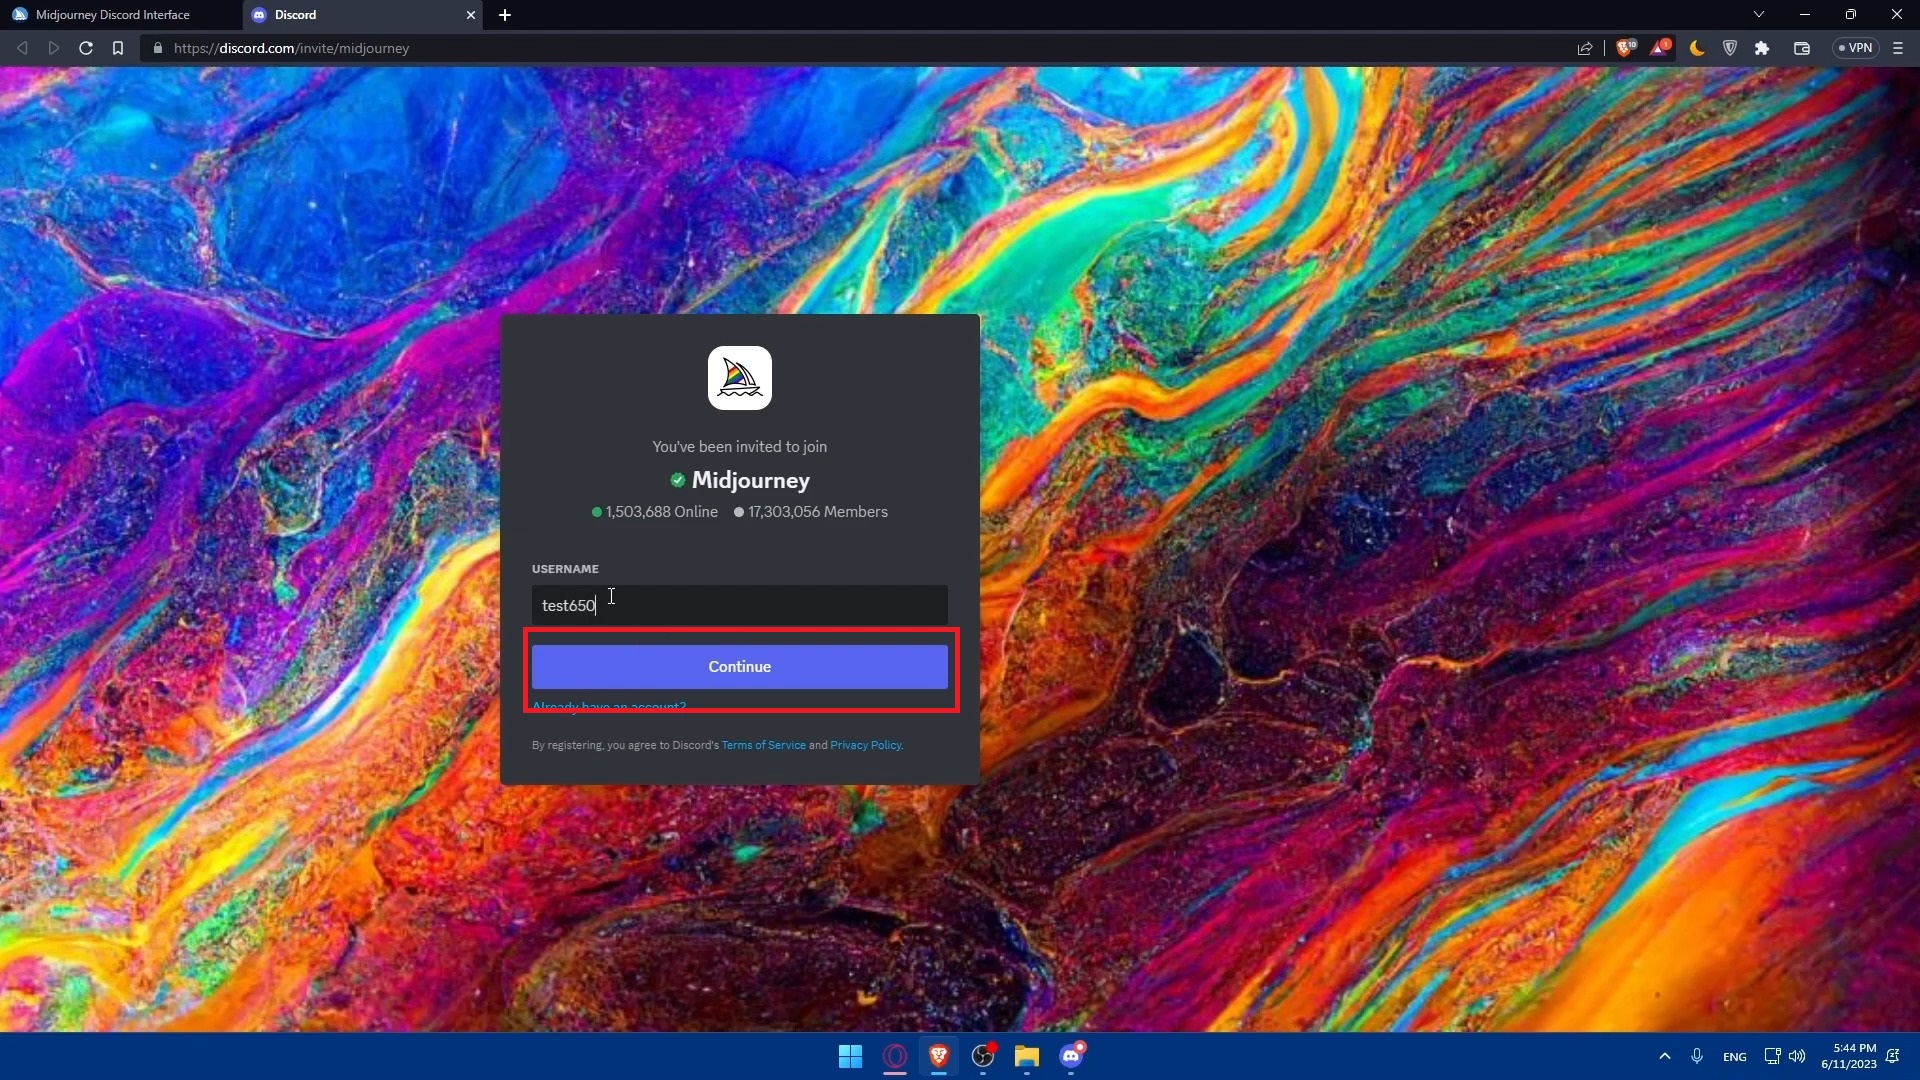
Click continue
Step 2: Add Midjourney Bot to Your Server
- Identify the member list on the screen’s right side. Look for a user named “Midjourney Bot” highlighted in green. Alternatively, locate the Midjourney Bot profile in the main server chat, and right-click on it.
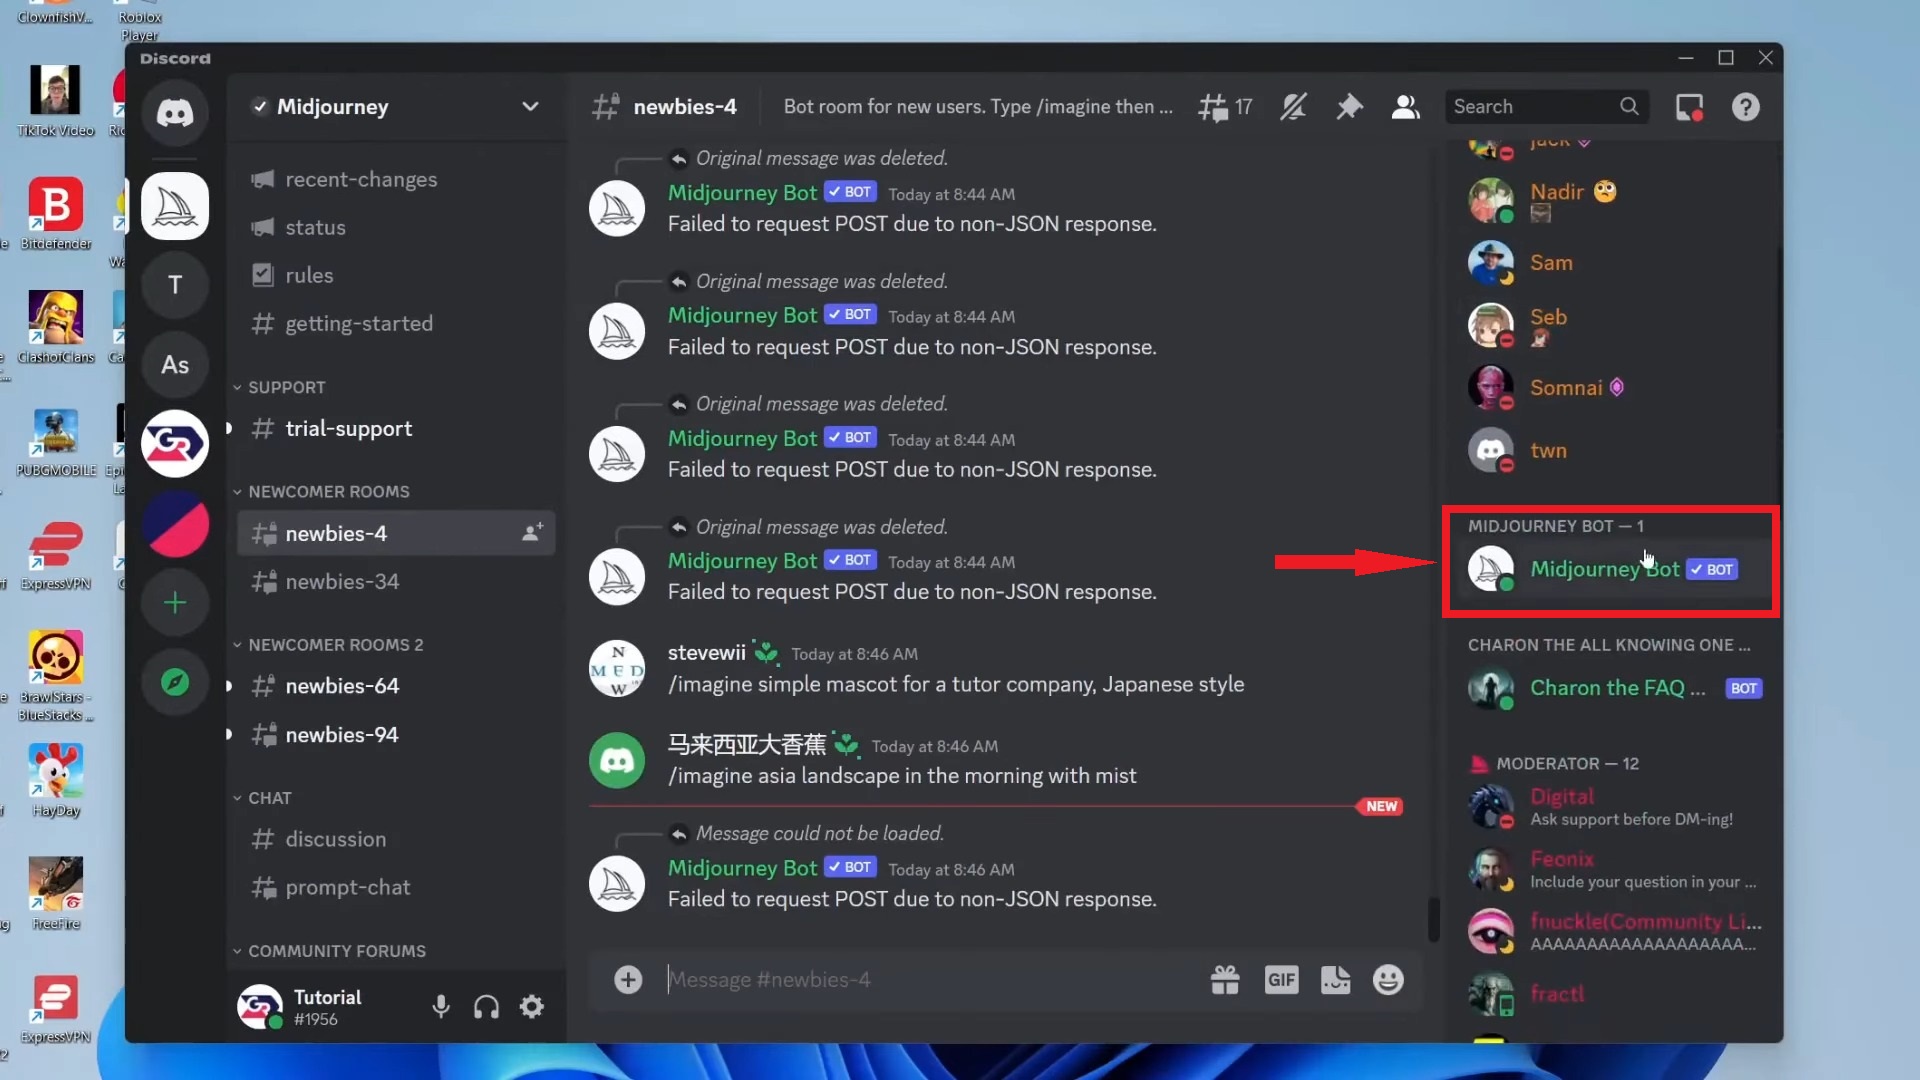
Look for Midjourney Bot Profile - Select Profile from the menu.

Click on the profile - A pop-up window will appear, choose “Add to Server.”
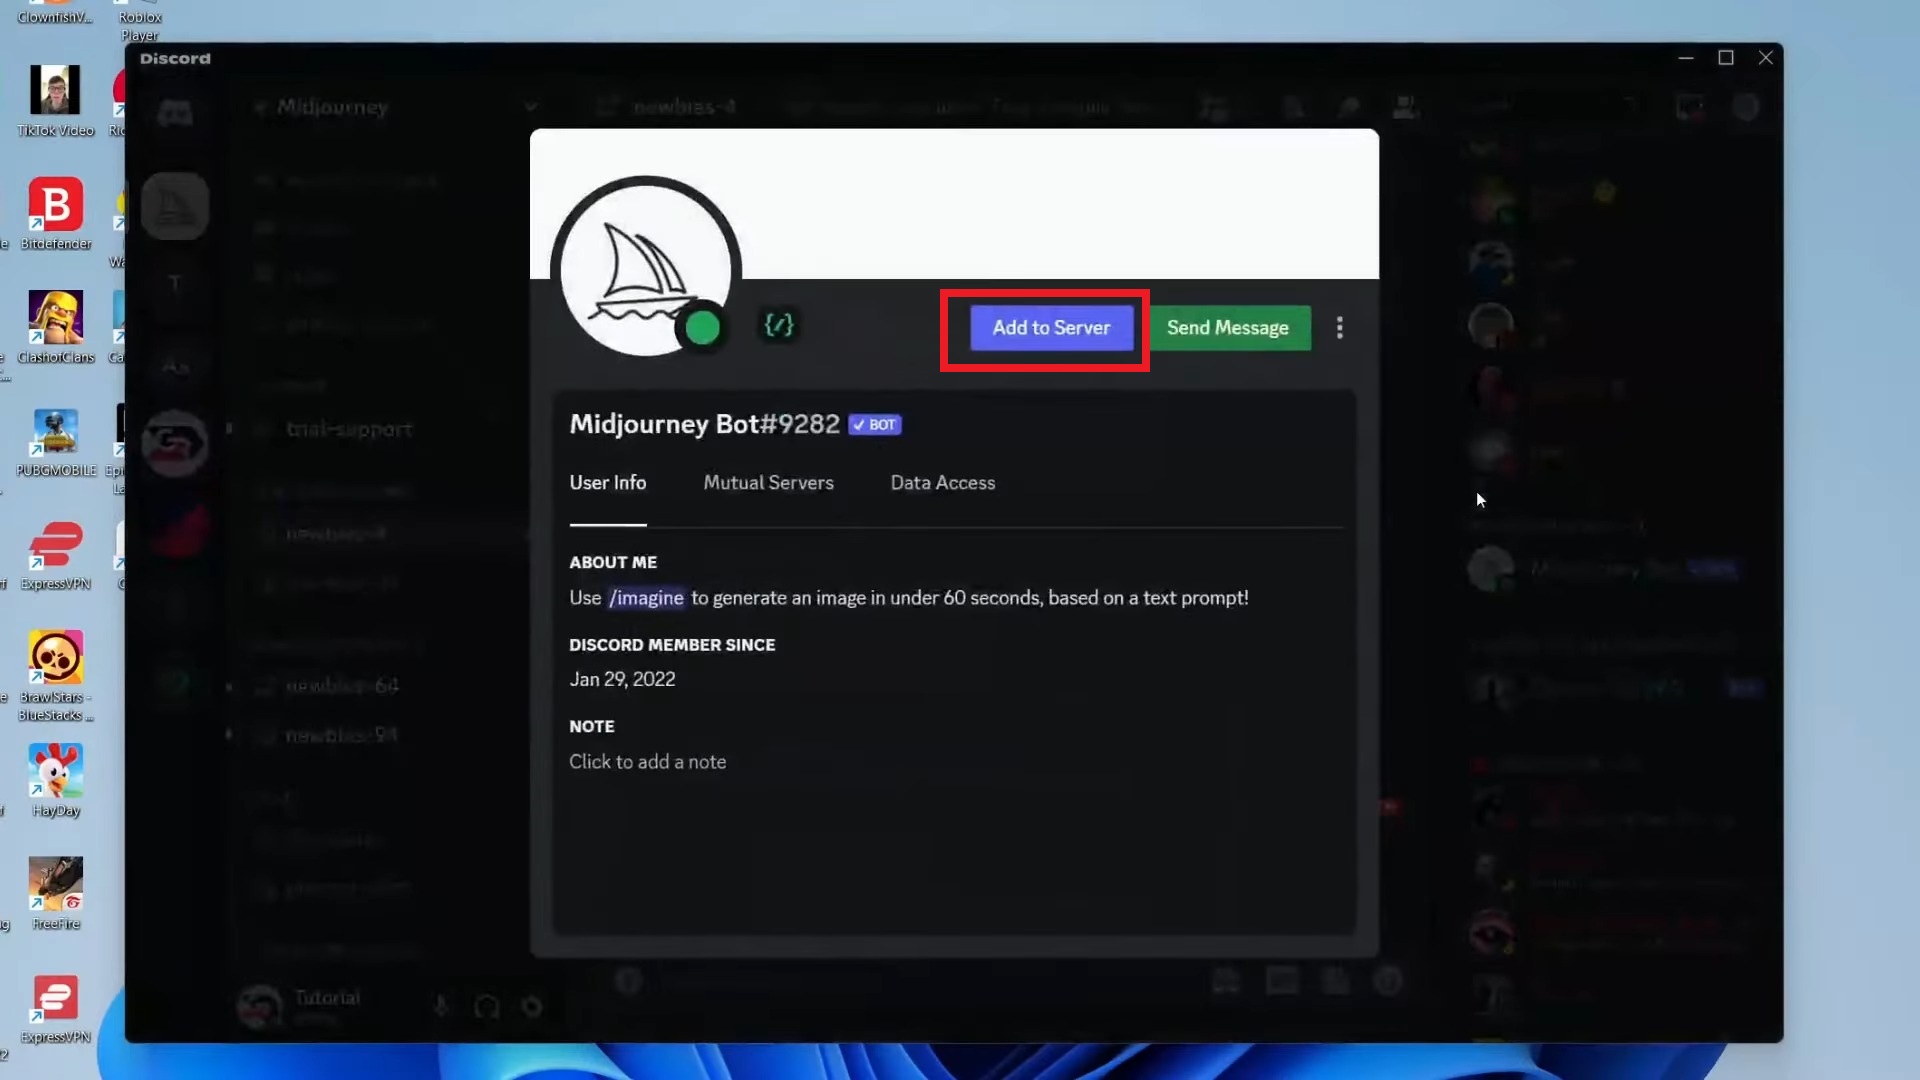
Select Add to Server - Select your server from the drop-down list (create one first if you do not have one).
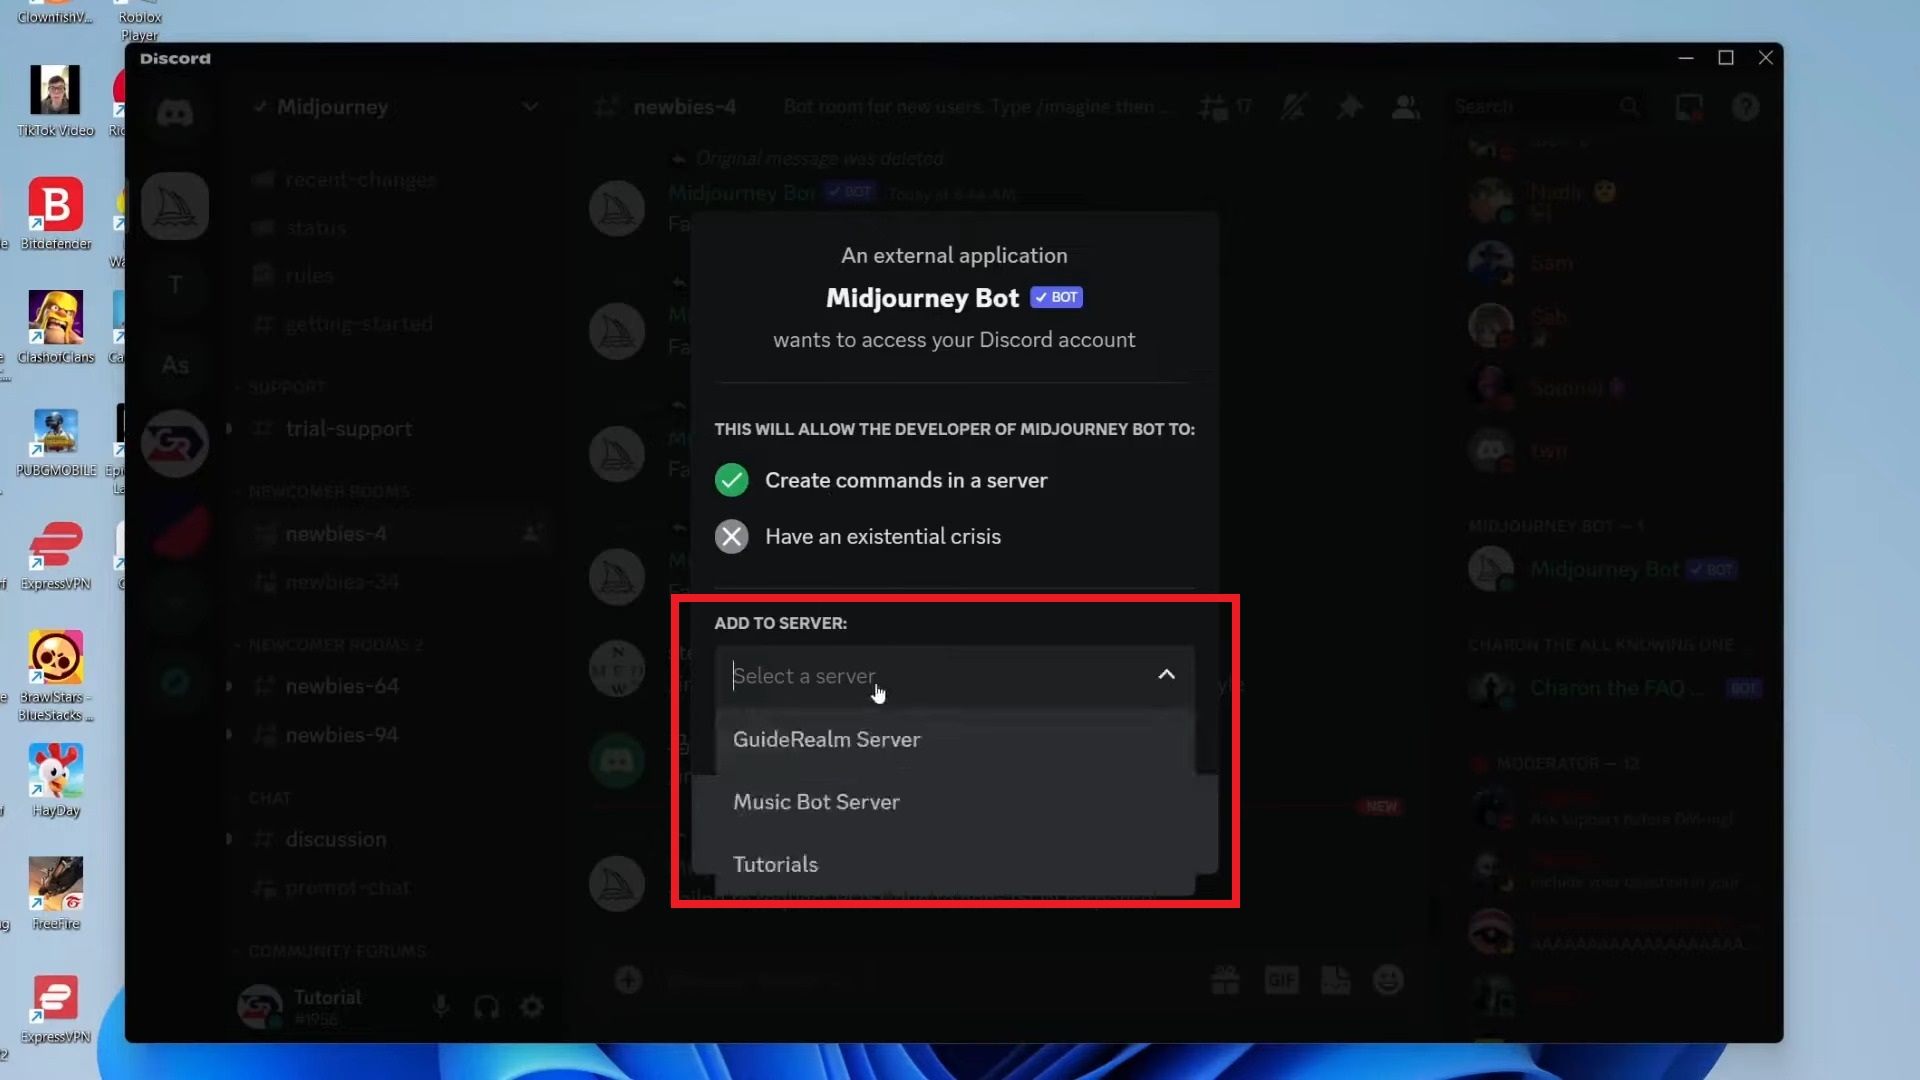
Then choose your server from the drop-down list - Click “Continue” after selection.

Click on Continue - You’ll be prompted to set permissions for the bot. Check all boxes to ensure smooth operation. Then, click “Authorize.”
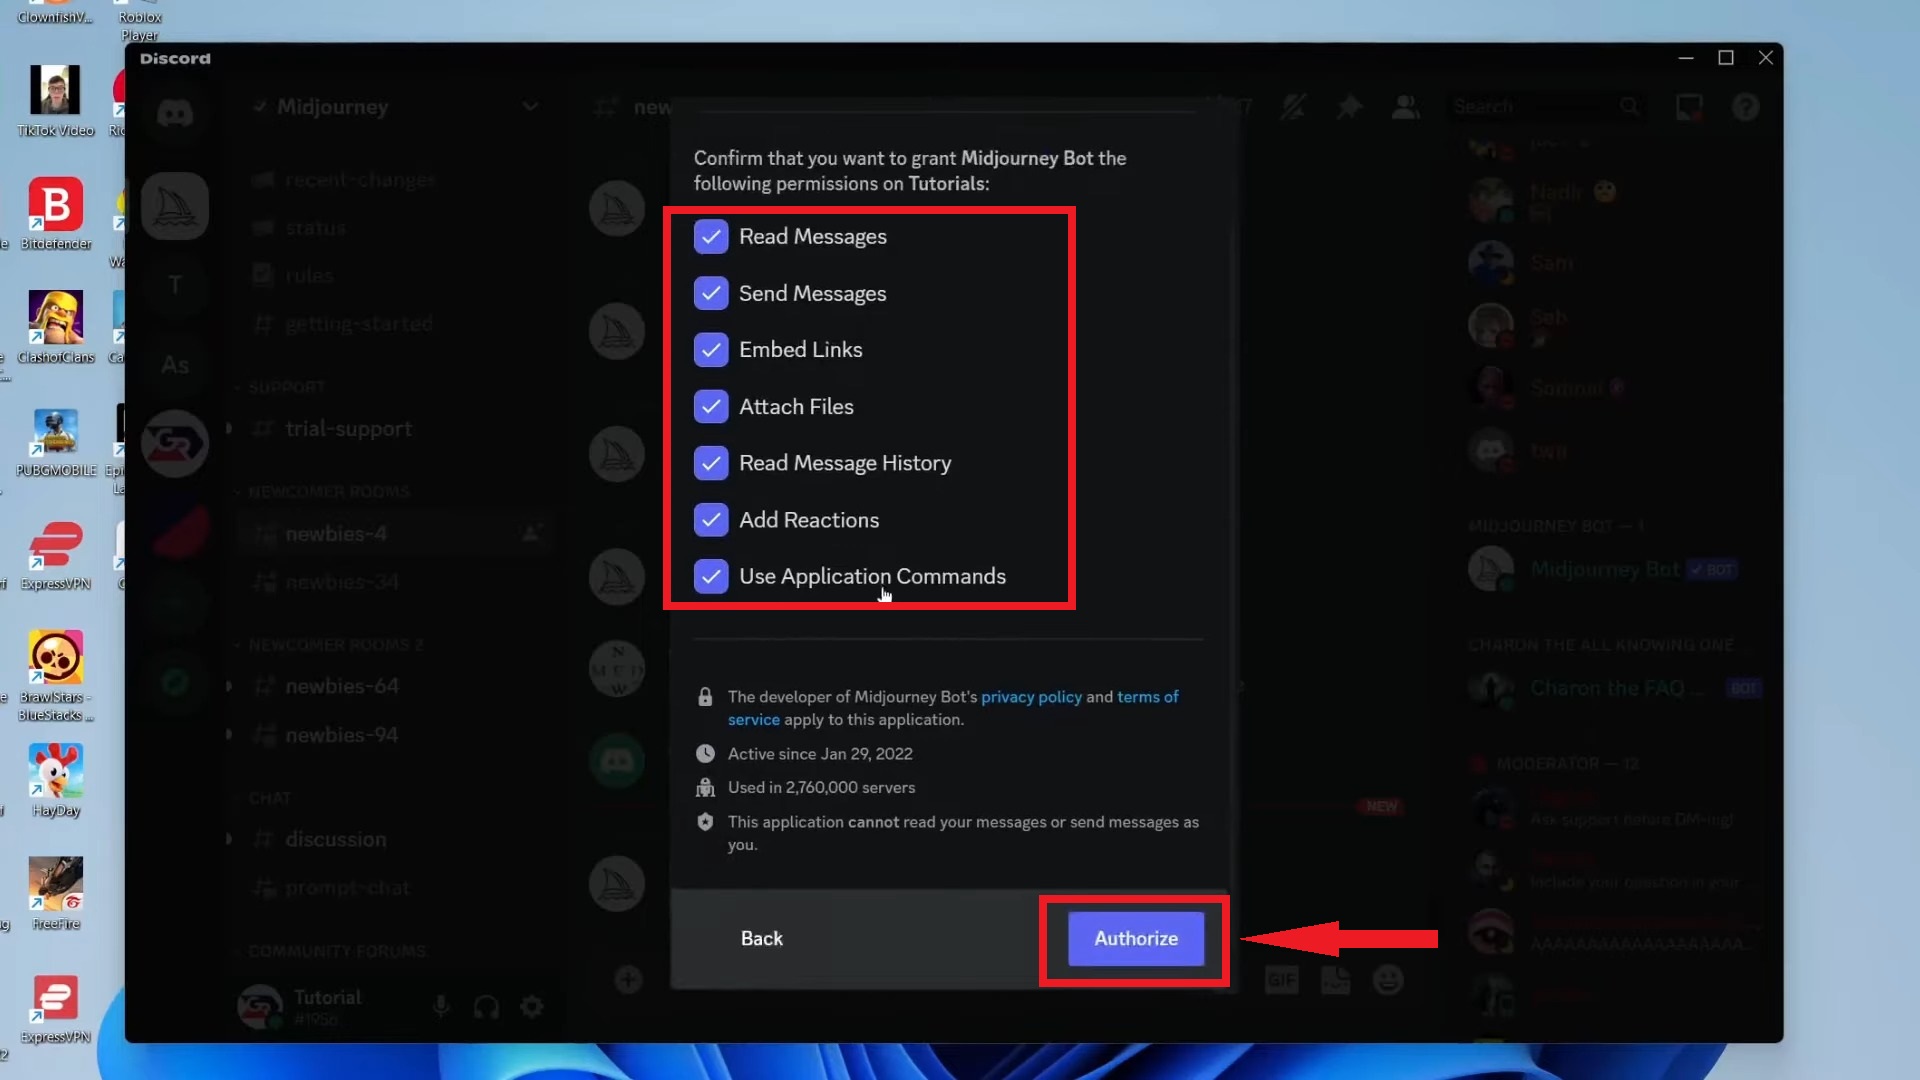
Click on Authorize - Complete the captcha, and you’re done. The Midjourney Bot is now active on your Discord server.

Solve the captcha
Note: You can add the Midjourney Bot to servers with fewer than 1000 members. By authorizing the bot, it can both read and send messages in your server. Also, ensure you possess administrative privileges to add bots.
Step 3: Test the Midjourney Bot
Put the Midjourney Bot to the test on your server using the Commands. These commands allow you to create images, tweak settings, and access user information, among other functionalities. To see the bot in action, begin with the /imagine command by writing your Prompt.

Congratulations, you have successfully added the Midjourney Bot to your Discord server.
An Alternative Way of Adding Midjourney Bot to Discord
If you prefer, there is another way to add the Midjourney Bot to your Discord server. Consider this a backup option since many steps are similar to the previous method. Here’s how you can proceed:
- Access the list panel by clicking the server’s name where you wish to add the Midjourney Bot, located in the top left corner.

- Select “App Directory” from the drop-down menu.

Click on App Directory - In the search bar, type “Midjourney” to find the Midjourney Bot in the App Directory.

Type Midjourney in the search bar - Select the official Midjourney Bot from the search results, typically the first result featuring the Midjourney logo.

Choose Midjourney Bot from the results - Click “Add to server” as it appears in the interface.

Click on Add to Server
 Reviewed by


