How to Add Custom Images for Android Magazine Lockscreen
A fair number of devices now come with the Magazine Lockscreen feature, also listed as MgzKeyguard in your installed /system packages. This app displays a rotating selection of random photos and quotes as your lockscreen wallpaper. It regularly updates itself to fetch new images from the internet. One limitation is that you usually can’t set your own photos as the slideshow, unless you’re on Android Nougat—in which case, you can only select up to 9 of your own photos for the lockscreen.

In this guide, I’ll show you how to customize the Magazine Lockscreen by modifying its .apk file. You’ll learn how to replace all the default photos with your own images and stop the app from updating, so only your selected photos appear on your lockscreen.
Requirements:
- A device featuring the Magazine Lockscreen app
- WinRar
- Cwebp Utility
- Optional: WebP Photoshop Plug-in
- First, install a root explorer app from Google Play, such as FX Explorer, Root Explorer, or ES File Explorer. You’ll need an app that can browse the /system directory.
- Next, locate the mgzkeyguard.apk file and copy it to a different location, such as your SD card.
- Connect your device to your computer via USB, and then transfer the mgzkeyguard.apk file from your SD card to your computer.
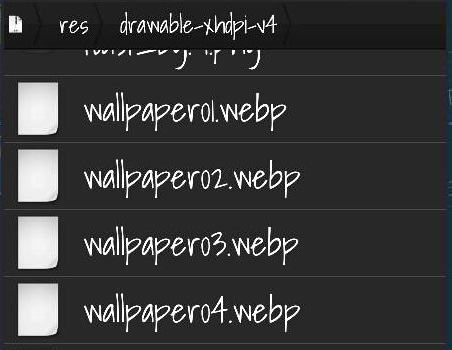
- Right-click the .apk file, choose Open With > WinRar. This will let you browse the contents of the .APK file. The images you want to replace are in the \Res\Drawable-xxxx folders. The xxxx refers to your screen resolution—for example, Drawable-xhdpi for high-density screens.

You’ll notice the wallpaper images are named wallpaper01.webp, wallpaper02.webp, and so on. If you’re wondering, a .webp file is an open-source image format that offers lossless compression. It can provide up to 30% better compression compared to JPEG without losing quality.
The good news is, there are several tools that can help you convert your favorite photos to .webp files.
- Gather the photos you want to use and rename them to match the existing files—wallpaper01, wallpaper02, etc.
- Download and install the cwebp encoder tool from the link above. This lets you convert your images to .webp format using the command line. Alternatively, you can use the WebP Photoshop plugin to convert images inside Photoshop.
To convert images to .webp using the cwebp command tool, enter this in the command prompt:
cwebp -q 80 image.png -o image.webp
After converting all your images to the .webp format, drag them into the appropriate folder inside the .apk file, replacing the old wallpapers. Make sure the filenames match exactly.
- Now it’s time to move the modified .apk back onto your device. There are a couple of ways to do this:
a) Open your ROM and navigate to where you originally found the .apk file. Delete the old .apk file, then drag and drop your newly edited .apk file into the same location inside the archive. Connect your device to your computer, transfer the updated ROM back to your SD card, and flash it via recovery. Reboot, and you should see your new images!
b) Copy the new .apk file from your computer back to your device. Using a root explorer app, navigate to the original .apk file and take note of its permissions (for example, RW–r–). Delete the old .apk and copy in the new one, making sure to set the permissions the same as before. Reboot your device, and enjoy your personalized lockscreen!