How to Activate Google Now Cards in Any Country
Today’s technology is becoming closer and closer to the real artificial intelligence, which we were dreaming about a couple of years ago. Voice assistants on our smartphones are a great example how useful this technology can be. One of the leading companies in this business is Google, with the Google Assistant app. It is an excellent example of a smart assistant that gives you personalized information based on your interests. It can show you the weather forecast for your city, traffic information based on your location, your favorite team results, and much more.
However, Google Now Cards are not available in all countries around the world. Though I don’t know the reason why this is happening, I know that it is really annoying to own an Android device, and don’t have an opportunity to use Google Now Cards.
After a little research, I found a way how can I quickly activate Google Now Cards in my country, even it is “blacklisted” by Google. I know that many of you would be interested how I did it, so here, in this article, I will show you how to activate Google Now Cards in any country. Let’s begin.
Requirements
First, I must tell you that this procedure does not work on all Android devices. So, here are the requirements:
- Rooted device
- Android version 6.0.1 or older
- Third party apps installation enabled (Unknown sources)
Install the Google App
Most of the Android devices have the Google app pre-installed, so the odds are that you already have it on your phone. However, if for any reason you don’t have the Google app on your Android, you should go to the Google Play Store and search for it or just click on the following link Google.

After you download Google, you can open the app and test if your country is one of the “blacklisted.” If Google Now Cards are not available in your country, you will see a blank white screen with a Google search bar at the top, just like in my case. So, if your Google app looks like mine, you are definitely ready to go to the next step.
![]()
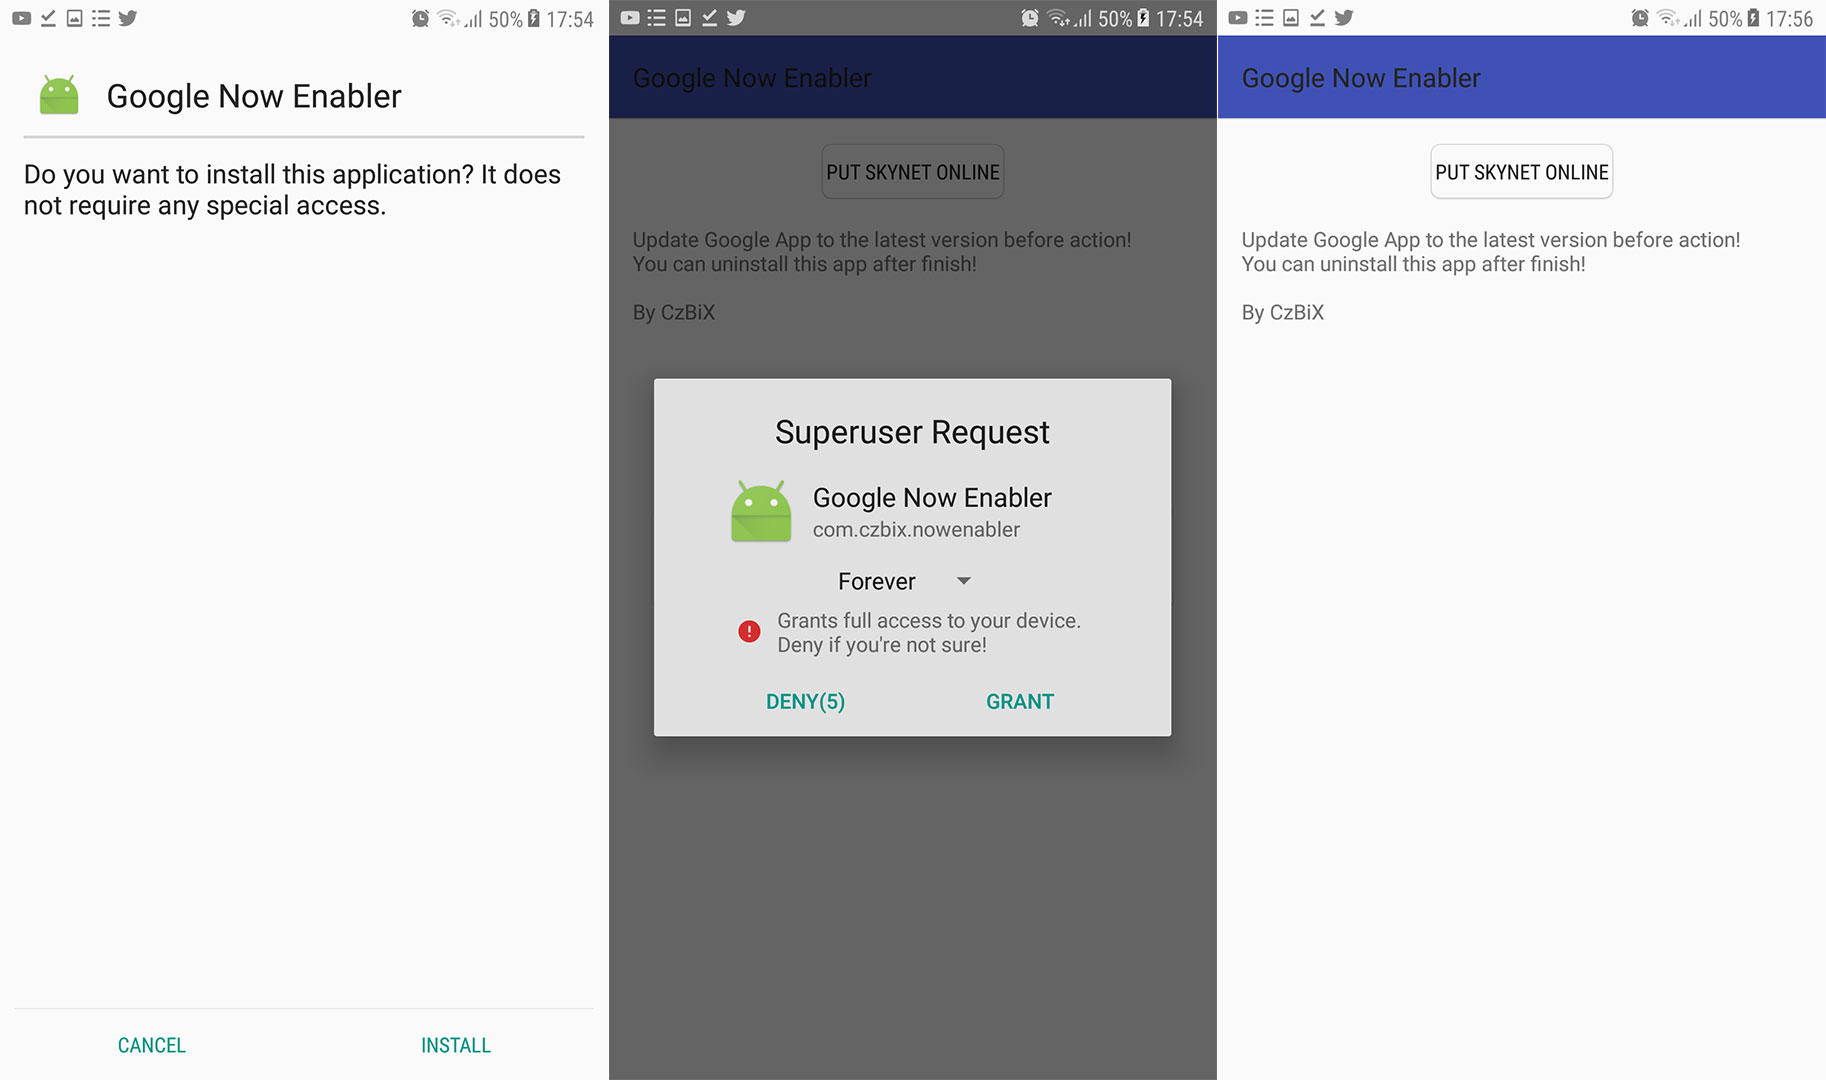
Install Google Now Enabler
Google Now Enabler is a simple app made with one purpose, to enable Google Now Cards. Here is the link where you can find all the versions of the app Google Now Enabler. I suggest downloading the latest version for the best results. After your download finishes, open the apk file and click install. When you first open the app, it will require root access. Allow the request, and then you can click on the only button. Now, wait for a couple of seconds, while the app does the magic. You’ve just activated your Google Now Cards.
Start Using Google Now
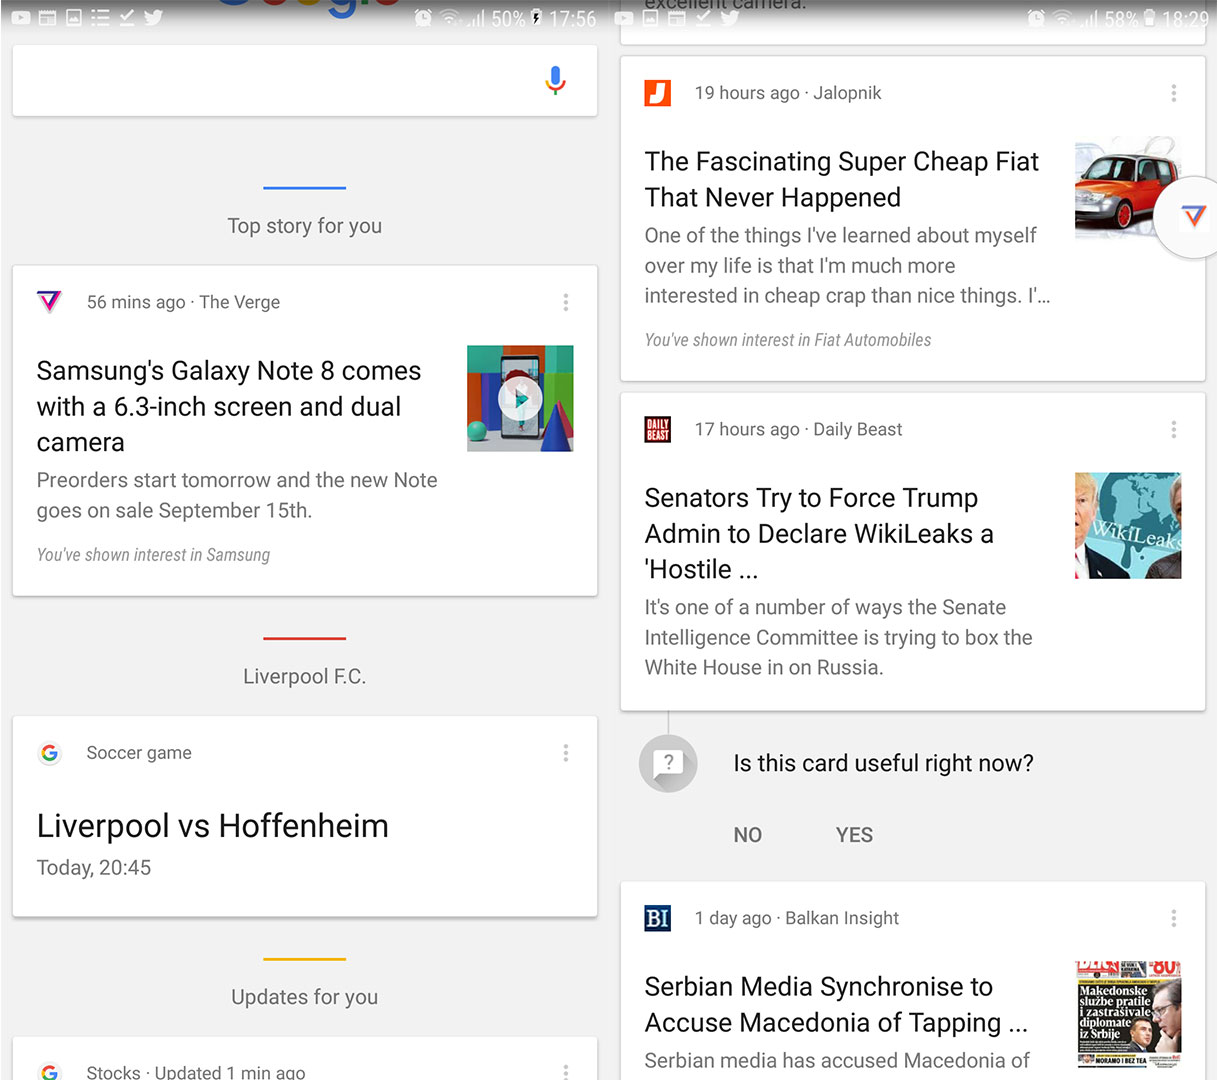
After you’ve successfully used the genius app Google Now Enabler, you can open Google Now and check if the trick worked. In my case, the cards are ready with all the information that may be interesting for me. If you want to know more about the info from one particular card, just click on the card and you will see the details.
Google Now Cards are an advantageous Android feature, and it should be available on all Android devices, in all countries. I hope that Google will make this feature available for all Android users in the future. If you want to add something, do not be shy to share your opinion with us.
Alternative No App / No Root Method
This method does not require any third party apps or a rooted phone, but it does require a factory reset. It also requires a WiFi connection for initial setup. However, this method has been confirmed as working by many users.
- First log out of all Google accounts and clear all cache and data for Google apps on your device. This can be done via Settings > Apps > tap the various Google apps (Google, Gmail, Play Store, etc) > Storage > Clear cache.
- Now you need to remove your SIM card(s) and perform a complete factory reset on your device. The best way would be via recovery mode.
- When you boot up your phone, skip all of the steps. Do not set up WiFi, email, time/date, nothing at all. Skip everything.
- Go into Settings > Location> Turn Off.
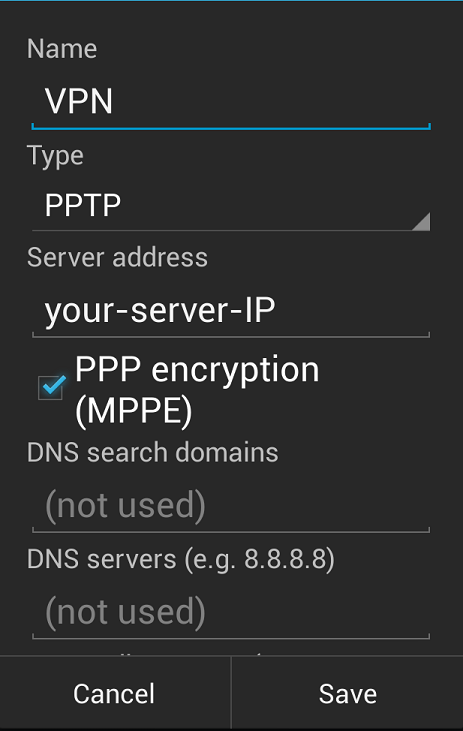
- Now go into Settings > WiFi > VPN Settings. Press the Plus icon to create a new VPN. Search Google for a United States VPN service and the VPN settings you need to put into your device.
- Make sure the VPN is enabled, and turn on WiFi. Connect to your WiFi network on your Android device, and tap the Google App.
- Sign in with your Google account, and you should see a window introducing Google Now, so click “Yes”.
- Now go to Settings > Google > Search and Now > Now Cards > Now on Tap and enable it if you want Now on Tap cards.
- Now re-insert your SIM card and delete the VPN. You should now be able to permanently enjoy Google Now.