ActionUri OOP Server: What is it and why does it keep running in the background?
The ‘ActionUri OOP Server’ process sometimes shows up in Task Manager, using memory and CPU even if you’re not using Cortana. This process is a real part of Windows and helps Cortana handle certain types of commands called URI (Uniform Resource Identifier) commands.
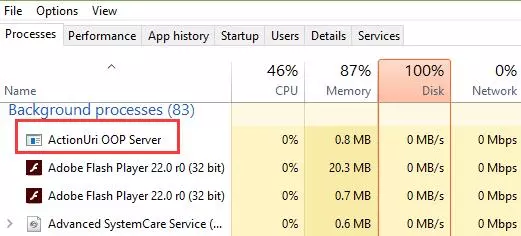
It usually runs in the background because Cortana is turned on by default in many versions of Windows. Even if you turn off Cortana, you might still see this process for a short time because of leftover background services.
In this article, we will discuss different ways to close this process.
1. Disable Cortana via Local Group Policy Editor
You can disable Cortana using the Local Group Policy Editor. This will remove all Cortana-related processes, including ActionUri OOP Server. This is the best option for users who don’t use or want Cortana.
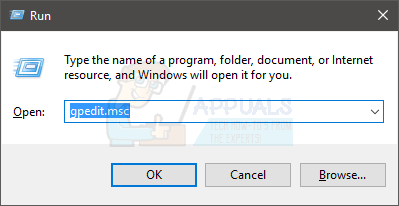
- Hold the Windows key and press R.
- Type gpedit.msc and press Enter.
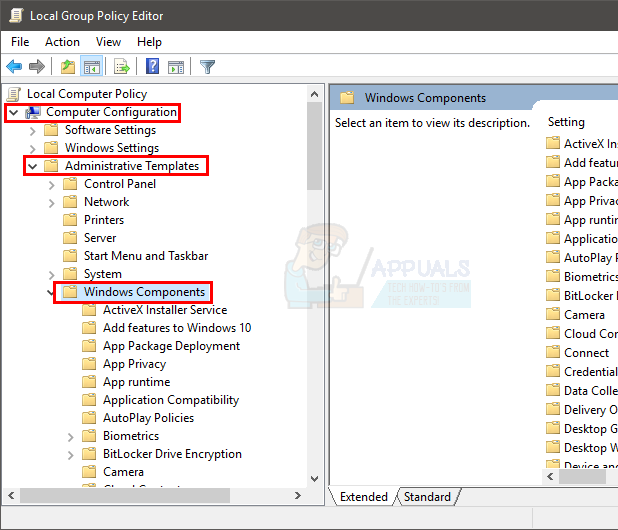
- Navigate to Computer Configuration > Administrative Templates > Windows Components > Search. If you’re unsure how to get there, follow these steps:
- Double-click Computer Configuration in the left panel.
- Double-click Administrative Templates.
- Double-click Windows Components.
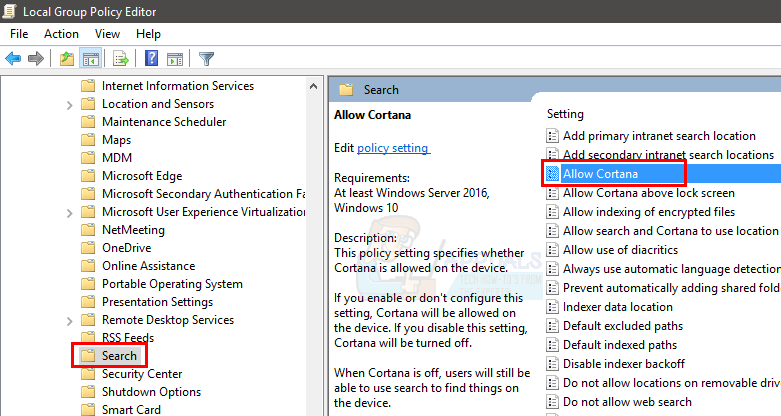
- Click Search in the left panel.
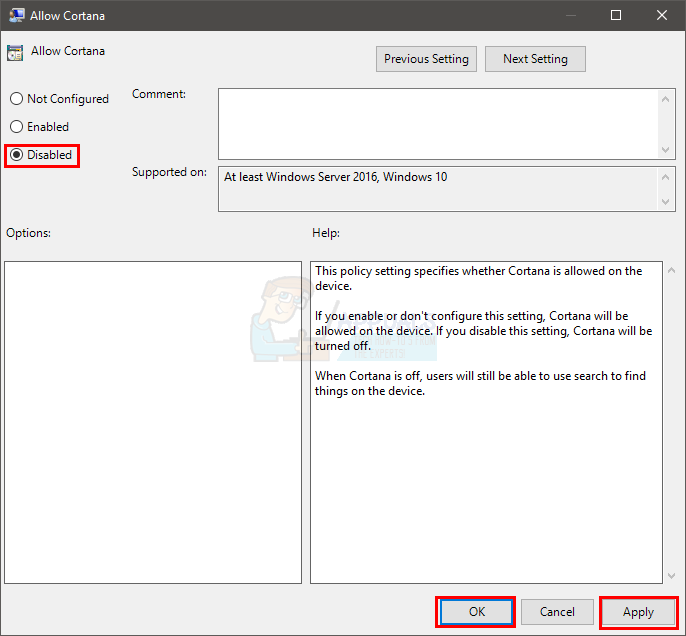
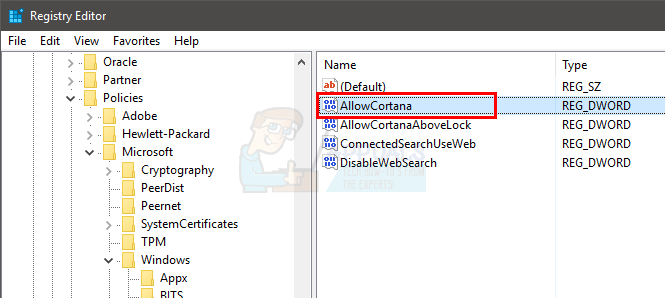
- Double-click Allow Cortana in the right panel.
- Select Disabled.
- Click Apply and then OK.
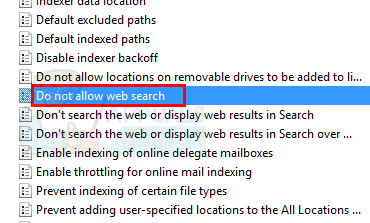
- Double-click Do not allow web search in the right panel.
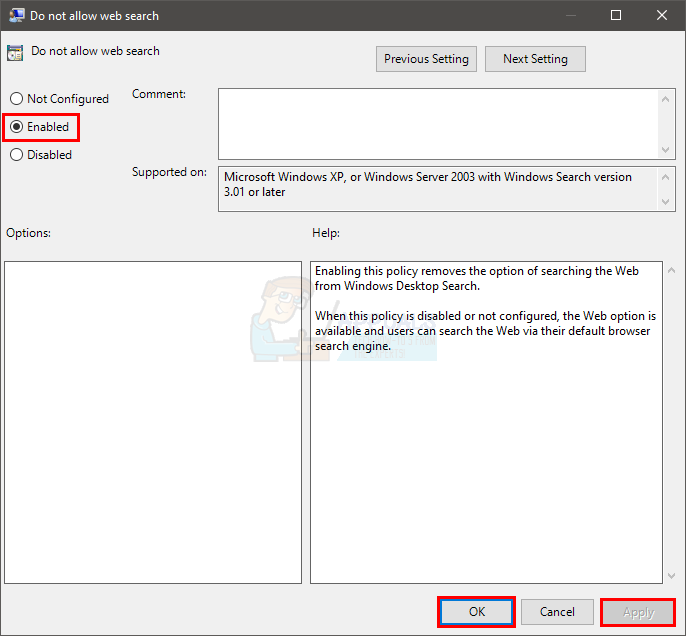
- Select Enabled.
- Click Apply and then OK.
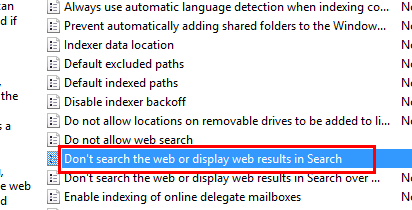
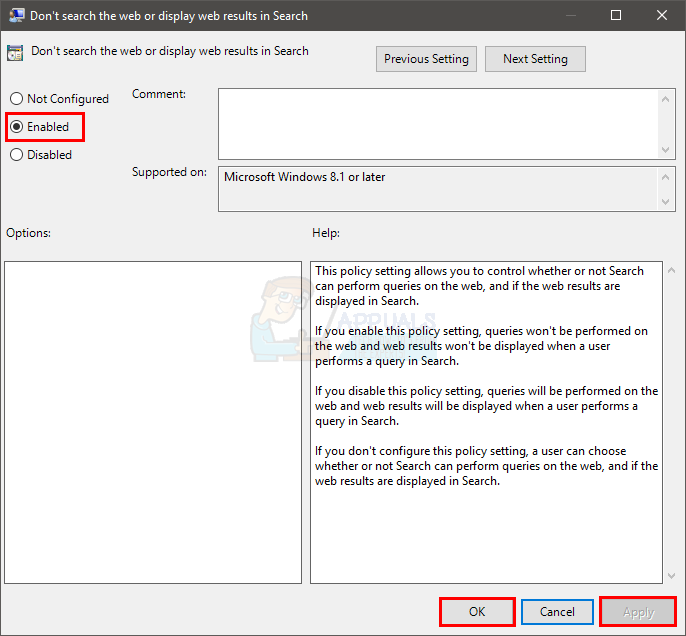
- Double-click Don’t search the web or display web results in Search in the right panel.
- Select Enabled.
- Click Apply and then OK.
That’s it! Cortana should now be disabled on your system. Restart your computer to apply the changes.
Note: This method only disables Cortana, the digital assistant. The Cortana process (SearchUI.exe) used for Windows Search will still be visible in Task Manager, which is normal. However, the ActionUri OOP Server process should not run anymore, and other related processes should use minimal resources.
2. Disable Cortana via Registry Editor
You can also disable Cortana using the Registry Editor. The previous method works for certain editions of Windows, but if you don’t have access to the Local Group Policy Editor, use this approach.
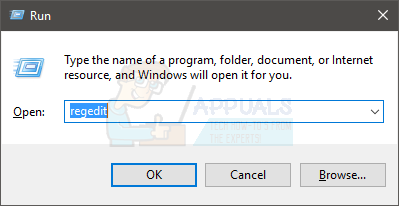
- Hold the Windows key and press R.
- Type regedit and press Enter.
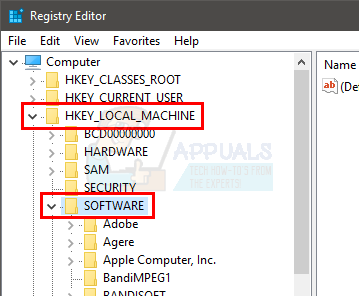
- Navigate to HKEY_LOCAL_MACHINE\SOFTWARE\Policies\Microsoft\Windows\Windows Search. If you’re unsure how to get there, follow these steps:
- Double-click HKEY_LOCAL_MACHINE in the left panel.
- Double-click SOFTWARE.
- Double-click Policies.
- Double-click Microsoft.
- Double-click Windows.
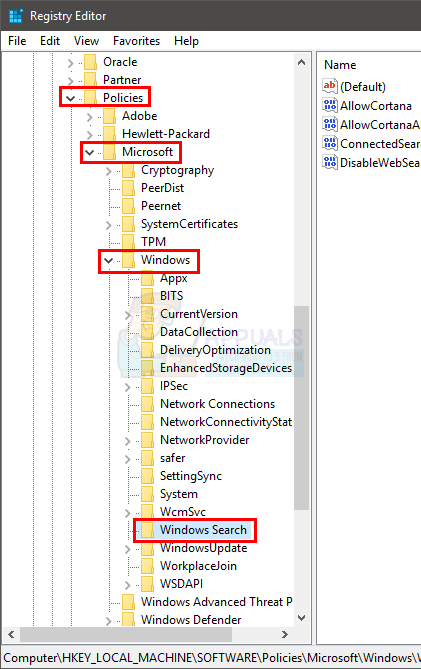
- Click Windows Search in the left panel. Note: If you don’t see Windows Search, you’ll need to create it:
- Right-click Windows (in the left panel), select New > Key, and name it Windows Search.
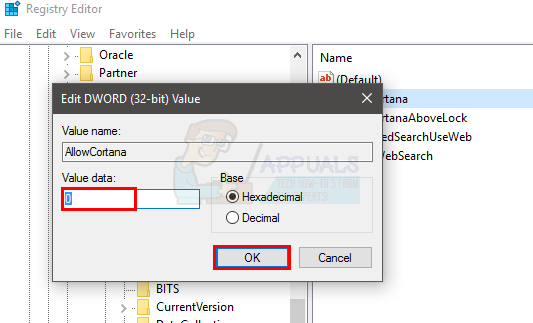
- Then right-click in the right panel, select New > DWORD (32-bit) Value, and name it AllowCortana.
- Double-click AllowCortana in the right panel.
- In the Value data box, type 0 and click OK.
Once you’re done, restart your computer and see if the problem is resolved.
Note: This turns off Cortana, but the Windows Search element (SearchUI.exe) is still present, which is normal. The ActionUri OOP Server process should no longer appear, and any other Cortana-related activity will use minimal resources.
3. Block ActionUri with Windows Firewall
Since the ActionUri OOP Server is started when Cortana sends and receives data over the internet, you can stop it from connecting by creating rules in Windows Firewall. This can help minimize its system usage. Note, however, that this will also stop Cortana from performing web searches.
- Hold the Windows key and press R.
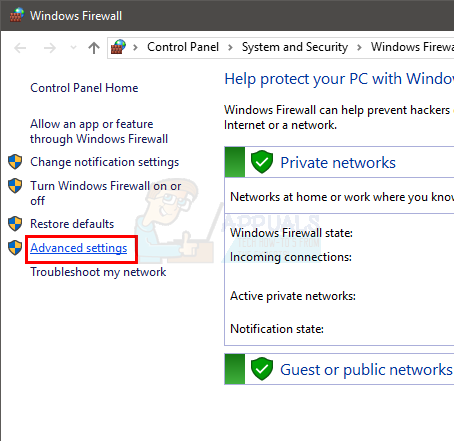
- Type firewall.cpl and press Enter.

- Click Advanced settings.
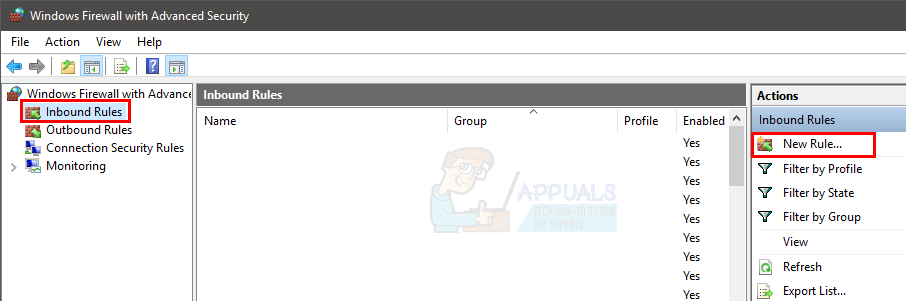
- Click Inbound Rules in the left panel.
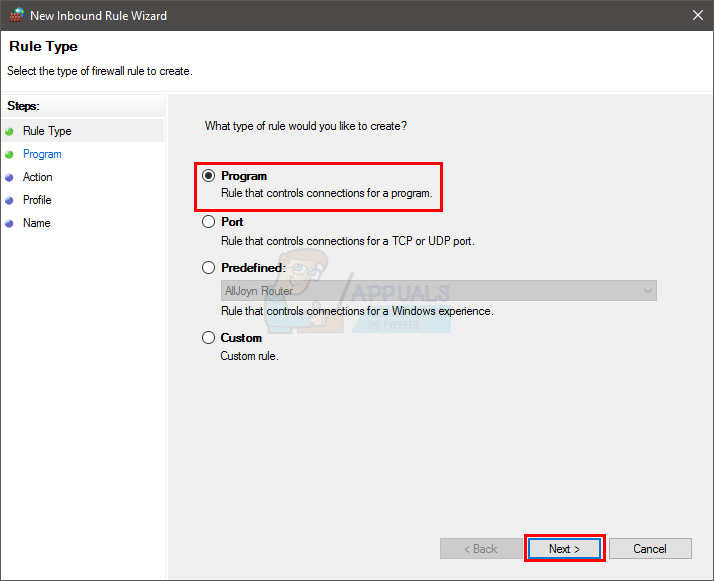
- Select New Rule….
- Select Program and click Next.
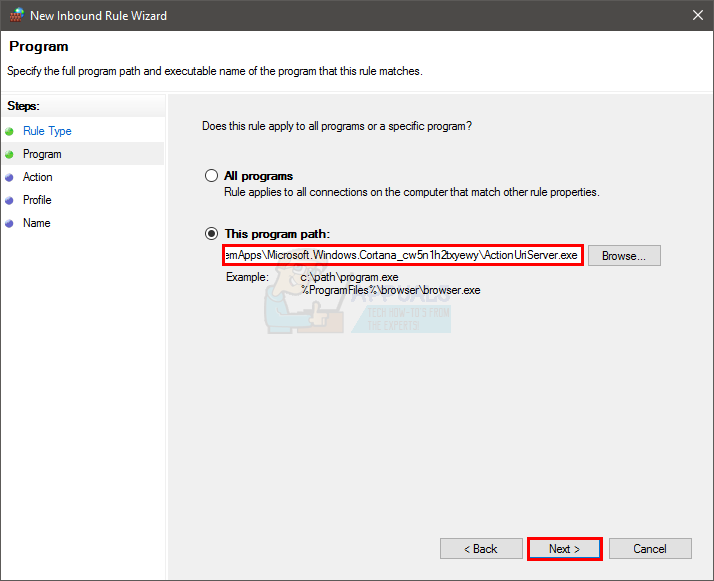
- Choose This program path:
- Enter: %SystemRoot%\SystemApps\Microsoft.Windows.Cortana_cw5n1h2txyewy\ActionUriServer.exe. You can also click Browse and navigate to C Drive > Windows > SystemApps > Microsoft.Windows.Cortana_cw5n1h2txyewy > ActionUriServer.exe.
- Click Next.
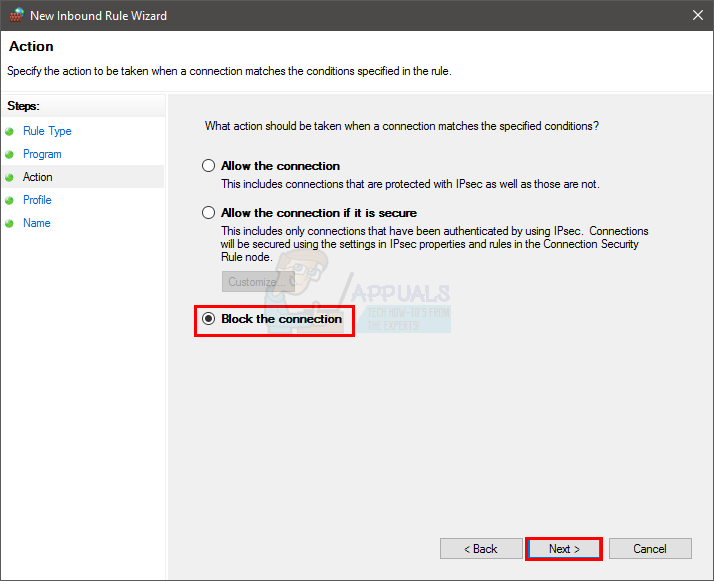
- Select Block the connection and click Next.
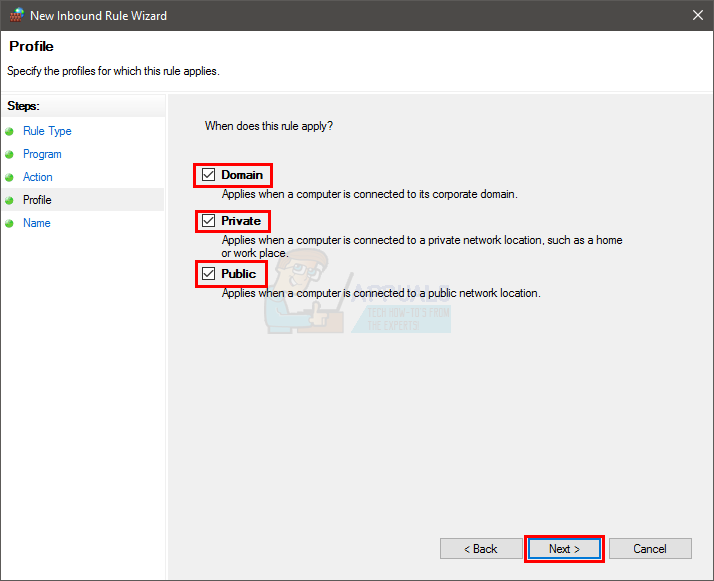
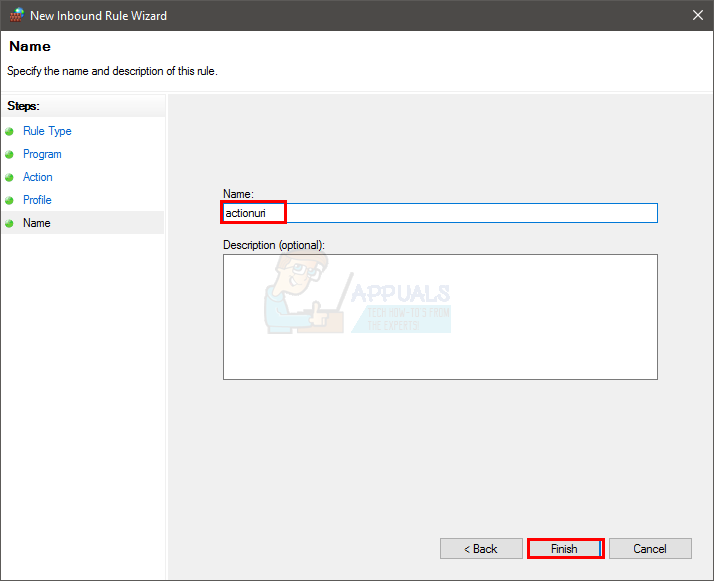
- Check all boxes (Domain, Private, and Public) and click Next.
- Give the rule any name (for example, “Block ActionUri OOP Server”) and click Finish.
- Now, click Outbound Rules in the left panel.
- Repeat steps 5-13 to block outgoing connections for the ActionUri OOP Server.
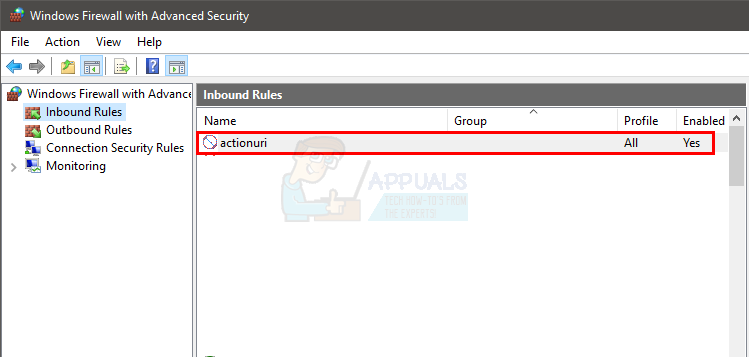
When finished, you should see these block rules at the top of your Windows Firewall rule list.
Note: You can also follow these steps to block other applications (such as Reminders WinRT OOP Server). Just use the right program file (for example, ReminderServer.exe) in step 8 instead of ActionUriServer.exe.
4. Rename the Cortana Folder
Warning: This method might cause your Start menu or other features that depend on Cortana to stop working. Only proceed if you’re aware of and accept this risk.
If nothing else has worked, and you want Cortana and its related processes completely gone, you can rename or move the Cortana system folder. This disables Cortana and its search features.
Note: If you update Windows after doing this, the changes will likely be undone. If you want to keep Cortana disabled after a Windows update, repeat these steps.
Before making any changes, you need to take ownership of the Cortana folder. The following steps will help you quickly add a “Take Ownership” option to your right-click menu, making this process easier in the future. (You can remove this context menu entry later if you want.)
- Hold Windows key and press R.
- Type regedit and press Enter.

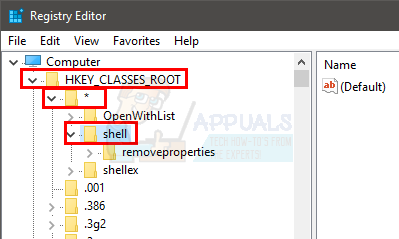
- Double-click HKEY_CLASSES_ROOT from the left panel.
- Double-click * entry from the left panel.
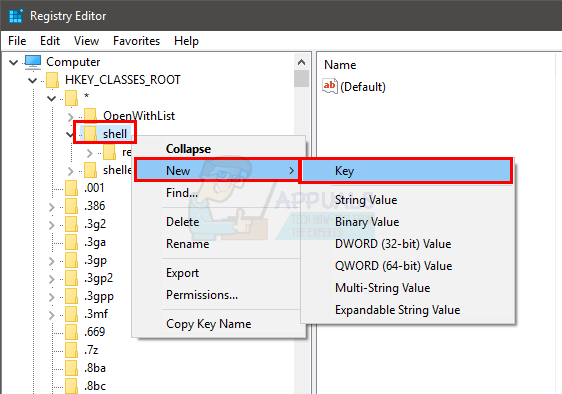
- Double-click shell from the left panel.
- Right-click shell and select New > Key. Name it runas.
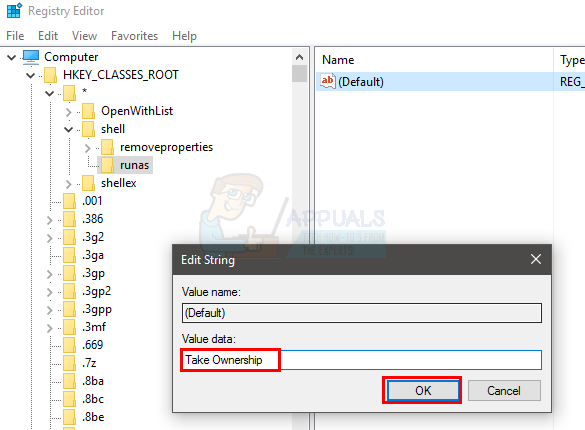
- Make sure runas is selected, then double-click (Default) in the right panel.
- Type Take Ownership in the Value data field and click OK.
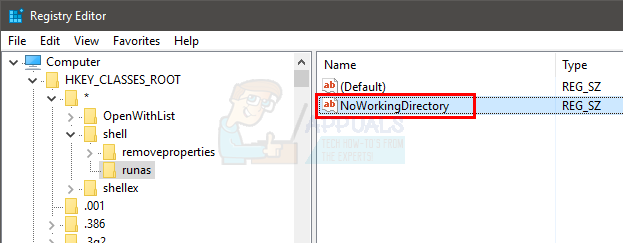
- Right-click an empty space in the right panel, select New > String Value.
- Name the new string NoWorkingDirectory.
- Right-click runas, select New > Key, and name it command.
- Double-click (Default) in the right panel for command.
- Type cmd.exe /c takeown /f “%1” && icacls “%1” /grant administrators:F in Value data and click OK.
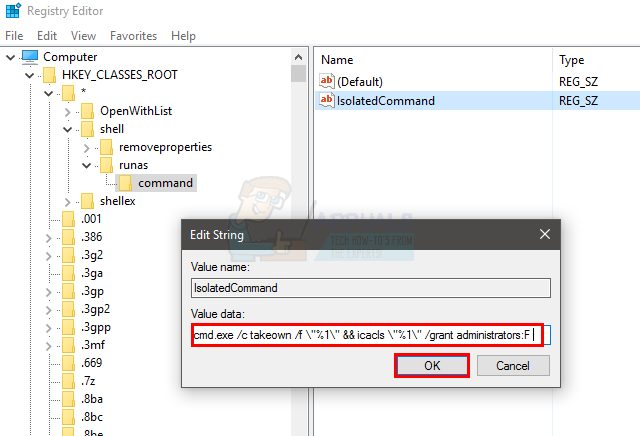
- Right-click empty space in the right panel, select New > String Value, and name it IsolatedCommand.
- Double-click IsolatedCommand, type cmd.exe /c takeown /f “%1” && icacls “%1” /grant administrators:F in Value data, and click OK.
- Now repeat these steps for the Directory \ shell key:
- Go to HKEY_CLASSES_ROOT \ Directory \ shell.
- Add a key called runas if it doesn’t already exist.
- Name the default value Take Ownership.
- Add a NoWorkingDirectory string value.
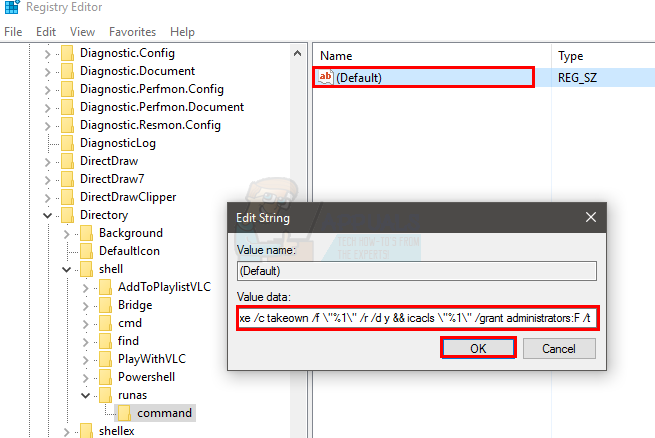
- Create a command key under runas, and in its default value type cmd.exe /c takeown /f “%1” /r /d y && icacls “%1” /grant administrators:F /t.
- Add an IsolatedCommand string value and type cmd.exe /c takeown /f “%1” /r /d y && icacls “%1” /grant administrators:F /t.
Now you have a “Take Ownership” option in your context menu.
Next, rename the Cortana folder:
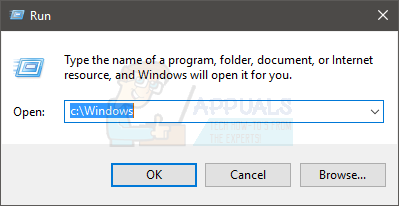
- Hold the Windows key and press R.
- Type C:\Windows and press Enter.
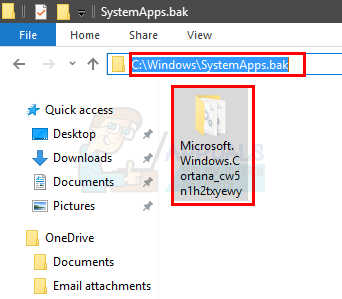
- Create a backup folder by right-clicking in an empty space, selecting New > Folder, and naming it SystemApps.bak.
- Open the SystemApps folder.
- Right-click the Microsoft.Windows.Cortana_cw5n1h2txyewy folder and select Take Ownership.
- Cut the Microsoft.Windows.Cortana_cw5n1h2txyewy folder (select the folder and press CTRL + X).
- Go back to the Windows directory, open the SystemApps.bak folder you created, and paste the Cortana folder there (press CTRL + V).
- If you see a permissions dialog, open Task Manager (hold CTRL + SHIFT + ESC), find SearchUI.exe, Cortana, and ActionUri OOP Server processes, and end them. Then complete the copy/move action.
The Cortana folder should now be moved to your backup folder, effectively disabling Cortana. If you ever want Cortana back, just copy or move the folder back to the original SystemApps directory.