How to Locate and Change Your Steam Screenshot Folder?
Gamers enjoy capturing screenshots during gameplay—whether to share memorable moments, highlight something interesting, report bugs, or preserve a gaming achievement. Steam makes this process easy by allowing users to take screenshots with a simple hotkey (Windows default: F12; Mac: Cmd + Shift + 4). When you capture a screenshot, a notification appears confirming the screenshot has been saved.

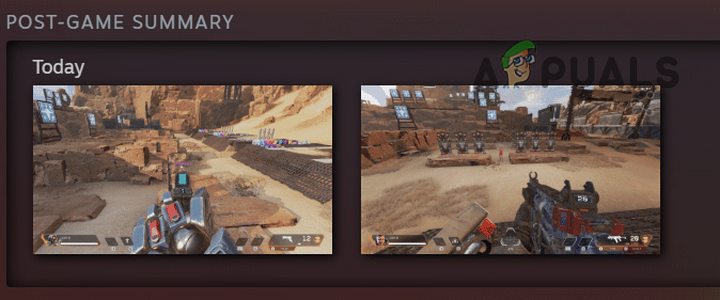
At the end of a gaming session, Steam provides a post-game summary where players can review their captured screenshots.
There may be times when you need to revisit an old screenshot or locate the folder where screenshots are stored. The following guide outlines the quickest and most effective way to access the Steam screenshots folder:
- Open Steam and click on the View menu to expand the options.
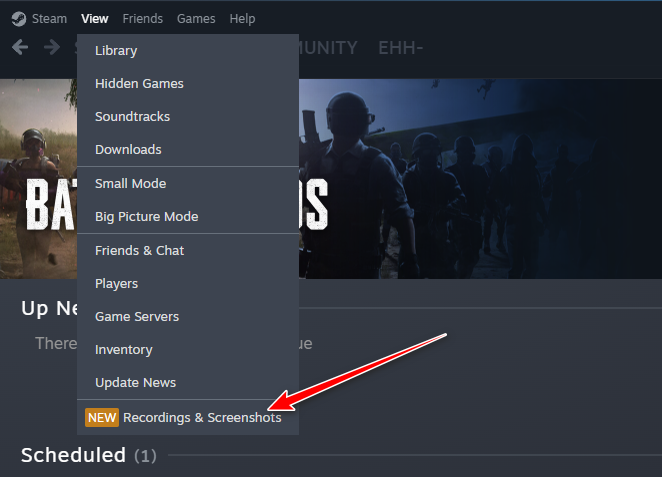
- Select Screenshots & Recordings and use the Show drop-down menu to choose the game whose screenshots you want to find.
- Right-click on any screenshot and click on View on Disk.
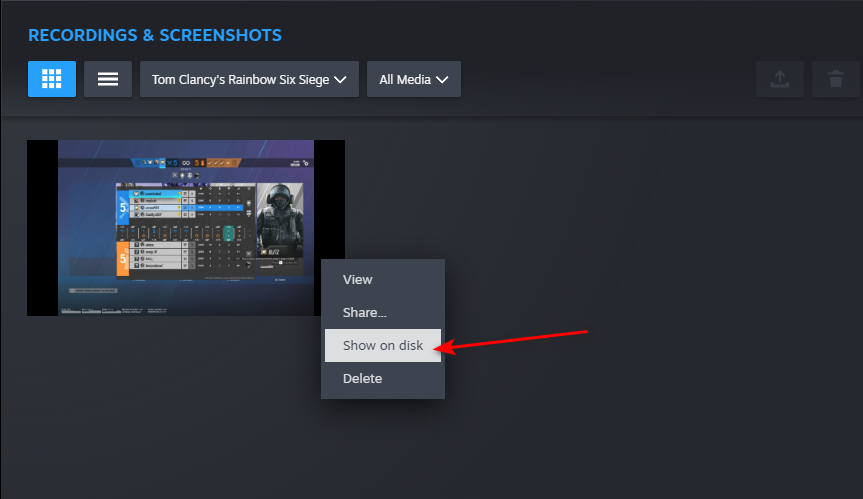
- The File Explorer window will open, directly displaying the folder containing that game’s screenshots.
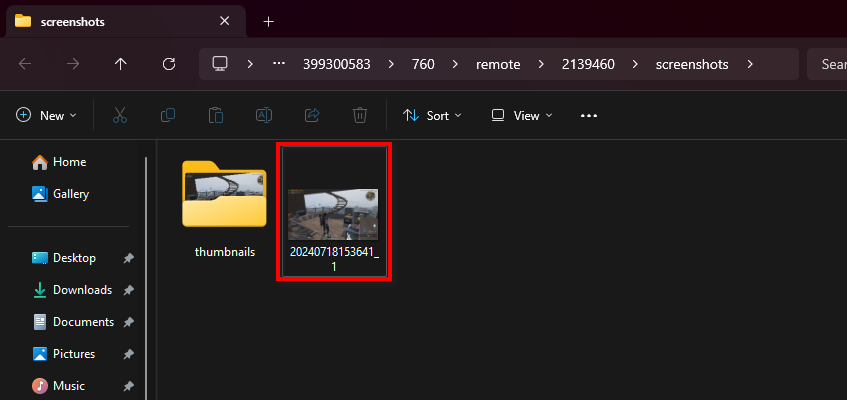
- You can now note the folder’s location or create a desktop shortcut for even easier access in the future.
How to Set Up a Custom Screenshot Folder
To better organize your screenshots, you can designate a custom folder location using the following steps:
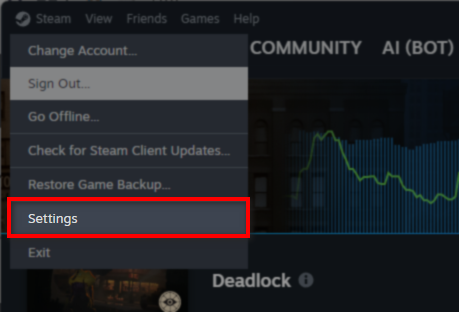
- Open the Steam client.
- Click the Steam menu button in the top-left corner of the window.
- Select Settings from the drop-down menu.
- In the Settings window, go to the In-Game tab.
- Scroll down to the “External Screenshots Folder” section and click the “Change Folder” button.
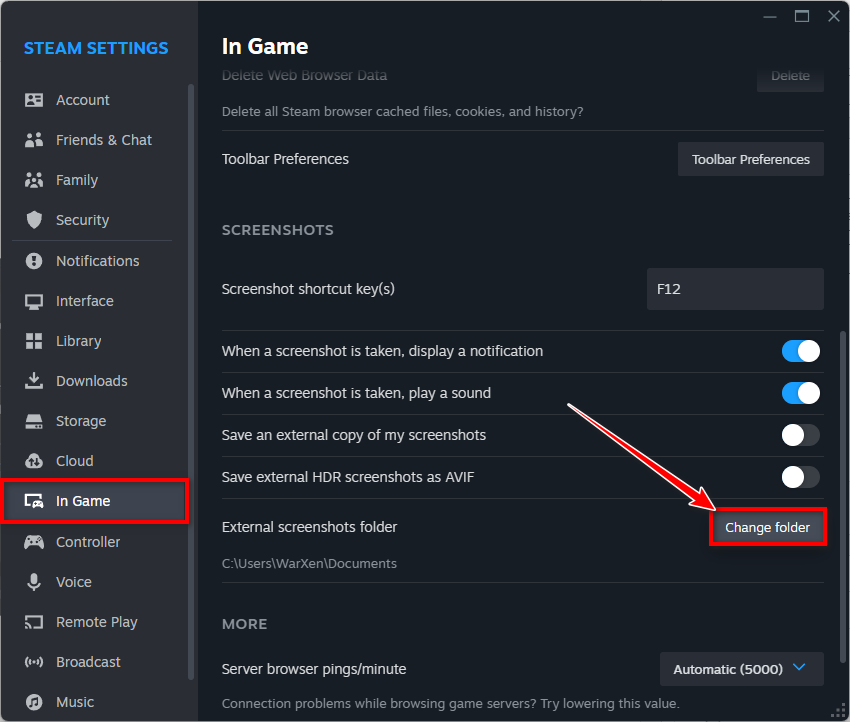
- Select the directory where you would like your screenshots to be saved.
From now on, your screenshots will be saved in both locations: the default Steam directory (as JPG files) and your chosen custom directory (as PNG files).
If you prefer to have all screenshots saved exclusively in your selected folder, follow these additional steps:
Delete the Remote folder, typically found at:
C:\Program Files (x86)\Steam\userdata\<YourSteamID>\760\
Then, create a symbolic link in Command Prompt (replace with your actual Steam account number):
mklink /D "C:\Program Files (x86)\Steam\userdata\<YourSteamID>\760\remote" "D:\newfolder"
This adjustment ensures that all future screenshots are stored only in your preferred directory, helping to keep your files organized and easy to manage.
For further customization, you may also use your operating system’s built-in screenshot tools or third-party screenshot applications, depending on your needs.
By following these steps, you can confidently manage, locate, and back up your valuable gaming screenshots whenever necessary.
I think I love you, JK, but seriously I spent over an hour looking through lots of folders just to find my Fallout Screenshots, so thank you very very much.