Fix: Access Denied or Permission Issues with Autorun.inf
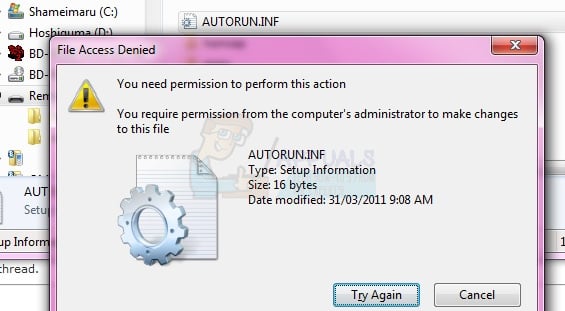
Attempting to delete or change the autorun.inf file often results in an “Access Denied” message, even if you are using an administrator account. This happens because Windows restricts access to the file due to its permissions or security settings. Usually, this problem occurs when the file is set as read-only, hidden, and a system file—settings often used by malware to stop you from removing it.
1. Copy Your Data and Format the Drive
If antivirus protection is preventing you from accessing the file, you can resolve the issue by formatting the drive.
1. Open your removable drive and select all important data you wish to keep.
2. Copy the selected data to a safe location on your desktop, as formatting will permanently erase all files from the drive.
3. Once the copying process is complete (the time required depends on the amount of data and your drive’s speed), open My Computer or This PC, depending on your Windows version.
4. Locate the problematic drive, right-click it, and select the Format option from the drop-down menu.
5. In the format window, click Start and wait for the procedure to finish.
Important: Double-check that you have selected the correct drive and backed up all essential data, as this step will delete everything on the drive.
Once formatting is complete, you may transfer your files back to the drive and continue using it as usual. If the autorun.inf file persists, it is likely infected with malware. Proceed to the following methods for advanced solutions.
2. Take Ownership of the File and Delete It
This method involves using an elevated Command Prompt, a powerful tool for resolving permission-related issues.
1. Press the Windows key or click the Start button, then type cmd in the search bar.
2. Right-click the cmd application from the search results and select Run as administrator.
3. In the elevated Command Prompt, type the following command, replacing F: with your actual drive letter if necessary:
takeown /f F:\autorun.inf
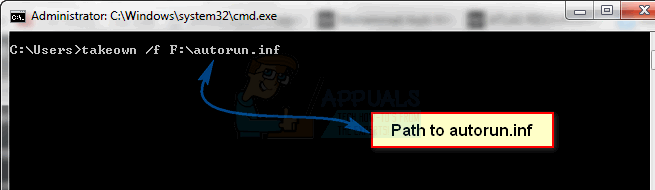
Check My Computer/This PC to confirm your drive’s letter. After executing the command, you acquire full ownership of the autorun.inf file and can delete it using Windows Explorer.
3. Boot Windows into Safe Mode and Delete the File
Safe Mode starts Windows with minimal drivers and background services, making it easier to remove files blocked by active processes or malware.
For Windows 7/Vista:
1. Restart or shut down your computer.
2. When the system begins to boot, repeatedly press F8 before the Windows logo appears.
3. Use the arrow keys to select Safe Mode and press Enter.
4. Once Windows loads in Safe Mode, navigate to your removable drive and attempt to delete the autorun.inf file.
For Windows 8/10: Please refer to the detailed steps here.
Method 4: Delete the File Directly through Command Prompt and Scan Your Computer
This approach uses a standard Command Prompt—no administrative privileges required. It is effective for removing persistent files and is especially useful when graphical methods fail.
1. Press Windows + R, type cmd, and press Enter to open the Command Prompt.
2. Enter each of the following commands (replace F: with your drive’s letter), pressing Enter after each:
cd F:  (or cd "path-to-your-drive")

attrib -r -h -s autorun.inf

del autorun.inf
Be attentive to spelling and spacing, particularly in the attrib command.
Afterward, restart your computer to ensure the changes take effect. It is highly recommended to perform a full system antivirus scan to detect and remove any remaining threats causing the problem.
5. Use Diskpart to Completely Wipe the Drive
NOTE: Exercise extreme caution with this method—only proceed if you are confident in these steps. Incorrect usage can result in data loss from your system or root drive. Always back up all important data before proceeding.
This method will erase all content from the selected drive. You can choose the clean or clean all command: clean all performs a more thorough wipe, but is slower and can reduce the drive’s lifespan if used repeatedly.
1. Open an elevated Command Prompt as demonstrated in Method 2.
2. Type diskpart and press Enter.
3. To determine the correct drive number:
– Press Windows + R, type compmgmt.msc, and press Enter.
– If prompted by User Account Control (UAC), click Yes.
– Select Disk Management in the left panel and note the number corresponding to your removable drive.
4. Return to the diskpart window, type list disk, then press Enter to display all connected disks.
5. Select the correct disk by typing, for example, select disk 1 and pressing Enter. Confirm the disk status—if Offline, use online disk to bring it online.
6. Type clean or clean all, and press Enter.
7. Type exit to close diskpart, and then close the Command Prompt.
After this procedure, the disk will appear as unallocated space. To make it usable:
1. In the Disk Management window, right-click the disk and select New Simple Volume.
2. Follow the on-screen instructions to create a new partition.
Your drive will then be ready for use again.
Hi, thanks for the advice. I was wondering though, a friend of mine used my hard drive and a flash, when he returned them they were nameless (except for the default letter e.g. H:) and they weren’t giving me the usual autoplay options anymore, they just show up as local disk and removable disk. I couldn’t rename them either and I tried every solution there is but don’t know what I’m doing wrong.