Fix: ‘A JNI Error Has Occurred’ in Minecraft
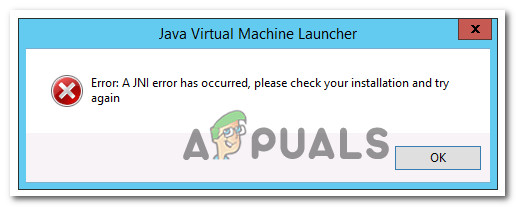
Launching Minecraft or a Minecraft server may suddenly fail, displaying the error “A JNI error has occurred, please check your installation and try again,” before closing. This message means that the Java Virtual Machine (JVM) cannot load a needed file because the Java version is not compatible.
The main reason for this error is using an old Java version, such as Java 8, while the latest version of Minecraft needs Java 17 or higher. Other possible causes are incorrect Java file paths or having more than one version of Java installed on your computer, which can create conflicts.
In this article, we will discuss how to solve this error.
1. Install the Latest Java JDK Version
In nearly all reported cases, users encounter this error because they are attempting to launch Minecraft or a Minecraft server on a PC that does not have Java 16 or a newer version installed. Since Minecraft build 21w19, the game requires Java 16 JDK or later. Without the correct version installed, Minecraft will not launch.
To resolve this, you need to update your Java JDK installation to the latest official version. This step also ensures you have the necessary security and compatibility updates for Minecraft to run smoothly.
- Ensure that your Minecraft launcher (TLauncher or any other launcher you use) is completely closed before proceeding.
- Open your preferred web browser and visit the Java 16 Development Kit download page.
- On the download page, ensure that the Windows tab is selected. Then, scroll down to locate the Windows x64 Compressed archive and click on the corresponding Download link.

Downloading the x64 compressed archive of the Java 16 JDK - When prompted, agree to the terms by selecting the checkbox for I reviewed and accept the Oracle Technology Network License Agreement for Oracle Java SE, then click the Download button.
- Wait for the download to finish. Extract the contents of the ZIP archive using a tool such as WinZip, WinRAR, 7-Zip, or the built-in Windows extractor.

Unzip the Java JDK - Once extraction is complete, navigate to the extracted JDK folder. Right-click the folder and choose Copy from the context menu.
- Using File Explorer, navigate to:
C:\Program Files\Java
and paste the copied JDK 16 folder into this directory.
- Wait for the copying process to finish. Once done, close the window and reopen your Minecraft launcher (TLauncher or other).
- Inside the Minecraft launcher, click the settings icon and then select Settings from the menu.

Accessing the Settings menu of the Minecraft launcher - In the Settings menu, ensure Minecraft Settings is selected at the top. Then, click the Browse button beside Java path.
- Navigate to:
C:\Program Files\Java\jdk-16.0.2\bin
and ensure javaw.exe is selected before clicking Open.
- Click the Save button to update your Minecraft launcher with the correct Java path.
- Now, launch the game as usual. The error should now be resolved.
2. Remove the Broken System Path Variable for Java
If installing the correct Java JDK version did not resolve the problem, a corrupted system variable may be interfering with Minecraft’s ability to locate Java.
A broken PATH variable can cause the Minecraft launcher to think Java is not installed, even when it is present. By removing the outdated or incorrect Java path variable from your environment variables, you ensure that your operating system and Minecraft launcher can correctly identify the new Java installation path.
Note: These instructions apply to all recent versions of Windows, including Windows 7, Windows 8.1, Windows 10, and Windows 11.
- Press Windows key + R to open the Run dialog box. Type ‘sysdm.cpl’ in the text box and press Enter to open the System Properties window.

Open up the System Properties window Note: If prompted by the User Account Control, click Yes to allow administrative access.
- In the System Properties window, go to the Advanced tab and click on Environment Variables found under Startup and Recovery.

Open up System Variables menu - Inside Environment Variables, under System variables, select the Path variable and click Edit.

Editing the path variable - In the Edit Environment Variable window, carefully look for any entries that reference Java, especially those pointing to outdated or incorrect paths.
- If you identify such an entry, select it and click Delete to remove it.

Deleting the Java environment variable - After removing the problematic environment variable, restart your computer. Once your system reboots, launch Minecraft and check if the “A JNI error has occurred, please check your installation and try again” issue has been resolved.