How to Fix Outlook Error 0x8004060c
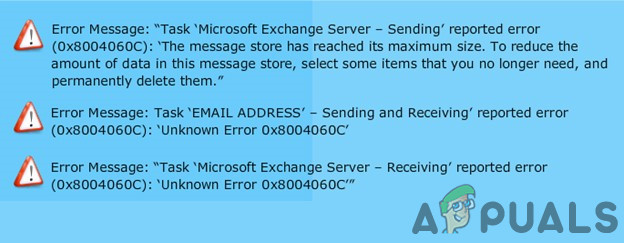
The send/receive process in Outlook may suddenly fail with error code 0x8004060C, halting email operations.
This error indicates that the Outlook PST file has exceeded its maximum size limit and can no longer store new data.
The most common cause is a bloated or oversized PST file. Additional triggers include sync failures or corrupted data files. Now that you know the causes, let’s discuss the solutions.
1. Compact the PST File
Outlook allows you to reduce the size of your PST file by compacting it. Normally, when you delete emails, the file size isn’t reduced immediately—compacting manually can help free up space.
Note: Offline Outlook Data Files (.ost) cannot be compacted directly.
- Open Outlook and click on File.
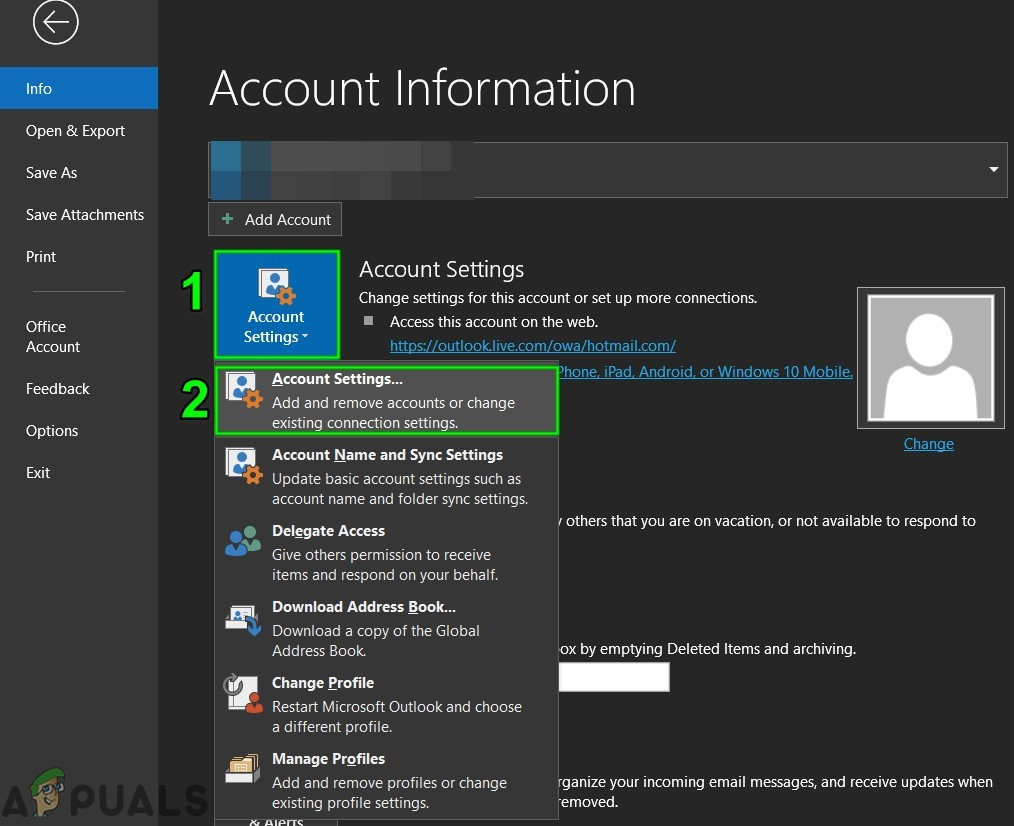
- In Info, click Account Settings and then select Account Settings from the drop-down menu.

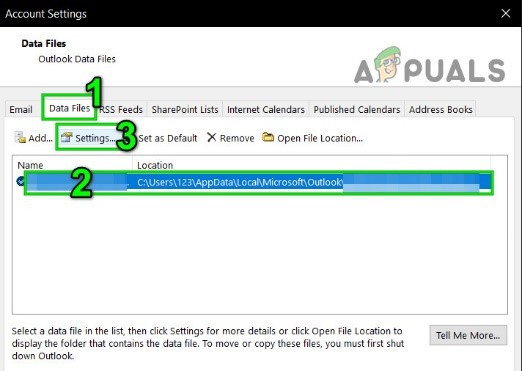
Account Settings of Outlook - In the Account Settings window, click on Data Files.
- Select the PST file you want to compact and click Settings.
Settings of PST File - Go to the Advanced tab and click Outlook Data File Settings.

Open Outlook Data File Settings - Press the Compact Now button.
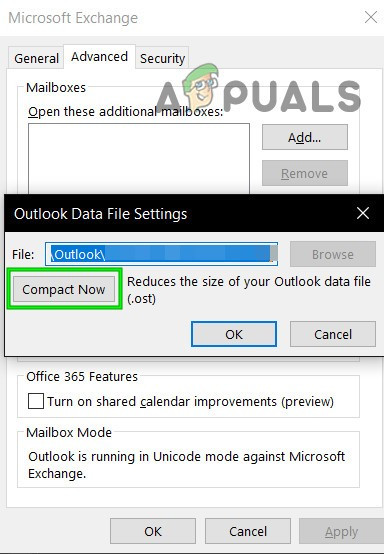
Compact Now of Outlook Data File - Close and then reopen Outlook to verify if the issue is resolved.
2. Update Outlook/Office
Microsoft frequently releases updates to improve Outlook and fix bugs. If your Outlook error is due to a known issue that’s been patched, updating should fix it.
- Open Outlook and click the File tab.
- Select Office Account, then click Update Options.
- From the drop-down, click Update Now.
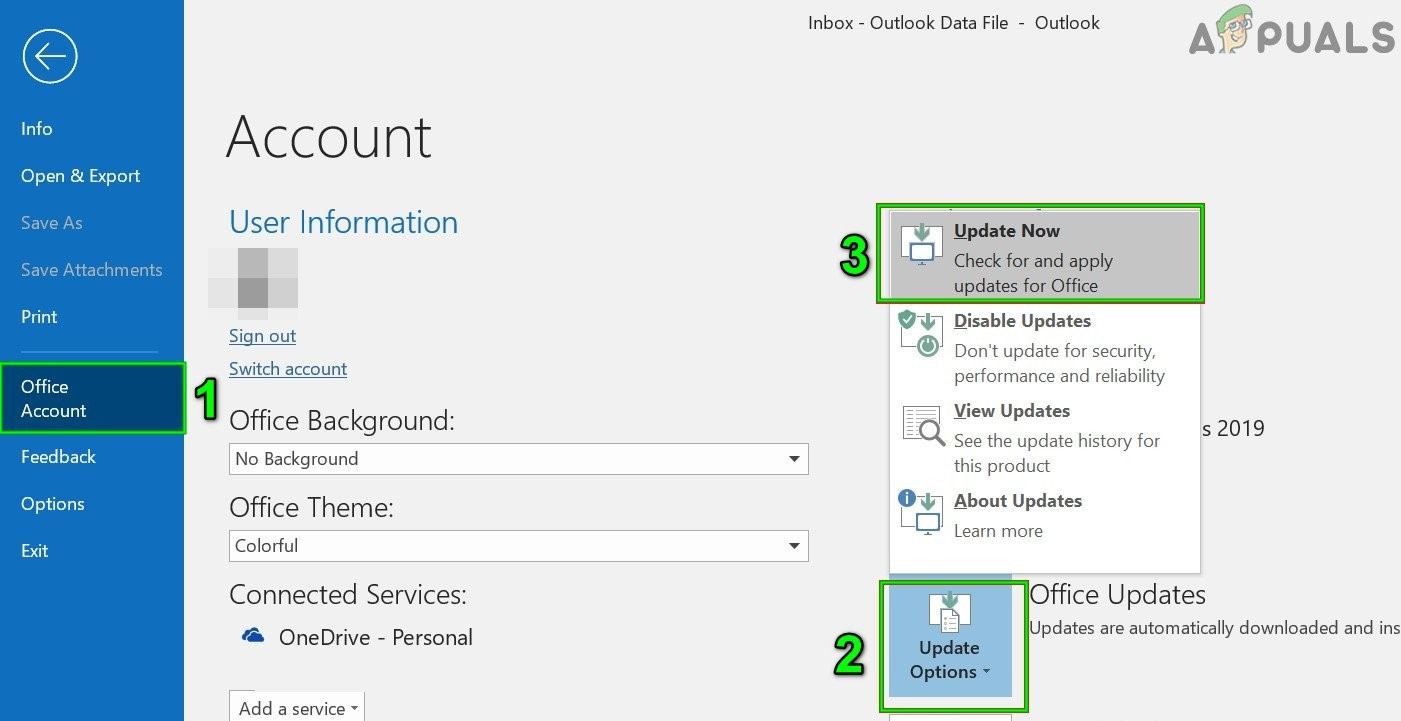
Run Update Now of Outlook - After updating, restart Outlook and check if it works properly.
3. Use Online Mode
Outlook operates in either Online Mode or Cached Mode. If you’re getting the error in cached mode, switching to online mode may help.
- Open Outlook and select the File menu.
- Click Account Settings > Account Settings.
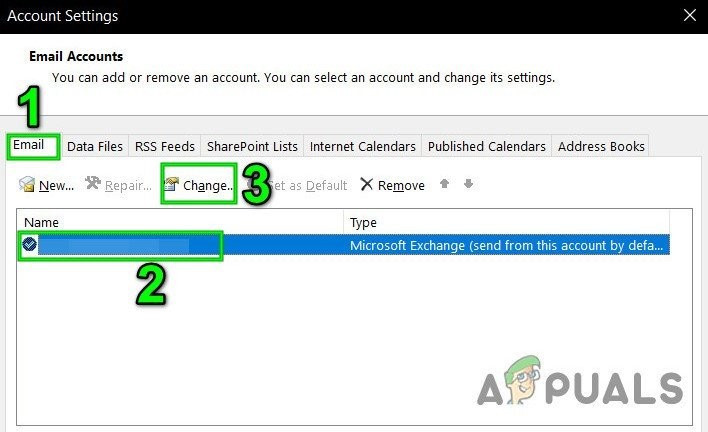
Run Update Now of Outlook - Go to the Email tab, select your account, and click Change.
Change Outlook Settings - In Exchange Account Settings, click More Settings.

Open More Settings of Outlook - Click the Advanced tab and uncheck “Use Cached Exchange Mode”.
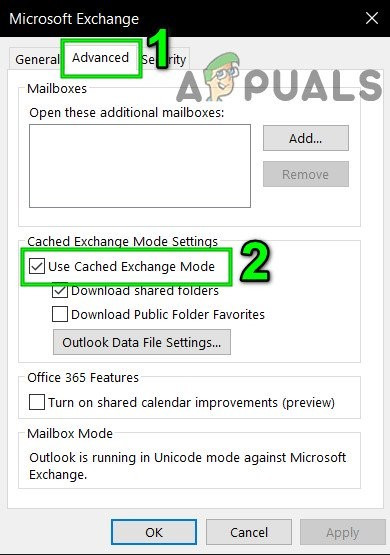
Uncheck Use Cached Mode - Restart Outlook and see if the error is resolved.
4. Repair Outlook’s PST File
Outlook stores your email data in a PST file. If this file is corrupted, Outlook can fail. Luckily, Microsoft provides a tool called SCANPST.EXE to fix PST files.
- Close Outlook.
- Click the Windows button, type Outlook in search, right-click the Outlook icon, and select “Open File Location”.
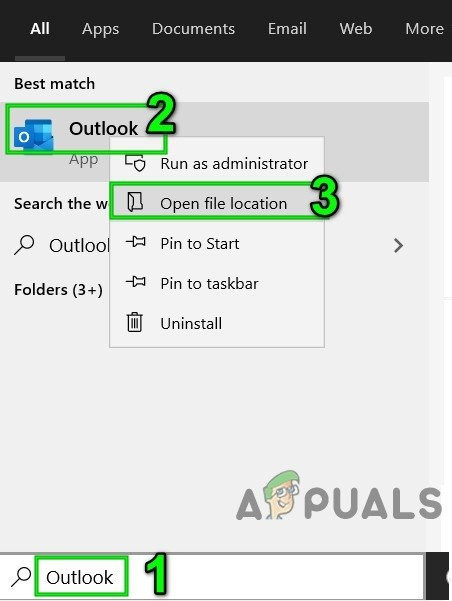
Open Outlook File Location from Windows Search - Open the folder path:
C:\ProgramData\Microsoft\Windows\Start Menu\Programs
- Right-click the Outlook shortcut and choose “Open File Location”.
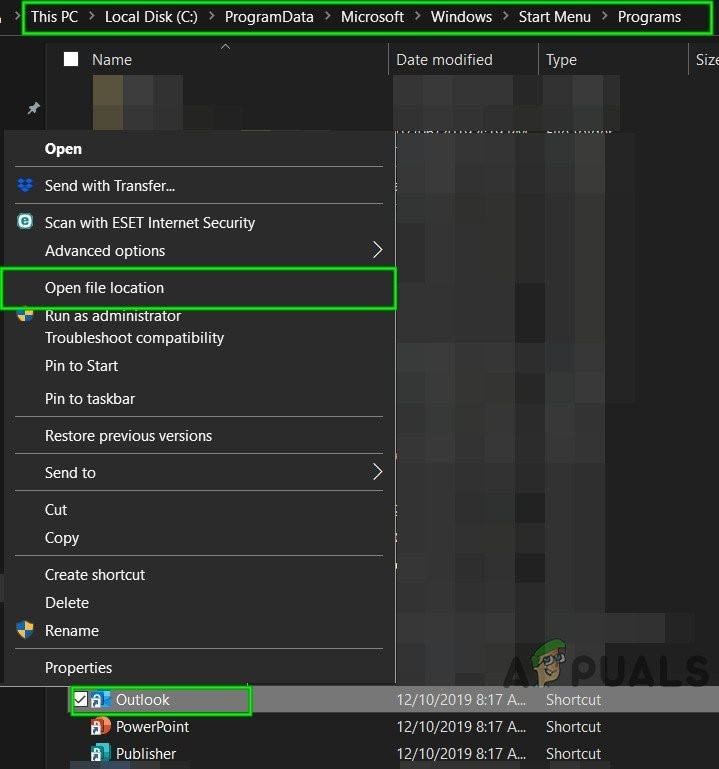
Open File Location from File Explorer - Open the folder:
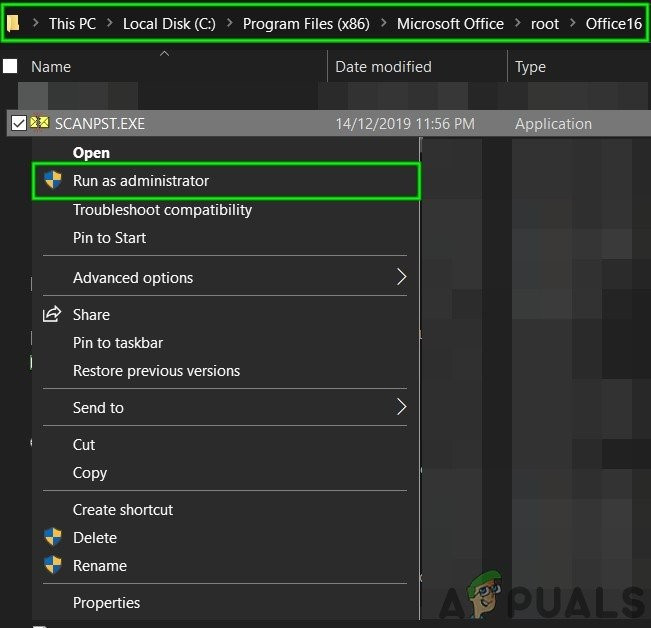
C:\Program Files (x86)\Microsoft Office\root\Office16
- In the Office folder, find SCANPST.EXE, right-click it, then select “Run as Administrator”.
Run ScanPST as Administrator - Click the Browse button in the Inbox Repair Tool.
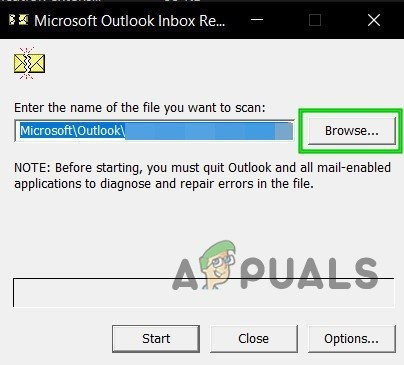
Microsoft Outlook Inbox Repair - Select the PST file with errors (location details follow these steps).
- Click Start to scan.
- If any issues are found, choose Repair.
- Restart Outlook and see if it works properly now.
The location of your PST file may differ based on your Outlook and Windows version.
- Windows 10
drive:\Users\<username>\AppData\Local\Microsoft\Outlook
drive:\Users\<username>\Roaming\Local\Microsoft\Outlook
- Older Windows Versions
drive:\Documents and Settings\<username>\Local Settings\Application Data\Microsoft\Outlook
5. Empty the “Deleted Items” Folder
Since this error can be caused by storage issues, make sure that your Deleted Items folder isn’t using up unnecessary space.
- Open Outlook, right-click the Deleted Items folder (left pane).
- Select Empty Folder.
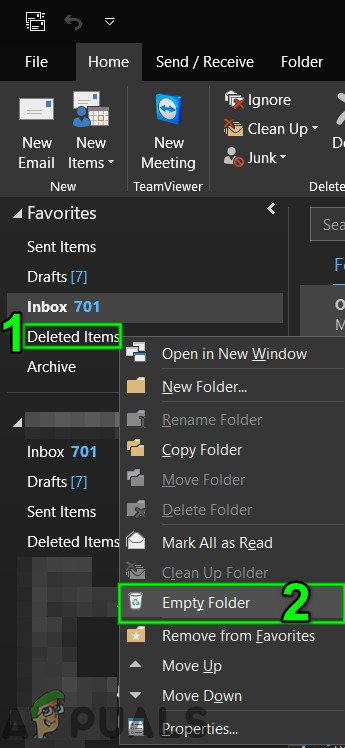
Empty Deleted Items Folder - Close Outlook, reopen it, and check if things are working now.
To empty the Deleted Items folder automatically:
- In Outlook, click File, then Options.
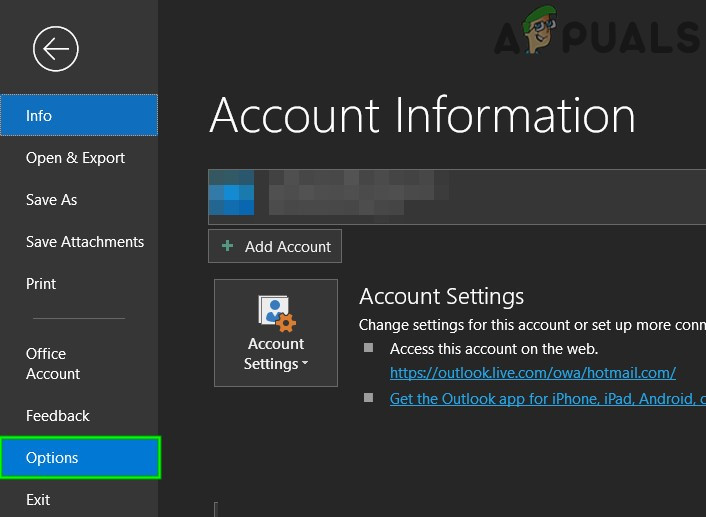
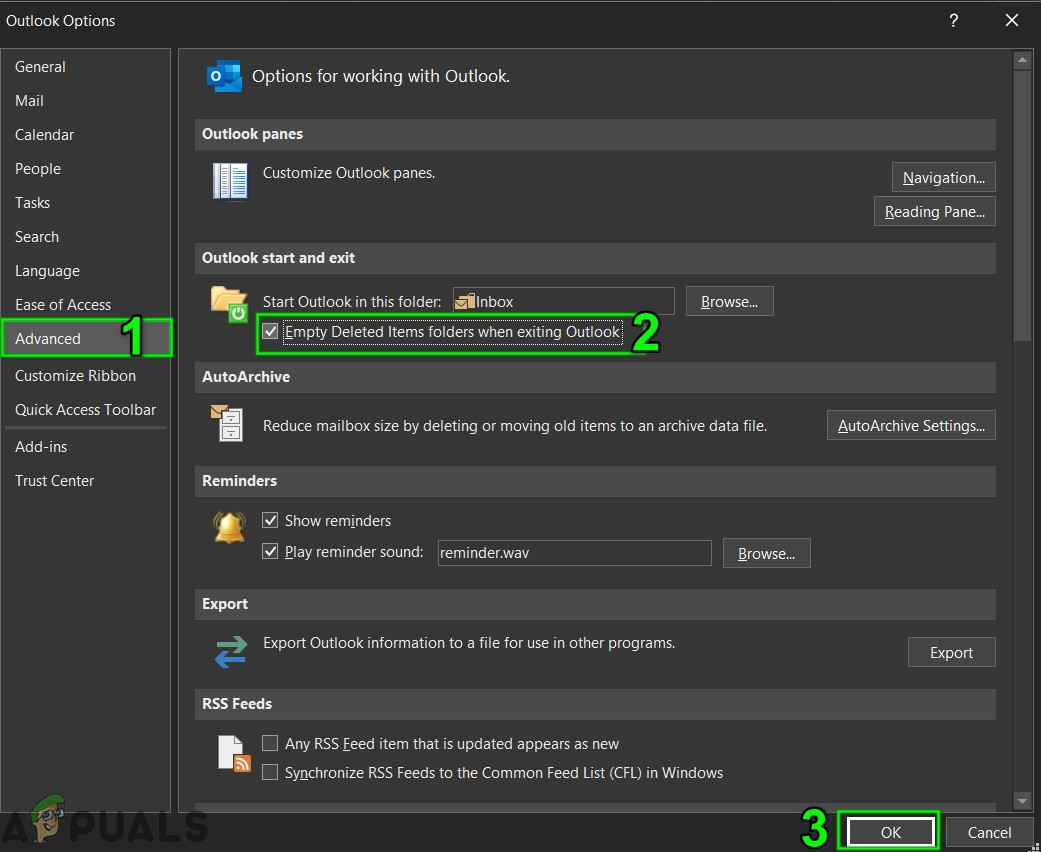
Open Outlook Options - Go to Advanced. In the right pane under Outlook start and exit, check ‘Empty Deleted Items folders when exiting Outlook‘.
- Click OK to save.
Empty Deleted Items Folder When Exiting Outlook
6. Delete Unnecessary Emails
Lots of old or junk emails can quickly fill up your Outlook data file. Also, every forwarded email is saved in both your Inbox and Sent Items by default, using extra space.
Deleting unnecessary or duplicate emails—and removing large attachments—can help.
- Open Outlook and go to your Sent Items folder.
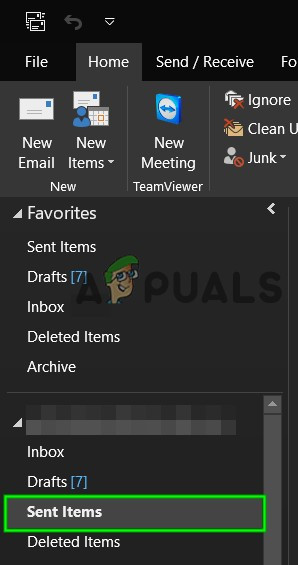
Open Sent Items Folder - In Sent Items, click the By Date filter and select “To” to filter by recipient.
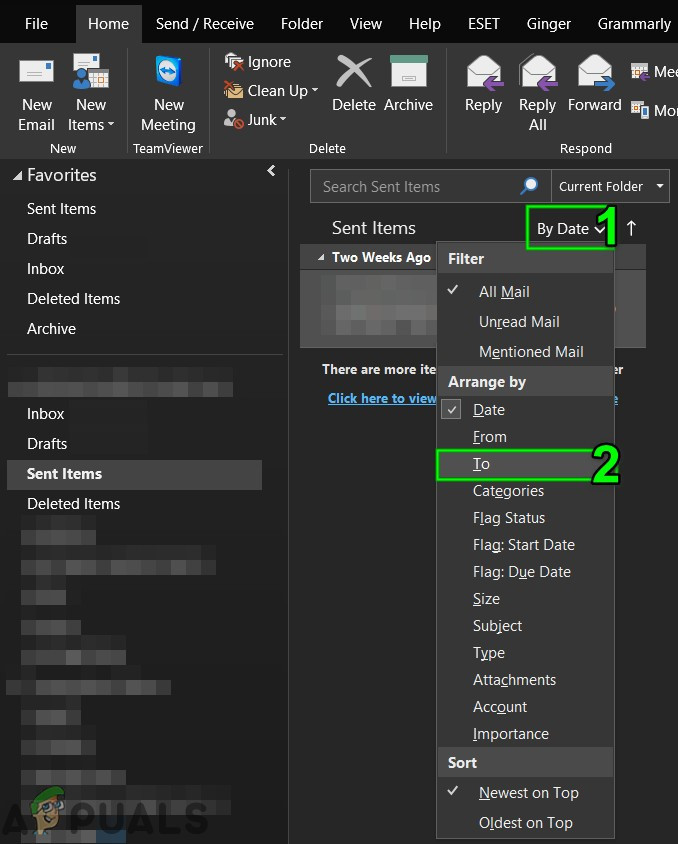
Filter Sent Mails by To - Delete duplicates and unwanted emails or attachments by holding Ctrl, selecting what you don’t need, and pressing Delete.
- Restart Outlook and see if it works correctly.
To stop saving a copy of forwarded messages automatically:
- Open Outlook, click File then Options.

Open Outlook Options - Go to Mail, and under the Save Messages section, uncheck ‘Save forwarded messages’.
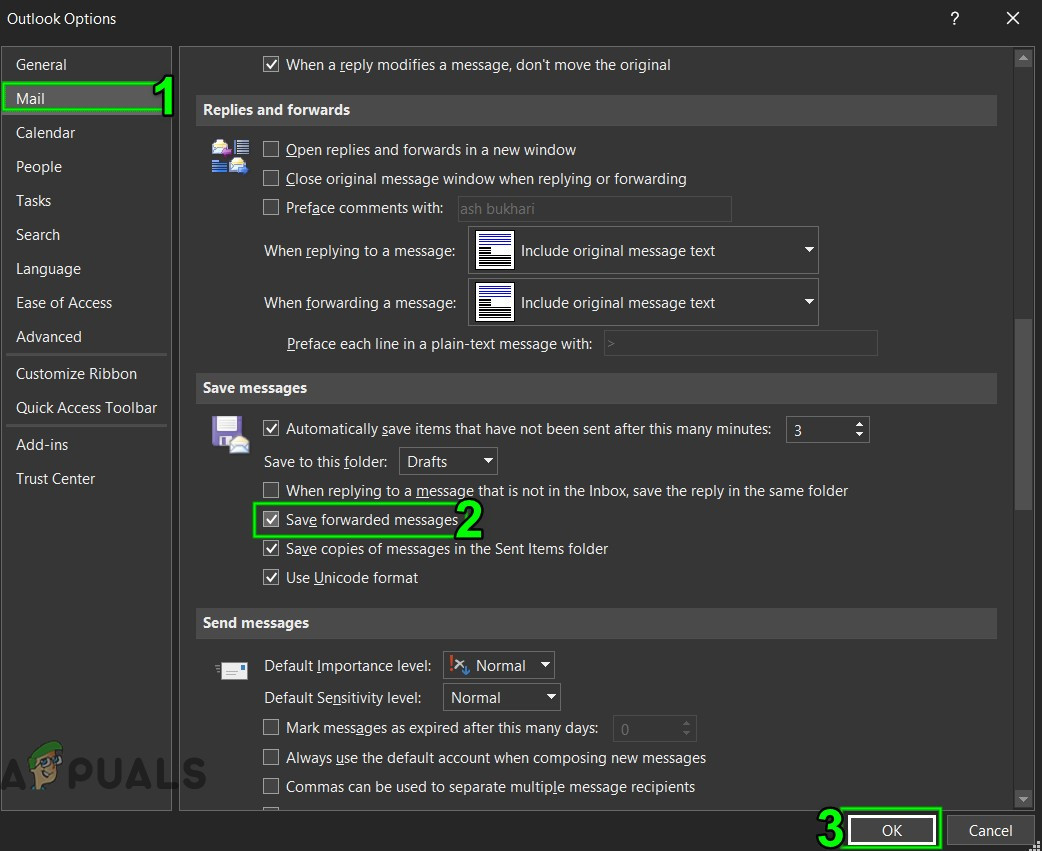
Uncheck Save Forwarded Messages - Click OK to save.
7. Run the Mailbox Cleanup Tool
Outlook’s Mailbox Cleanup helps you identify and manage large emails, which can free up a lot of space.
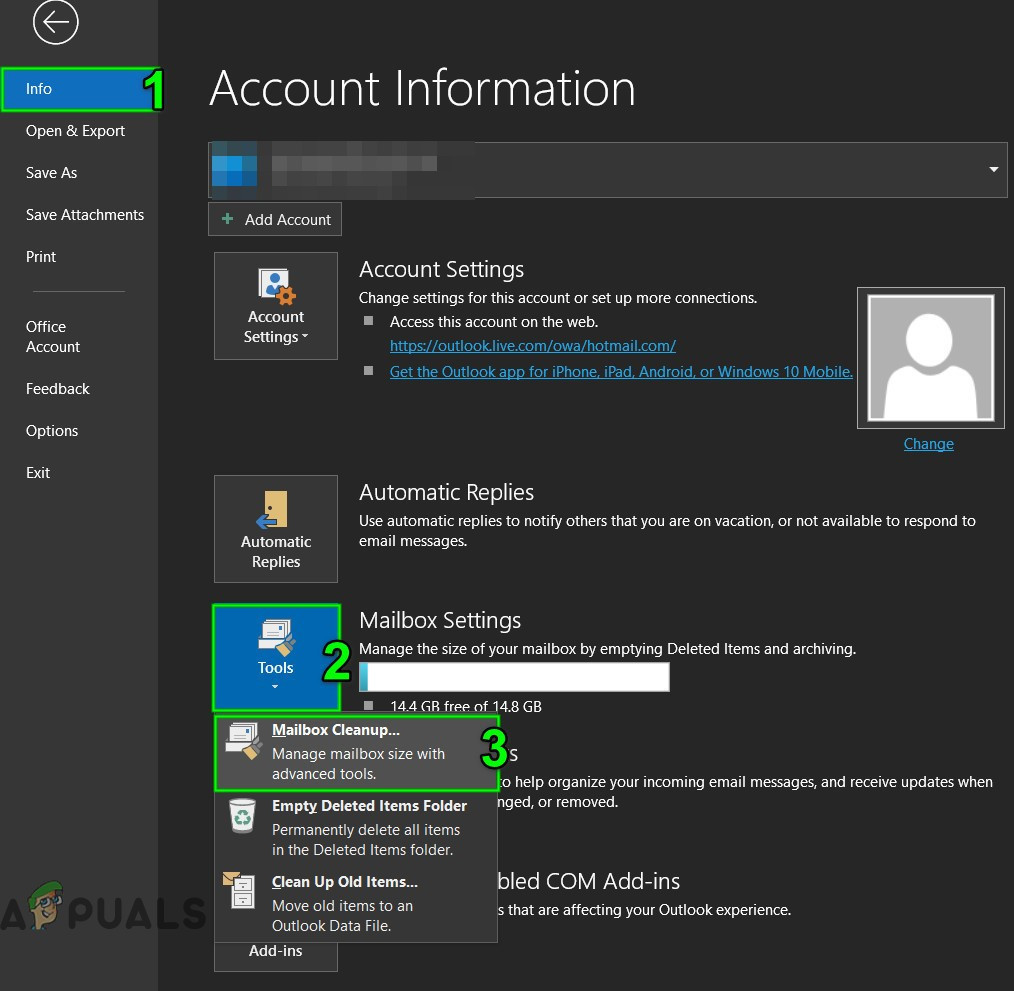
- Click the File tab, then in Info, click Tools.
- Select Mailbox Cleanup.
Mailbox Cleanup Tool - Here, you can manage mailbox size, find old emails, empty deleted items, or remove alternate versions.
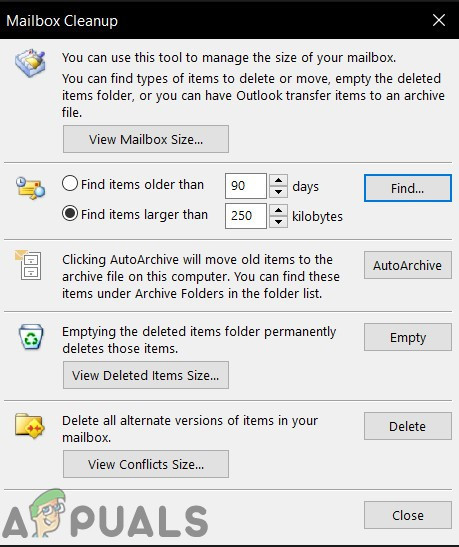
Manage Mailbox Cleanup - Relaunch Outlook to see if the problem is fixed.
8. Use Outlook’s Import/Export Feature
The Import/Export wizard allows you to move or split PST files, helping to reduce their size.
- Open MS Outlook and click File.
- In Info, click Account Settings, then Account Settings again.
Account Settings of Outlook - Go to the Data Files tab and click Add.

Add New Data File - Name your new Outlook data file (.pst) and click OK to add it.
- Check that the new file appears under Data Files. Close the Account Settings window.
- Go to File > Open & Export.
- Click Import/Export.
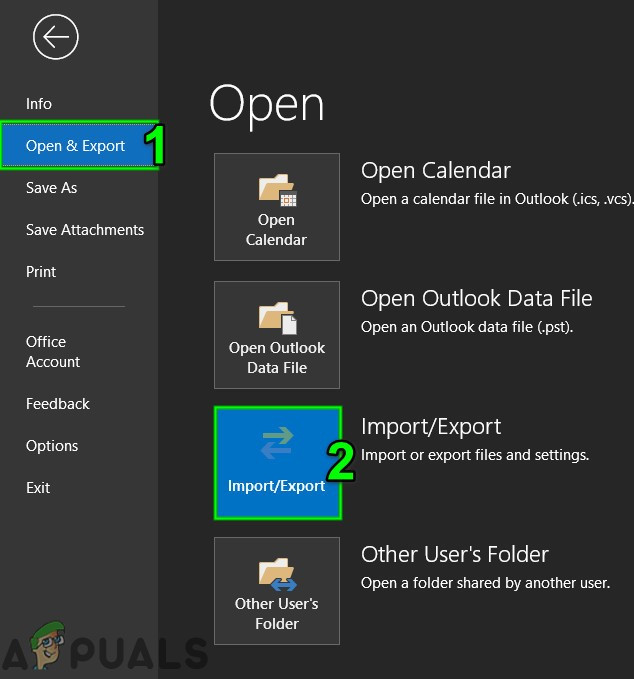
Import Export Outlook - In the wizard, choose Export a File and click Next.
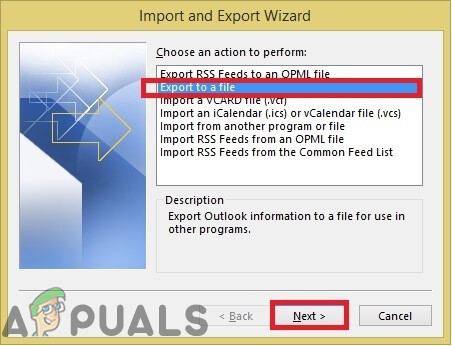
Export to a File in Import and Export Wizard - Select Outlook Data File (.pst) and click Next.
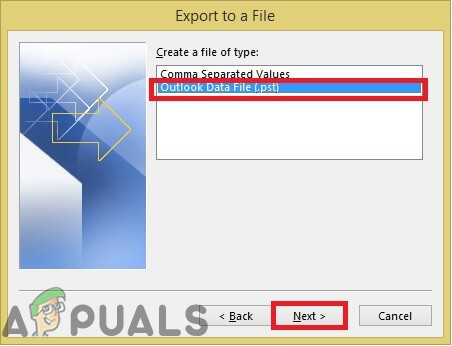
Export to Outlook Data File PST - Choose which folders you want to export (select Include Subfolders if needed).
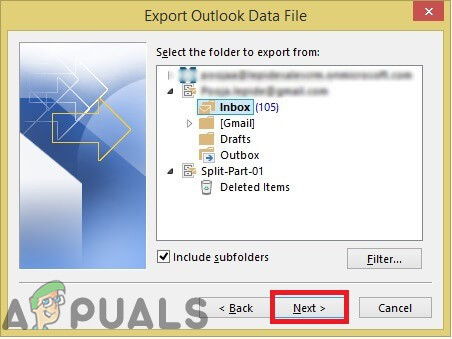
Select Folders to Export - Browse for a save location, select not to export duplicates, and click Finish.
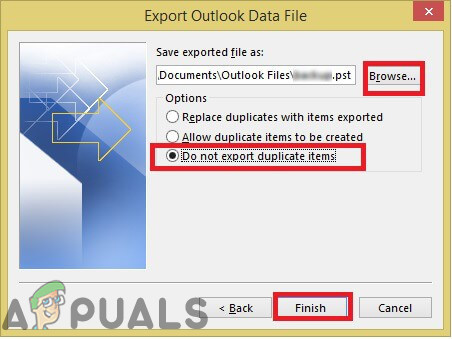
Do Not Export Duplicate Items - Set a password for the export if you want, then finish up.
- Delete exported folders from the main PST file to reduce size. Check if the error has cleared.
9. Use the “Move to Folder” Option
Outlook’s Move to Folder feature helps you easily transfer emails from your main PST file to another, reducing its size.
- Start Outlook and click File.
- Go to Account Settings, then Account Settings again.
Open Outlook Account Settings - Under Data Files, click Add.
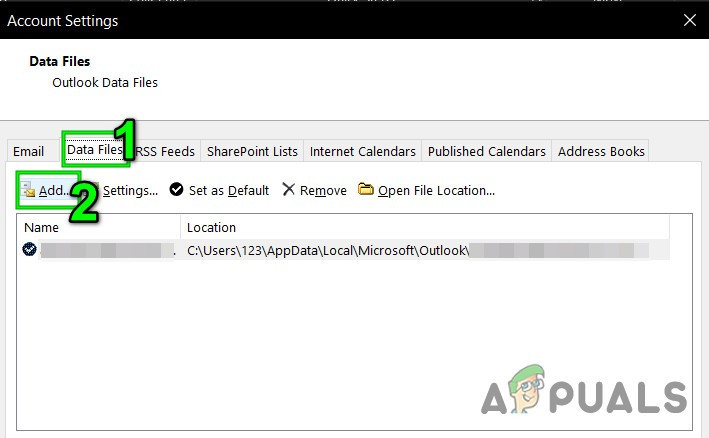
Add New Data File in Outlook - Enter a name and choose Outlook data file (.pst), then click OK to create the file.
- Confirm the new file appears under Data Files. Close Account Settings.
- Switch to the Home tab, open your default PST file, select emails to move, then drag or use the “Move to Folder” option to move them to the new PST file.
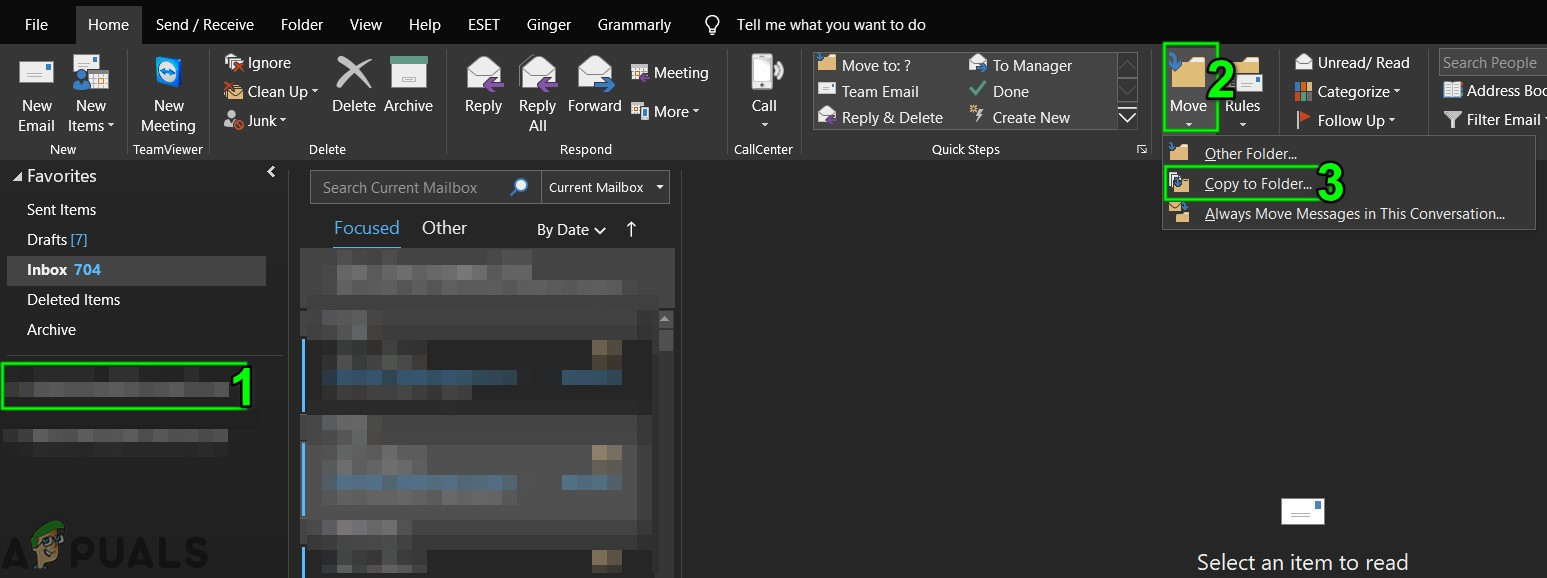
Copy to Folder - After copying, delete those items from the main PST file.
- Restart Outlook to see if it now works.
10. Use Outlook Archive Wizard
Old emails can fill up your PST file over time. Using the Archive Wizard lets you move older items to a different file.
- Open Outlook and click File.
- In Info, click Tools and choose Clean Up Old Items.
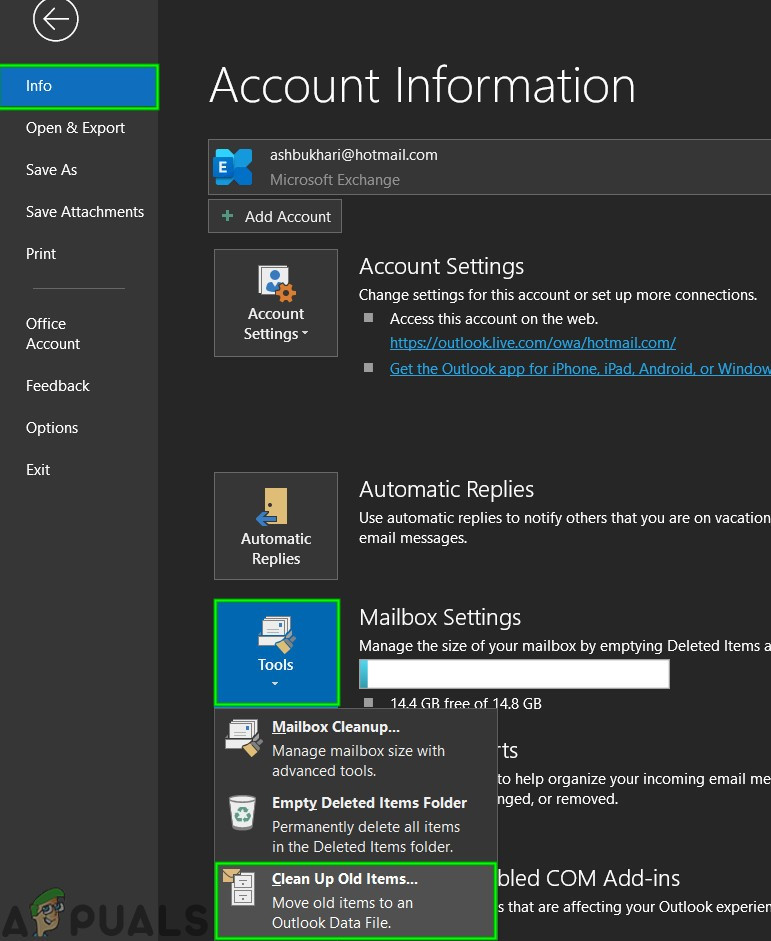
Clean Up Old Items - Select which folder to archive, pick a date, and browse for a location to save the archive.
- Restart Outlook and check if things are back to normal.
11. Create a New Outlook Data File
If your current Outlook data file is corrupted, making a new one and setting it as default may solve the error.
- In Outlook, on the Home tab, click New Items.
- Select More Items > Outlook Data File.
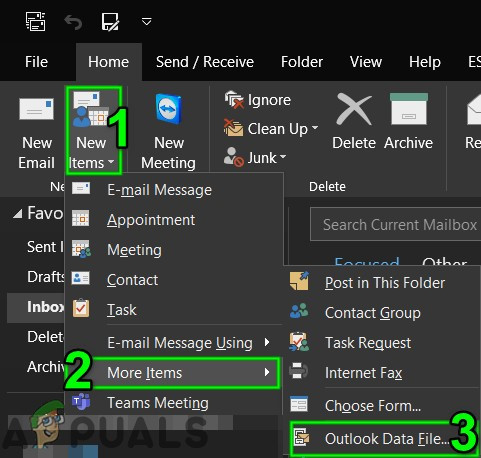
Create a New Outlook Data File - Name the new file. If you want a password for extra security, check Add Optional Password and set it.
- After creating the file, open Outlook, go to File > Account Settings.

Open Outlook Account Settings - Click Data Files, select the newly created file, and click Set as Default.

Set Outlook Data File as Default - Restart Outlook and check if the issue has cleared up.
12. Increase Maximum Storage Size of Outlook PST File
Microsoft sets a default limit for PST files, but you can manually increase this using the Windows Registry.
Warning: Be very careful when editing the Windows Registry; incorrect changes can harm your system.
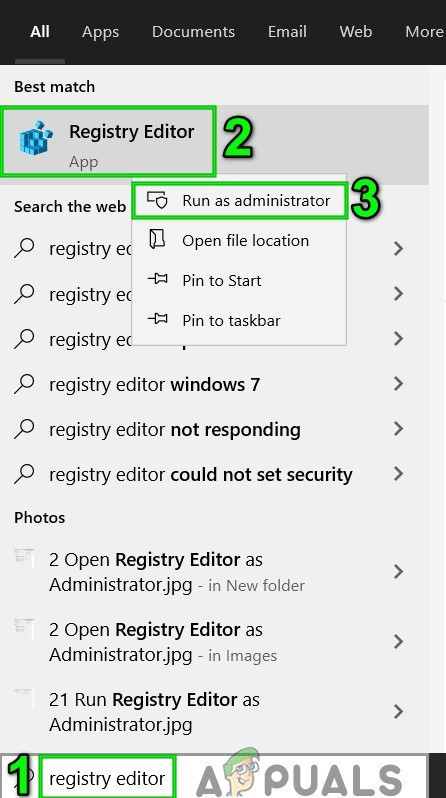
- Close Outlook.
- Press Windows key, type Registry Editor, right-click it, and select Run as Administrator.
Open Registry Editor as Administrator - Navigate to the appropriate path for your Outlook version:
- Outlook 2016, 2019, & 365:
HKEY_CURRENT_USER\Software\Microsoft\Office\16.0\Outlook\PST
- Outlook 2013:
HKEY_CURRENT_USER\Software\Microsoft\Office\15.0\Outlook\PST
- Outlook 2010:
HKEY_CURRENT_USER\Software\Microsoft\Office\14.0\Outlook\PST
- Outlook 2007:
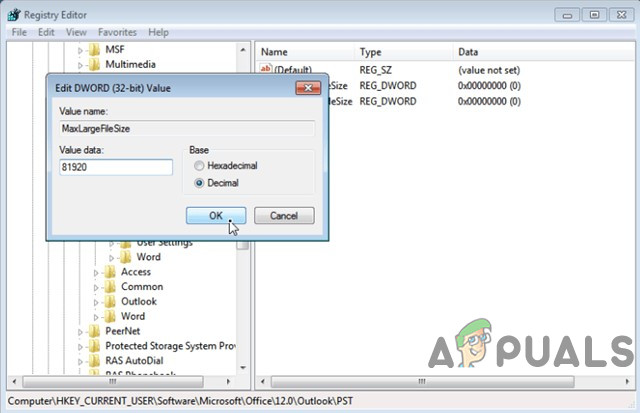
HKEY_CURRENT_USER\Software\Microsoft\Office\12.0\Outlook\PST
- Outlook 2003:
HKEY_CURRENT_USER\Software\Microsoft\Office\11.0\Outlook\PST
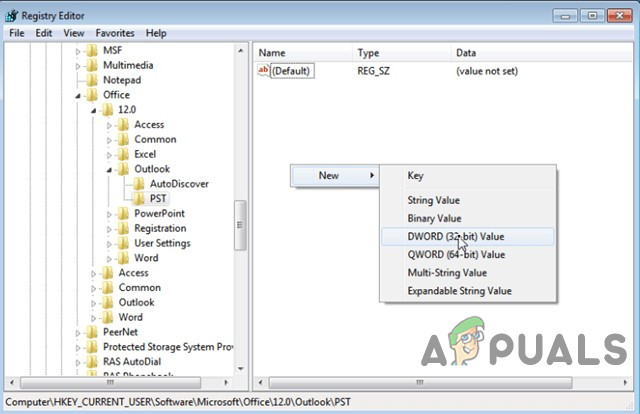
- Right-click in the right pane, then select New > DWORD (32-bit) Value. Name them:
- MaxLargeFileSize: Sets the maximum file size for PST files.
- WarnLargeFileSize: Sends a warning when the file size approaches the limit.
- Double-click MaxLargeFileSize. Set it to Decimal and enter the desired maximum size (in MB).
- For Outlook 2003 & 2007, enter a value higher than 20,480 (20GB).
- For Outlook 2010 and newer, enter a value higher than 51,200 (50GB). For example, 81,920 for 80GB.
- Click OK.
- Double-click WarnLargeFileSize, set to Decimal, and enter a value 95% of MaxLargeFileSize. For example, if MaxLargeFileSize is 81,920, then WarnLargeFileSize should be 77,824.
- Click OK.
- Close Registry Editor.
- Restart your system and then open Outlook to check if it works properly.
13. Run Microsoft Support and Recovery Assistant
The Microsoft Support and Recovery Assistant can automatically diagnose and fix many Outlook issues. If it can’t fix the problem, it will guide you on what to do next.
- Download Microsoft Support and Recovery Assistant from Microsoft’s official website.

Microsoft Support and Recovery Assistant - Run the file after downloading.
- Accept the license agreement by clicking I Agree.
- Select Outlook as the product you’re having trouble with and click Next.
- Describe your problem from the list and click Next.
- Follow the-step-by-step instructions given by the tool.