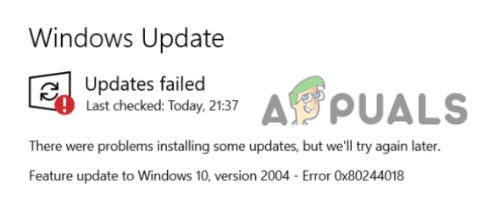
How to Fix “Error: 0x80244018” When Updating Windows?
0x80244018 Windows Update Error usually occurs when users try to install new updates on Windows. The server receives the update request, but often, if the server is busy or there are issues with your system, the update files can’t reach the server.
This error can be caused by corrupted update files, active antivirus software, VPN or proxy settings, or incorrect system configurations. Now that you know the causes, let’s discuss the solutions.
1. Run the Windows Update Troubleshooter
Windows 11 has a built-in troubleshooter that can automatically detect and fix update problems.
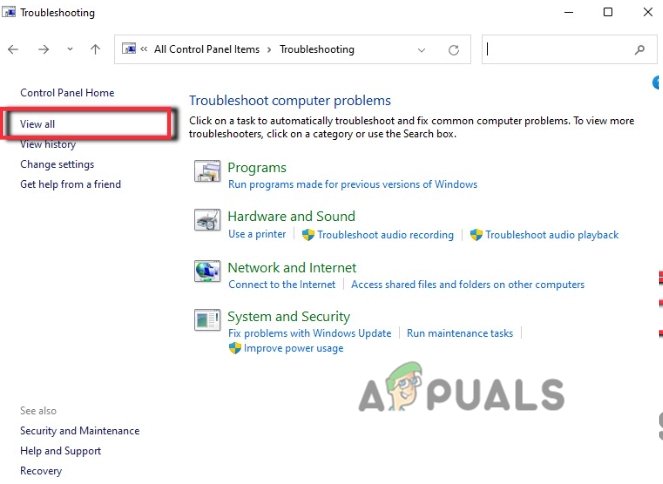
- Press Windows key + R to open the Run window. Type Control Panel and click OK.
- In the Control Panel, use the search box (top right) to type troubleshooting.
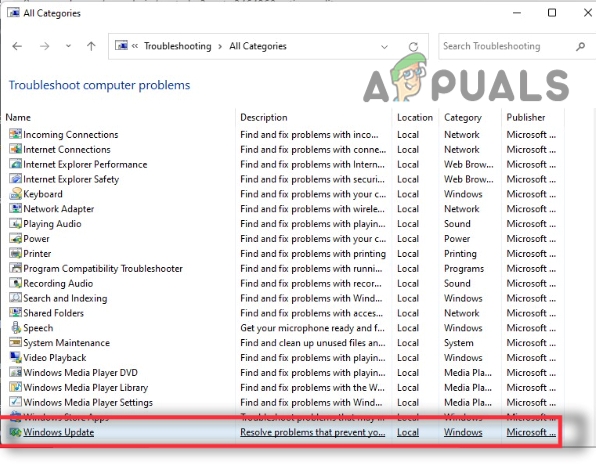
- Click on the View all option on the left side of the window.
Windows Update Troubleshooter - Scroll down and click on Windows Update.
Windows Update Troubleshooter Settings - A window will open. Press Next.
- Wait while the troubleshooter checks for issues and applies any fixes it finds.
- After troubleshooting is complete, restart your computer.
2. Run SFC and DISM Scans
If essential update files have become corrupted or damaged, you can use the built-in SFC and DISM tools to scan and repair your system files.
2.1 SFC Scan
- Open the Start menu and type CMD in the search bar.
- Right-click on Command Prompt and select Run as administrator.
- Type the following command and press Enter:
SFC /scannow
- The scan will take some time. When it finishes, close the window.

Perform an SFC Scan
2.2. DISM Scan
- Open Command Prompt as an administrator.
- Type each command below, pressing Enter after each one:
Dism /Online /Cleanup-Image /CheckHealth
Dism /Online /Cleanup-Image /RestoreHealth
- The scan may take several minutes, so please wait.

Use the DISM Command to RestoreHealth - Type Exit and press Enter to close the window.
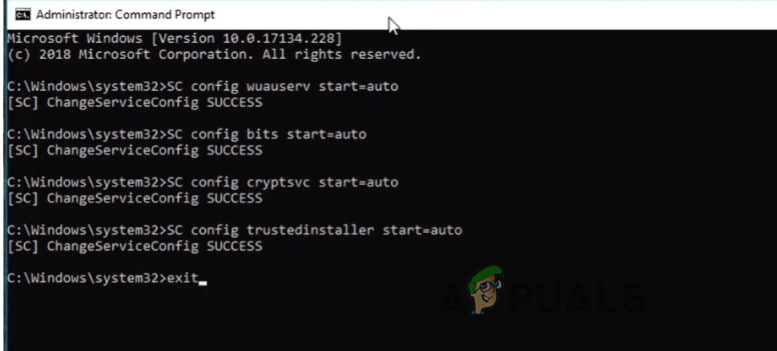
3. Automate the Windows Update Services
If Windows updates aren’t installing automatically and you see error 0x80244018, you may need to automate Windows Update services using the Command Prompt.
- Open the Start Menu and type CMD in the search bar.
- Right-click on Command Prompt and select Run as Administrator.
- Type the commands below, pressing Enter after each one:
SC CONFIG WUAUSERV START=AUTO
SC CONFIG BITS START=AUTO
SC CONFIG CRYPTSVC START=AUTO
SC CONFIG TRUSTEDINSTALLER START=AUTO
Exit
- After entering the commands, press the Enter key and then restart your computer.
Update the Windows Automatically
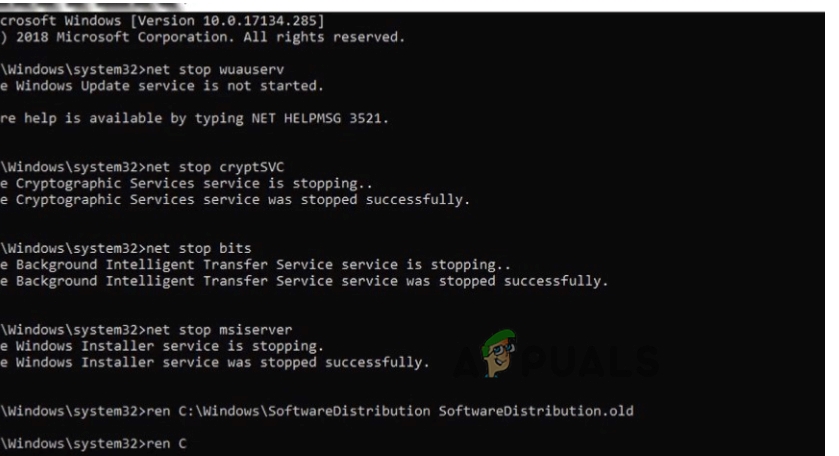
4. Restart Update Services and Rename the SoftwareDistribution Folder
The SoftwareDistribution and Catroot2 folders store temporary files used by the system to manage updates. Over time, these folders can become corrupted or hold incomplete downloads, which may interfere with successful update installations.
Renaming these folders doesn’t remove essential components—instead, it prompts the system to generate new, clean versions the next time updates are checked. This refresh helps eliminate issues caused by damaged or stuck files.
- Click the Start Menu. Right-click on Command Prompt and select Run as administrator.
- Type the following commands, pressing Enter after each one:
NET STOP WUAUSERV
NET STOP CRYPTSVC
NET STOP BITS
NET STOP MSISERVER
REN C:\WINDOWS\SOFTWAREDISTRIBUTION SOFTWAREDISTRIBUTION.OLD
REN C:\WINDOWS\SYSTEM32\CATROOT2 CATROOT2.OLD
NET START WUAUSERV
NET START CRYPTSVC
NET START BITS
NET START MSISERVER
EXIT
3. Press Enter when finished and close Command Prompt.
5. Turn Off Proxy Settings
Microsoft regularly releases updates to keep Windows secure. However, if a proxy server is turned on, you might encounter the 0x80244018 error. Disabling the proxy server can help you install updates.
- Press Windows key + I to open Settings.
- Click on Network & Internet. (You can also open the Run window, type ms-settings:network-proxy, and press Enter.)
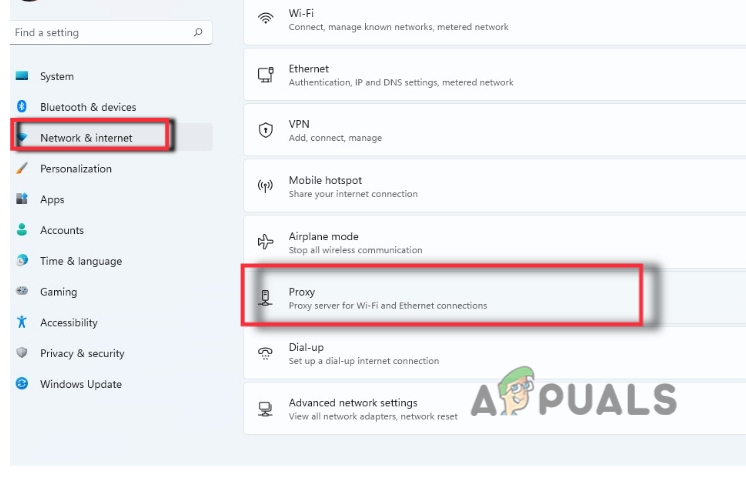
Proxy Settings - Go to Manual Proxy Setup and click on Setup.
- Turn off the option that says Use a proxy server. Then close the window and restart your computer.

Turn off the Proxy from your System
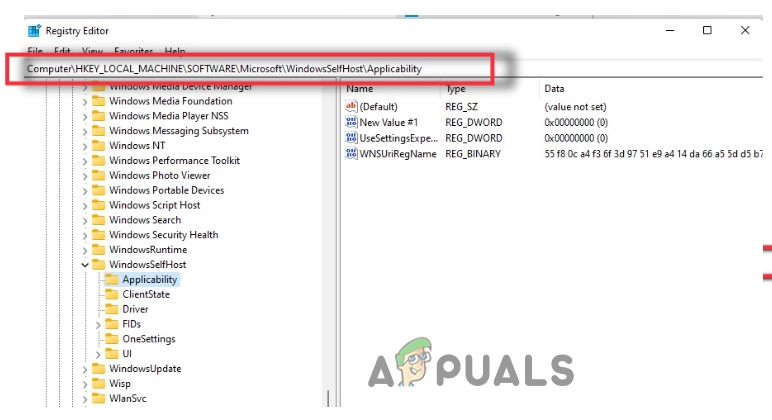
6. Remove the ThresholdOptedIn Registry Entry
The Windows Registry holds important data about your installed applications and settings. Sometimes, if specific registry entries are corrupted, you can experience update issues.
- Press Windows key + R to open the Run dialog.
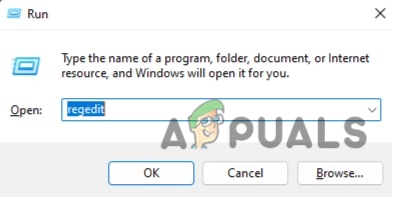
Open Windows Registry - Type regedit and press OK. Then navigate to the following path:
Computer\HKEY_LOCAL_MACHINE\SOFTWARE\Microsoft\WindowsSelfHost\Applicability
- Check if the ThresholdOptedIn entry appears. If you see it, delete the entry.
Remove the ThresholdOptedIn Registry Entry


