How to Fix Error 0x8007112A when Moving or Deleting Folders
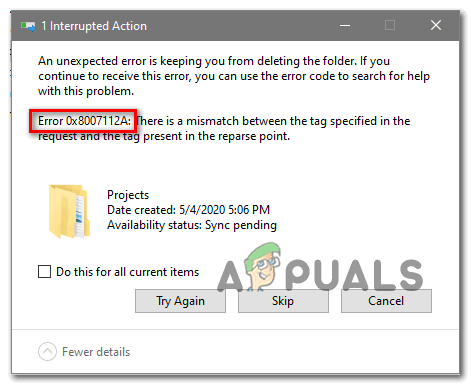
The 0x8007112A error appears with the message “An unexpected error is keeping you from deleting the folder” while trying to move or delete certain directories. This error means the tag specified in the request doesn’t match the tag present in the reparse point, pointing to a symbolic link or junction issue.
The most common cause is folder corruption or cloud sync conflicts, especially with OneDrive or third-party security tools interfering with access. It can also occur if system reparse points are broken or if the NTFS file system metadata is damaged.
Now that you know the causes, let’s move to the solutions.
1. Run the File & Folder Troubleshooter
If you’re facing this issue with a shared folder or a subfolder inside OneDrive (or another cloud service), it’s likely a permissions problem is preventing you from moving or deleting things. If this sounds like your situation, try running the File & Folder troubleshooter, and if you’re on Windows 10, the Shared Folders troubleshooter as well.
These troubleshooting tools can automatically fix many common folder and file errors, including the 0x8007112a error. If they detect a problem they know how to solve, they’ll attempt to fix it for you.
- Go to the download page for the Windows File & Folder troubleshooter and click the download button to get the utility.
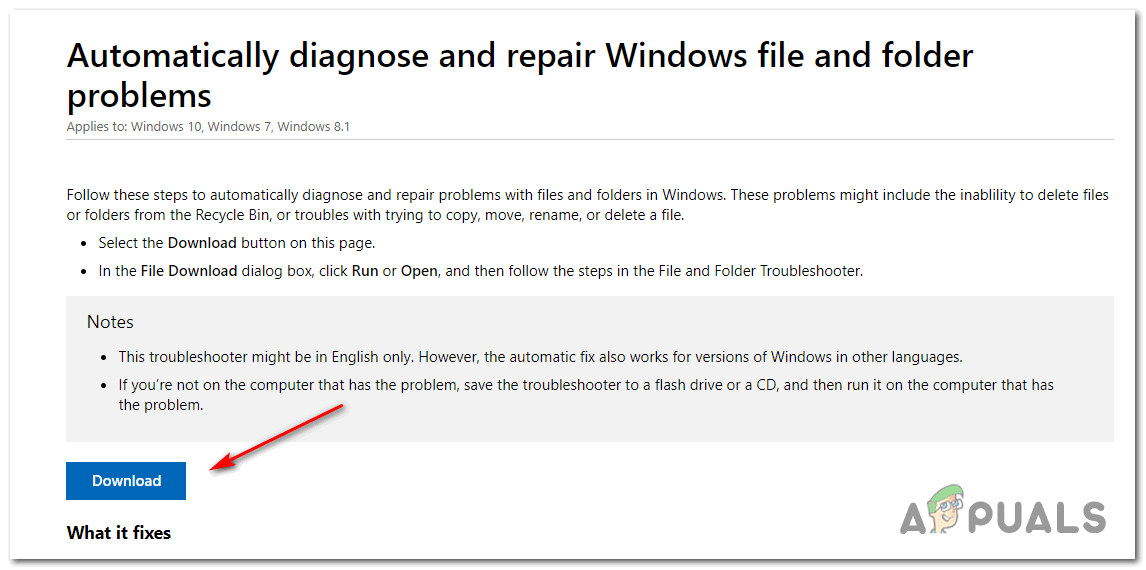
Downloading the File & Folder troubleshooter Note: This utility works with Windows 10, Windows 7, and Windows 8.1.
- Once the .diagCab file finishes downloading, double-click it and click Yes at the User Account Control (UAC) prompt to give it the needed permissions.
- In the first screen of the File & Folder Troubleshooter, click Advanced and make sure to check Apply repairs automatically. Then click Next to start scanning.
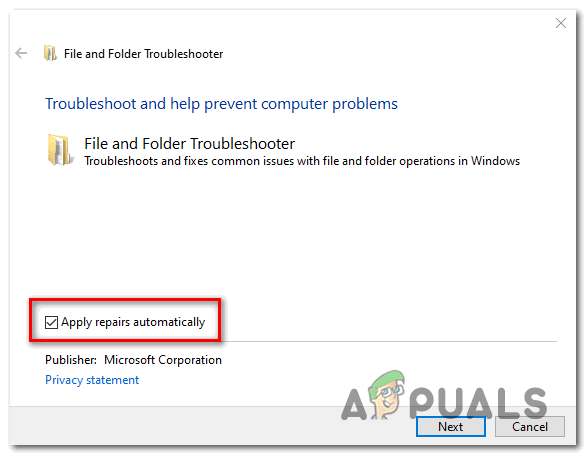
Enabling the ‘Apply repairs automatically’ box - After the scan completes, check the boxes for problems that match what you’re experiencing.
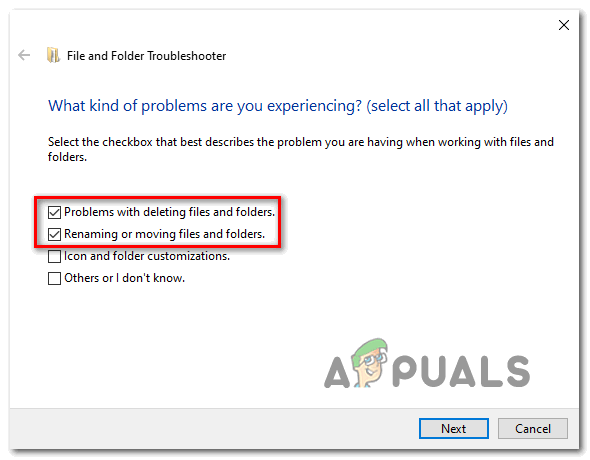
Using the File and Folder troubleshooter Note: Users who fixed 0x8007112a with this troubleshooter often checked Problems with deleting files and folders and Renaming or moving files and folders.
- Wait for the troubleshooter to finish. If it finds and fixes any issues, restart your PC and see if the problem is gone the next time it starts up.
- If the error is still there, and you’re seeing it with a shared folder on Windows 10, try the steps below to run the Shared Folders troubleshooter.
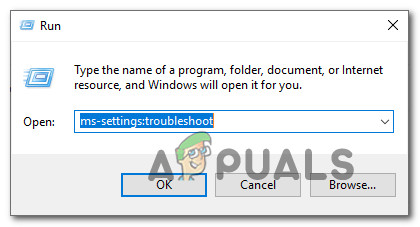
Note: If you’re not using Windows 10, move directly to Method 2. - Press Windows key + R to open a Run dialog. Type ms-settings:troubleshoot and press Enter to open the Troubleshoot section in Settings.
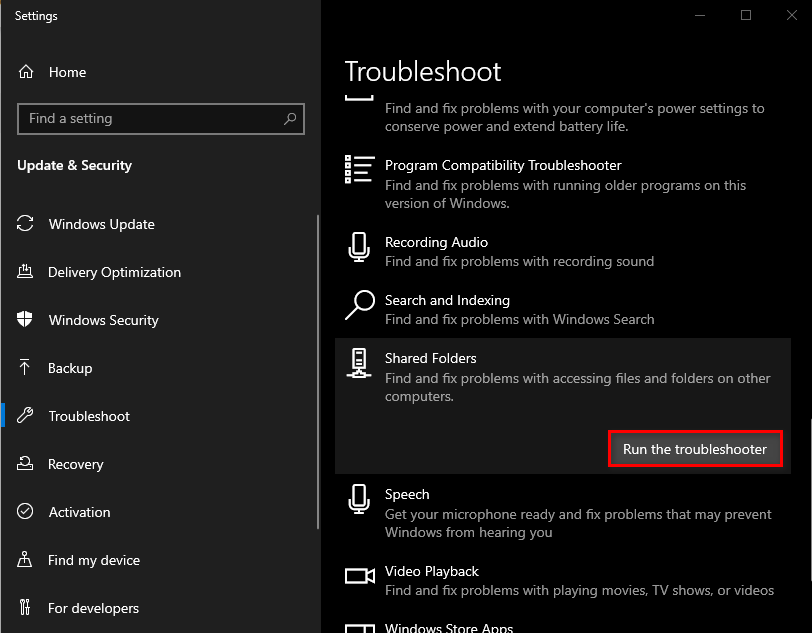
Accessing the Troubleshooting tab - On the Troubleshoot page, scroll down to Find and Fix other problems, expand Shared folders, and then click Run the troubleshooter.
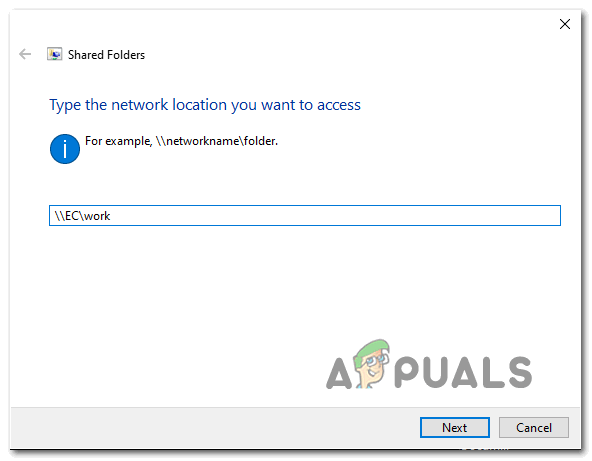
Running the Shared Folders troubleshooter - Wait for the scan to complete, then enter the network location of the folder you’re having trouble with and click Next.
Accessing the shared folder troubleshooter - When the troubleshooter finishes, follow any on-screen instructions to apply the recommended fix, then restart your computer and router to see if the error is gone.
2. Run DISM and SFC Scans
If the troubleshooters didn’t solve the problem, your folder issue might be due to corrupted system files. In this case, you can use built-in Windows tools to automatically replace damaged files. Two useful utilities for this are SFC (System File Checker) and DISM (Deployment Image Servicing and Management).
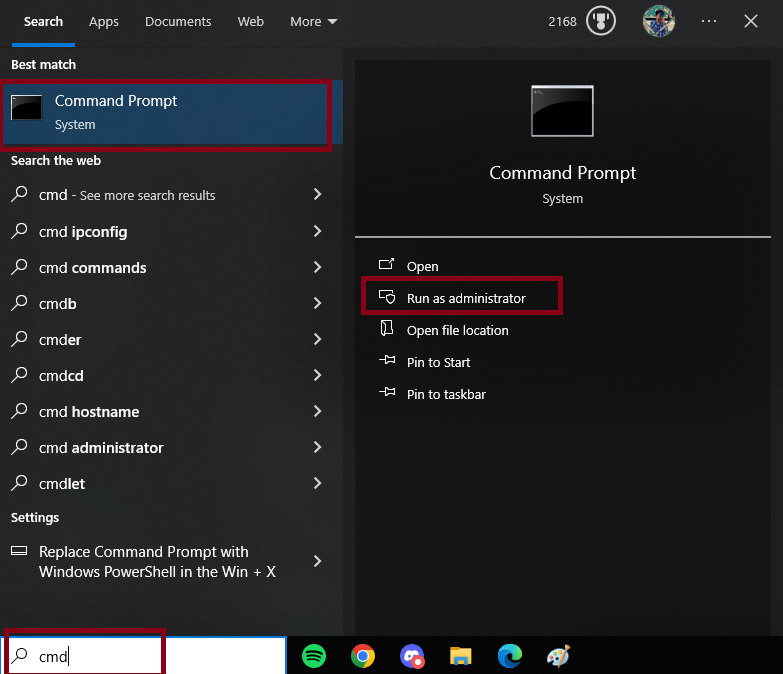
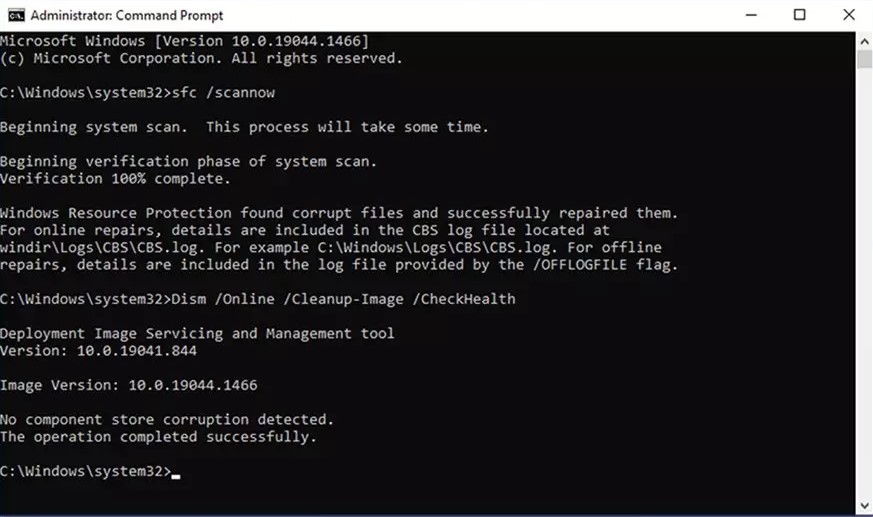
- Open the Search menu, type Command Prompt, right-click it, and select Run as Administrator.
- Enter the following command in Command Prompt:
sfc /scannow
- Restart your PC after the scan completes.
If the issue persists, - Run the following commands in Command Prompt as administrator:
Dism /Online /Cleanup-Image /RestoreHealth
- Close Command Prompt and restart your PC.
3. Perform a System Restore
If the problem only started after installing or updating an app, or after Windows installed a new update, you might be dealing with a software conflict or a faulty driver. When you’re not sure what caused the issue, the easiest fix is to use System Restore. This feature lets you go back to a time when your PC was working properly.
Note: By default, System Restore saves restore points before major system events, like updates or new app installations. This increases your chances of having a suitable point to go back to.
If you want to try this solution, follow this step-by-step guide on using System Restore to restore your computer to a working state before the 0x8007112a error appeared.
4. Reset All Windows Components
If none of the above methods worked, your system may have deeper corruption that standard tools can’t fix. In this case, the last option is to reset all Windows components. There are two main ways to do this.
- Perform a Clean Install – This is the simplest option as you don’t need an installation disc or USB. However, it will erase all your data, so make sure to back up important files first.
- Repair Install – Also known as an ‘in-place upgrade,’ this method reinstalls Windows while keeping your personal files, settings, and most apps. It’s a safer choice if you want to avoid data loss, but you’ll need a copy of Windows installation media.


