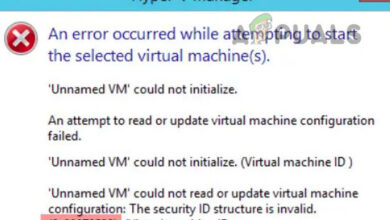
Hyper-V 2019 Core Server – Initial Configuration
As we successfully installed Hyper-V 2019 on a physical server, the next step is to make it ready for hosting the virtual machines and communicating with the rest of the network infrastructure. If you haven’t read the article, please check it on this page.
In this article, we will walk you through the procedure of initial configuration of your Hyper-V 2019 Server. There are few options that we will configure including workgroup name, computer name, remote management, remote desktop, Windows updates, and network settings.
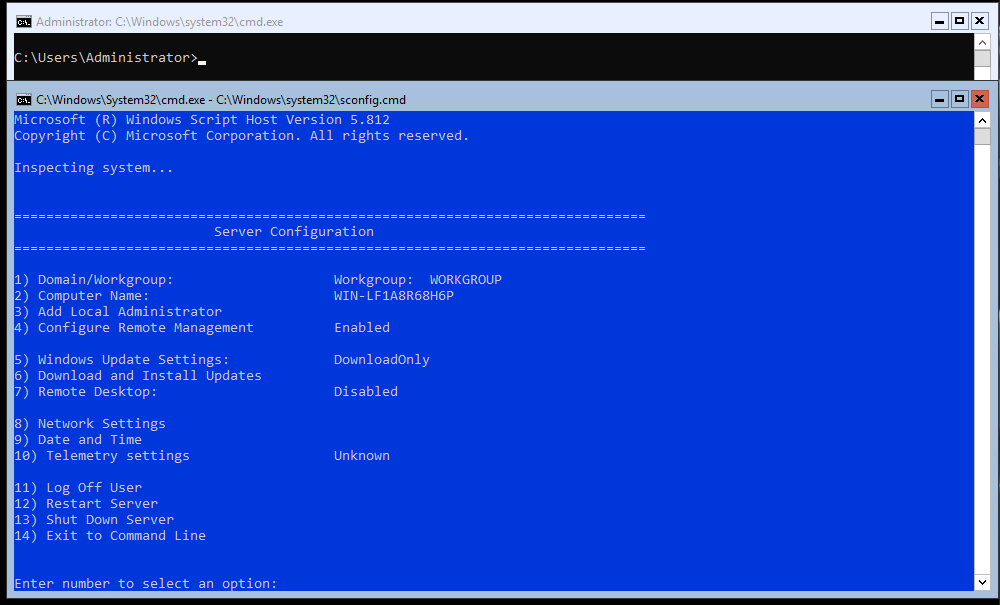
After you successfully deployed Hyper-V 2019 Server you will see the screen as shown on the screenshot below. From this point, we will start our configuration. So, let’s start from Workgroup Name.
Change Domain/Workgroup Name
In our case, we are not using Domain infrastructure (Active Directory Domain Services), but Workgroup. According to that, we will need to join our Hyper-V 2019 to existing Workgroup which is called APPUALS. In order to change settings, please follow the procedure below:
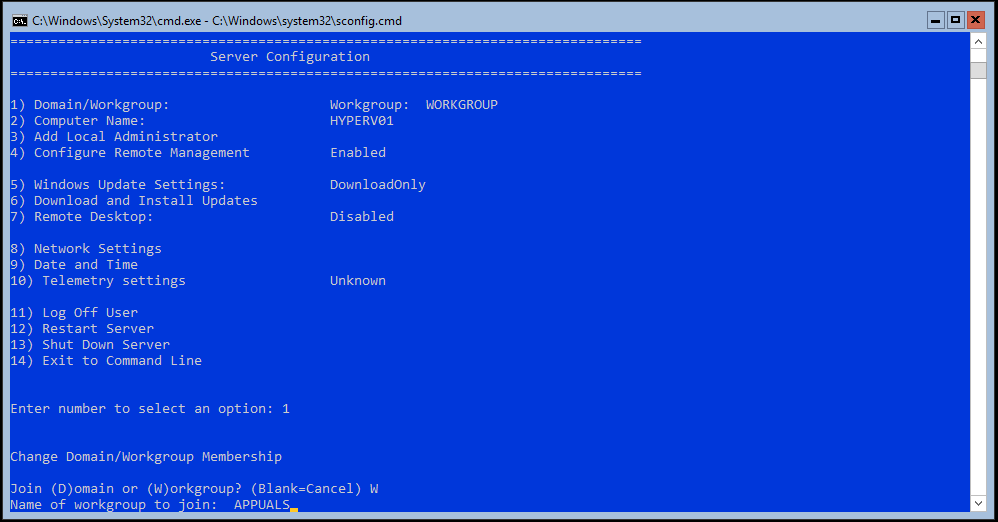
- Under „Enter Number to select an option“ type 1 and press Enter
- Type W to join the machine to Workgroup and press
- Type the name of Workgroup and press Enter. In our example, the name is APPUALS.
- After the machine is joined to Workgroup, click OK
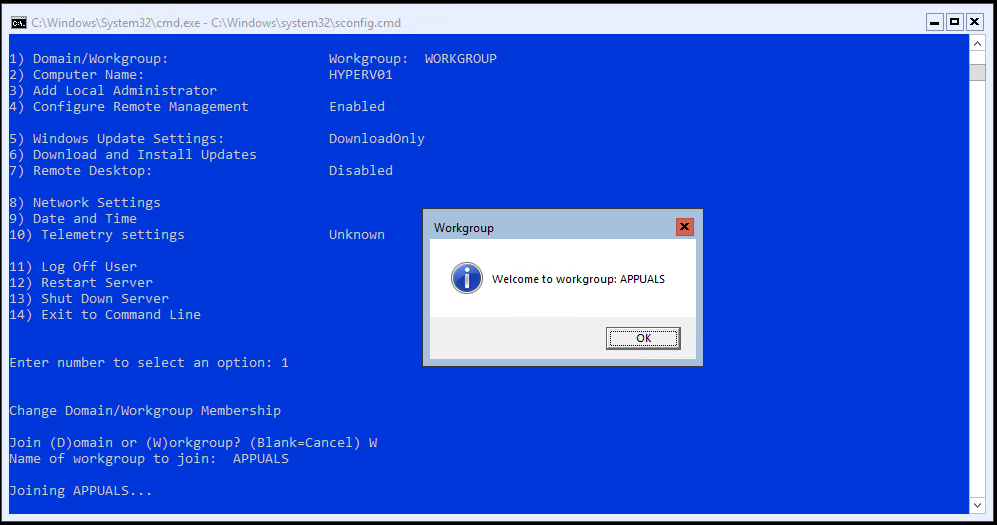
- Congratulation, you have successfully joined your Hyper-V 2019 server to the Workgroup
Change Computer Name:
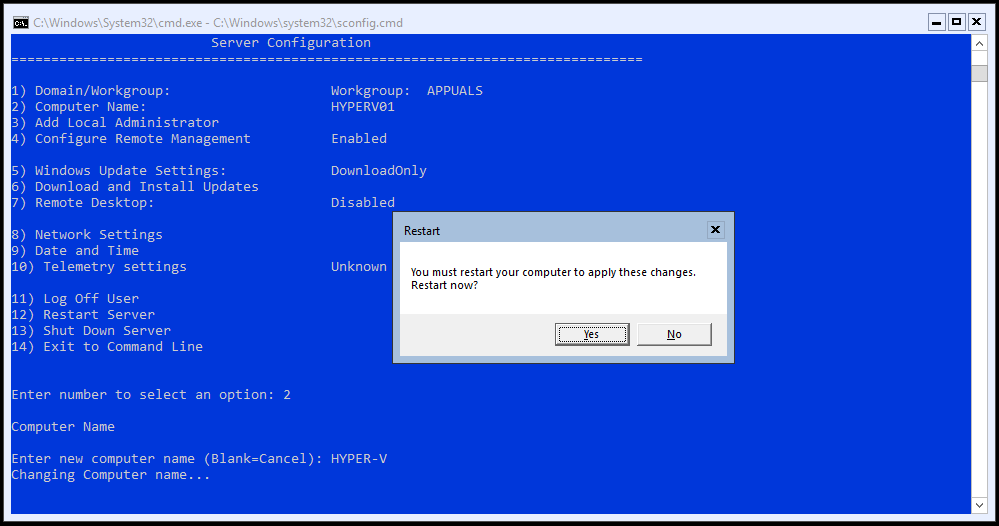
- Under „Enter Number to select an option“ type 2 and press Enter
- Type new computer name and press In our case, the computer name is HYPER-V.
- After you successfully change the computer name, click Yes to restart your server
- Type the password to log on the server
- Congratulation, you have successfully changed the computer name
Configure Remote Management:
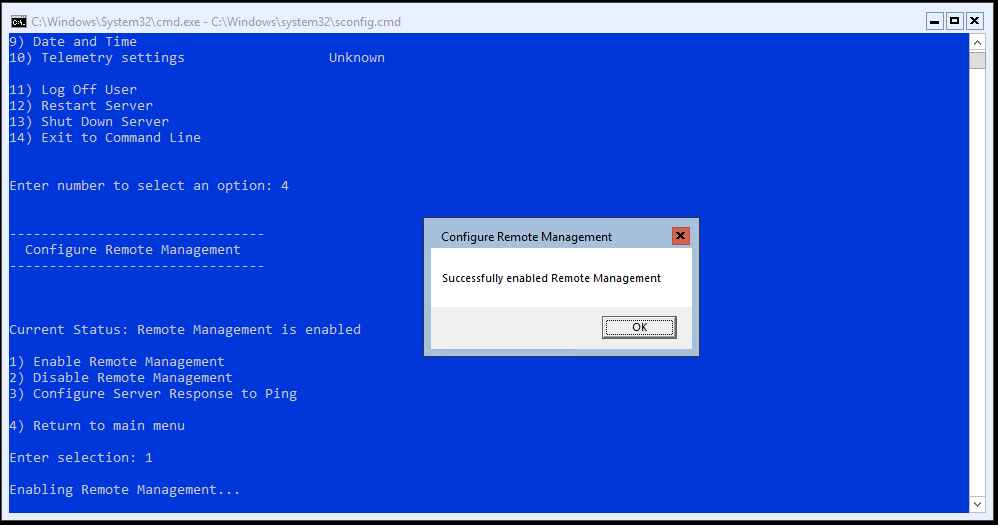
- Under „Enter Number to select an option“ type 4 and press Enter
- In order to Enable Remote Management, type 1 and press Enter
- Click OK to confirm.
- In order to Enable the server to respond on Ping, type 3 and press Enter
- Under Allow remote machines to Ping the server click Yes
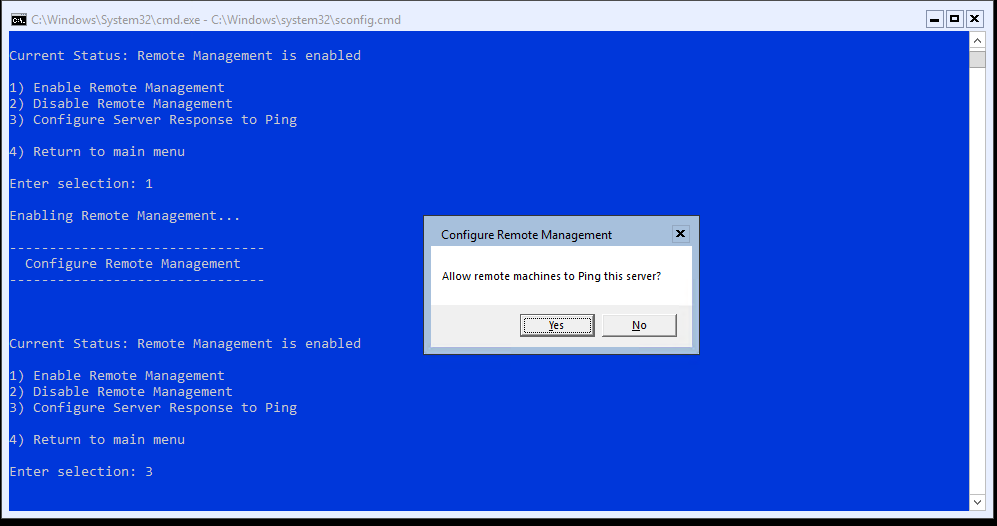
- Click OK
- Type 4 to return to Main Menu
- Congratulation, you have successfully changed remote management settings
Configure Windows Update Settings:
- Under „Enter Number to select an option“ type 5 and press Enter
- Select which options you want to use for downloading and installing the updates. There are three options available including:
- (A)utomatic – automatically check if the new update is available, download, install and reboot a server for applying updates
- (D)ownloadOnly – automatically check if the new update is available, but notify the admin if new updates need to be installed
- (M)anual – This turns Automatic Updates off. Your system will never check for updates.
- We will keep the default option: DownloadOnly.
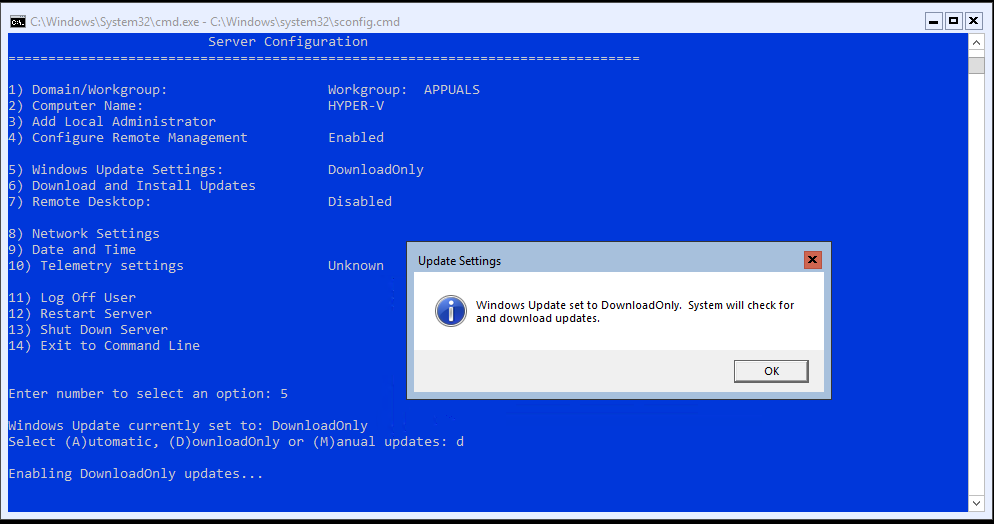
- Click OK
- Congratulation, you have successfully changed Windows Update Settings
Download ad Install Updates:
- Under „Enter Number to select an option“ type 6 and press Enter
- A new window will open where you will need to specify if you want to download All updates or Recommended updates. In our example, we will select Recommended updates by typing R
- Hyper-V will search for recommended updates. As we are using the latest version of Hyper-V 2019, there are no applicable updates available
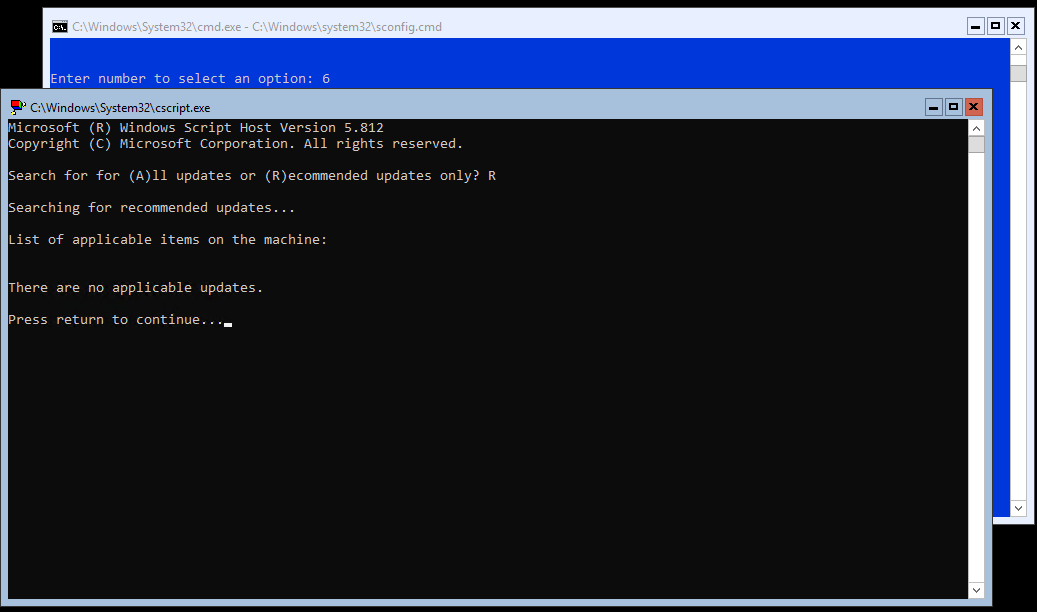
- Press Return to Continue
- Congratulation, you have successfully installed new updates
Configure Remote Desktop:
Would you like to remotely access your Hyper-V? If so, you would need to activate Remote Desktop by following the procedure below:
- Under „Enter Number to select an option“ type 7 and press Enter
- Type „E“ in order to enable Remote Desktop
- In the next step, we will need to select who will be able to do a remote connection to Hyper-V. There are two options available:
- Allow only clients running Remote Desktop with Network Leveö Authentification (more secure)
- Allow clients running any version of Remote Desktop (less secure)
In our example, we will choose the first option by typing 1.
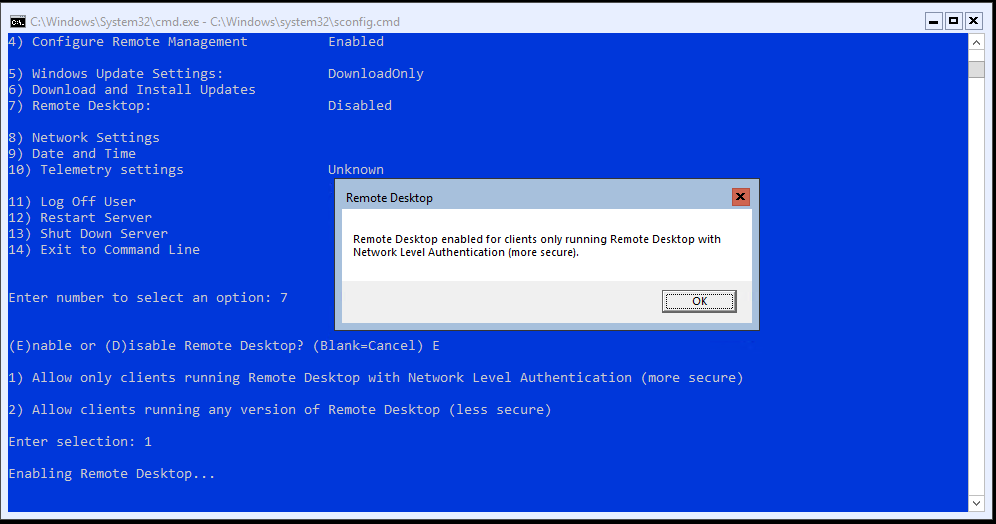
- Type OK to confirm enabling Remote Desktop
- Congratulation, you have successfully enabled Remote Desktop
Configure Network Settings:
In order to communicate with the rest of the network, our Hyper-V 2019 Server has to be available on the network. We are using IP Class C Network 192.168.10.0; subnet mask 255.255.255.0. According to the mentioned network segment, we will configure Hyper-V 2019 to be available on 192.168.10.100 address.
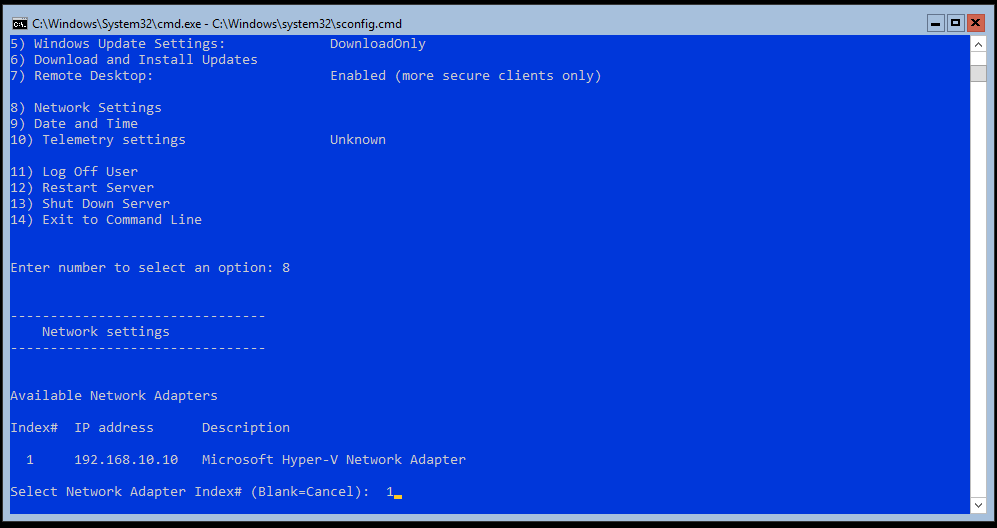
- Under „Enter Number to select an option“ type 8 and press Enter
- Choose the network card that you would like to configure. In our example, there is only one card available. Type 1 to select the network card
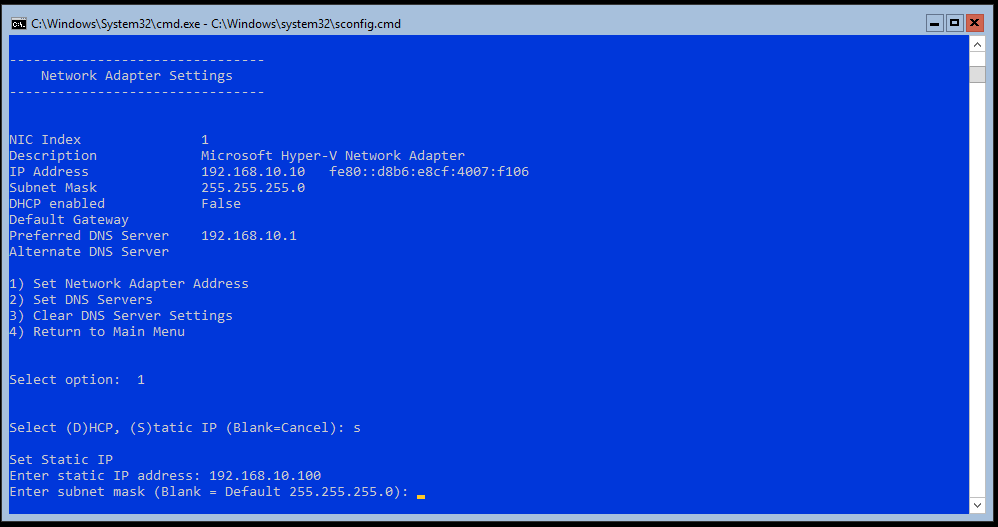
- Type „1“ to change the IP address
- Type „S“ to configure Static IP address
- Type the IP address and press Enter. In our example, the IP address is 192.168.10.100.
- Enter the subnet mask and press Enter. As Hyper-V automatically detects subnet mask for network ID, we will press Enter to confirm default subnet mask. If you are using subnetting in the network, you would need to specify the proper subnet mask.
- If needed enter default gateway and press Enter. As we don’t need default gateways for this purpose, we will just press Enter
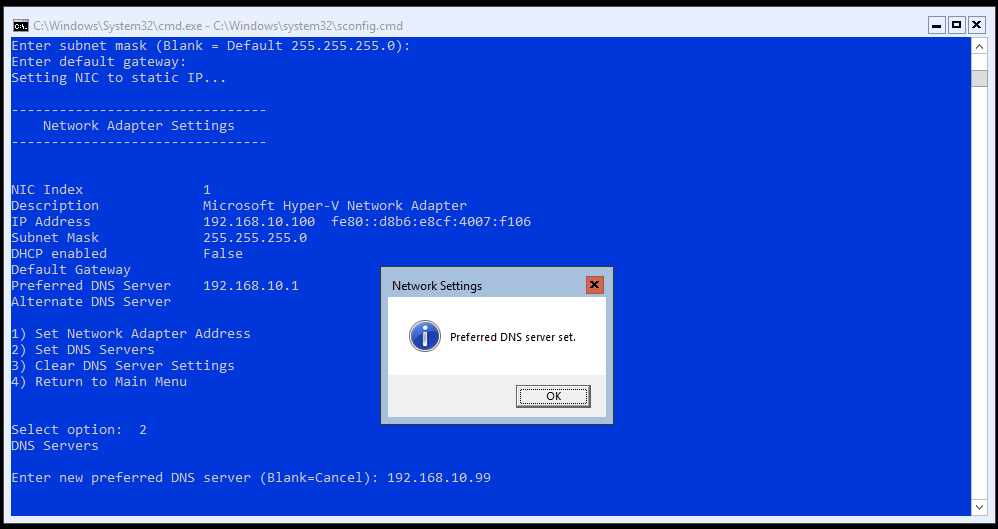
- Type 2 to configure DNS Server
- Type the IP address of DNS Servers. In our example, it is 192.168.10.99
- Click OK to confirm adding DNS Server
- If you have a secondary DNS server, enter the IP address and press Enter
- Type 4 to Return to Main Menu.
- Congratulation, you have successfully configured network settings.
In the next article, we will connect to the Hyper-V 2019 server by using Hyper-V Manager that is installed on Windows 10 Professional.