How to run Hyper-V in a Virtual Machine with Nested Virtualization?
Installation of Hyper-V Server role or Hyper-V Core Server on the physical machine is a straightforward process and doesn’t always require to do an additional configuration. The next step in a building the isolated environment is to deploy and configure a virtual machine, operating system, and hosted application. This is known as traditional virtualization. In this case, the physical machine is abstracted and presented to guest operating systems that are hosted on the virtual machine. But what if we want to run a Hyper-V inside of the virtual machine? It is not possible to do it by default, but with additional changed on the Hyper-V Server and target virtual machine. The technology that allows us to run a virtual machine inside the virtual machine is called nested virtualization. It is also supported by other popular vendors including VMware, Citrix, and Nutanix. Sounds interesting, but what is the use case for running a virtual machine inside the virtual machine? It is mainly used by developers for testing purpose, labs and running Hyper-V containers.
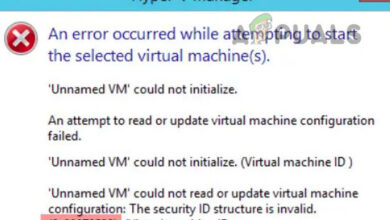
If we try to install Hyper-V in the VM, we will get an error that says that installation can’t be done due to the missing virtualization capabilities.

The solutions for this obstacle is to enable nested virtualization on the Hyper-V server for a target virtual machine. In the following text, we will walk you through the procedure of enabling nested virtualization on the Hyper-V Server hosted on Windows Server 2019.
- Log in or connect to Windows Server 2019 where you installed Hyper-V role
- Open Hyper-V Manager
- Navigate to the VM where you want to enable nested virtualization. In our example, it is VM named „Windows2019“ as shown in the screenshot

- Shutdown the VM
- Right click on the Start Menu and then click on Windows Powershell (Admin)
- Type Set-VMProcessor -VMName Windows2019 -ExposeVirtualizationExtensions $true and then press In this example, Windows2019 is the VM name. You would need to type the name of your VM hosted on your Hyper-V Manager

- The next step is to configure networking with the nested virtual machine. This can be done by using MAC Spoofing or Network Address Translation (NAT). In our case we will enable MAC Spoofing by typing command Get-VMNetworkAdapter -VMName Windows2019 | Set-VMNetworkAdapter -MacAddressSpoofing On into the Powershell. Please replace Windows2019 with the name of your virtual machine

- Turn on the VM and login into Windows Server 2019
- Open Server Manager and click Add roles and features
- Click Next under Before you begin
- Click Next under Select Installation Type
- Click Next or choose destination server under Select destination server
- Select Hyper-V under Select server roles and then click Add Features
- Click Next to install Hyper-V
- Click Next under Select features
- Click Next under Hyper-V
- Choose network adapter under Create Virtual Switches. Windows Server will automatically detect all available network adapters on that machine
- Click Next under Virtual Machine Migration
- Click Next or choose the default location for virtual hard disk or virtual machine configuration file under Default Stores
- Select Restart the destination roles, role services, or features on a selected server, click install and then click Yes under Confirm Installation Selections
- Click Install and wait until Windows Server 2019 install Hyper-V role
- Click Install under Confirm installation selection
- Wait until Windows finishes installation of Hyper-V role. It will automatically install the virtual machine.

- Log in to the Windows Server 2019
- Open Server Manager
- Navigate to Tools and then click Hyper-V Manager
- Install a virtual machine and enjoy playing with Hyper-V