How to Fix MSI Afterburner not Working?
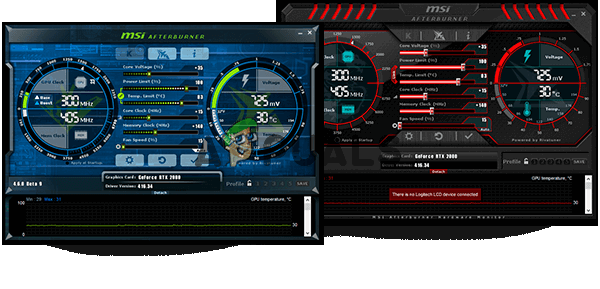
MSI Afterburner is probably one of the most recognized and most popular overclocking tools for Windows. It didn’t become popular for no reason but some users claim that it’s simply not working on their computers. It might not be opening at all or it may not be able to change the clock speed of your devices. In other cases, it’s the in-game overlay that’s not working.
We have prepared several methods which can be used to resolve this problem and we highly recommend you check them out before giving up. Good luck and follow the instructions carefully.
What Causes MSI Afterburner to not Work on Windows?
There are a few causes which can prevent MSI Afterburner from working properly on Windows. Also, it depends on which feature you are struggling with. However, you should have a clear idea of what your scenario might be after you check out the list of causes we have prepared below!
- Various overlays running on your PC – When multiple overlays run at the same time, errors are bound to ruin everything! The most common culprits are definitely Steam and NVIDIA overlays which need to be disabled for MSI Afterburner’s overlay to work properly.
- Onboard graphics card – When you’re having problems overclocking using MSI Afterburner, consider disabling the integrated graphics card in BIOS in order to switch all graphics handling to your external graphics card!
Solution 1: Disable NVIDIA Overlay
This is the best method to try out if you notice that the in-game overlay provided by MSI Afterburner is not working properly. Having several different overlay tools running at the same time is never a good idea and one of them needs to be disabled. Follow the steps we have provided below in order to disable NVIDIA overlay on your computer!
- Open GeForce Experience by searching for it on your Desktop or the Start menu. Wait for it to open and click the cog icon from the home screen which should be located in the upper right corner in order to open Settings.
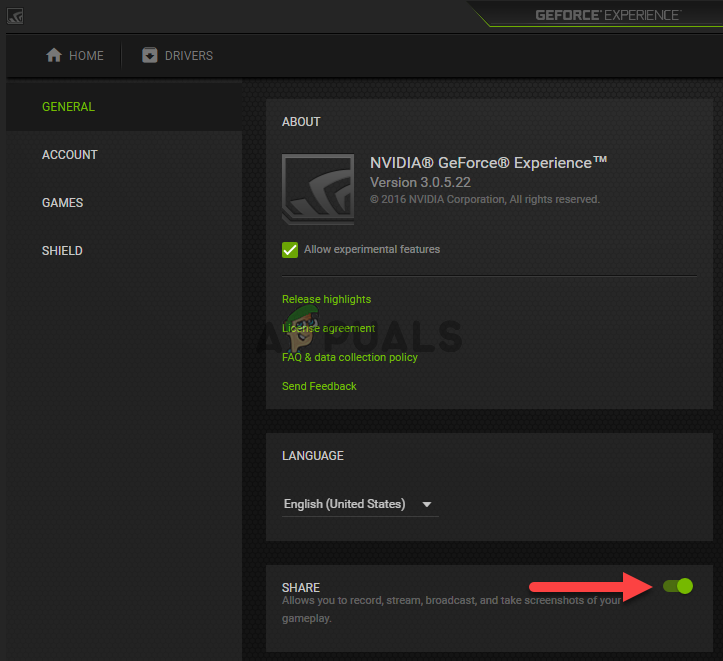
- From the General tab, locate the Share option with the “Allows you to record, stream, broadcast, and take screenshots of your gameplay” description underneath. Make sure you slide the slider to the left in order to disable
- Accept the changes you have made and check to see if MSI Afterburner starts working properly!
Solution 2: Disable Steam Overlay
Steam Overlay is yet another overlay which might mess up MSI Afterburner so consider disabling it to resolve the issue. Follow the steps below to disable it!
- Open Steam by double-clicking its entry on the Desktop or by searching for it in the Start menu. Windows 10 OS users can also search for it using Cortana or the search bar, both of them next to the Start menu at the left part of your taskbar!

Opening Steam from Start menu - Navigate to the Library tab in the Steam window, and locate the problematic game in the list of the games you own in your library.
- Right-click the game’s entry in the library and choose the Properties option from the context menu which should appear. Stay in the General tab in the Properties window and clear the box next to the “Enable the Steam Overlay while in-game” entry.
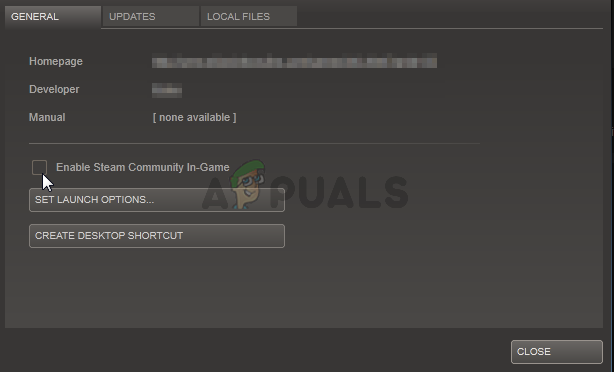
Disabling Steam Overlay - Apply the changes, exit, and try running the game. Check to see if MSI Afterburner overlay works while playing the game!
Solution 3: Reinstall Afterburner’s Latest Version
If MSI Afterburner isn’t working properly on your computer, you should consider uninstalling the version currently installed on your computer and updating to the latest one. This is an easy process to perform and it’s something to try out before moving onto more difficult methods!
- Click the Start menu button and open Control Panel by searching for it. Alternatively, you can click on the cog icon in order to open settings if you are using Windows 10.
- In Control Panel, select to View as – Category at the top right corner and click on Uninstall a Program under the Programs section.
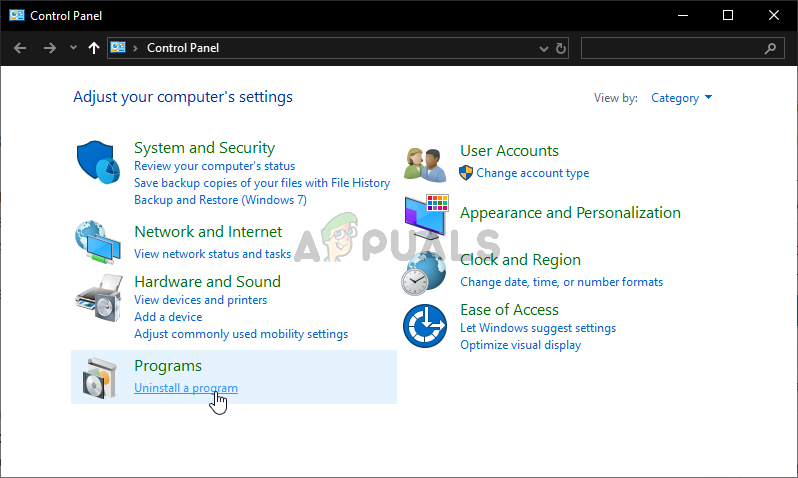
Uninstall a program in Control Panel - If you are using the Settings app, clicking on Apps should immediately open a list of all installed programs on your PC.
- Locate MSI Afterburner tool in Control Panel or Settings and click on Uninstall. Its uninstall wizard should open so follow the instructions to uninstall it.
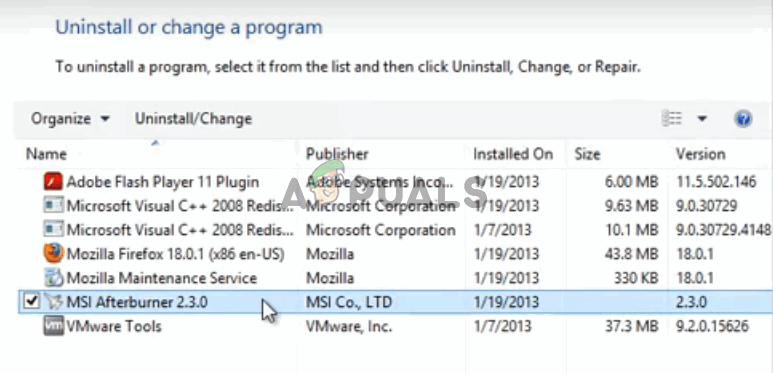
Uninstalling MSI Afterburner - Click Finish when the uninstaller completes the process and restart your computer to see whether errors will still appear. Make sure you visit this website, download the installation file, and install it again to see if MSI Afterburner is working properly!
Solution 4: Manually Add the Game and Set the Detection Level to High
If MSI Afterburner/RivaTuber isn’t working properly on your computer for a specific game, you might want to consider adding the game’s executable manually and setting the application detection level to high. This method can be highly useful if the overlay simply won’t appear in-game. Follow the steps below to set the application detection level to high for the problematic game!
- Open RivaTuner by double-clicking its entry on the Desktop or by searching for it in the Start menu. Windows 10 OS users can also search for it using Cortana or the search bar, both of them next to the Start menu at the left part of your taskbar!
- When its main window opens, click the plus button at the bottom-left part of the window and browse for the game’s executable. It will be located in the game’s installation folder which is C >> Program Files (x86) by default.
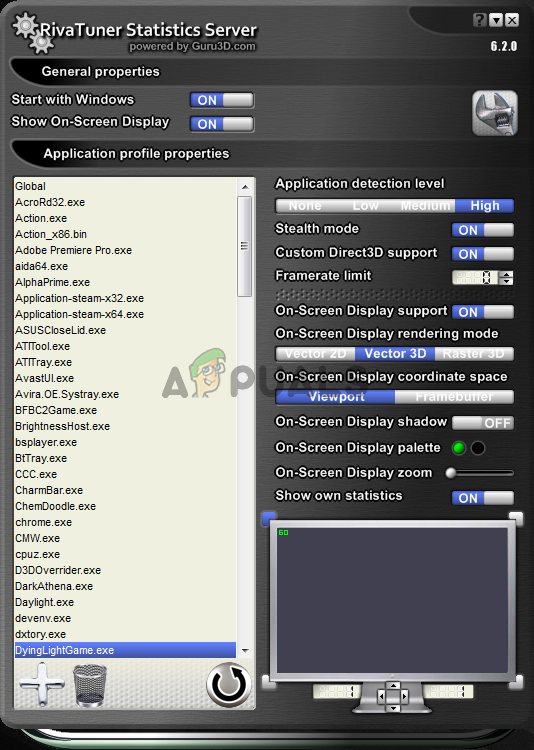
- After the executable has been added in the program, locate it in the list above and left-click to select it. Check the right side for the Application detection level Make sure you set this option to high and check if MSI Afterburner works properly now!
Solution 5: Run MSI Afterburner in Compatibility Mode for an Older Version of Windows
Running the software in compatibility mode for older versions of Window can resolve the problem quite easily and it’s something to try out. This method can be applied for both the overlay and the overclocking tool. Make sure you follow the steps below!
- Navigate to the main MSI Afterburner installation folder which depends on what you chose during the installation. The default location is C:\Program Files (x86)\MSI Afterburner.
- Locate the main executable file and change its properties by right-clicking its entry either on the Desktop, the Start menu or the Search results window and choose Properties. Navigate to the Compatibility tab in the Properties window and stay in this window.
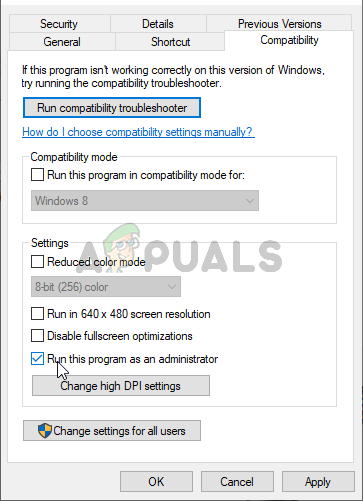
- Under the Compatibility mode section, uncheck the box next to the Run this program in compatibility mode for option if it was checked before accepting the changes.
- Make sure you confirm any dialogs which may appear for you to confirm with admin privileges and MSI Afterburner should launch with admin privileges from now on. Open it by double-clicking its icon and try to see if opens successfully.
Solution 6: Disable the Integrated Graphics Card
Disabling the onboard graphics card on your computer can resolve the overclocking issues with MSI Afterburner. When your external graphics card is selected as the default device for graphics management, MSI Afterburner’s overclocking features should work properly and resolve the problem you’re having!
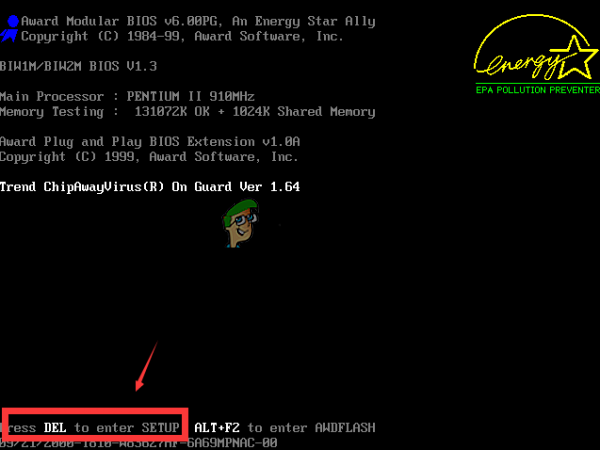
- Turn your PC on and try to enter BIOS settings by pressing the BIOS key as the system is about to start. The BIOS key is typically displayed on the boot screen, saying “Press ___ to enter Setup.” or something similar. There are other keys as well. The usual BIOS keys are F1, F2, Del, etc.
Press __ to run Setup - Now it’s time to disable the onboard graphics card. The option which you will need to change is located under different tabs on BIOS firmware tools made by different manufacturers and there is no unique way to find it. It’s usually located under the Security tab but there are many names for the same option.
- Use the arrow keys to navigate to the Advanced tab or a similar sounding tab inside BIOS. Inside, select an option named Onboard Devices Configuration or something similar inside.
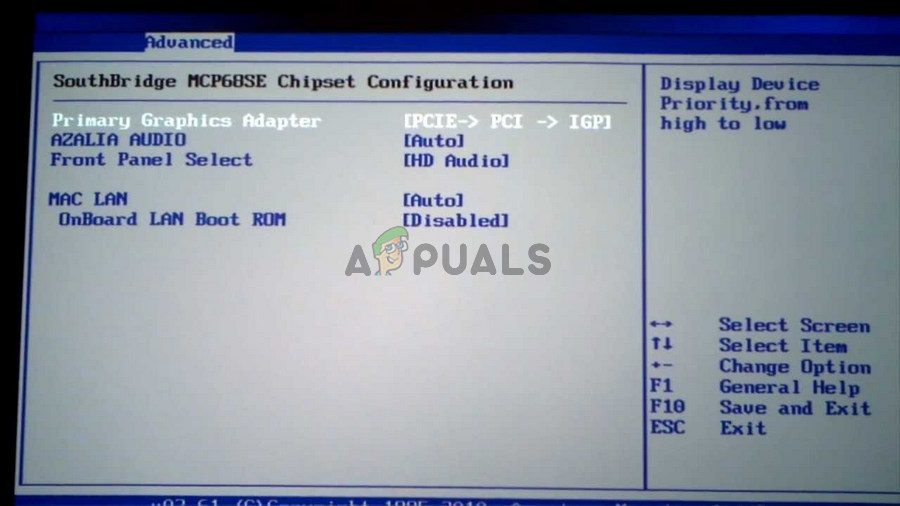
Settings the primary graphics adapter in BIOS - The Primary Graphics Adapter option you need to locate can also be located directly in the advanced tab. After selecting the Primary Graphics Adapter option, you will be able to tweak it by clicking the Enter key with the option selected and using the arrow keys to select the option where PCI-E goes first.
- Navigate to the Exit section and choose to Exit Saving Changes. This will proceed with the computer’s boot. Check to see if the problem persists.