How to Use the Snipping Tool Shortcut in Windows 10 & 11
 Reviewed by Huzaifa Haroon
- The Snipping Tool in Windows 11 allows users to capture screenshots in various modes such as rectangular, window, full-screen, free-form, and video. It can be launched using the keyboard shortcut Windows key + Shift + S.
- Post-capture, images open in an editor for annotations and edits with options like cropping and highlighting. The tool is designed to be user-friendly and integrates well with touchscreens, enhancing accessibility for all users.
- The default screenshot shortcut is customizable via Windows settings, allowing the use of the Print Screen key for launching the snipping utility, simplifying the screen capture process.
Snipping Tool is a built-in utility in Windows that allows you to take screenshots with ease. Whether you’re saving a snippet of a conversation, a graph from a report, or a funny meme, this tool is your go-to for swift and simple screen captures.
Understanding how to use the Snipping Tool shortcut can streamline your workflow, saving you time and hassle. This article will guide you through the steps to utilize this handy feature effectively, ensuring that you can capture exactly what you need, when you need it, with just a few keystrokes.
While Ctrl + C and Ctrl + V may have been your best friends, it’s time to make room for a new pal on your keyboard shortcut squad. Don’t worry; we won’t be cutting corners in this article, but we might just help you cut out a few extra steps in your workflow. Let’s get started, shall we?
Table of Contents
What is the Snipping Tool?
The Snipping Tool in Windows 11 is a versatile application designed for capturing screenshots in various ways. Here’s a detailed look at its features and functionalities:
↪ Capture Modes
- Rectangle mode: This allows you to draw a rectangular area to capture.
- Window mode: Captures the currently active window.
- Full-screen mode: Takes a screenshot of the entire screen.
- Free-form mode: Enables you to draw any shape on the screen and captures the area inside it.
- Video mode: Capture a video clip of a rectangular selection of any part of the screen you like.
↪ Usage
- You can launch the Snipping Tool via the
Start Menuor using the keyboard shortcut Windows key + Shift + S. - After initiating a snip, you can select the desired capture mode from the toolbar at the top of your screen.
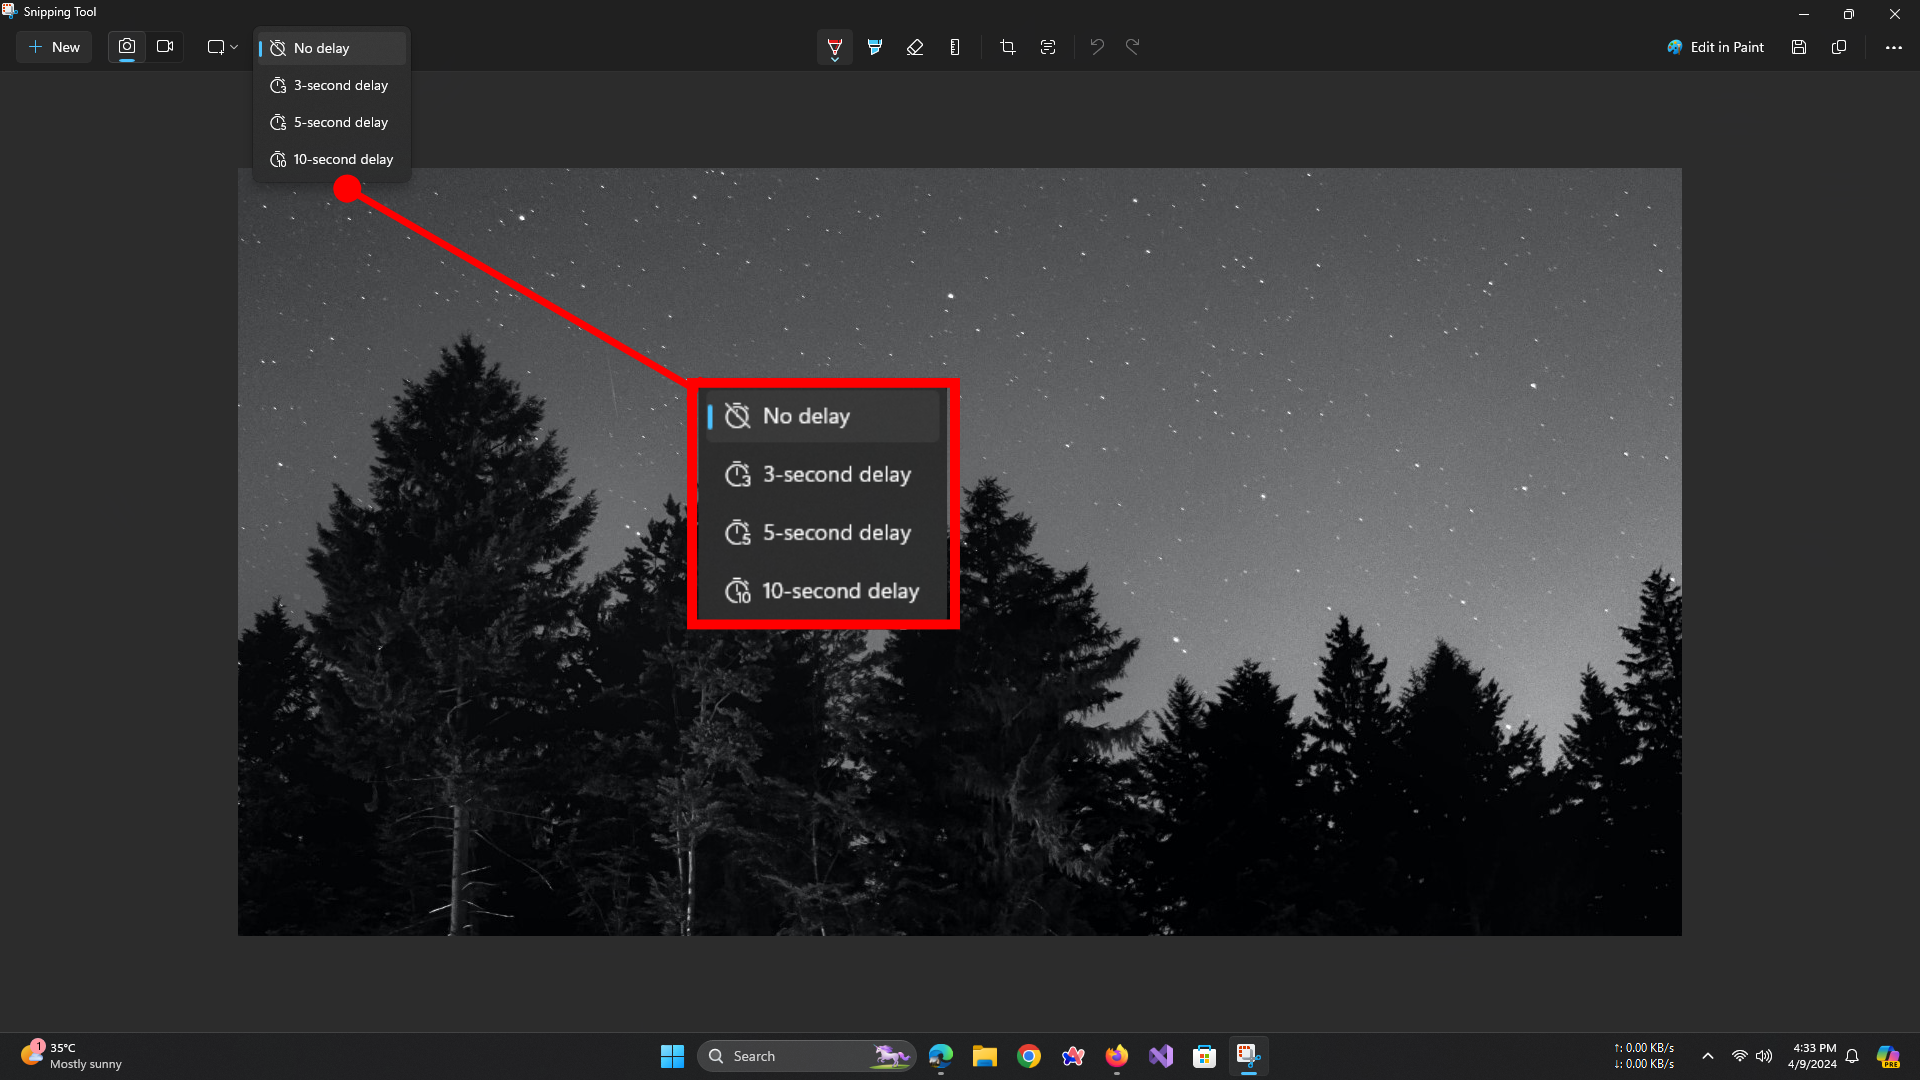
- There’s an optional delay feature that lets you set a timer (up to 10 seconds) before the screenshot is taken, which is useful for capturing dropdown menus or other temporary states.
↪ Editing and Annotation
- Once captured, the screenshot opens in the Snipping Tool Editor.
- The editor provides tools for cropping, annotating with a pen or highlighter, and erasing annotations.
- You can save your edited screenshot in various formats, share it, or print it directly from the editor.
↪ Settings
- The Snipping Tool settings allow you to configure default behaviors, such as the default snip mode or the option to use the Print Screen button to initiate a snip.
↪ Integration
- Screenshots taken with the Snipping Tool can be copied to the clipboard, saved as a file, or shared directly from the app.
- The tool integrates well with touchscreens, allowing for direct drawing or annotation with a finger or stylus.
↪ Accessibility
- The Snipping Tool is accessible to all users and is designed with simplicity in mind, making it easy to capture and share screenshots without the need for complex commands or third-party software.
This tool is particularly useful for creating tutorials, documenting issues, or simply sharing what’s on your screen with others. It’s a significant improvement over the legacy Snipping Tool and Snip & Sketch apps, combining their best features with an updated interface. Let’s dive into the easy steps for using this handy and useful tool with keyboard shortcuts.
READ MORE: How to Use Snipping Tool in Windows ➜
How to Use Snipping Tool with Keyboard Shortcut?
Follow these steps carefully; the process is straightforward.
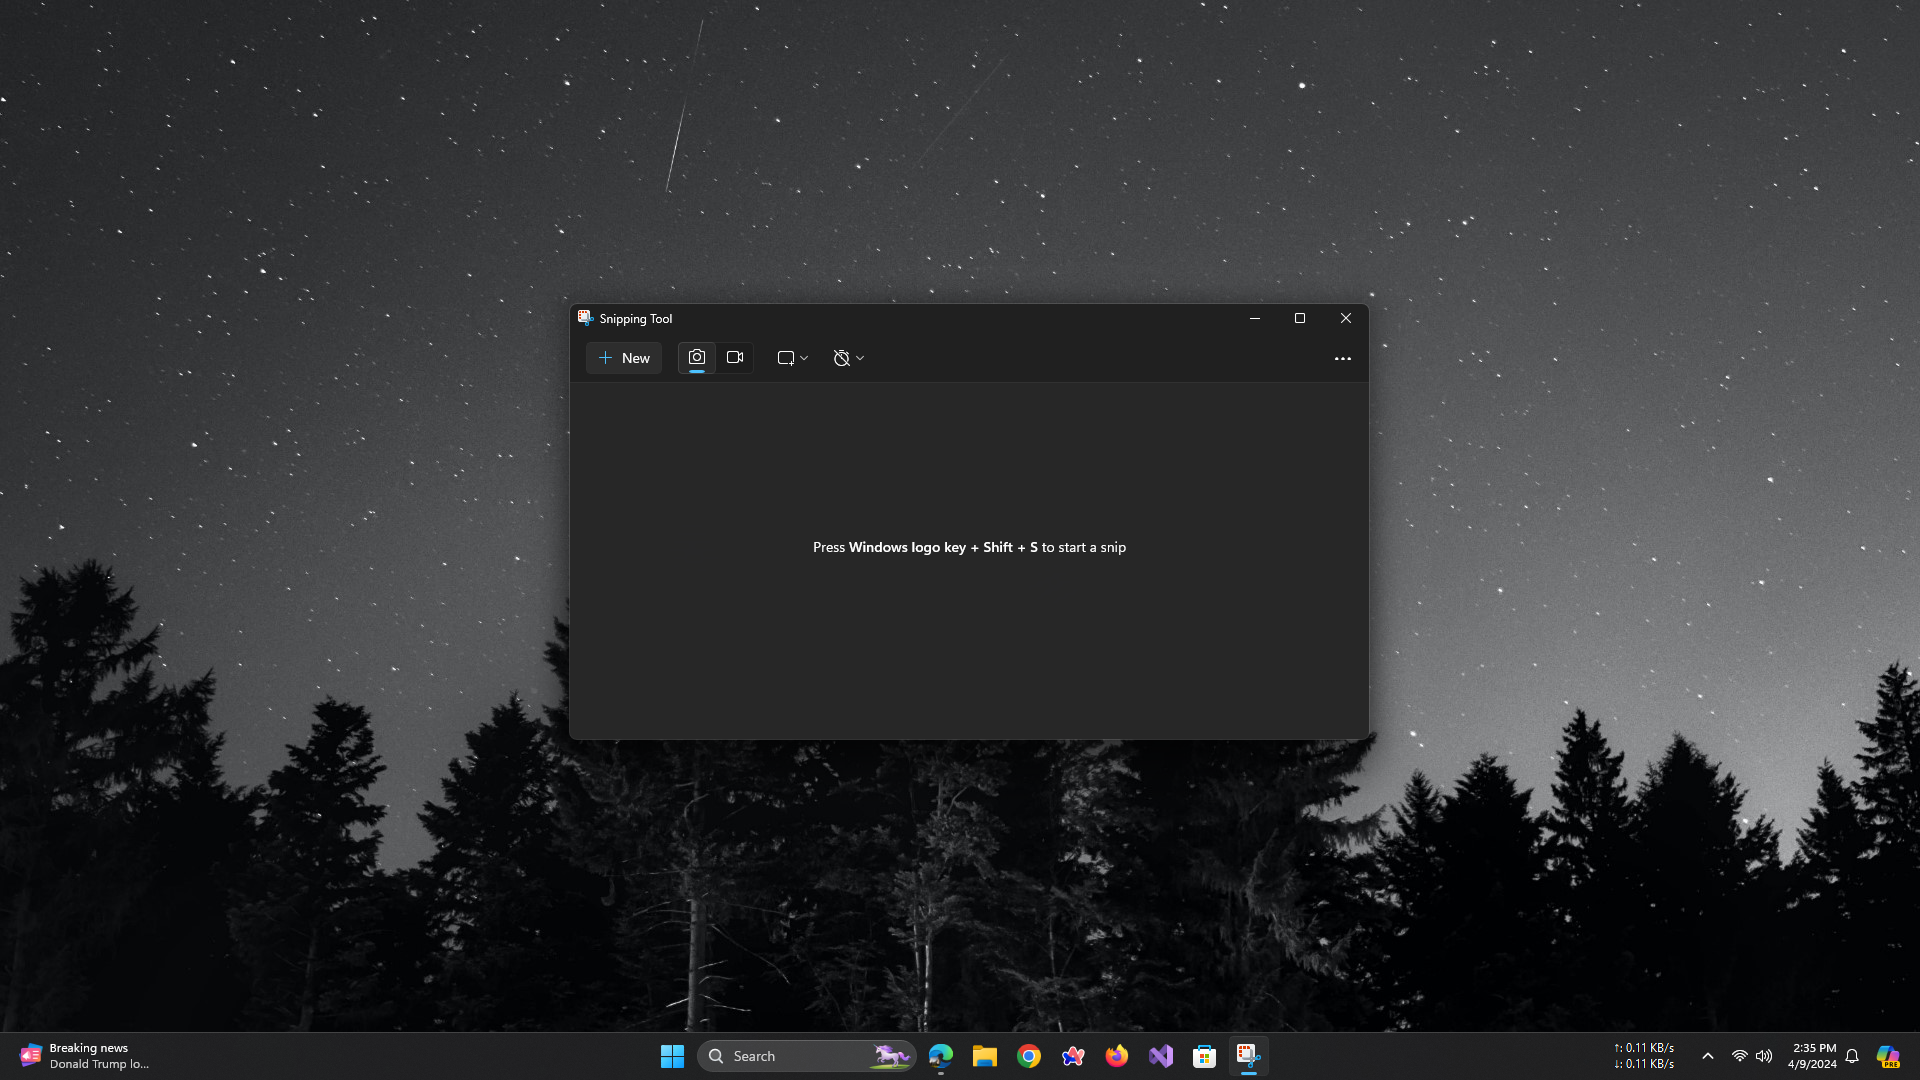
Step 1: Open the Snipping Tool
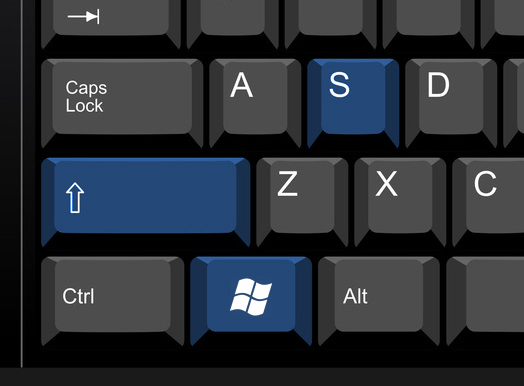
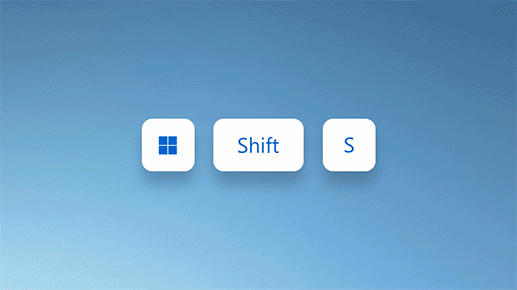
Press Windows logo key + Shift + S to directly initiate the screenshot process without opening the Snipping Tool window.
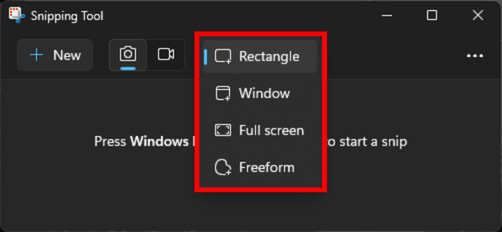
Step 2: Choose Snip Shape
A Snipping Tool widget or utility will appear at the top of your screen. Choose your desired snip mode from it.
- Rectangular Snip: This is the default option and it captures your screenshots in a rectangular shape.
- Freeform Snip: If you’d like to capture screenshots in a freeform way, select this option.
- Window Snip: This option captures the entire window of a specific app open on your PC.
- Fullscreen Snip: This captures your entire screen, including all your open windows and even the taskbar.
Step 3: Open the Screenshot in Snipping Tool Editor
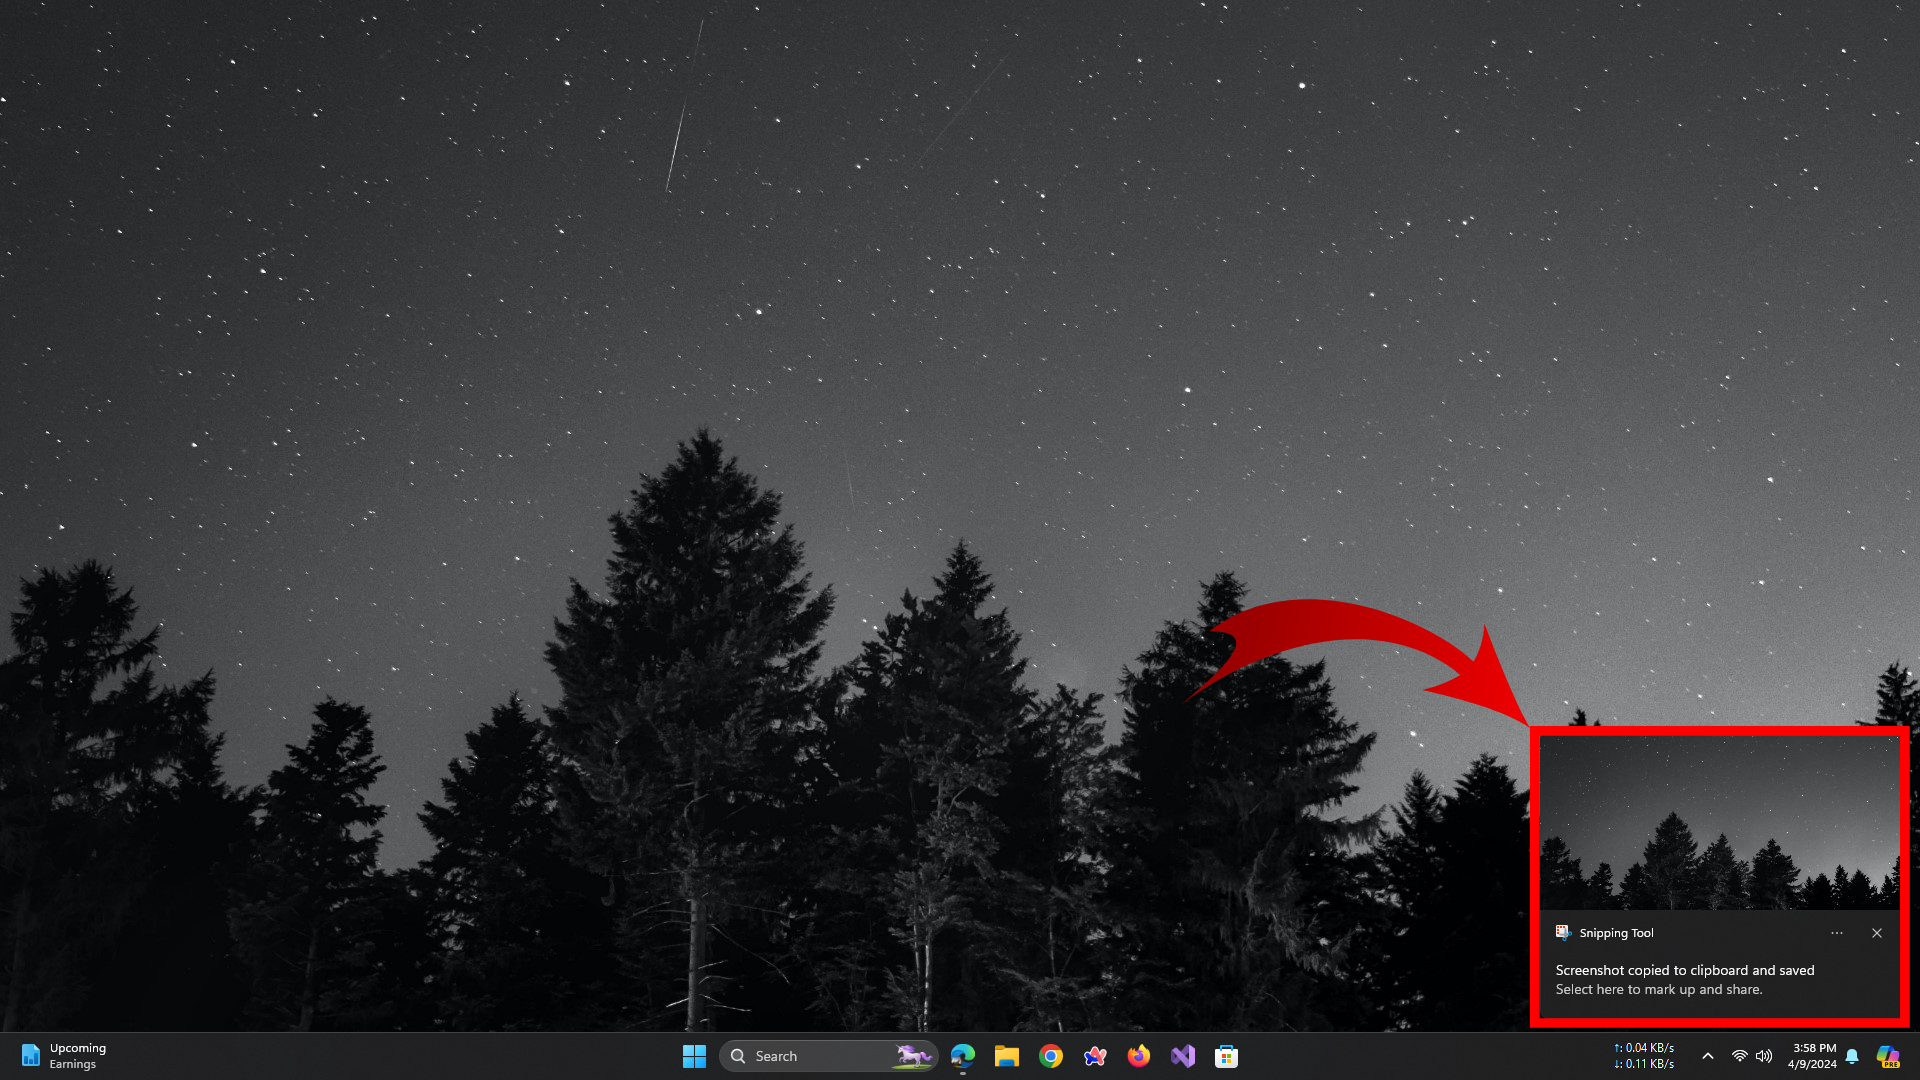
After selecting your desired snip mode and capturing the screenshot, you will see a ‘Screenshot copied to clipboard and saved’ notification in the bottom-right corner of your screen. Click on it to proceed. Your screenshot will then open in a new editing window.
Step 4: Edit, Copy, and Save
- Edit: Use the Ballpoint pen, Highlighter, or Touch Writing features to annotate the image. The Ballpoint pen and Highlighter offer various options to change the color and stroke size for annotating the image.
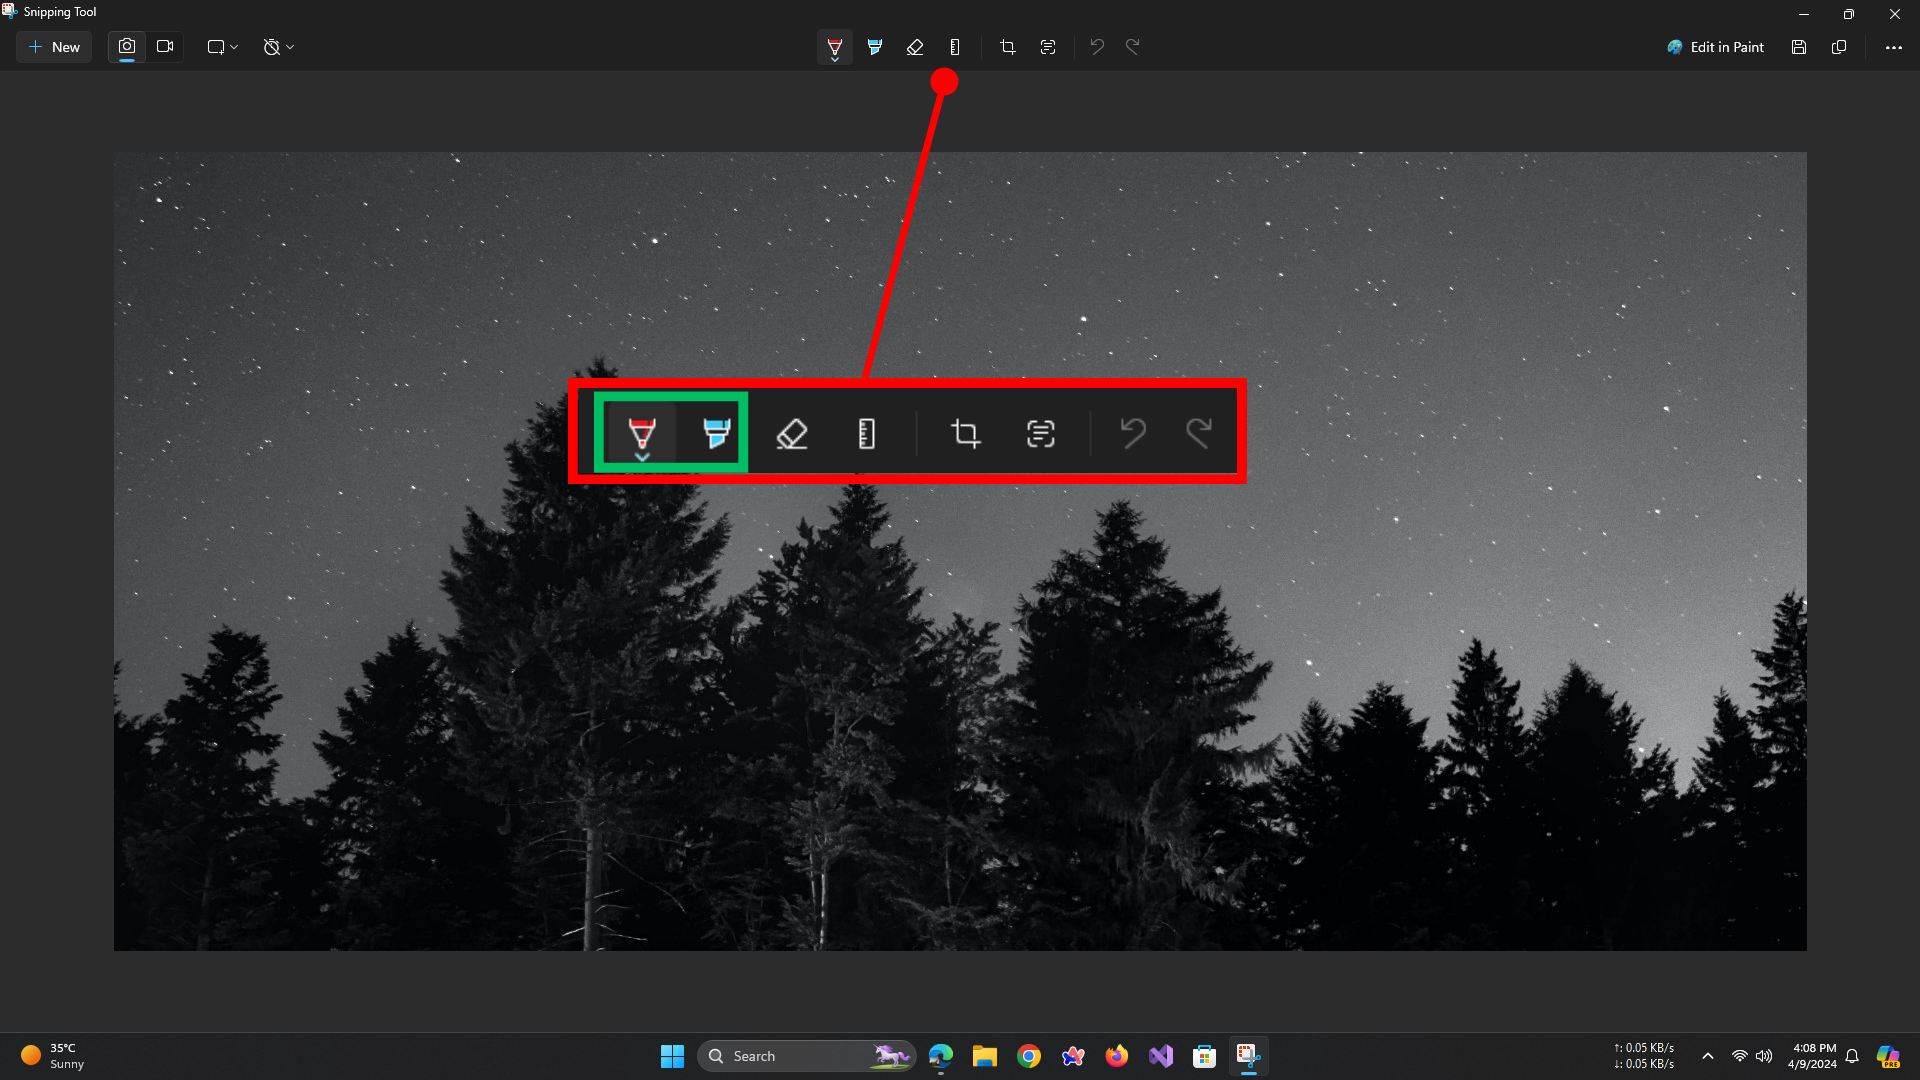
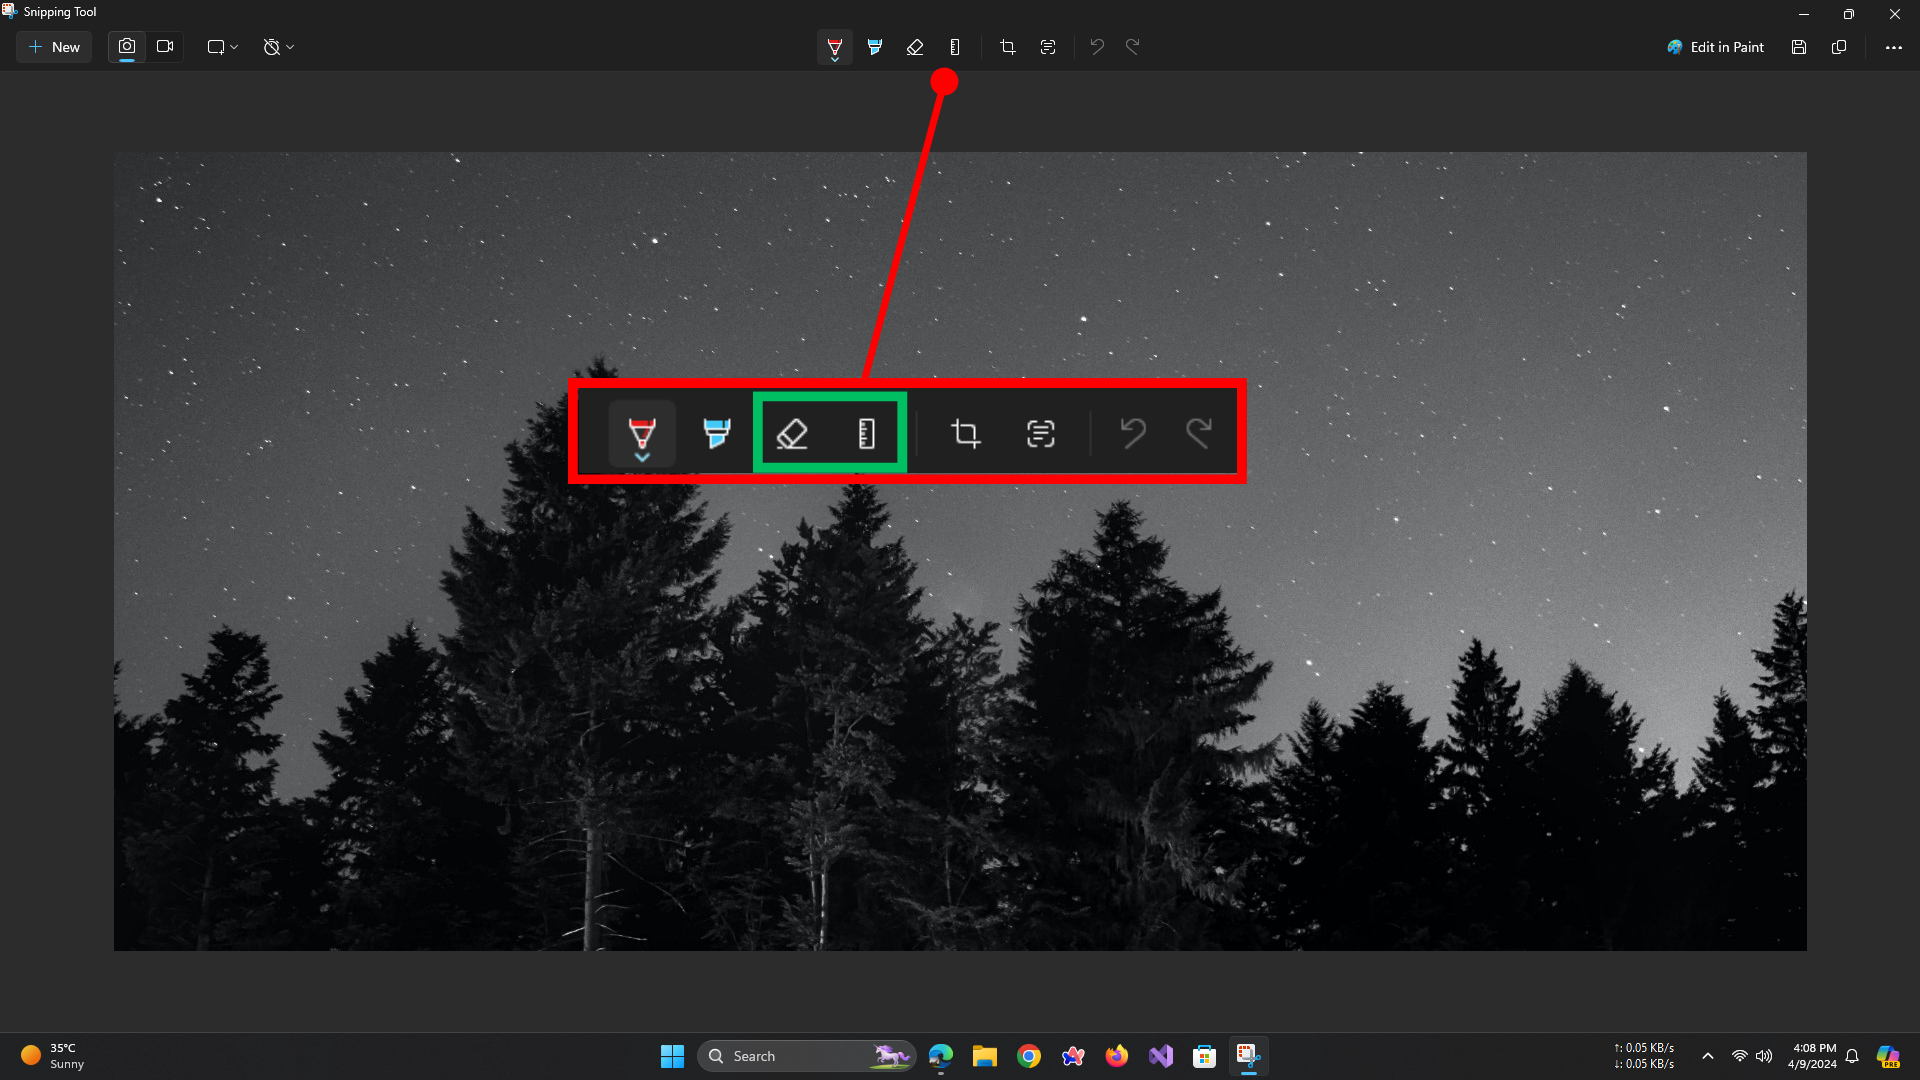
- Use the Ruler to draw straight lines and the Eraser to delete strokes. Additionally, you can select the ‘Edit in Paint’ option in the toolbar to further edit your screen capture in the full-fledged Paint app for Windows.
- Copy: Press
Ctrl + Cto copy the screenshot to the clipboard. - Save: Press
Ctrl + Sto save the screenshot. - Capture Delay (Optional): Press
Alt + Dto set a delay. Use the arrow keys to choose the delay time, then pressEnter.
There you have it! It’s this easy to use the Snipping Tool and access all its available features. Plus, the keyboard shortcut makes it even handier and more useful.
READ MORE: Snipping Tool for Mac – How to Screenshot Effortlessly ➜
Changing the Default Keyboard Shortcut for Snipping Tool
Most modern keyboards do not have a Print Screen key. However, if your keyboard has one, you can leverage it to your advantage by accessing the Snipping Tool utility with just one key press instead of pressing three keys simultaneously. This will make capturing your screen just a keypress away. Here’s how you can do it:
Using Print Screen for Snipping Tool
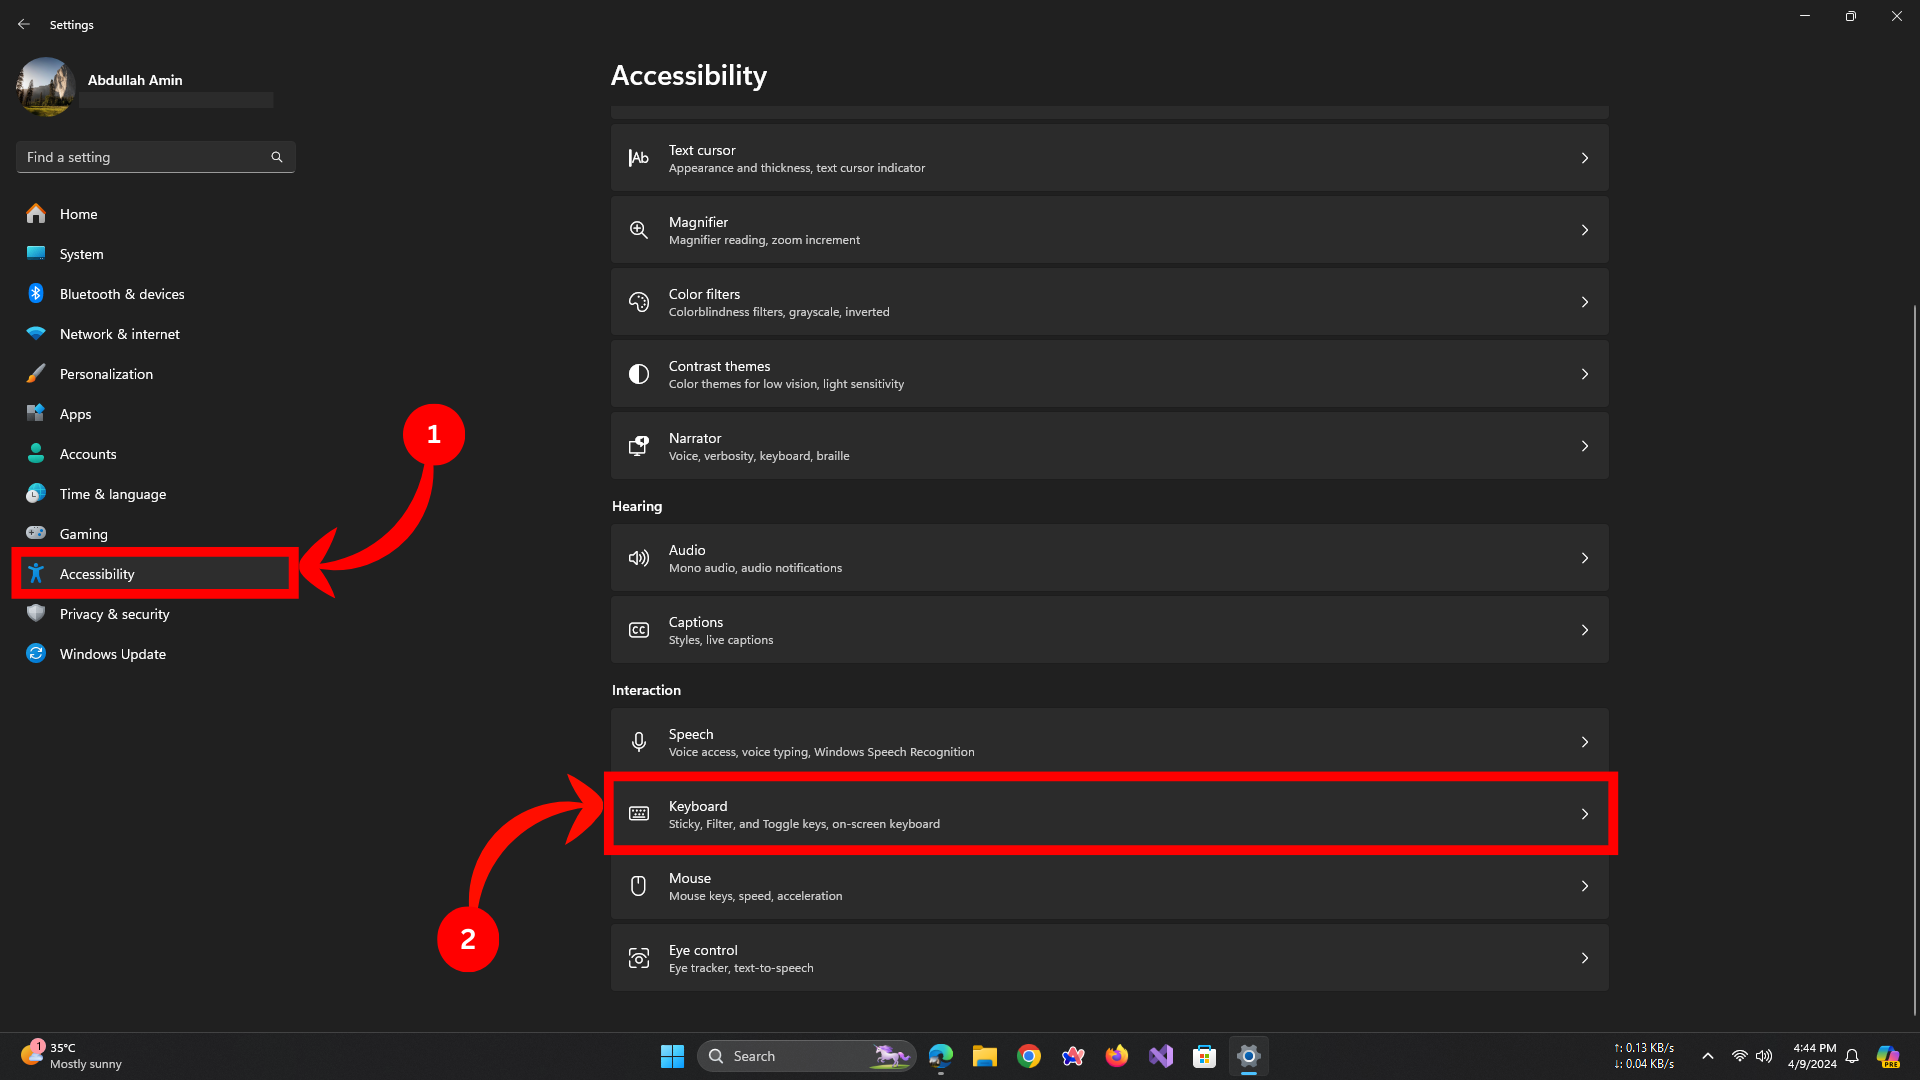
- Open
Settingson Windows 11.
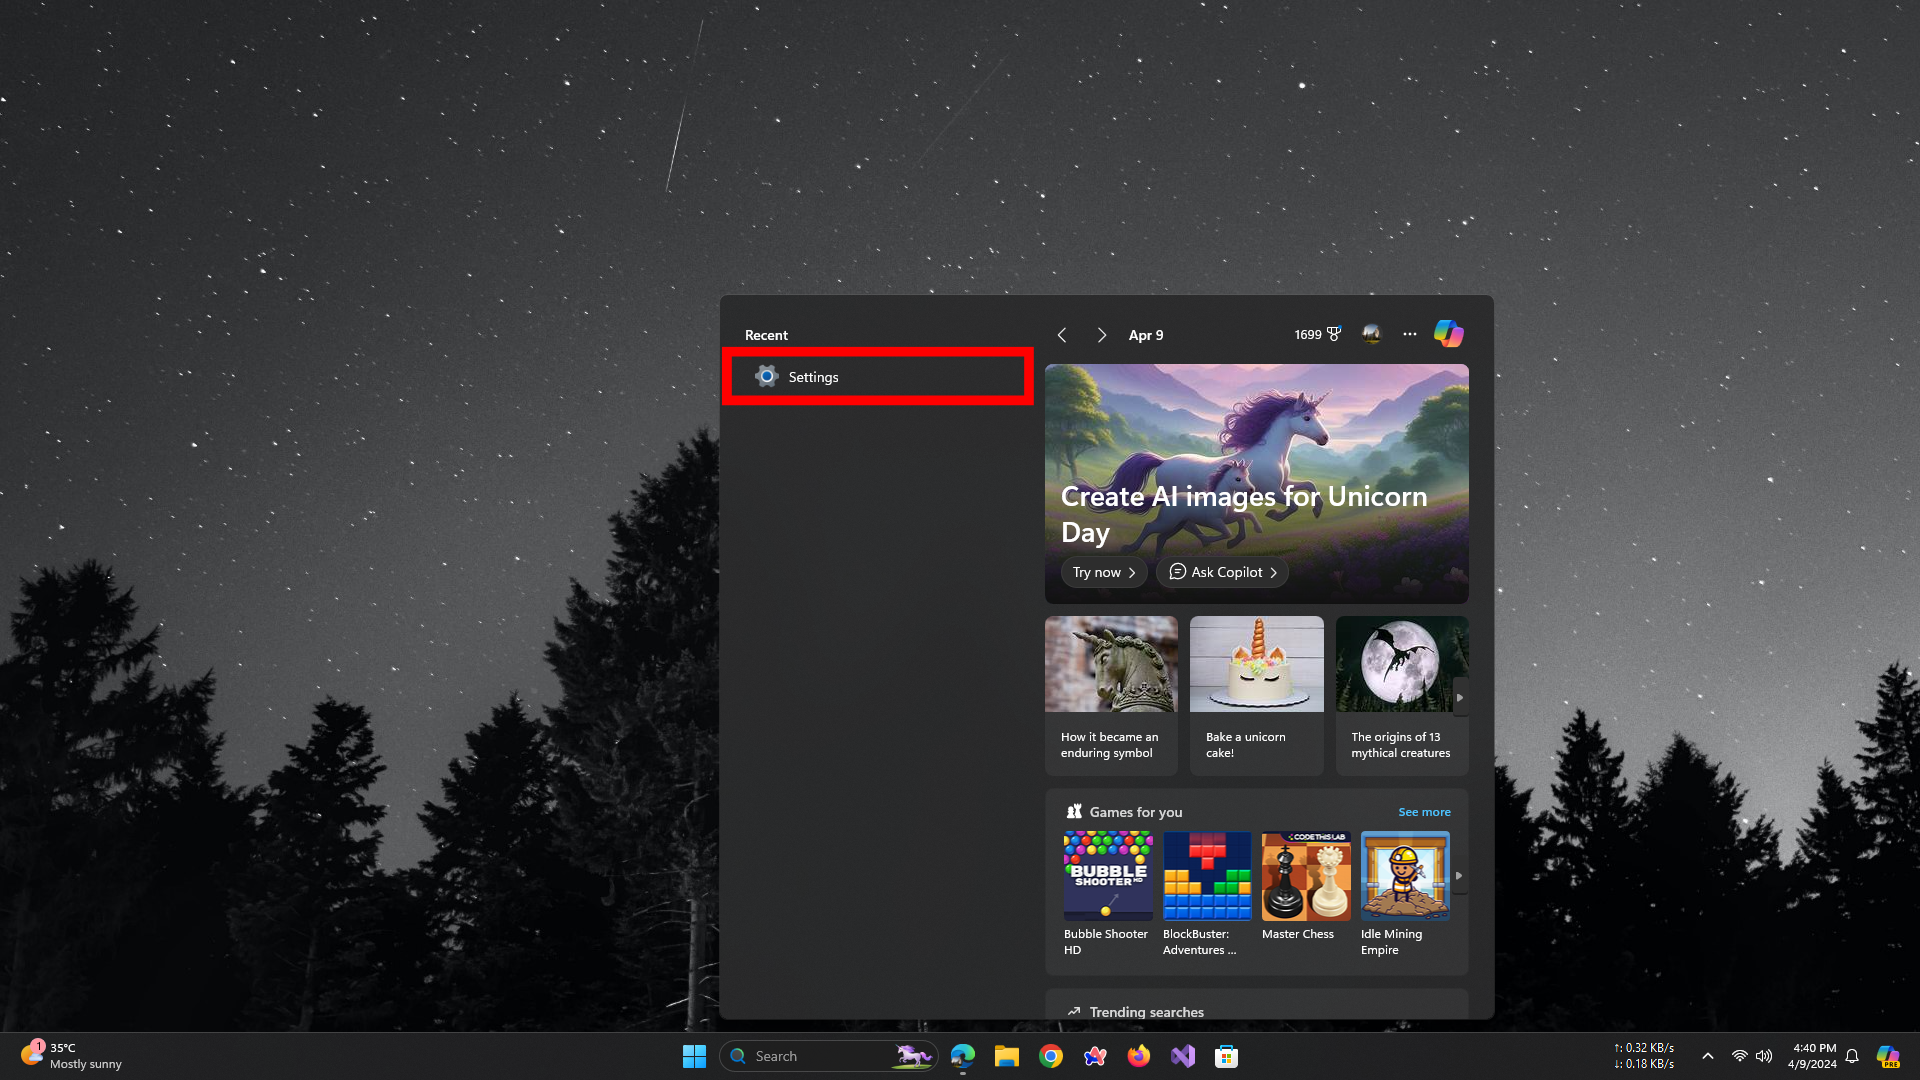
- Click on
Accessbility, then onKeyboard.
- Under the “Print Screen shortcut” section, turn on the “Use the Print Screen Key to open screen capture” toggle switch.
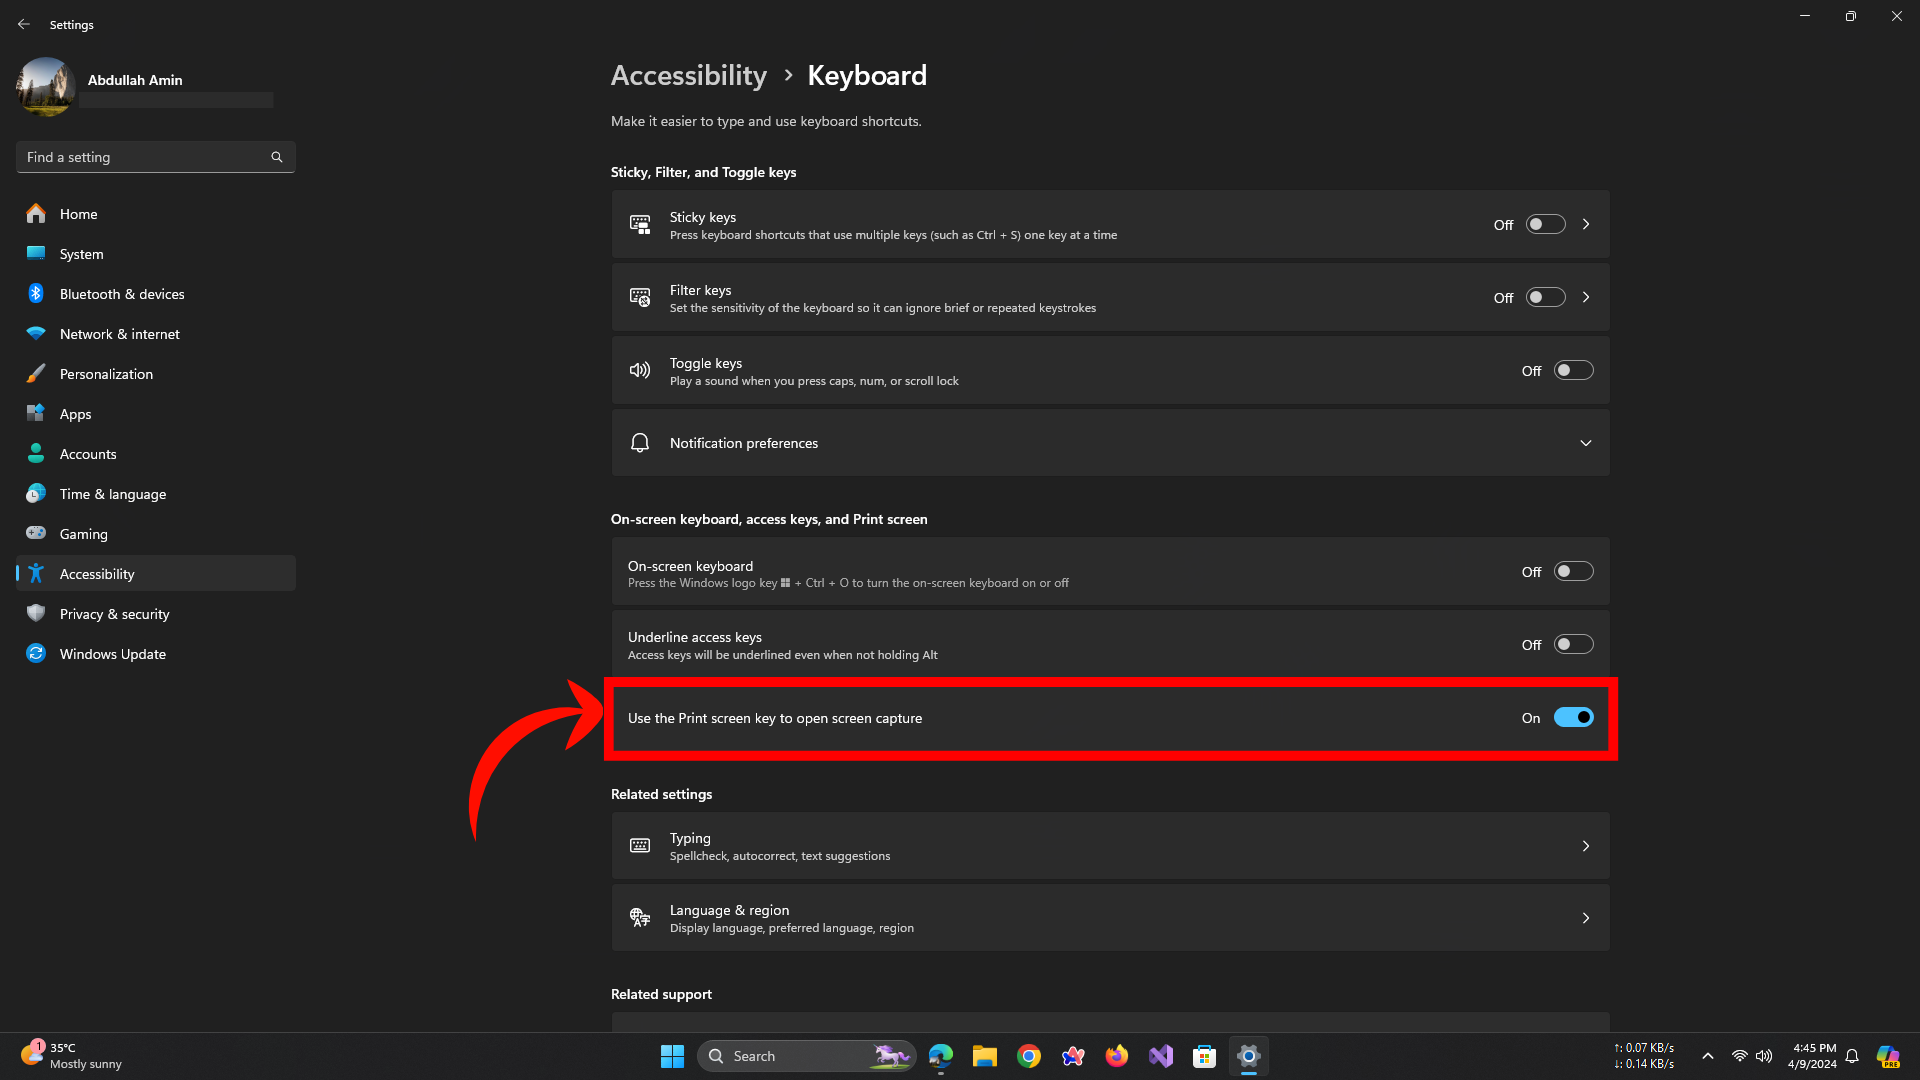
That’s it! Now you can access the Snipping Tool utility with just one keypress.
READ MORE: How to Troubleshoot and Repair the Snipping Tool in Windows? ➜
Conclusion
To wrap up, the Snipping Tool’s shortcut is a handy trick to keep up your sleeve. It’s straightforward to use and can help you quickly capture whatever you need from your screen. Think of it as a quick-draw tool for all your screenshot needs. Use it wisely, and it’ll become a part of your everyday digital routine. Thanks for reading, and enjoy the simplicity of snipping.
FAQs
No, the Snipping Tool cannot capture scrolling windows natively, but third-party tools offer this functionality.
Screenshots are not automatically saved. They are copied to the clipboard, and you can paste them into an image editor or document and save them from there.
If you can’t locate your screenshot, it’s likely still on your clipboard. Open an image editing program or document editor and paste the screenshot. Remember to save your work!
Yes, you can capture menus or pop-ups by setting a delay in the Snipping Tool. Once the delay is set, open the menu or pop-up you wish to capture, and the Snipping Tool will take the screenshot after the delay period.
Search for the Snipping Tool in the Start menu, right-click on it, and choose “Pin to taskbar.” This will create a shortcut on your taskbar, allowing you to launch the Snipping Tool with a single click.
If you encounter issues with the Snipping Tool not responding, several troubleshooting steps can be taken. Firstly, ensure that your Windows operating system is up to date by checking for and installing any pending updates. After updating, try restarting your computer to see if the problem resolves itself. If the issue persists, consider utilizing the ‘Repair’ or ‘Reset’ option for the Snipping Tool, which can be found in the Windows Settings under Apps & Features. These options may help in resolving any software-related issues causing the Snipping Tool to become unresponsive.
Reviewed by Huzaifa Haroon