(Solved) Wi-Fi Option Missing in Windows Settings App
The WIFI option in the settings on Windows 10 can disappear if your Windows fails to start the WLAN AutoConfig service, which is responsible for setting up the Wireless Adapter driver. This service automatically sets all the essential configurations required to get your Wireless Adapter up and running. However, if this service is not running in the background, Windows will be unable to read the settings and configurations of your Wireless adapter, thus causing the WIFI option to disappear from Settings.
In some cases, this issue can also cause the WIFI option in the taskbar to disappear. If that happens to you, simply follow our dedicated article to get your issue resolved. Follow the methods mentioned in our “WIFI Option missing from Task Tray” article.
This issue can sometimes be due to your operating system not detecting the WIFI card or something preventing it from doing so. Nonetheless, the issue can easily be dealt with by applying a few specific solutions.
What causes the WIFI Option to disappear in Windows Settings on Windows?
The absence of a WIFI tab in Windows settings is often caused by the following factors —
- Required services: Your WIFI system requires certain services to be running in order for it to operate properly. If these required services are stopped, they can cause the issue.
- WIFI drivers: The WIFI drivers on your system are responsible for establishing a connection between the wireless card and the system. Corrupted or outdated drivers can cause the issue to occur.
To solve your problem, follow through with the given solutions. However, some solutions might not be applicable to certain cases, so make sure you go through them all.
Before making changes to your system, especially when updating or uninstalling drivers, it’s safe practice to set a system restore point to avoid unintended issues.
Solution 1: Check the WIFI Card
If your motherboard does not come with a built-in wireless card and you have purchased a separate WIFI card for the system, this solution is for you. Before exploring other solutions, please ensure that you have correctly connected the WIFI card, as incorrect connectivity will cause the card to not be detected by Windows, leading to the said problem.
If you are using a laptop or your motherboard comes with built-in WIFI, move on to the next solution.
Solution 2: Turn On the Required Service
Some users have reported that their issue was due to the required WIFI services not running. Therefore, check the required services before proceeding. Here’s how to do it:
- Go to the Start Menu, type in Services, and open it up.
- In the Services window, locate the WLAN AutoConfig service.
- Right-click on it and select Properties.
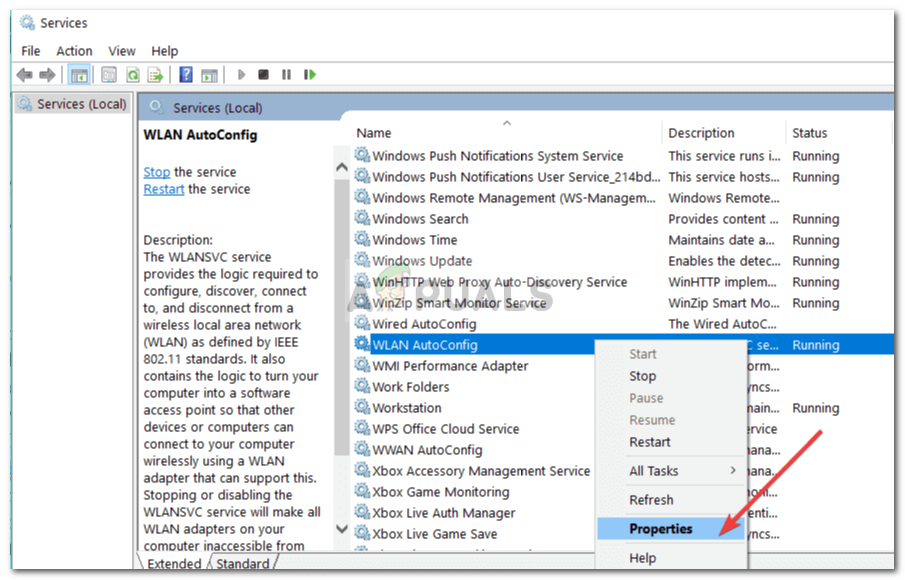
WLAN Autoconfig – Windows Services - Change the Startup type to ‘Automatic‘ and click Start to run the service.
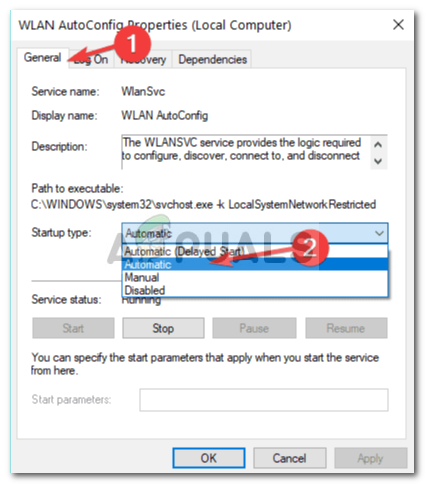
Starting WLAN Autoconfig Service - Click Apply and then OK.
- Check if this fixes the issue.
Solution 3: Update WIFI Driver
You may be unable to see the WIFI option in Windows Settings because your WIFI drivers are outdated. In such a case, you should try updating the driver automatically. Here’s how:
- Open the Start Menu, type Device Manager, and open it up.
- Expand the Network adapters list.
- Locate your wireless card, right-click on it, and select ‘Update driver‘.
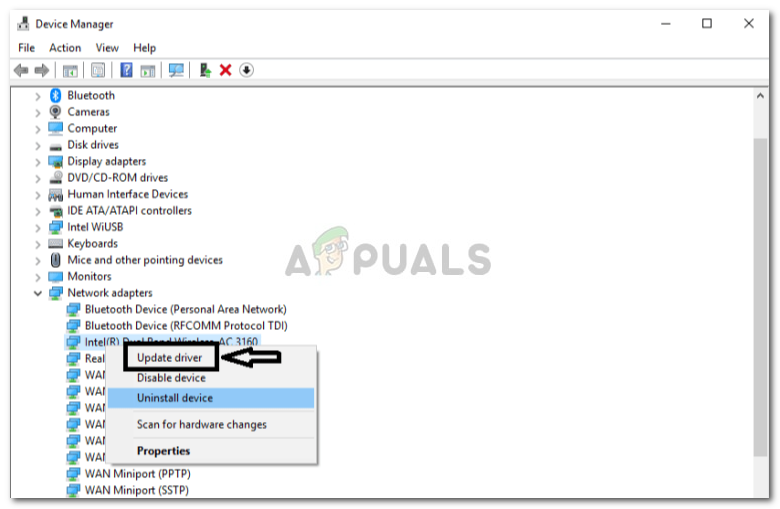
Updating Wireless Driver - Click ‘Browse my computer for driver software‘.
- Select ‘Let me pick from a list of available drivers on my computer‘.
- Click Next.
- Wait for the update to complete and then check if your issue is resolved.
Solution 4: Reinstall WIFI Driver
In cases where your WIFI driver is corrupted, simply updating your driver may not fix the issue. You will need to reinstall your WIFI driver by downloading the latest driver from your manufacturer’s website. Here’s how:
- Open Device Manager.
- Expand the Network adapters list and locate your wireless driver.
- Double-click on it to open Properties.
- Switch to the Driver tab and note down the details of your driver.
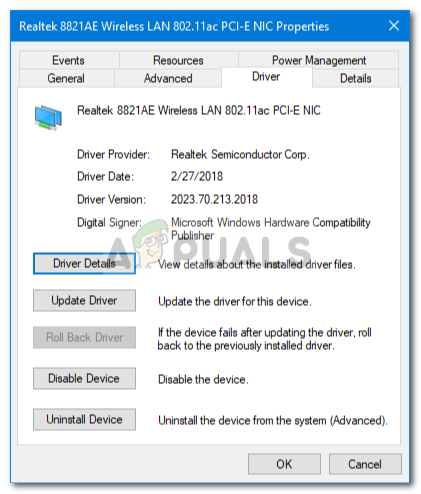
Wireless Driver Details - Close the Properties window, right-click on your wireless card, and select Uninstall.
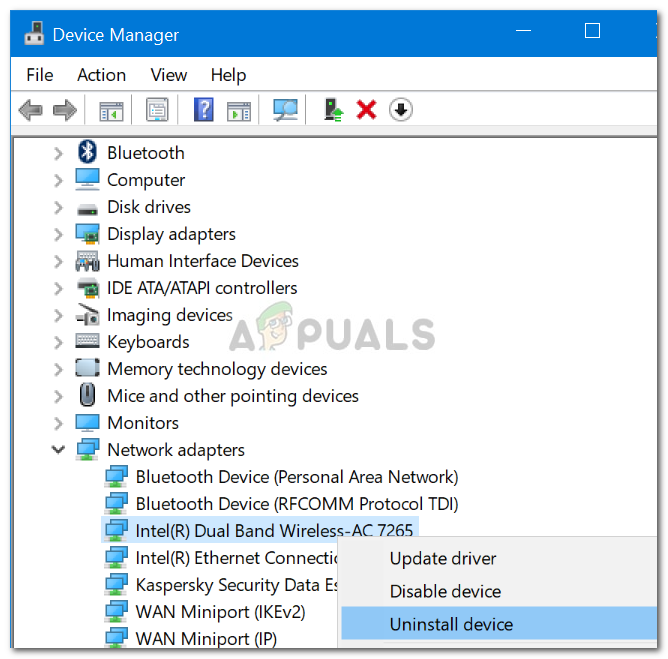
Uninstalling Wireless Driver
After uninstalling your wireless card driver, go to your manufacturer’s website and download the latest drivers for your WIFI card. Install the drivers and then restart your system.
Solution 5: Tweak Power Management
If the WIFI option in Windows Settings disappears suddenly, this can be due to your card driver’s power settings. To get the WIFI option back, edit the Power Management settings. Here’s how:
- Open Device Manager and expand the Network Adapters list.
- Double-click on your wireless card and then switch to the Power Management tab.
- Uncheck the ‘Allow the computer to turn off this device to save power‘ box.
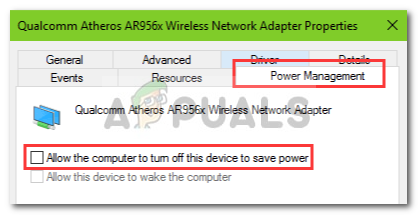
Changing Wireless Driver Power Settings - Click OK.