How to Add Line Numbers in MS Word [Step-by-Step Pics]
- Line numbers in Word mark each line with a number, aiding in easy reference and collaboration, particularly useful in legal, academic, and team settings.
- To add line numbers, select "Line Numbers" under the "Layout" tab. You can apply numbers to the whole document or specific sections, with options to number continuously, restart per page, or per section.
- Customize line numbers via "Line Numbering Options" in the "Layout" tab, adjusting start number and interval. To remove them, choose "None" in the "Line Numbers" menu or suppress for specific paragraphs.
Have you ever been puzzled about adding line numbers to your Word document? You’re not alone! Microsoft Word, a popular tool for everything from typing scripts to creating legal documents, offers many helpful features, including one that lets you see how many lines are in your document.
While Word automatically counts characters and words, it doesn’t show line numbers by default. But don’t worry, it’s easy to add them. In this blog, we’ll guide you through understanding line numbers in Word, things to consider, and detailed steps on how to add line numbers to your entire document or just to certain sections.
We’ll also discuss customizing line numbers, removing them, and why they’re useful in your document. Get ready to enhance your Word documents with line numbers.
Table of Contents
What are Line Numbers in Word?
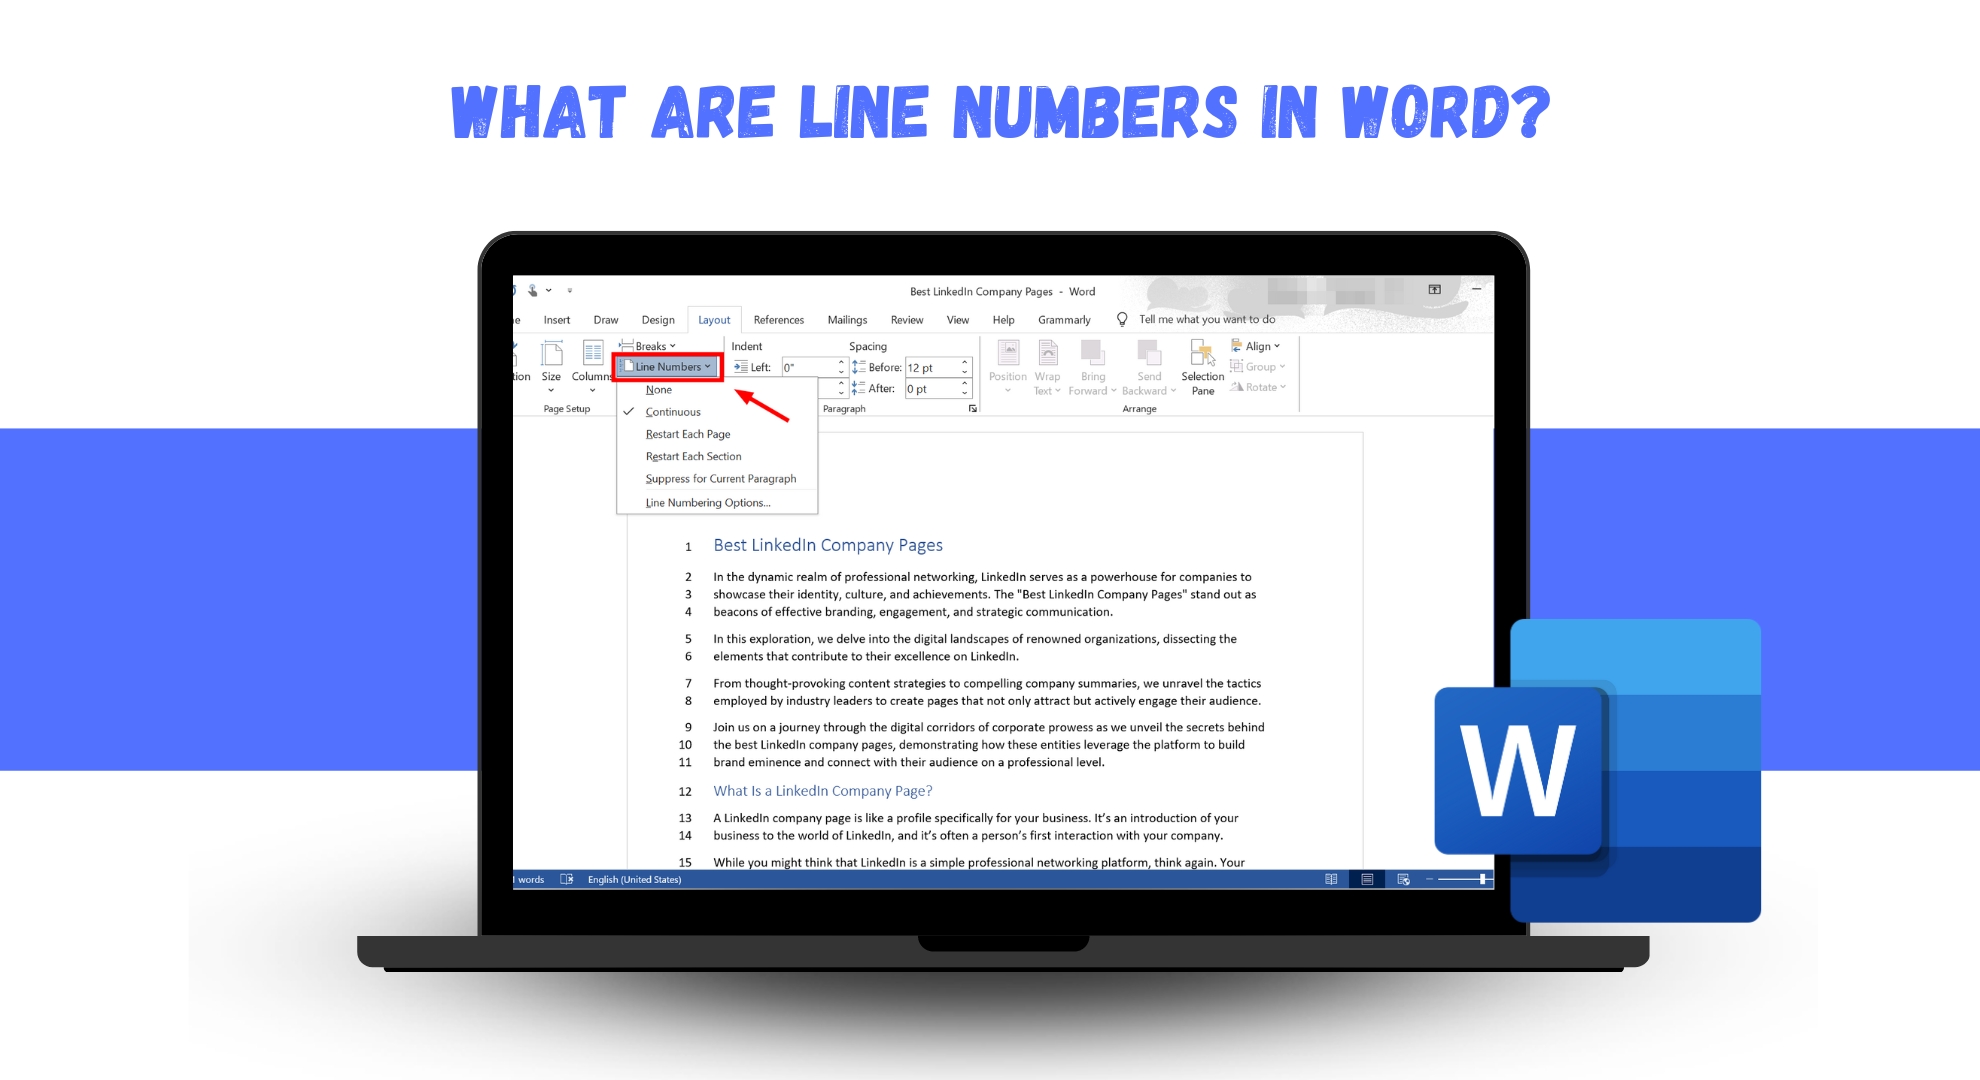
Line numbers in Microsoft Word are like markers on each line of text in your document, giving every line its own unique number. These handy numbers are great for helping you find your way around a document, especially when you’re working with others.
They allow you and your team to quickly and accurately discuss specific parts of the document. They’re also incredibly useful during document reviews.
Line numbers make giving and understanding feedback easier, which is important in settings like schools, law offices, or any professional setting where referring to specific document parts is crucial.
READ MORE: 7 Best Free Word Processors For Easy Editing ➜
Things to keep in mind
When you add line numbers in Word, remember these points:
- A table, no matter how big, counts as just one line.
- The same goes for figures. They’re also considered a single line.
- Text boxes in Word are a bit different. They count as one line, too, but if there’s text wrapped around them, those lines get counted. Even if there’s a lot of text inside the text box, those lines aren’t included in the line numbering.
How to add Line Numbers in Word?
Adding line numbers in your Word document is easy and helps you organize and move through your document better. Whether you want to number every line in the whole document or just in certain parts, Word has simple ways to do it.
Let’s walk through the steps for both ways. Keep reading to learn how to add line numbers to your document smoothly.
1. Add Line Numbers to an entire document
To add line numbers to your whole Word document, follow these steps:
- Open Word and go to the “Layout” tab. In older versions of Word, this is called the “Page Layout” option.
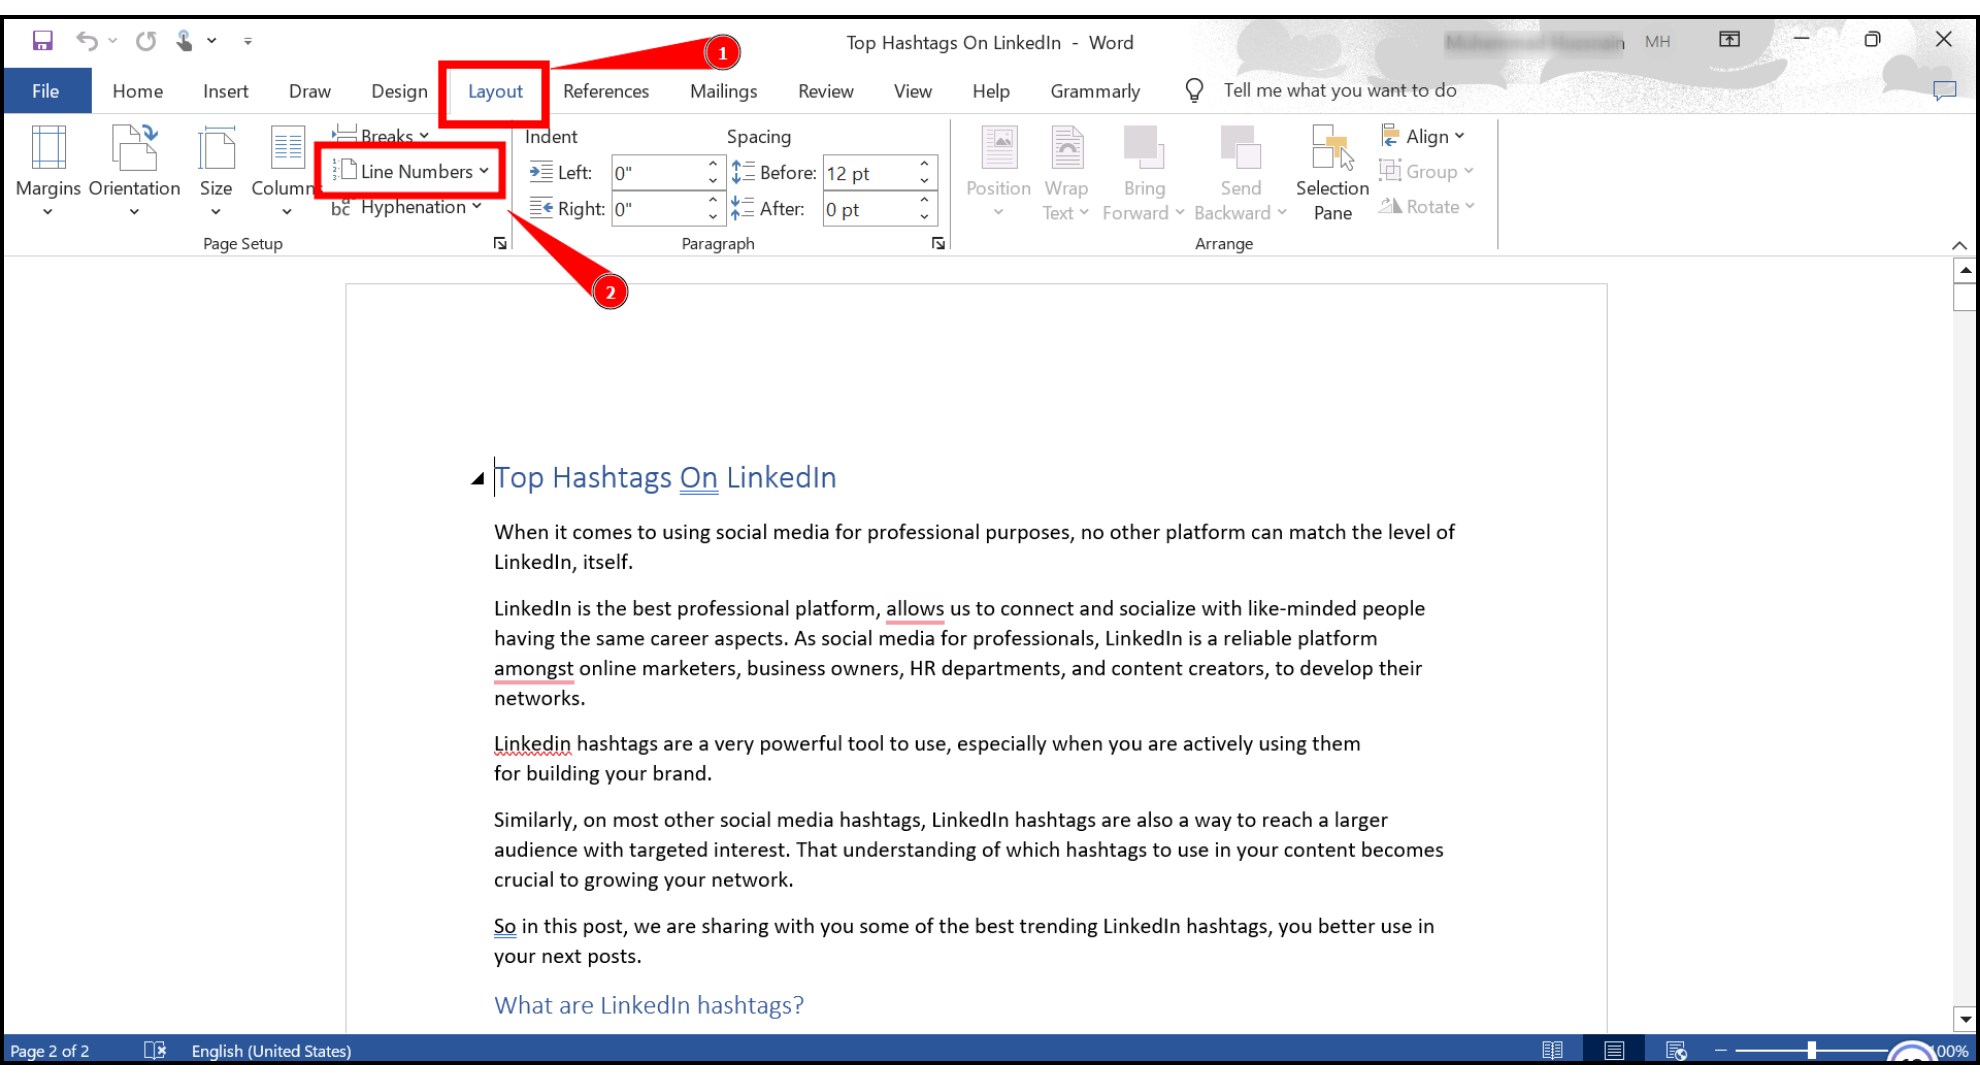
Open Layout Tab - Under “Layout Page Setup,” find and click on “Line Numbers.”
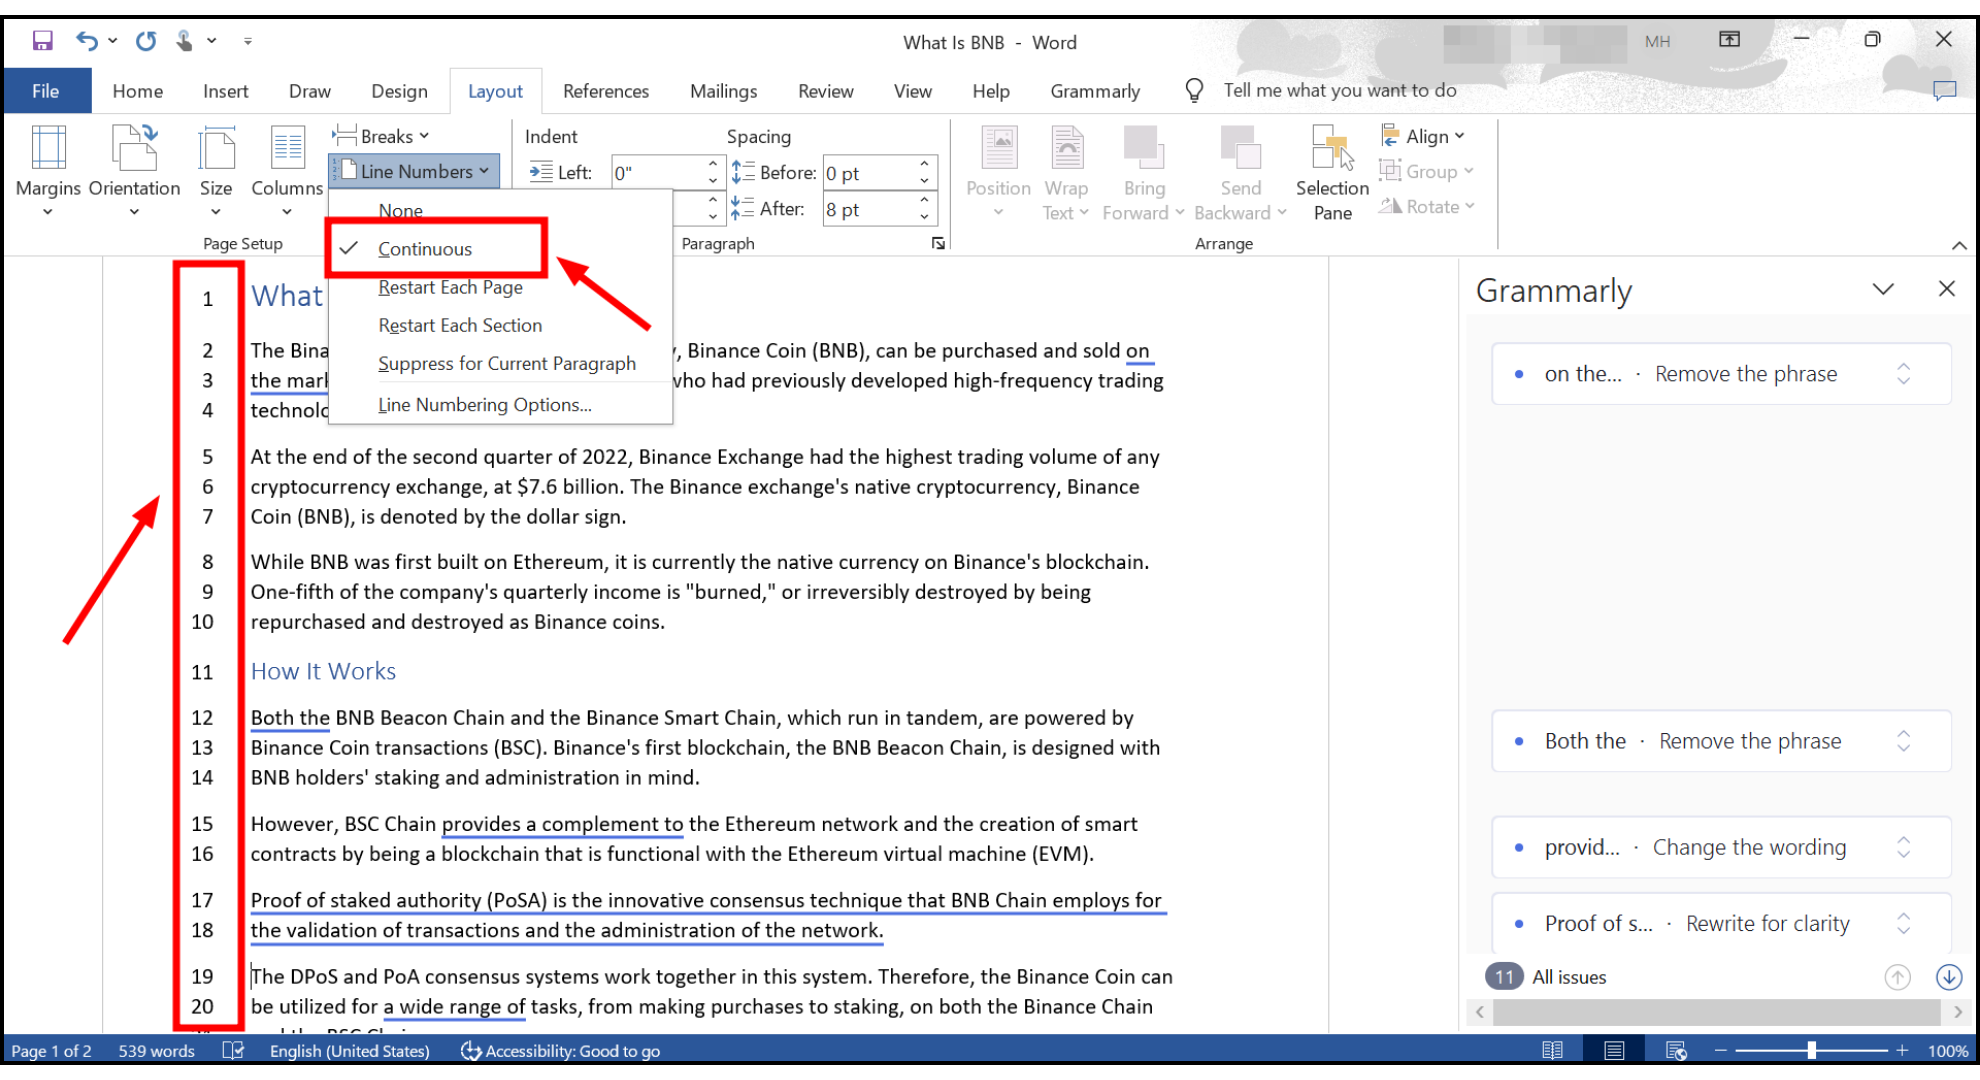
Select Line numbers - Now, choose one of these options:
- If you want numbers to go in order throughout the document, click “Continuous.”
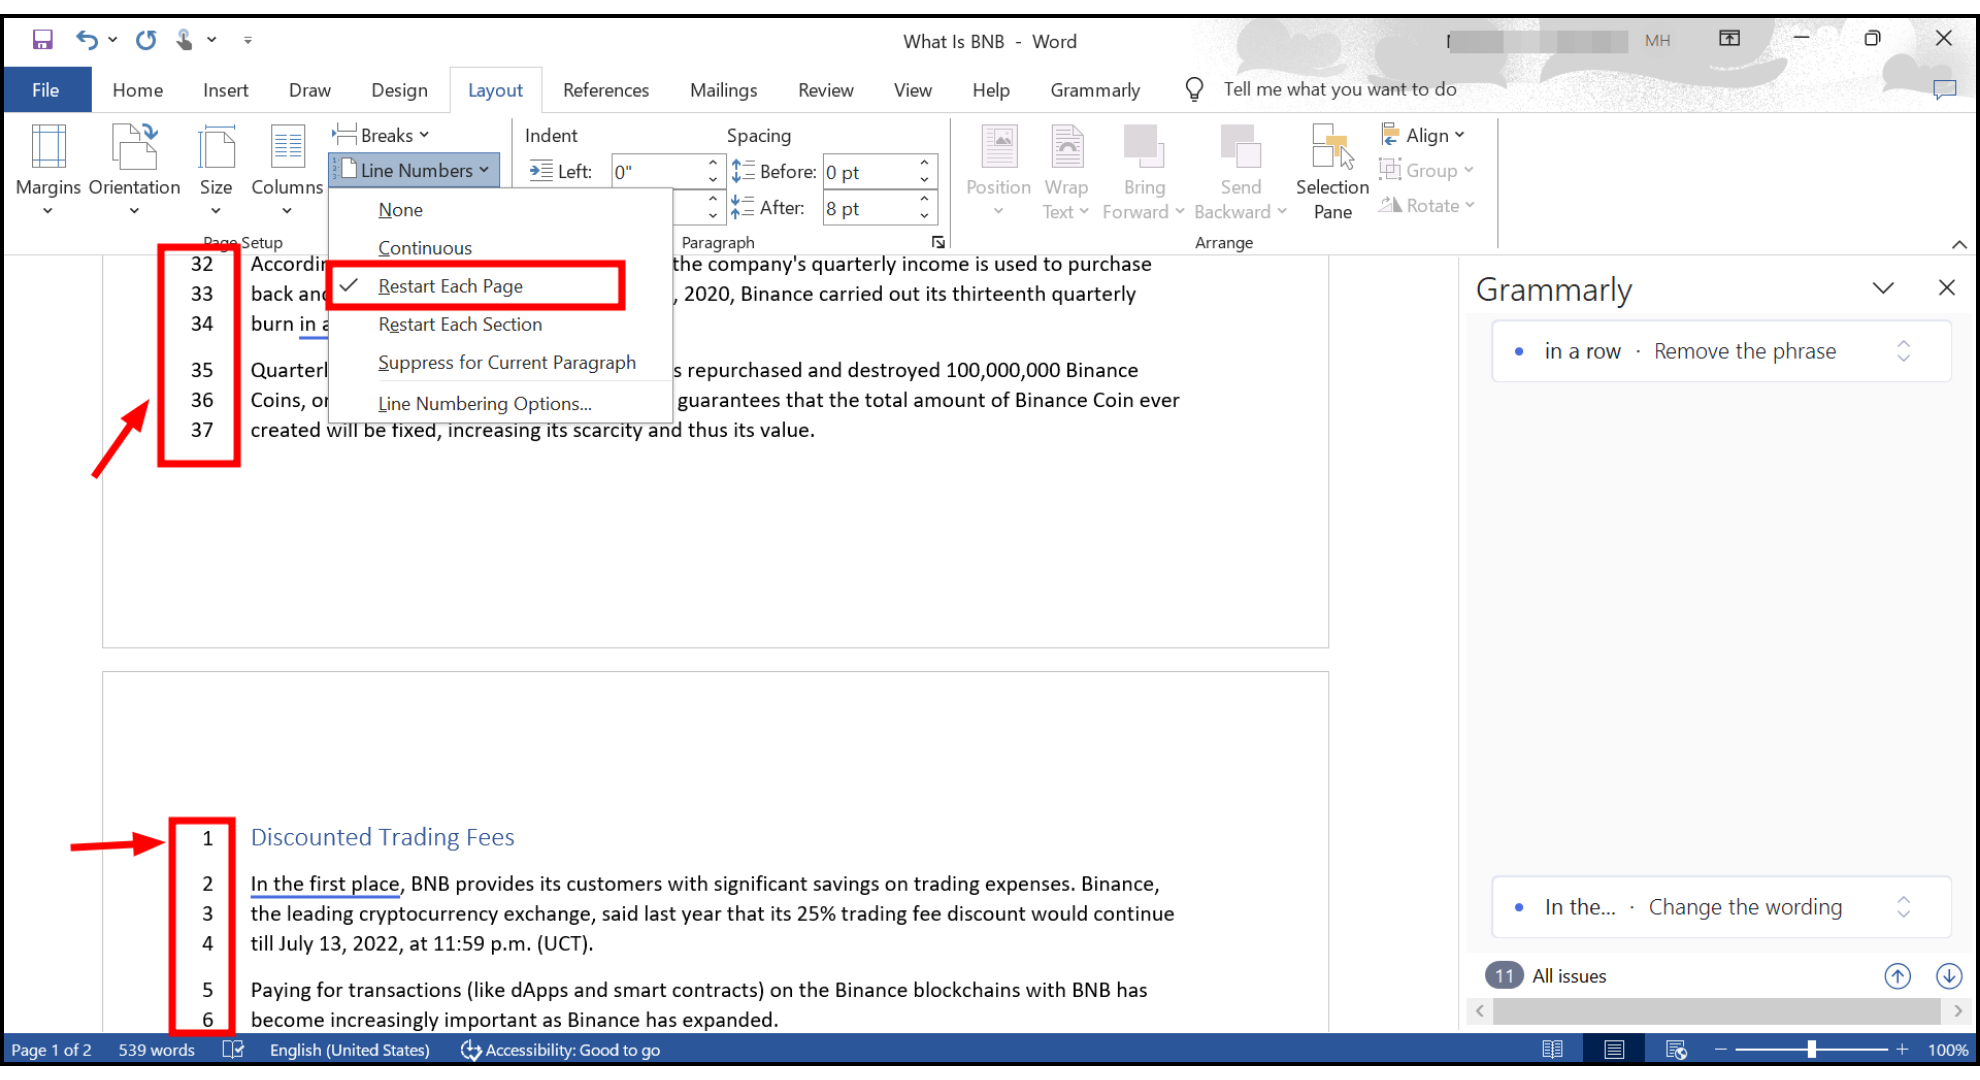
Click Continuous - To start back at number 1 on each new page, choose “Restart Each Page.”
Choose Restart Each Page - To begin at number 1 again after every section break, select “Restart Each Section.”
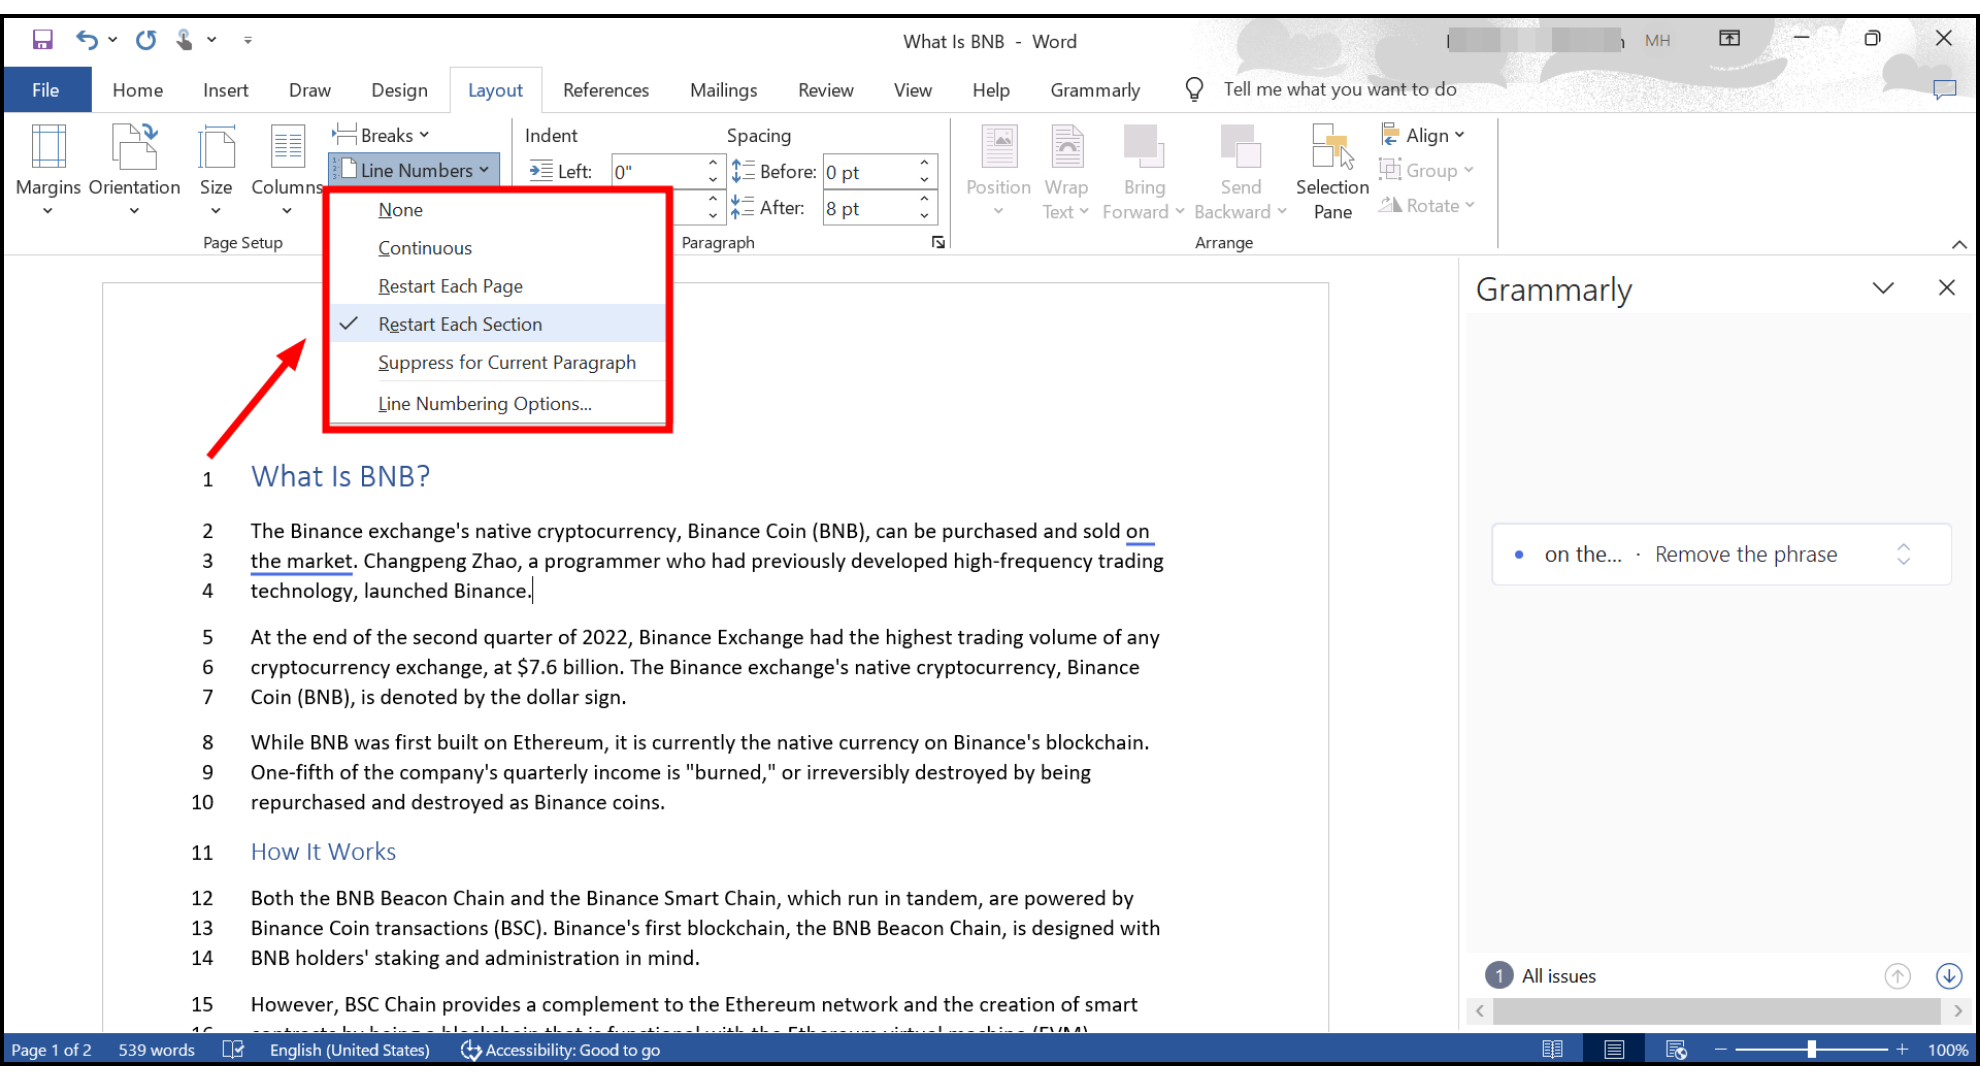
Select Restart Each Section
2. Add Line Numbers to a section or to multiple sections
To add line numbers to just one section or several sections of your Word document, here’s what you need to do:
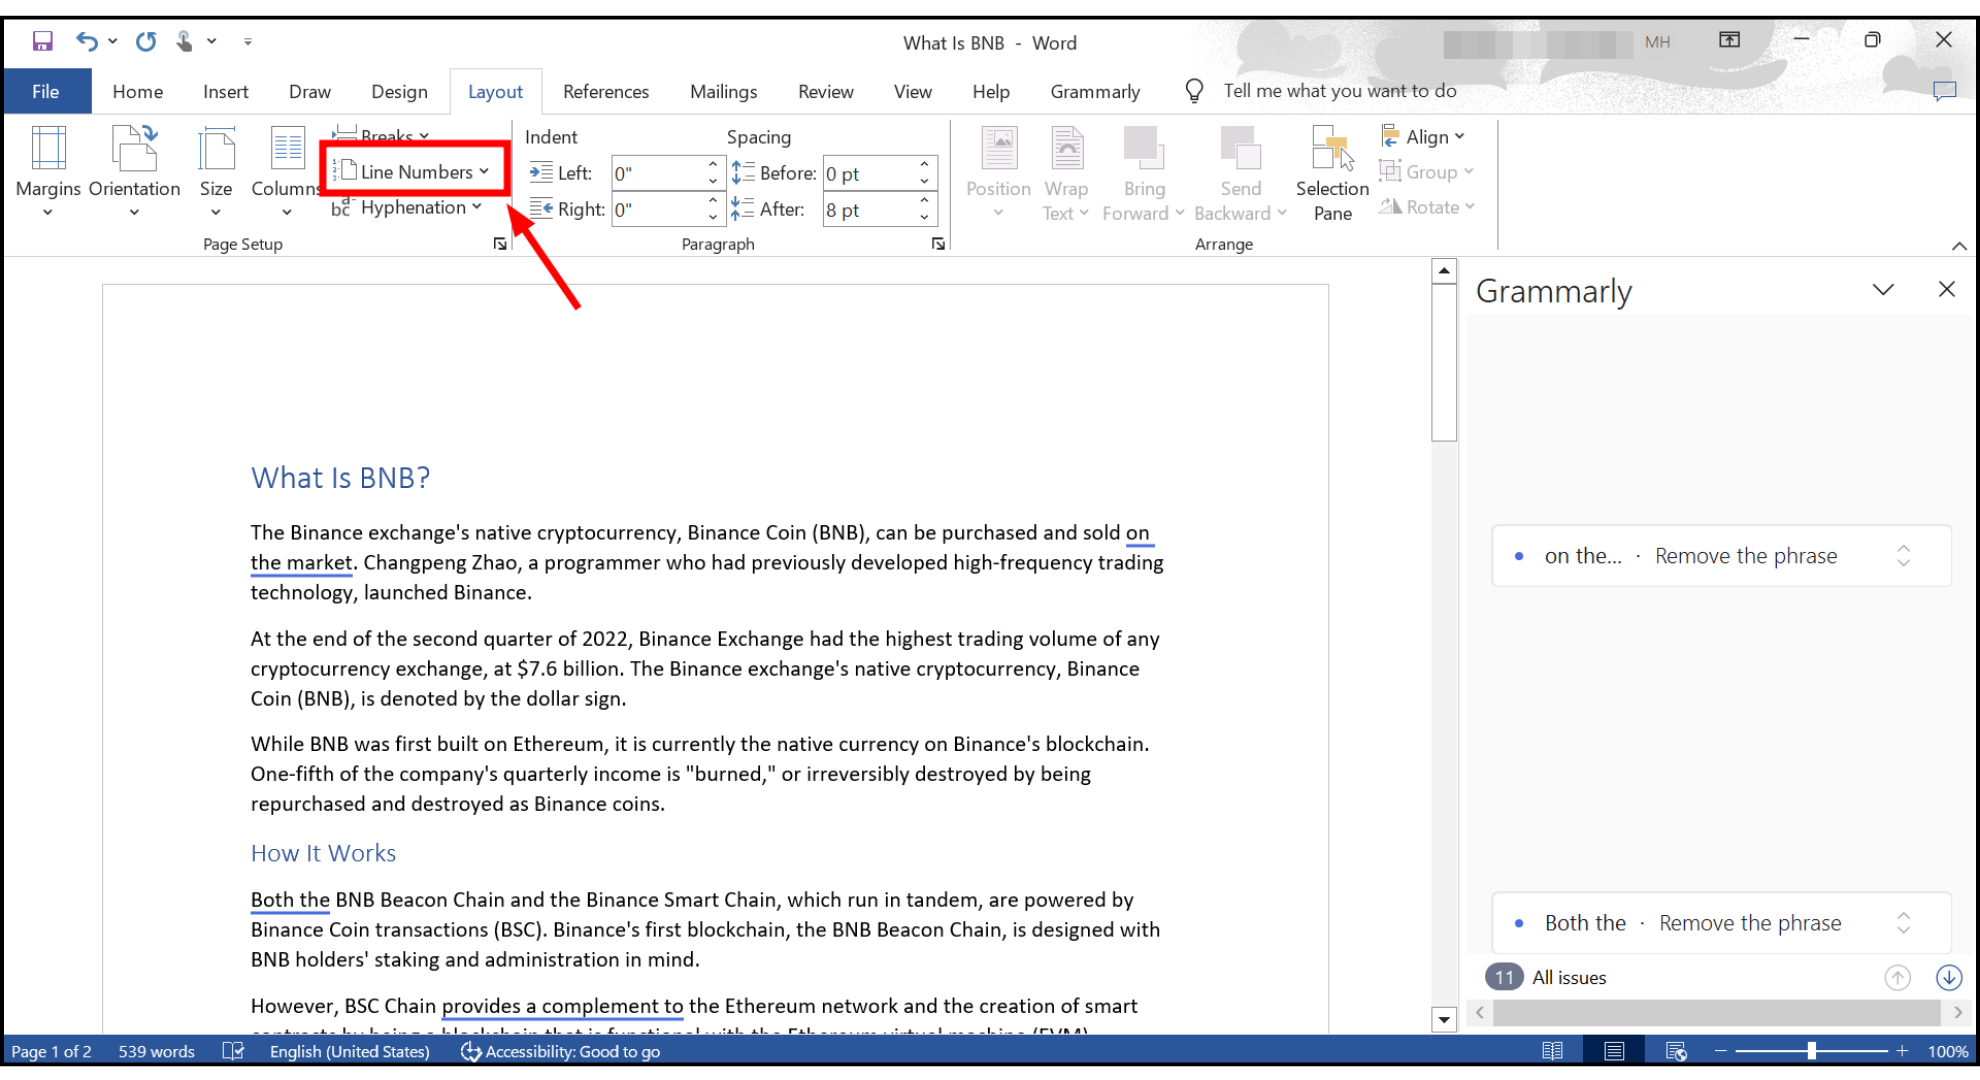
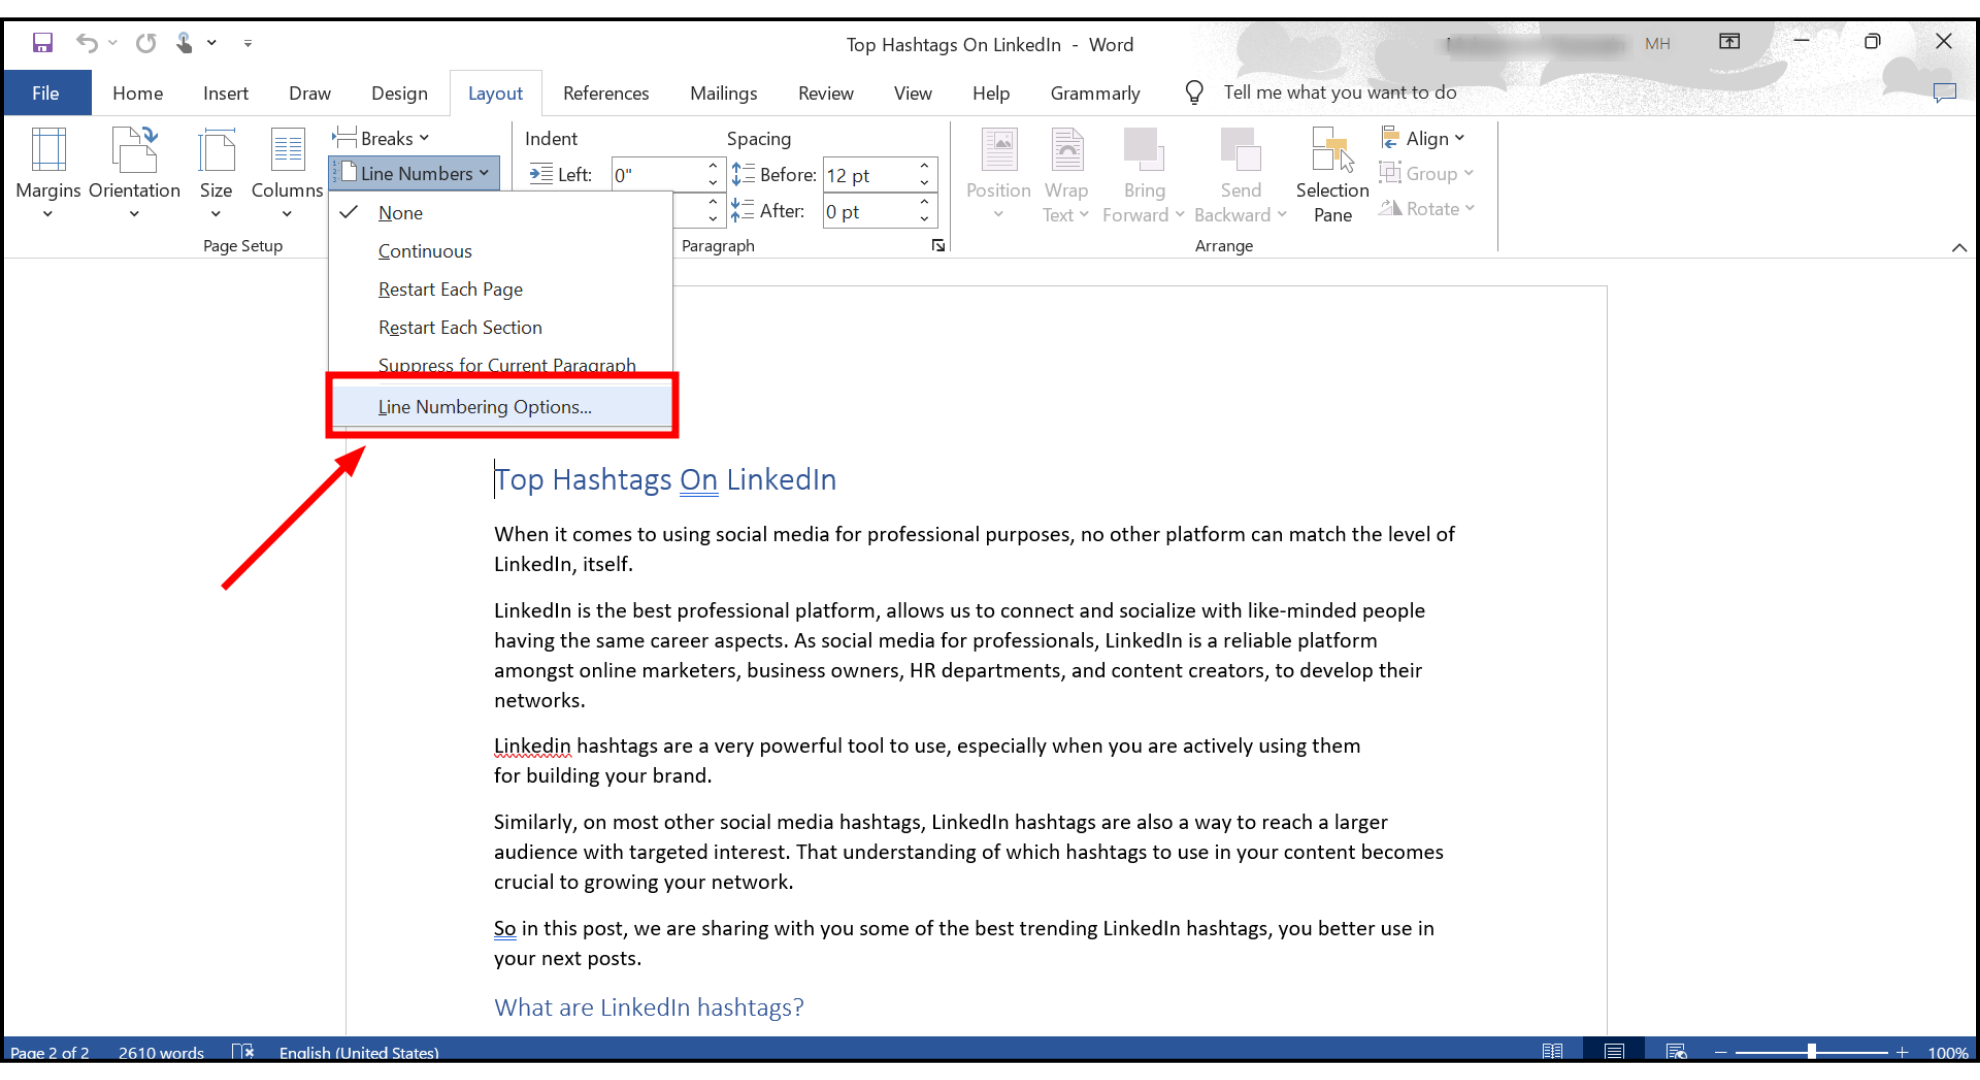
- Go to the “Layout” tab and click “Line Numbers.”

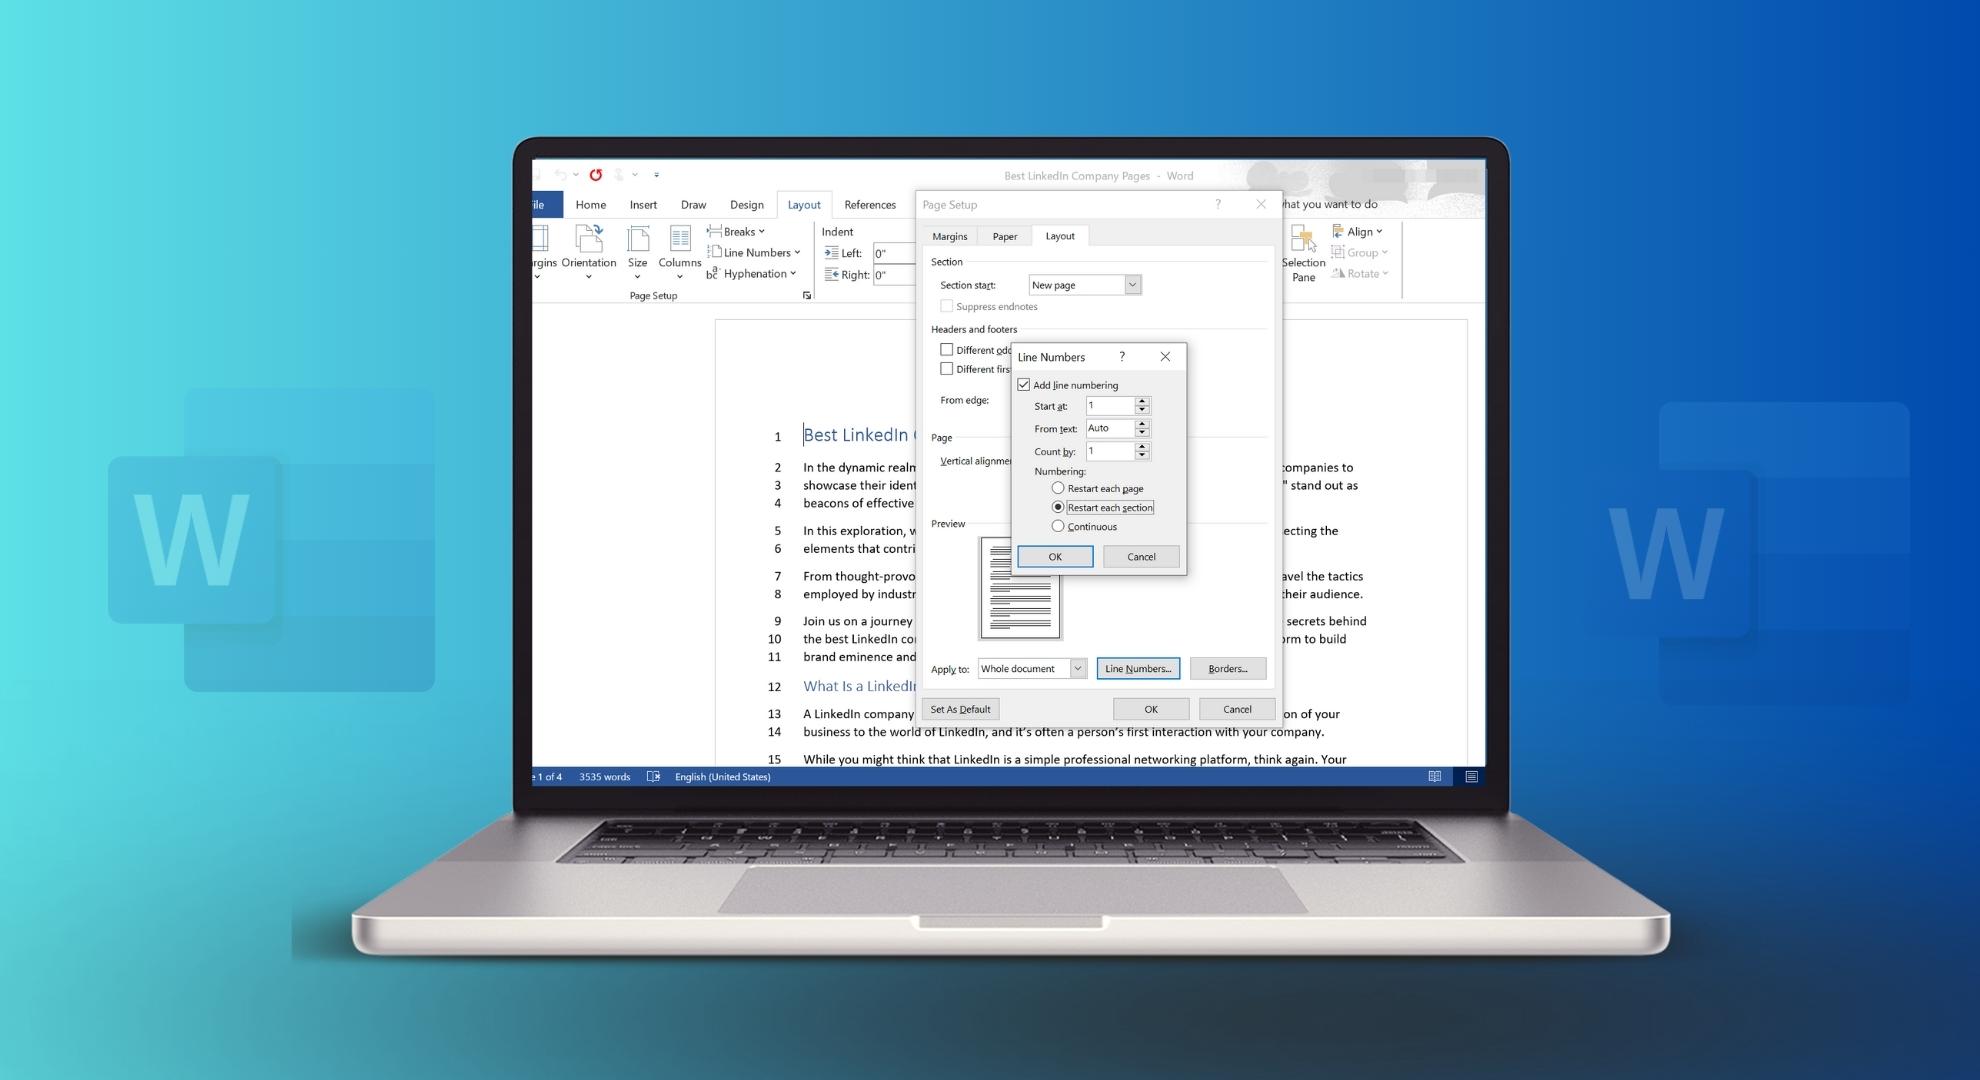
Click on Line Numbers - Next, click “Line Numbering Options.”
Click Line Number options - Then, select the “Layout” tab.
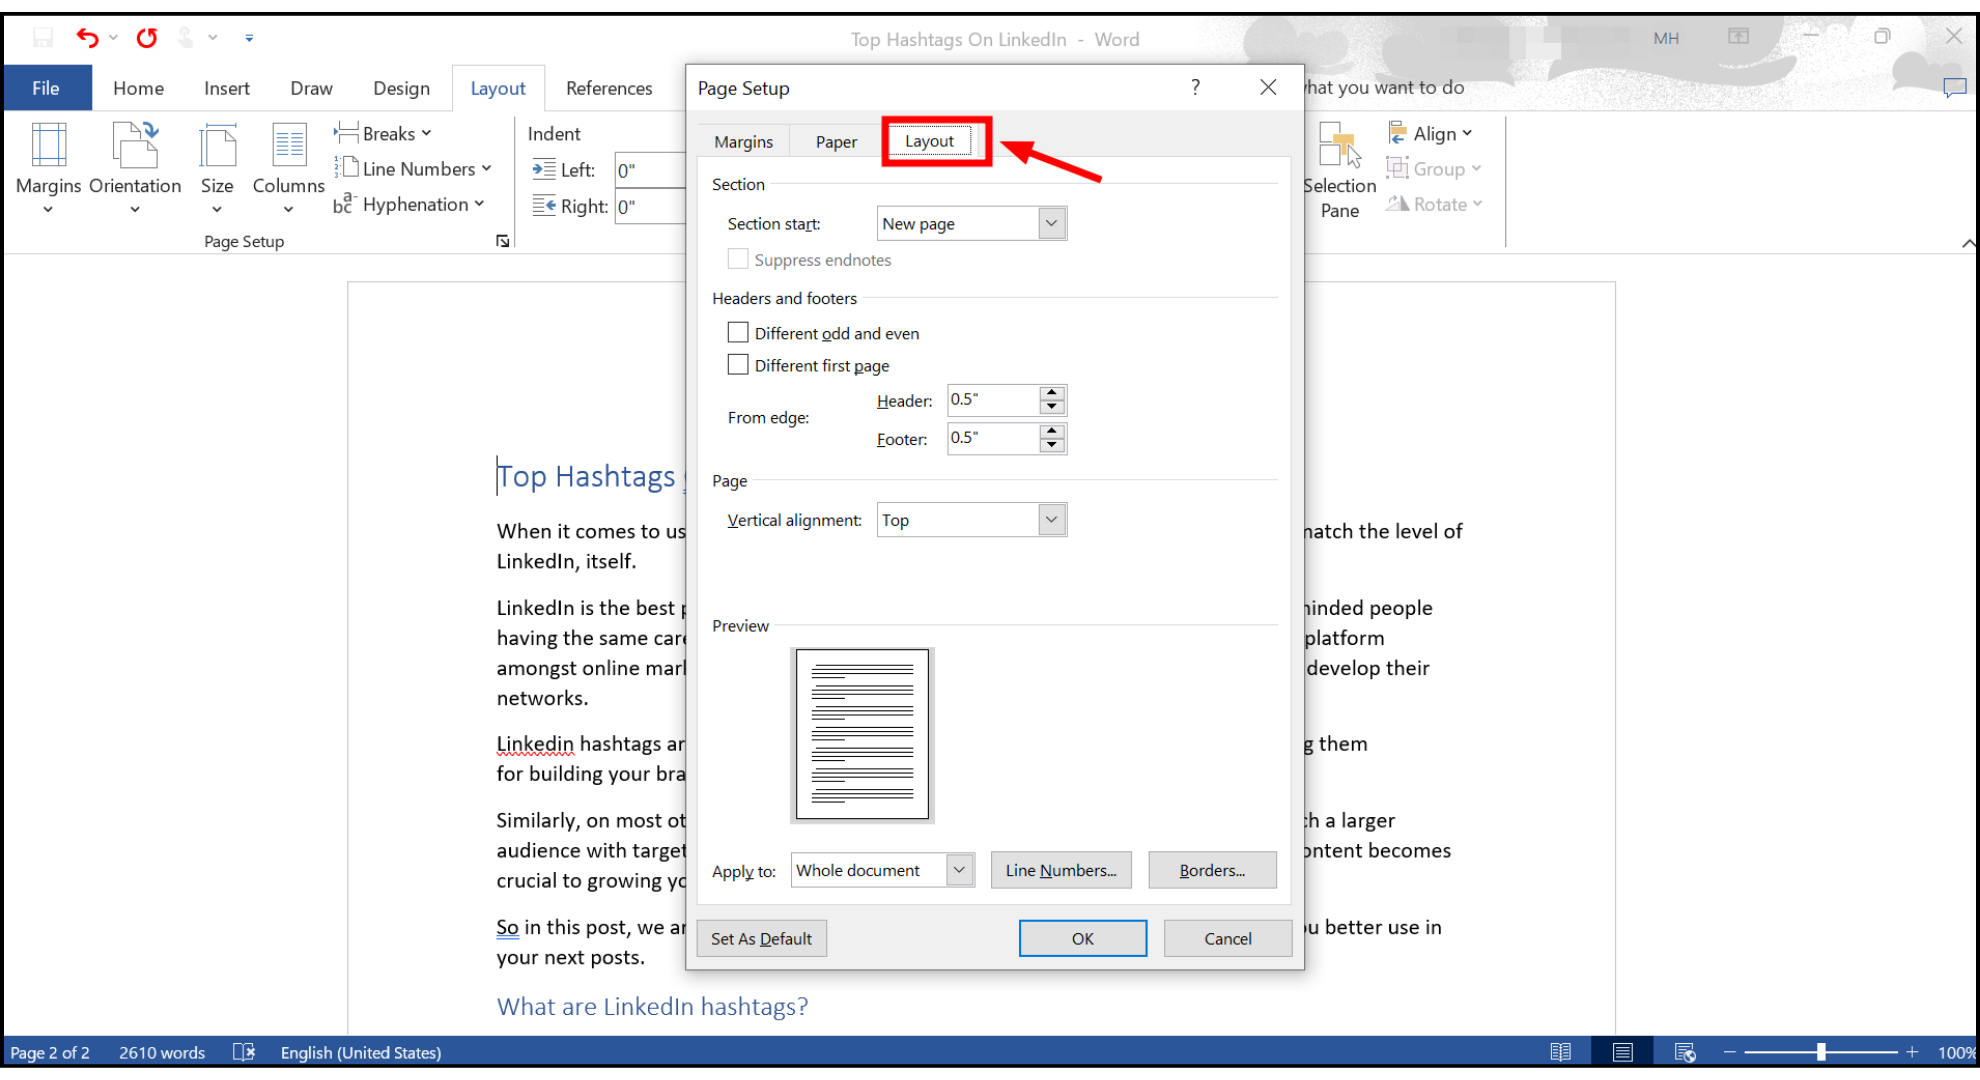
Open Layout Tab - Look for the “Apply to list” and choose selected sections.
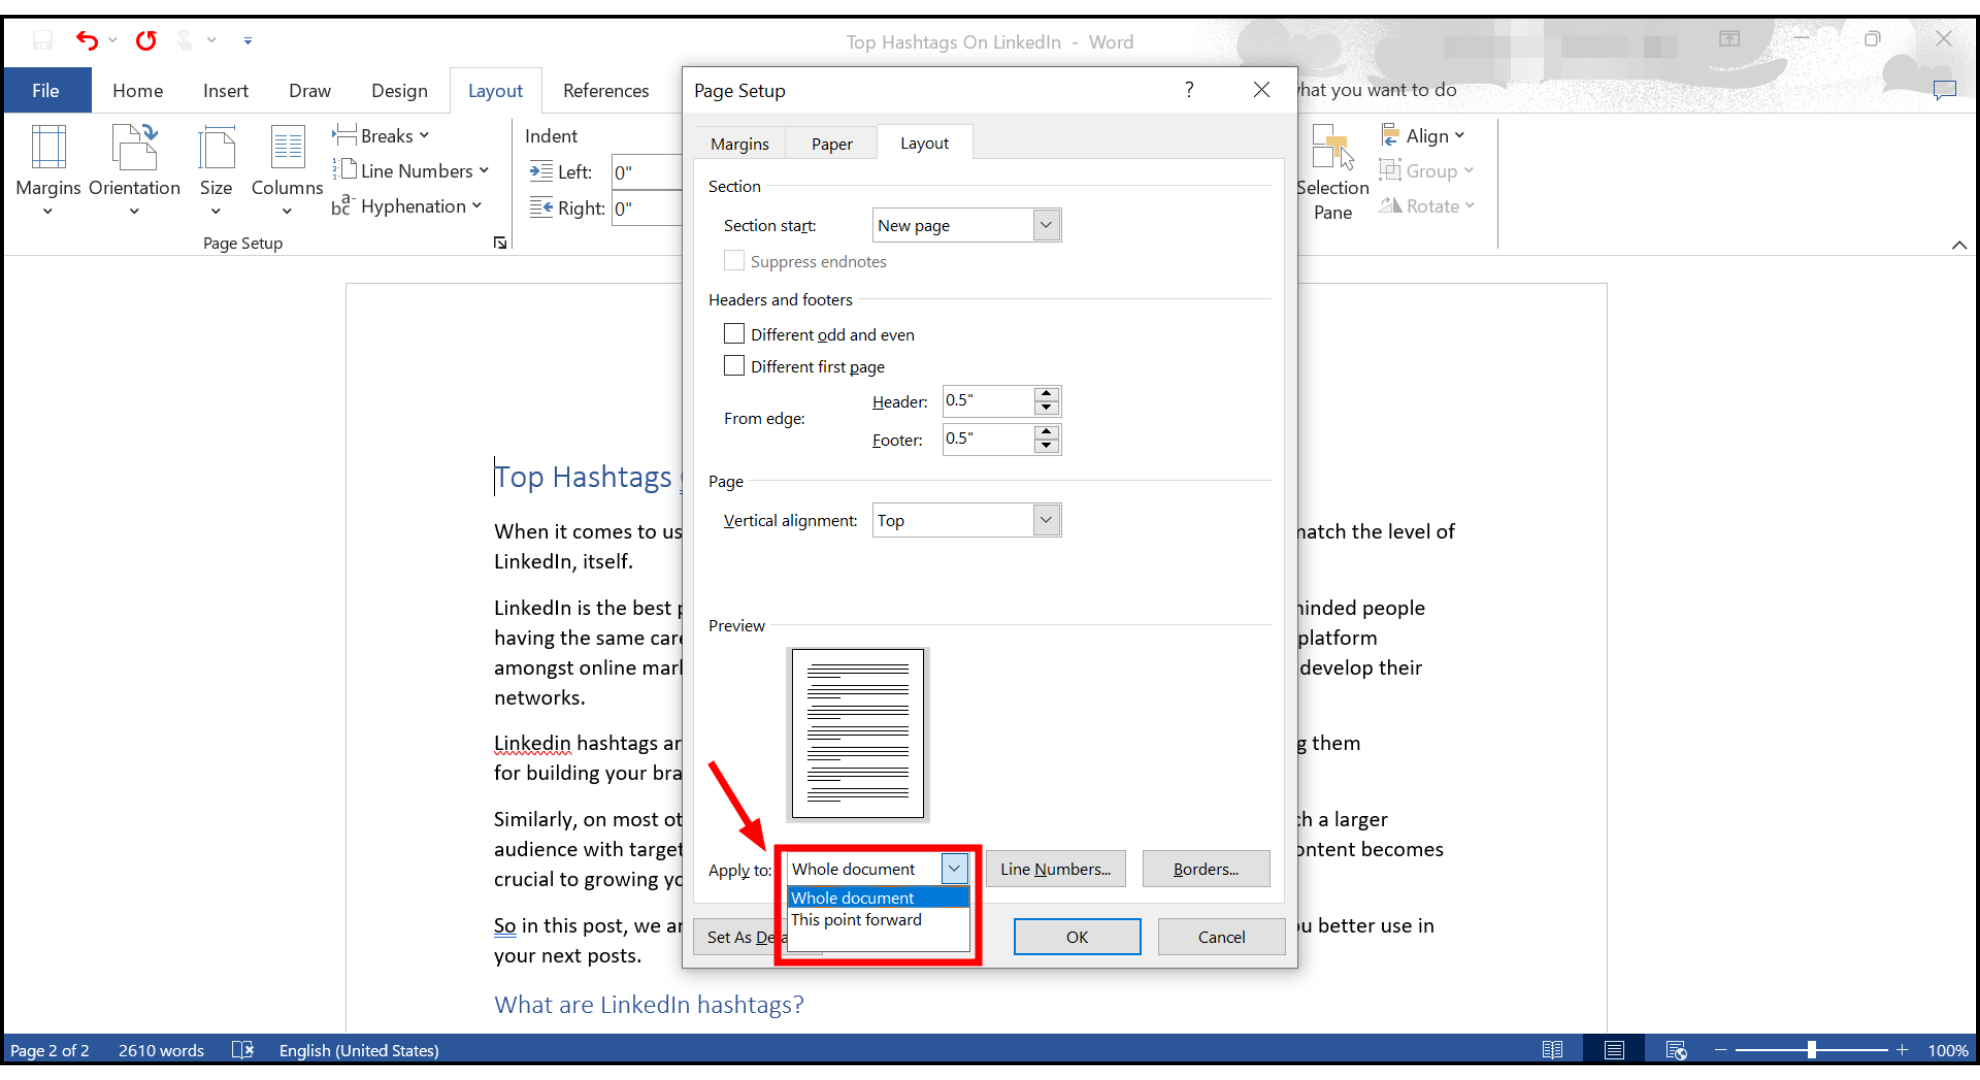
Select Apply to List - Now, click on “Line Numbers” again.

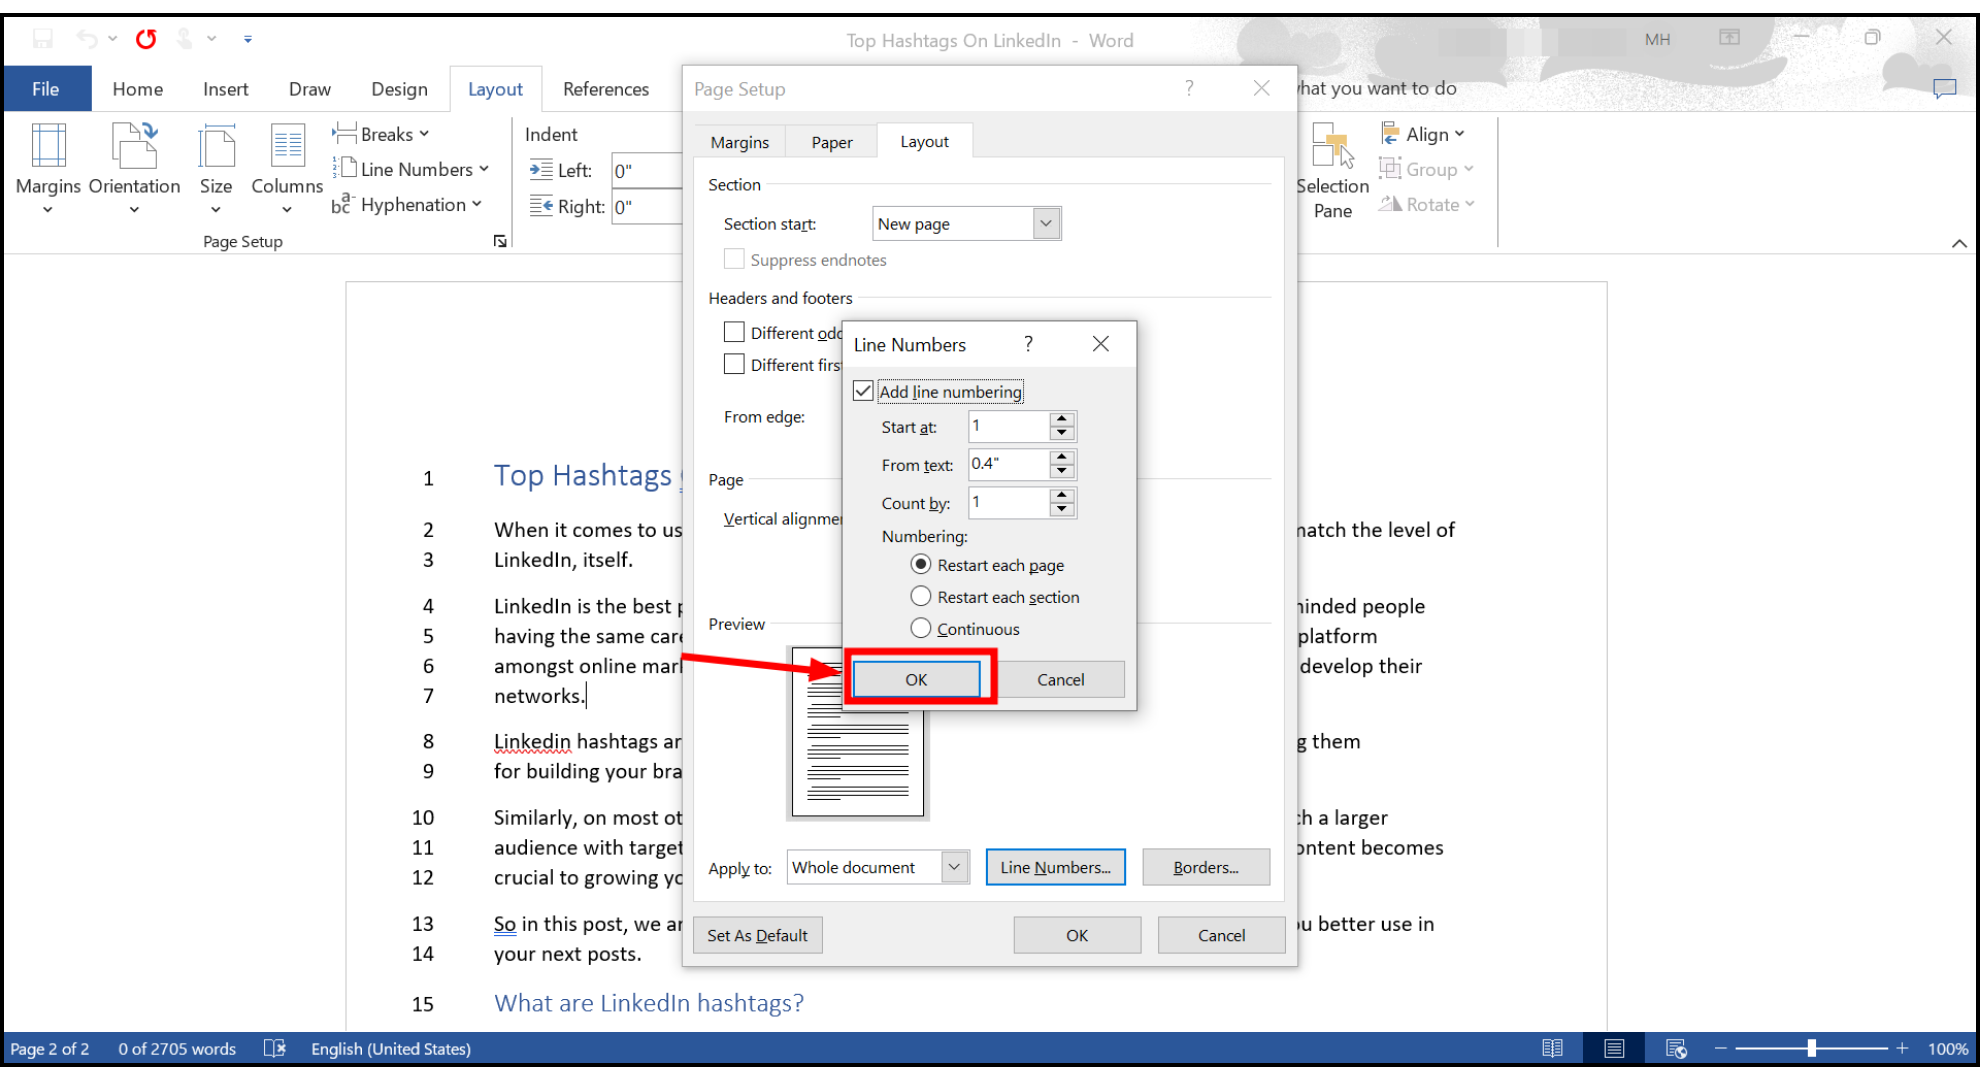
Click on Line Numbers - Tick the “Add line numbering” box, pick the options that suit your needs, and click “OK.”
Choose the options and click OK
Customize Line Numbers in Word
After you’ve put line numbers in your Word document, you can change how they look and work.
- From the “Layout” tab, click the “Line Numbers” option and choose “Line Numbering Options.”
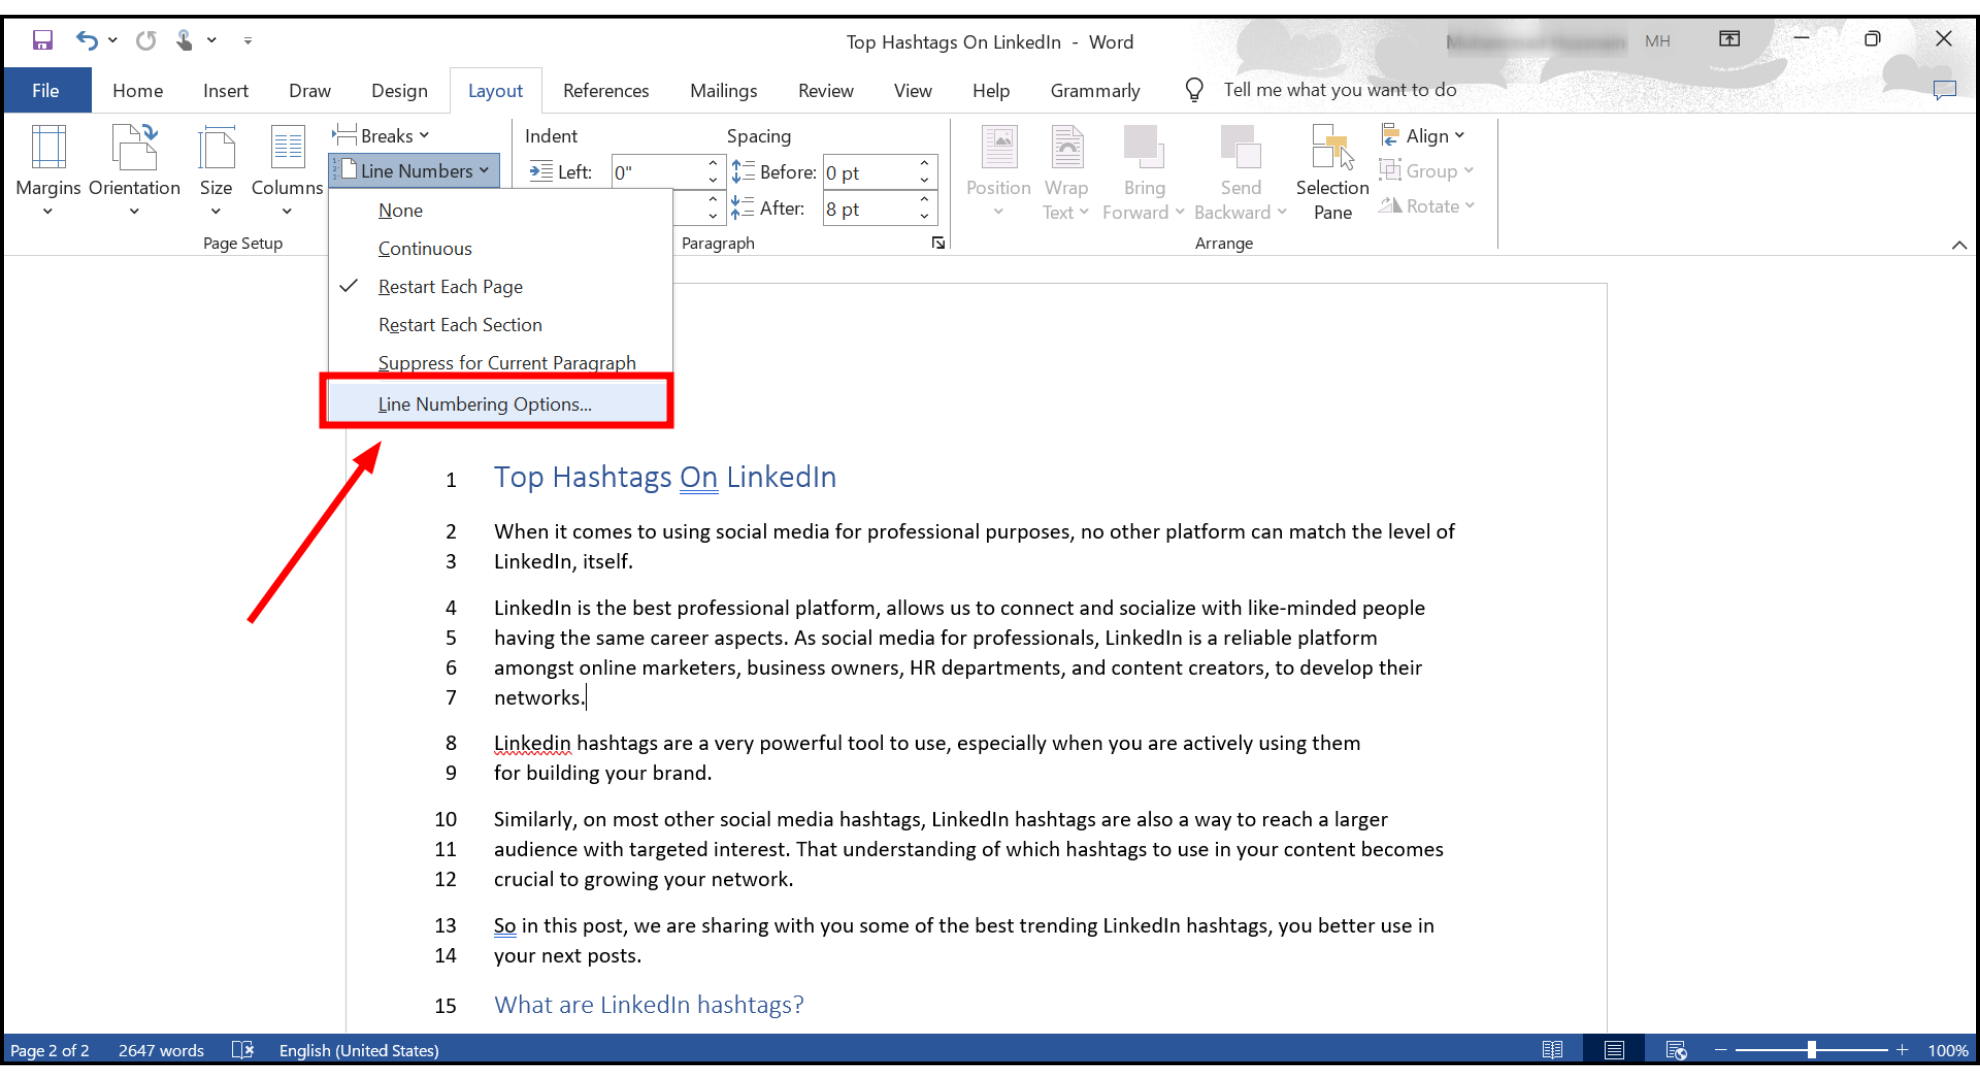
Click on Line Numbering options - Here, click the “Line Numbers” button again.
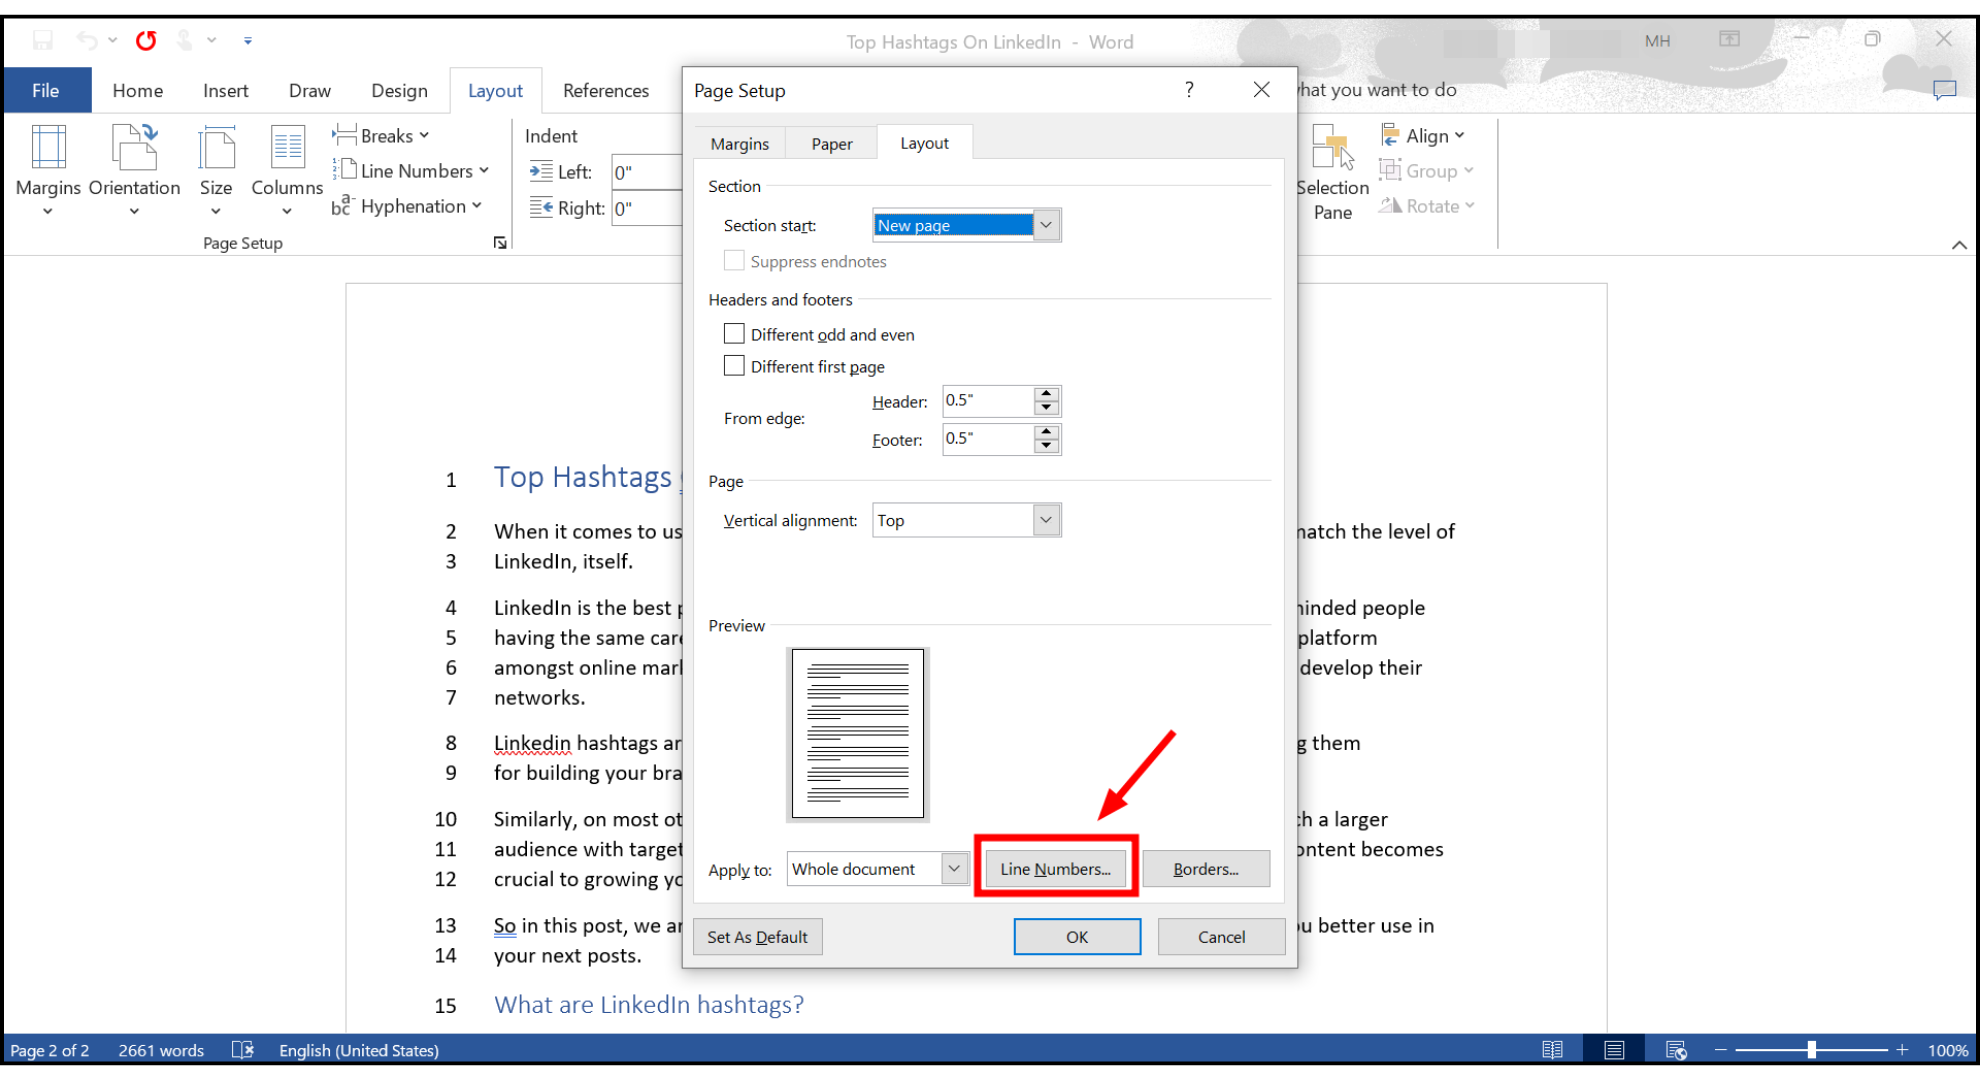
Click Line Numbers
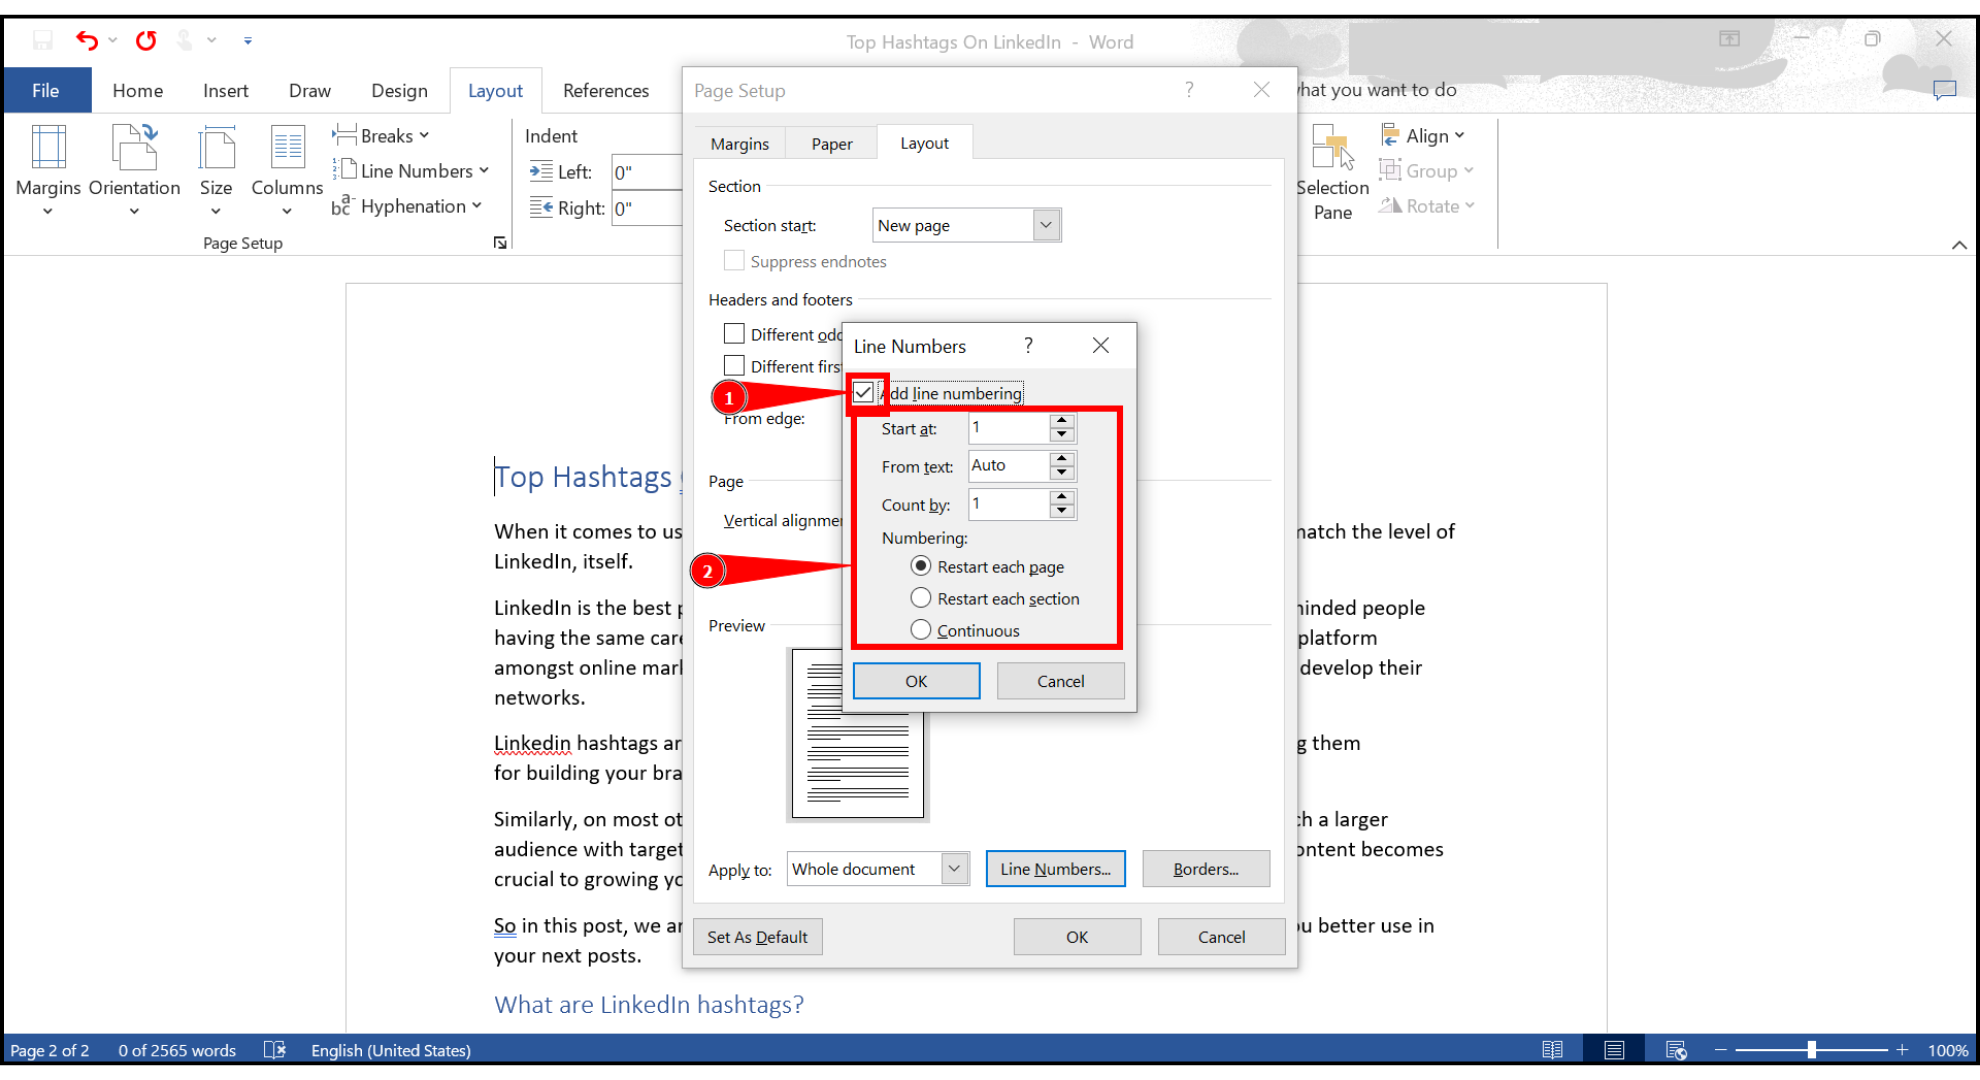
A new dialog box will pop up, giving you different options for line numbering. Here, you can turn off line numbering or make some adjustments:
- Start at: Decide what number you want the line numbering to begin with.
- From text: This option lets you set how far the line numbers will be from your text.
- Count by: You can choose to have line numbers show up on every line or set an interval, like every second or third line.
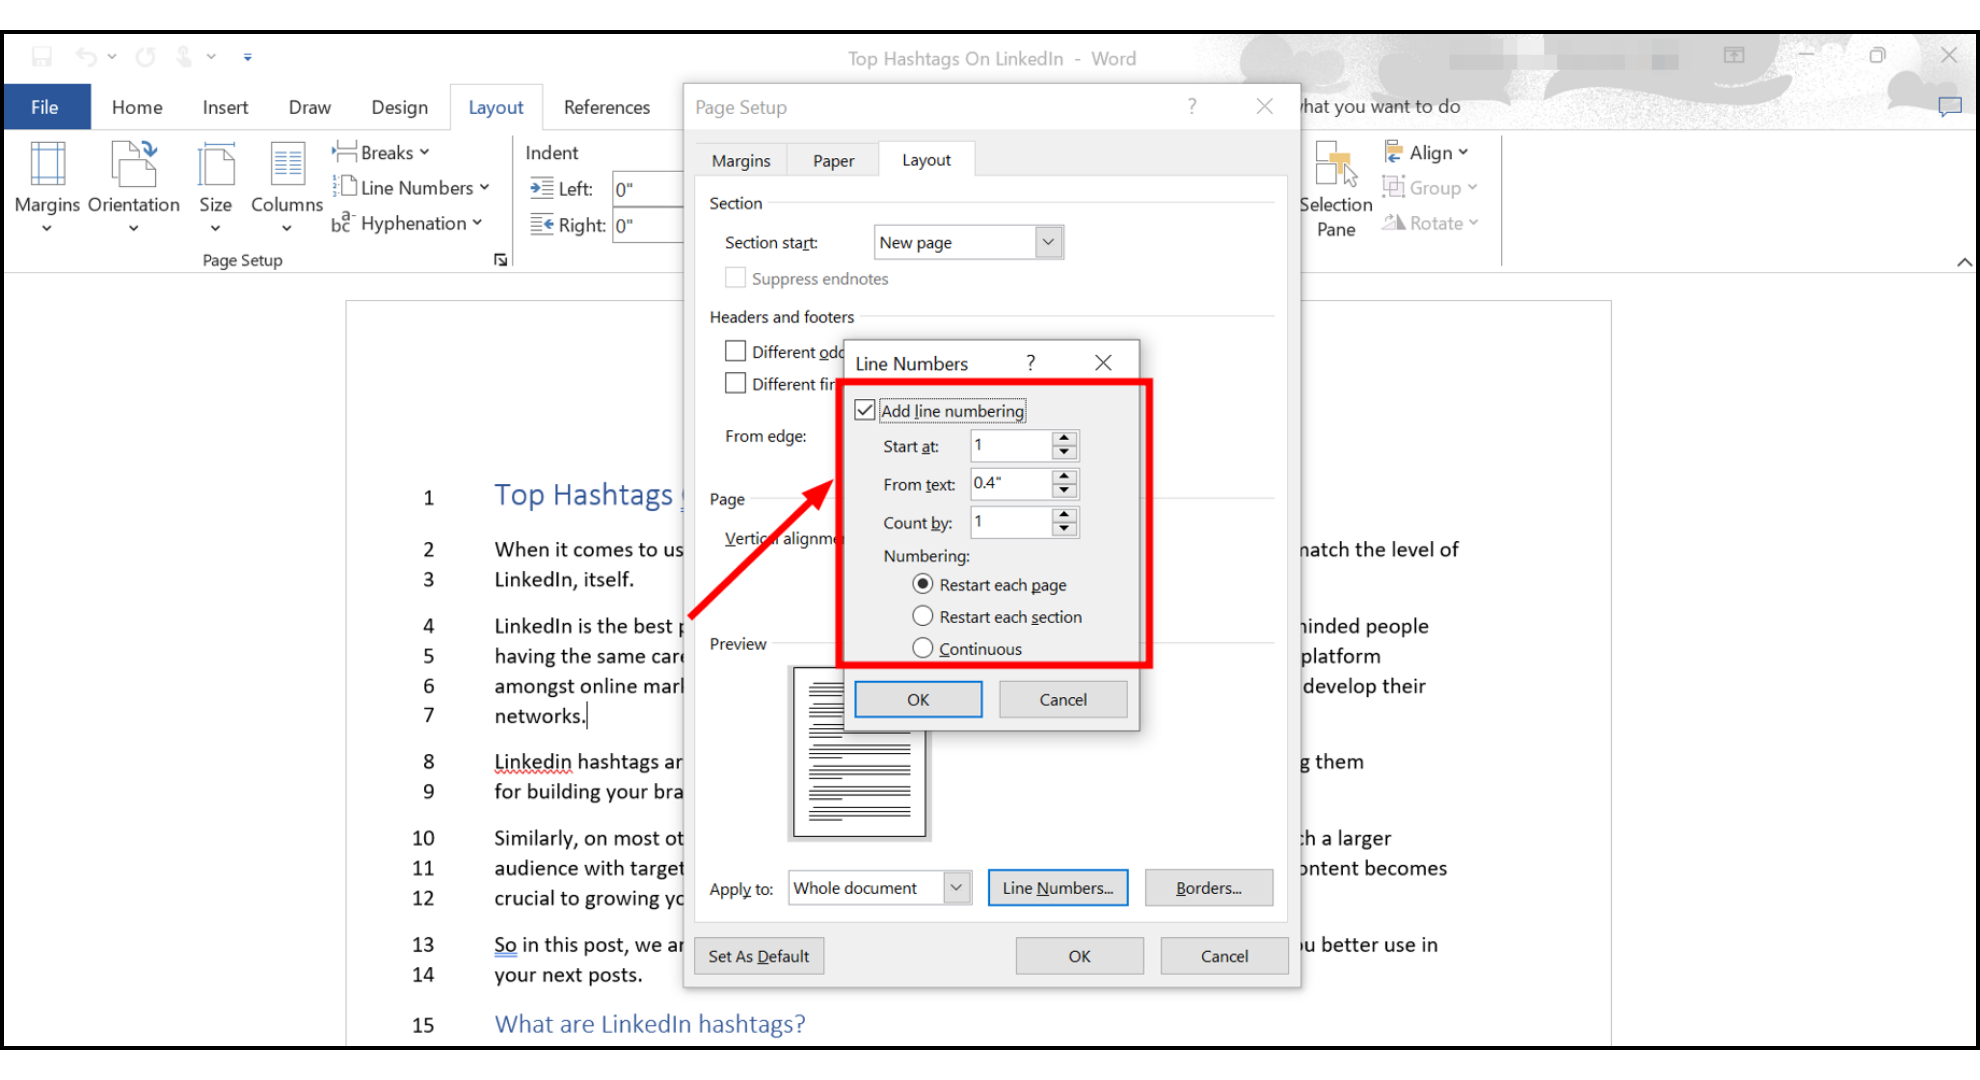
Choose the options you like best
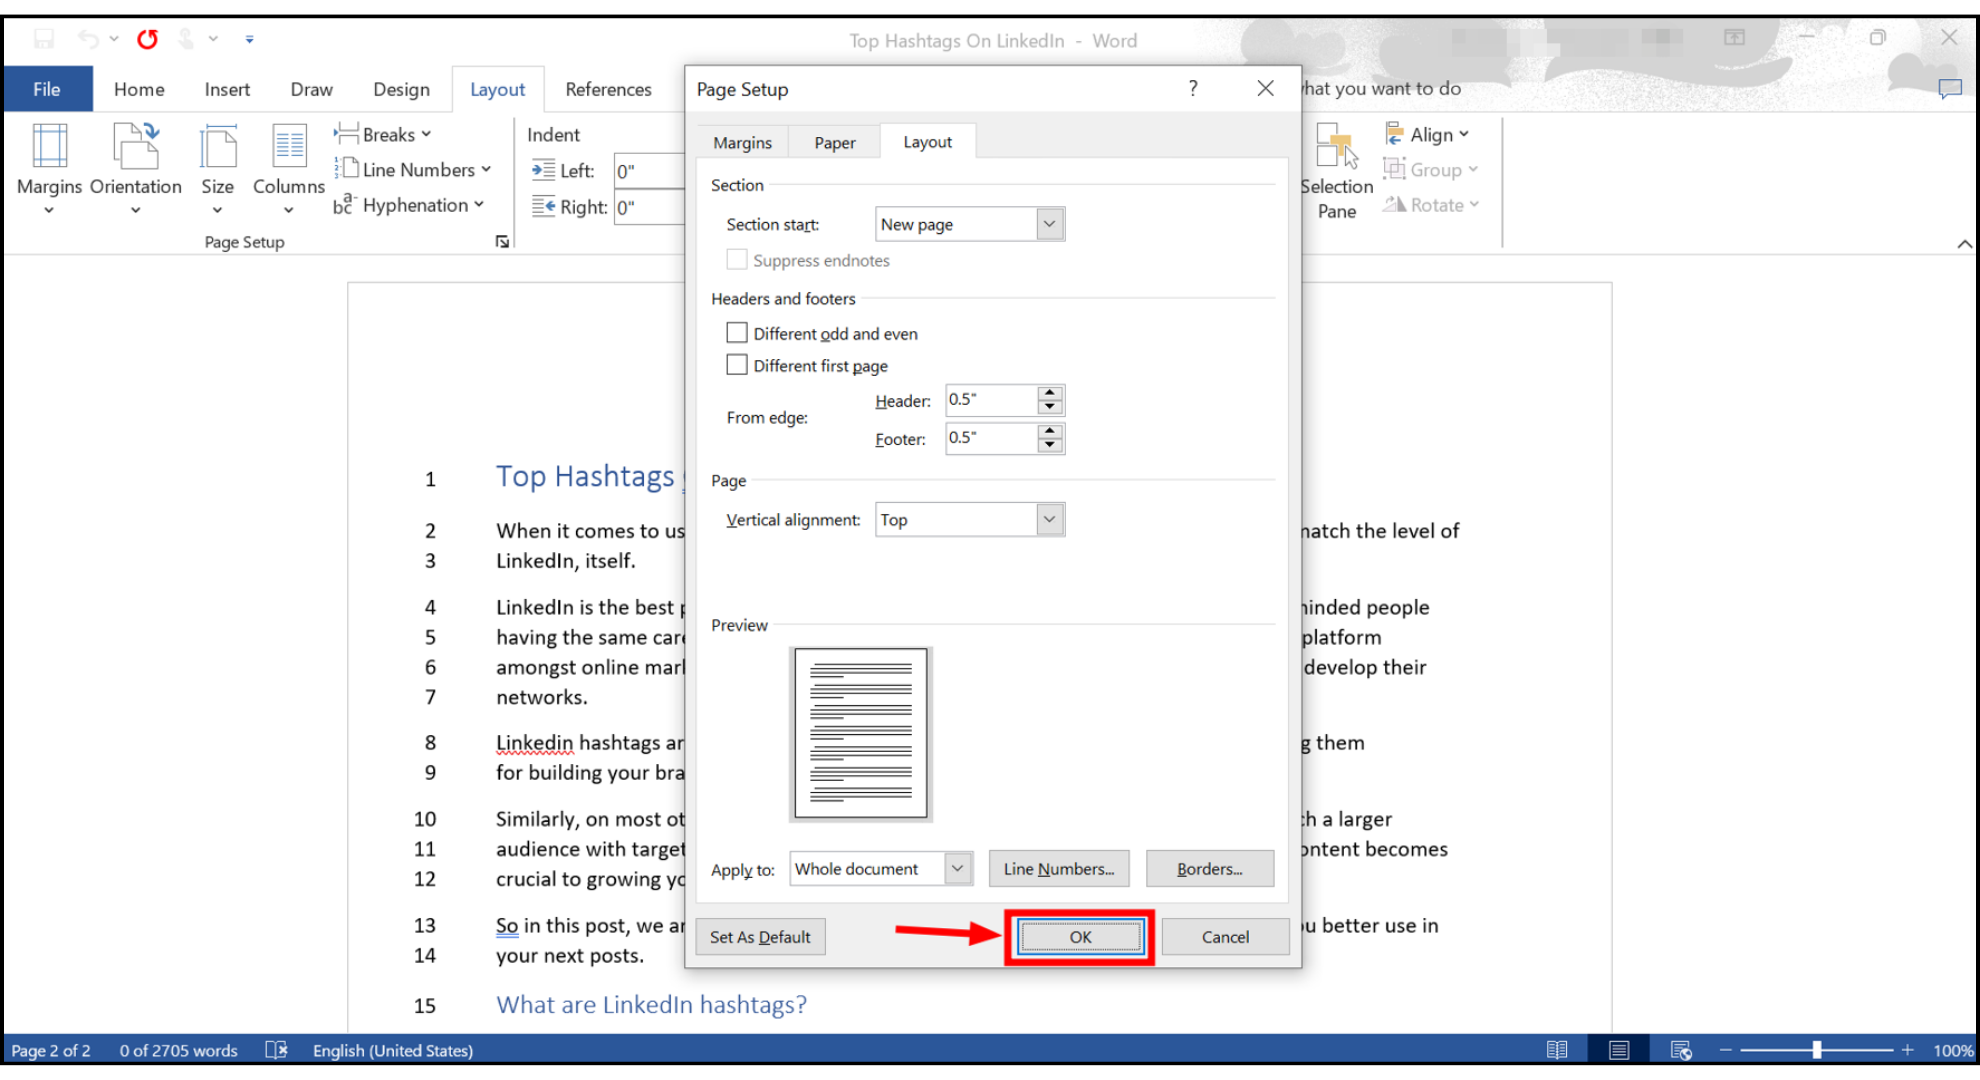
- Change these options as you like and click “OK.”
Click OK - Finally, click “OK” again to close the Page Setup dialog box.
Finally Click Ok again
Your line number settings will now be updated to what you chose.
Remove Line Numbers in Word
If you’ve added line numbers to your document and later decide to remove them, you can easily do this for the entire document or just parts of it.
To take off the line numbers from the whole document:
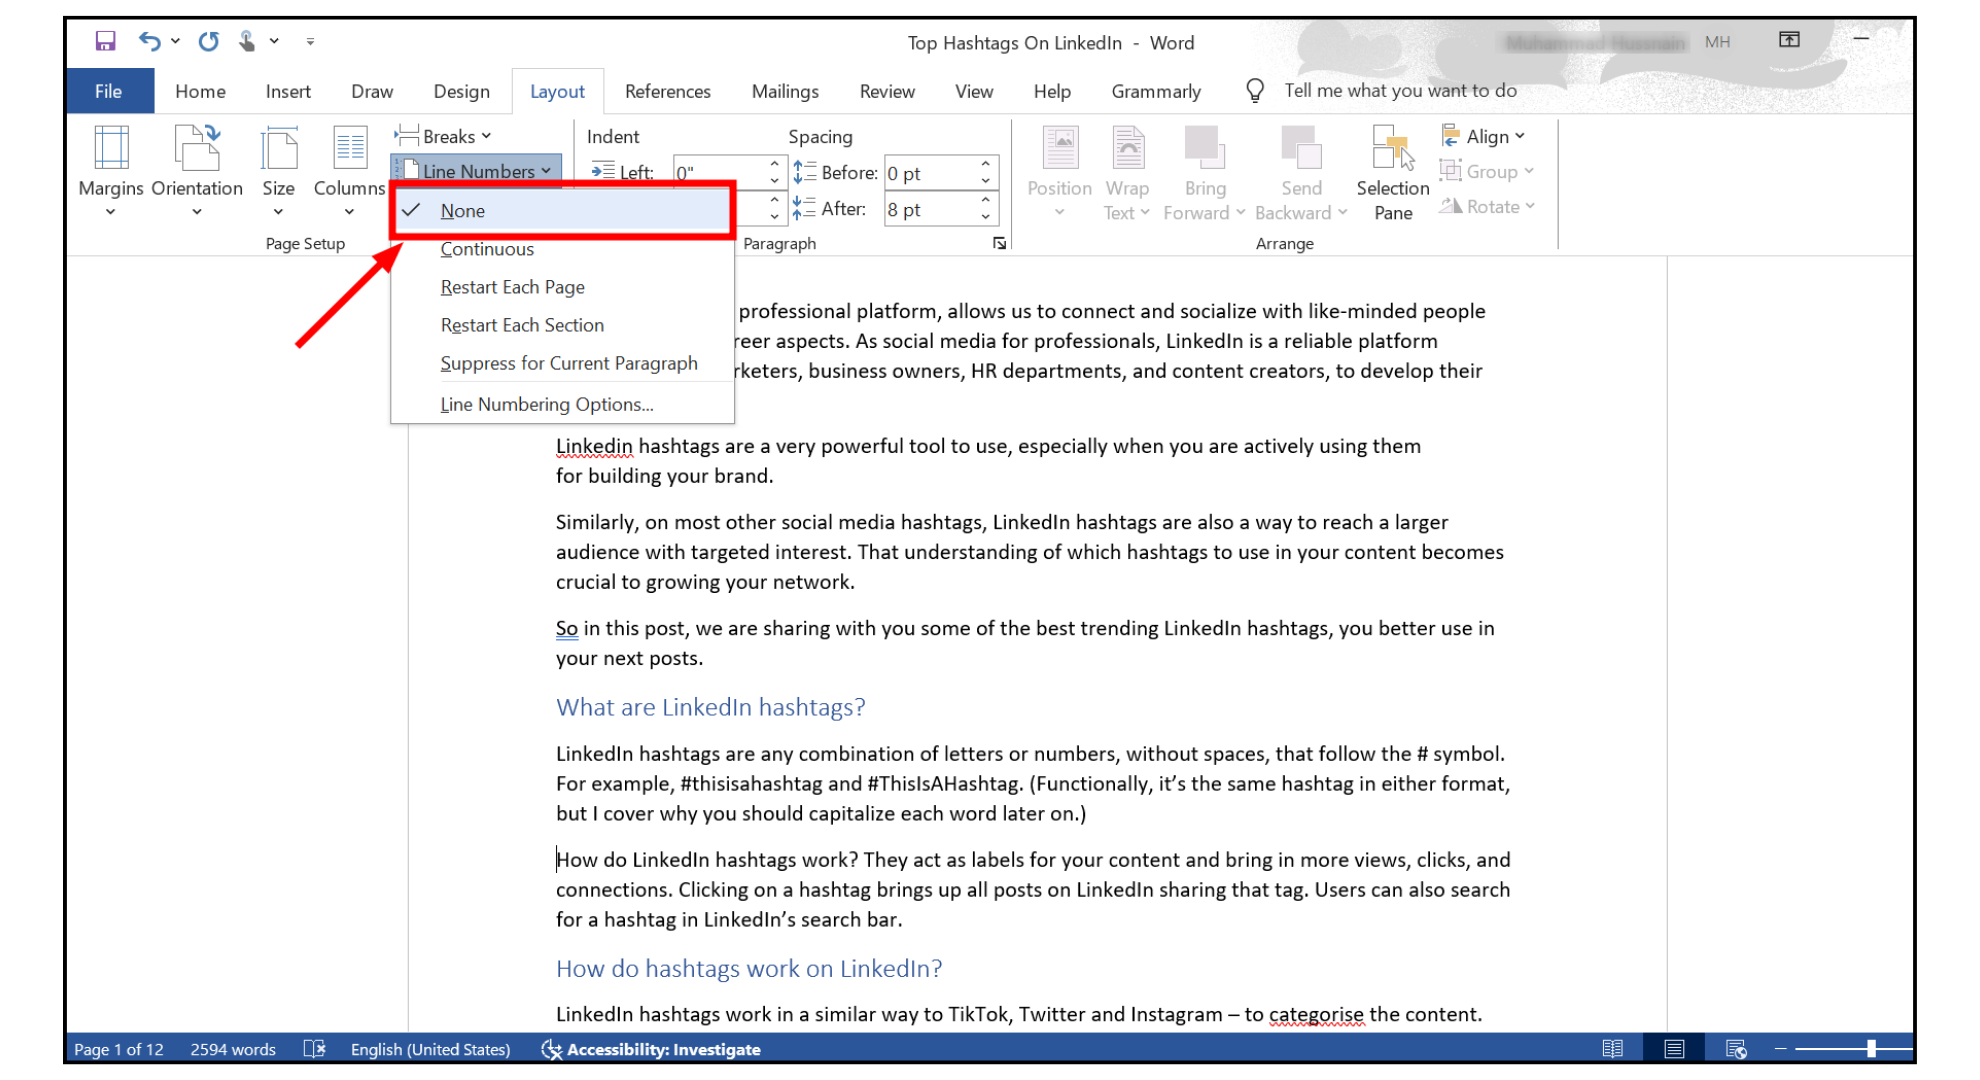
- Go to the “Layout” tab and click the “Line Numbers.”
- Now choose “None.”
To remove numbering from a specific paragraph:
- Click your cursor on that paragraph.
- Open the “Line Numbers” drop-down menu and select “Suppress for Current Paragraph.”
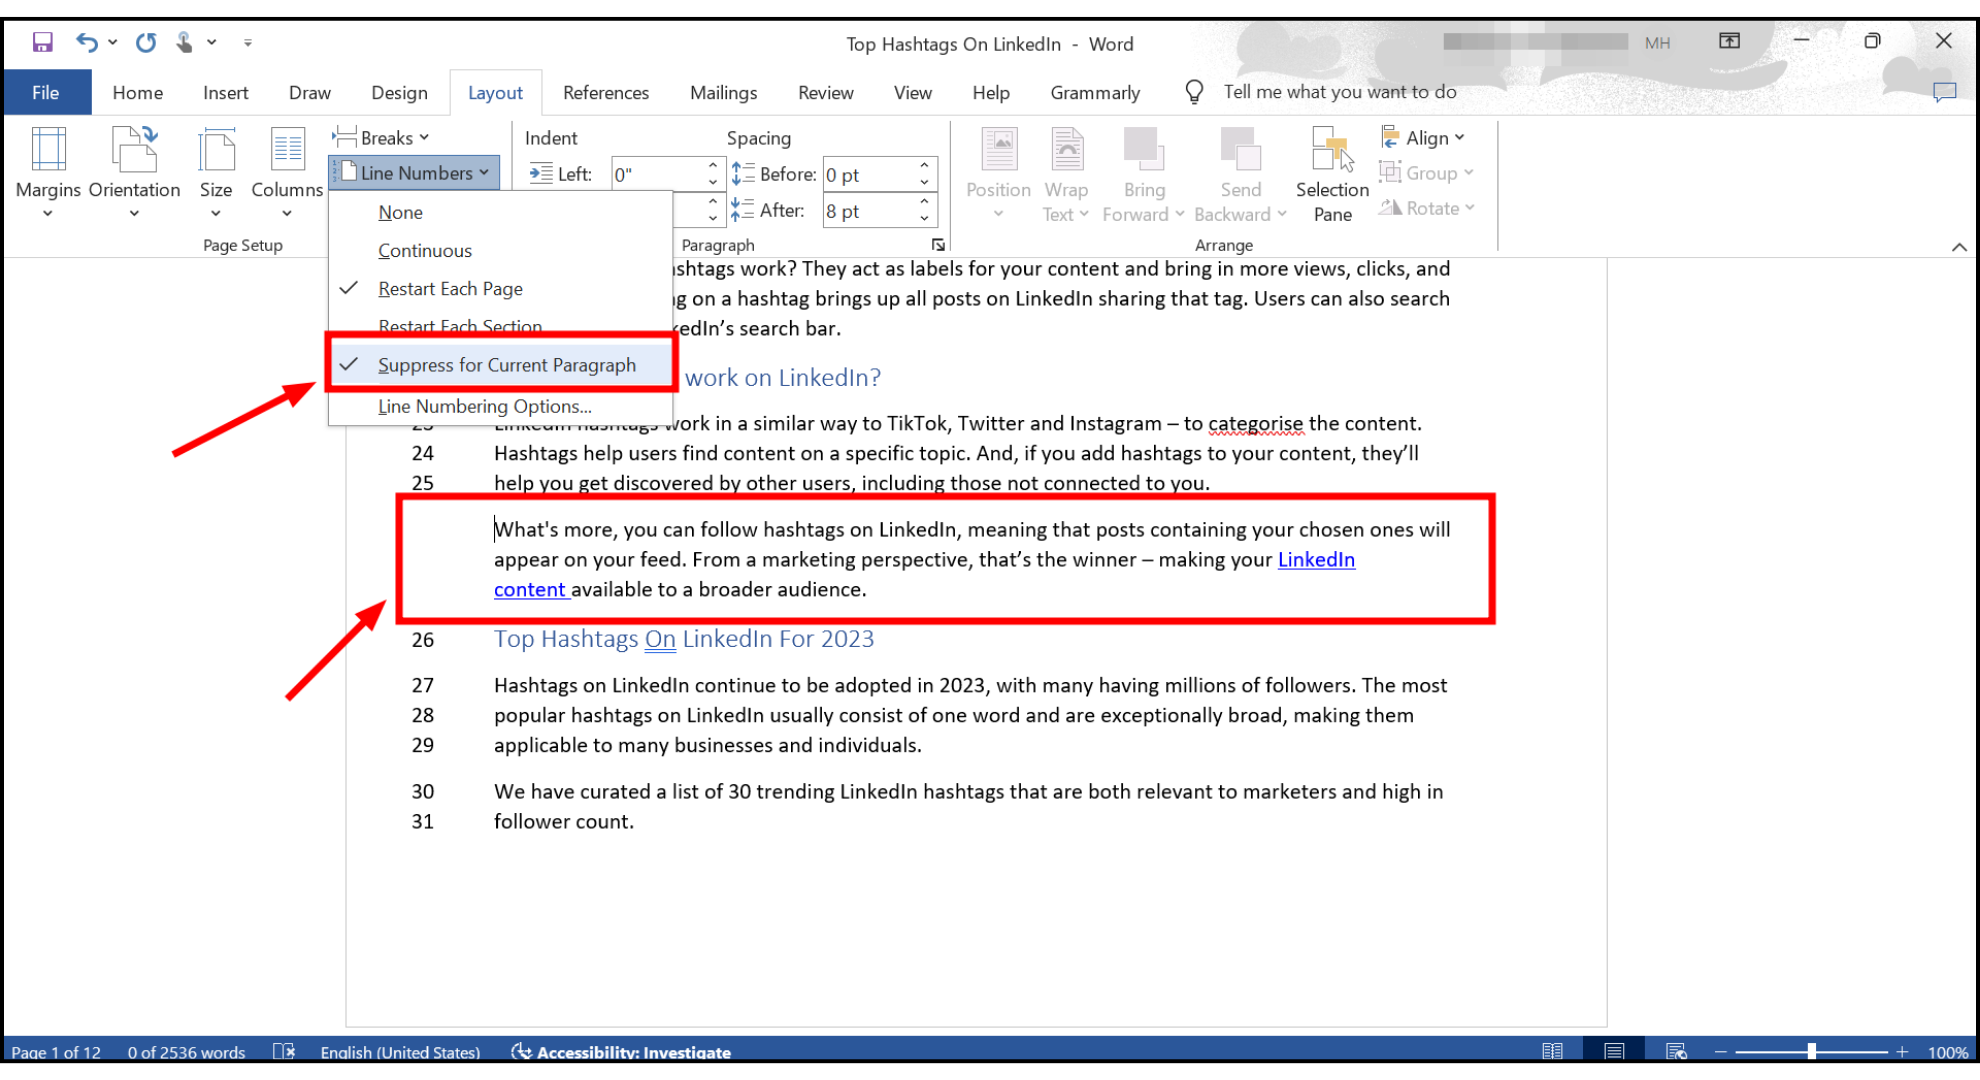
Do the same for any other paragraphs you want to remove numbering from.
But, why even add Line Numbers?

Adding line numbers to your document might seem small, but line numbers can help make your document easier to read, use, and organize. Here’s why adding line numbers can be a great idea:
- Facilitates Collaboration: Line numbers make it simple for people working on the same document to discuss specific parts without confusion.
- Simplifies Document Review: Line numbers help streamline the review process, making it quicker and more precise, especially in academic, legal, or team projects.
- Enhances Document Navigation: Line numbers can help quickly find different sections in long or complicated documents.
- Complies with Formatting Requirements: In some cases, like legal documents, you might need line numbers to meet certain formatting rules.
- Improves Reference Accuracy: Line numbers give you exact spots to refer to, which is really useful in academic and professional writing.
- Assists in Legal and Scholarly Work: Line numbers make your legal documents and academic papers clearer and more credible when citing specific lines.
READ MORE: How to Make a Copy of a Word Document: 5 Different Ways ➜
Final Thoughts
Adding line numbers in Word is a valuable feature that greatly enhances the functionality and organization of your documents. We’ve walked through the simple steps to add line numbers to your document-specific sections and how to customize or remove them as needed.
These steps are straightforward and user-friendly, from starting with the Layout tab to adjusting settings in the Page Setup dialog. Whether you’re collaborating on a project, reviewing academic work, or navigating through lengthy legal documents, line numbers are an indispensable tool.
They not only improve the readability and accessibility of your content but also ensure precision in referencing and compliance with formatting standards.
FAQs
Yes, Word provides options to customize line numbering, including choosing the placement of line numbers, specifying the starting number, and adjusting the formatting to suit your document’s style.
No, line numbers do not affect the page count. They are added as a visual aid for navigation and referencing but do not alter the document’s fundamental structure or page number.
Word allows you to add line numbers to the entire document or specific sections. You can choose the desired sections and apply line numbering accordingly.
Tables and figures are counted as single lines for line numbering. Regardless of the number of rows in a table or the complexity of a figure, they contribute as one line each.
Text boxes are treated as single lines if not wrapped by text. However, if a text box is wrapped by text, only the lines of text within the box are counted, not the text box itself. This ensures accurate line numbering in various document layouts.