Fix: Start Menu and CORTANA aren’t working
Microsoft released its latest and most-awaited version of Windows, called Windows 10, on July 29, 2015. There were some major changes in the latest OS based on GUI and services. Almost 14 million people upgraded their previous Windows versions to the latest one within a timespan of just 24 hours.
At the same time, people began encountering an annoying issue related to the Start Menu and Cortana. This problem is associated with the launch of the Start Menu and Cortana. Whenever a user launches the Start Menu or Cortana, a Critical Error appears, stating that the functions are not working properly and a fix will be attempted the next time the user signs in.

This critical error message compels users to bang their heads on the wall, as they cannot use their PCs properly. People have tried numerous methods to eliminate this error message. Creating a new account or using different accounts on Windows has not been successful, and the error still persists. A majority of people have reverted back to their previous version of Windows due to this issue, and Microsoft is still unable to identify the causes of this problem.
My guess is that this should be fixed when Microsoft pushes a fix for this via an update within a month or two.
So, listed below are the methods to restore the functionality of the Start Menu and Cortana back to normal.
Methods to Fix Critical Error: Start Menu and Cortana Aren’t Working.
The following methods are known to be the best solutions for this error on Windows 10. You should follow these methods sequentially if the first one doesn’t work for you.
Method #1: Uninstall Antivirus.
The first method is found to be the best solution for this critical error message. A number of times, external antivirus programs create conflicts between other Windows programs, which result in different issues. This critical error, related to Cortana and the Start Menu, is connected to the antivirus programs installed on the PC. Therefore, it is better to uninstall the antivirus. To do so, follow these simple steps.
Most of the users experiencing this issue had Avast!
1. Go to the Control Panel and find “Uninstall a Program” if you are in Category view mode. If you are in Small icon view mode, locate “Programs and Features,” then click on it.
2. Now, navigate to the antivirus program installed on the PC and double-click to uninstall it.
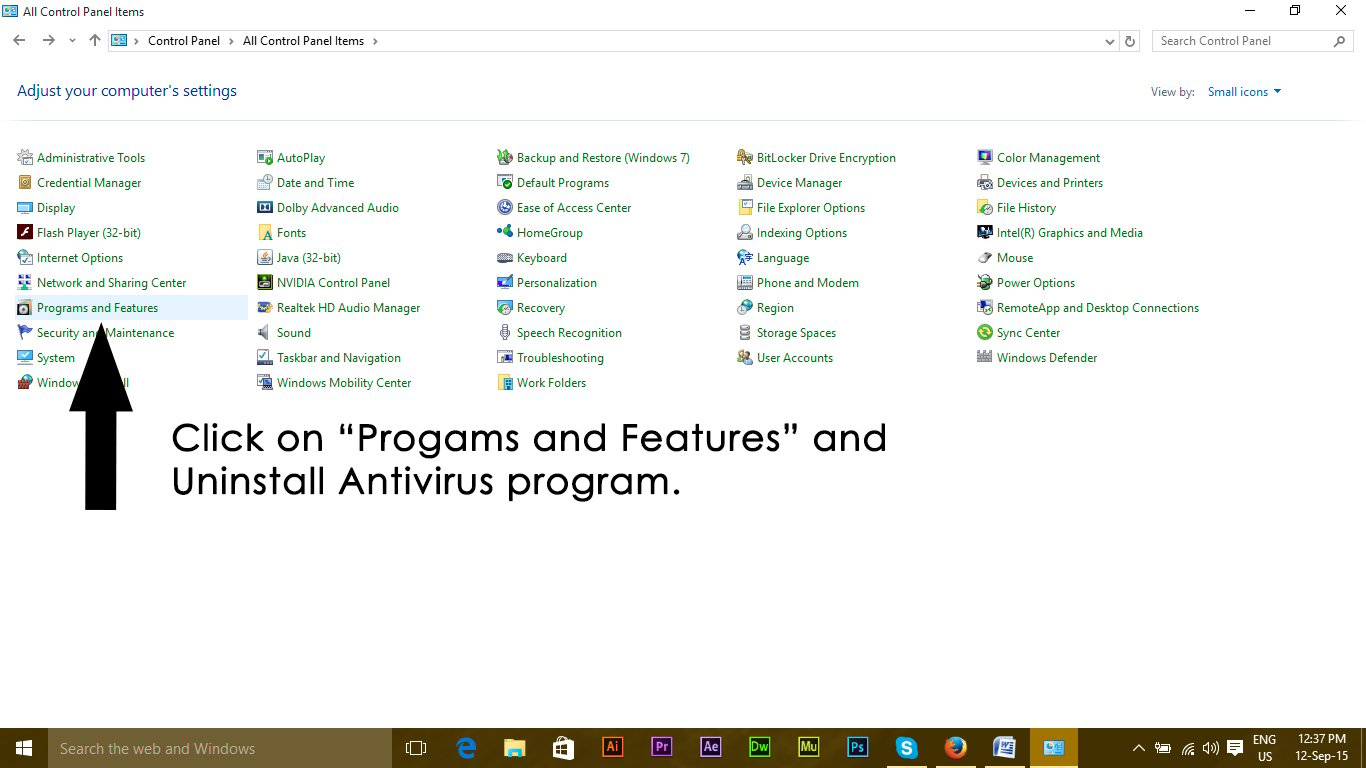
3. After the program is uninstalled, restart your PC. Now, you should see that your Windows 10 Start Menu and Cortana are working. You can reinstall the antivirus if necessary. However, if the issue persists, proceed to Method 2.
Method 2: Fix Using PowerShell.
1. Press Ctrl + Alt + Delete to open the Task Manager.
2. Click ‘File‘ -> and choose ‘Run New Task‘.
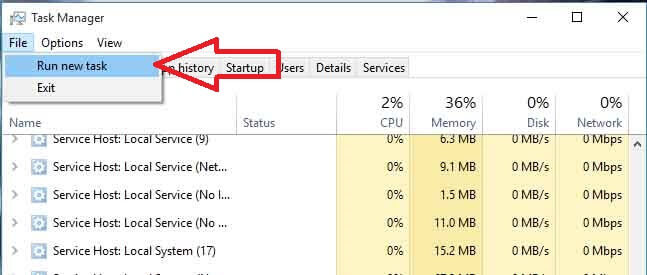
3. Type ‘powershell‘ and click ‘OK.'”
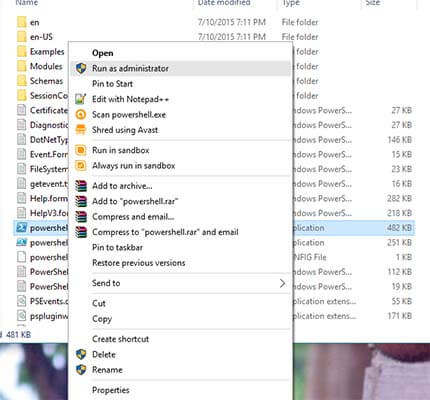
4. Now, right-click Powershell from the taskbar and select ‘Run as administrator‘.
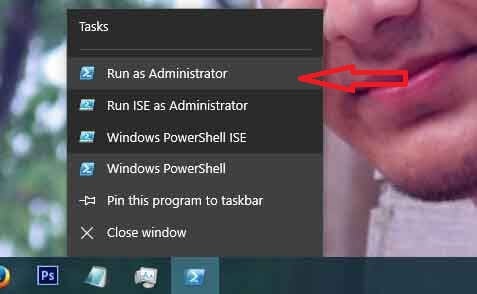
If the right click isn’t working, reopen Task Manager in a more limited view mode.
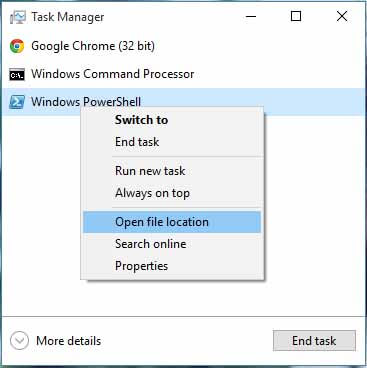
5. You will see a list of your running apps. Right-click on PowerShell and choose Open File Location. This will open the file location. Locate PowerShell, right-click on it, and select Run as Administrator to open PowerShell in administrator mode.
6. Now, copy and paste the following command into the command prompt:
Get-AppXPackage -AllUsers | Foreach {Add-AppxPackage -DisableDevelopmentMode -Register "$($_.InstallLocation)\AppXManifest.xml"}
Press the ENTER key and wait for the command to finish. Afterward, reboot your PC and test to see if Cortana and the Start Menu are now working properly.
Method 3: Via the Command Prompt.
1. Right-click on the Start Menu button, and in the menu that pops up, select Command Prompt (Admin).
2. Type in ‘ren %windir%\System32\AppLocker\Plugin*.* *.bak‘ and then press the Enter key.
3. Restart the computer.
Method 4: Conducting a System File Checker Scan.
The above method will work in most cases. If it doesn’t seem to work for you, then use this method. You have to run the System File Checker in order to check for damaged or corrupted files within your system and fix them thereafter.
You can go through this link to run SFC.
Method 5: Booting in Safe Mode.
It is possible that certain applications or a driver may be malfunctioning and interfering with important elements of the operating system. Therefore, in this step, we will boot the computer in Safe Mode to fix the issue. To do so:
- Reboot your computer, let it boot to the lock screen, and click on the “Power” icon while pressing the “Shift” button.
- Click on the “Restart” option and release the “Shift” key.
- Once Windows boots to the ‘Choose an Option‘ screen, select ‘Troubleshoot‘.
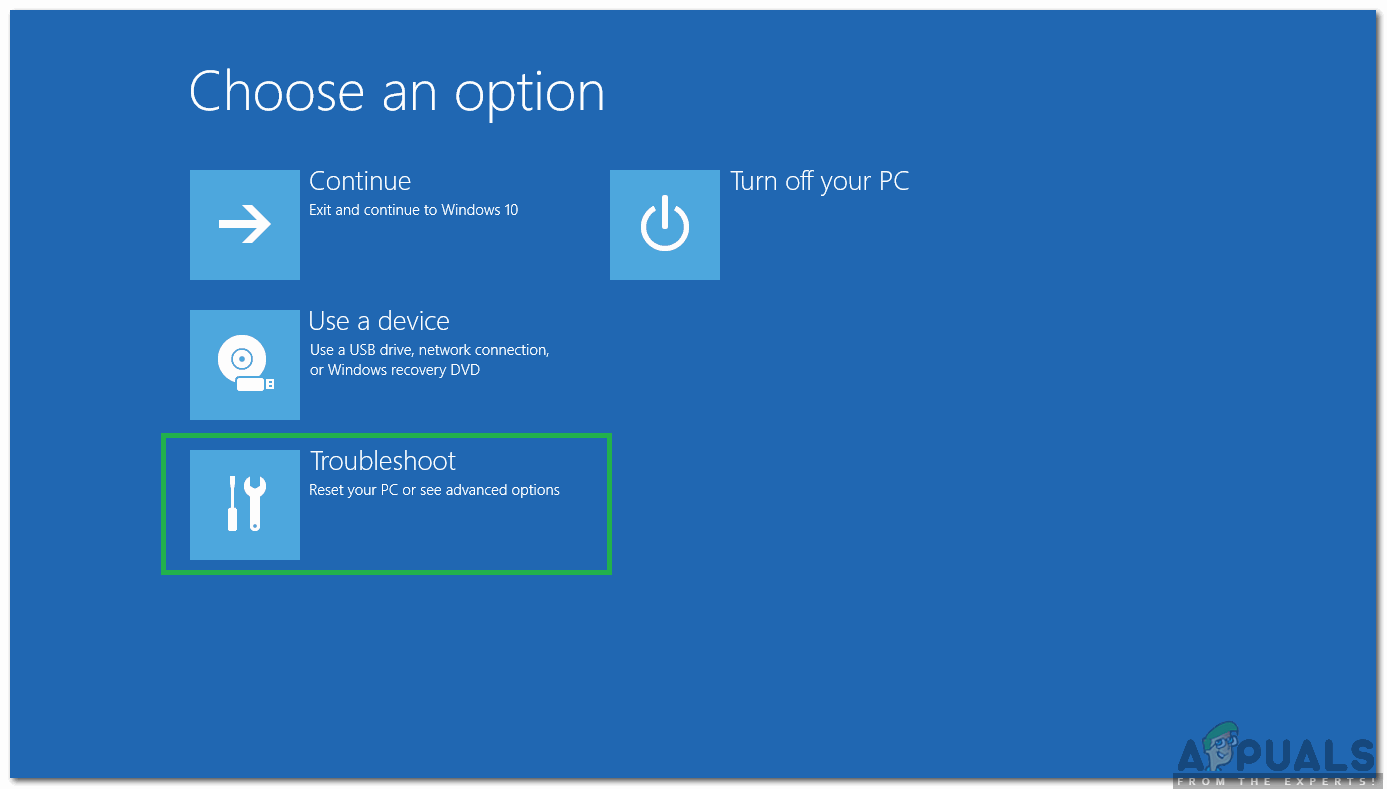
Selecting the “Troubleshoot” option - Click on “Advanced Options” and then select “Startup Settings.
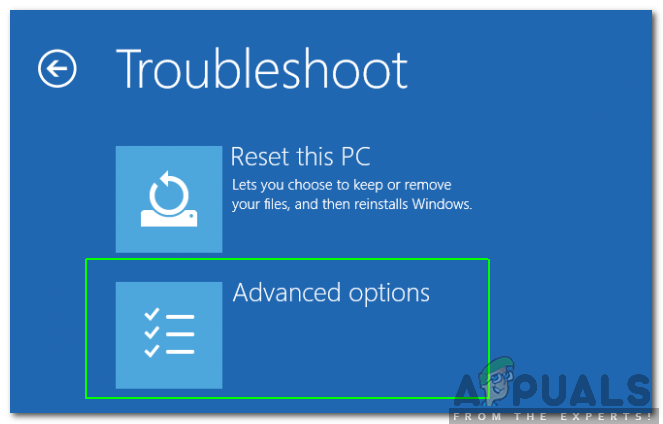
Selecting “Advanced Options” - Select the “Restart” option.
- When the computer restarts, a number of options will be displayed. Press “5” or “F5” to select the “Safe Mode with Networking” option.
- Sign into your account in the Safe Mode and restart your computer.
- Check to see if the issue persists.