How to turn off Automatic Maintenance in Windows?
Windows comes with a feature known as automatic maintenance. This feature run maintenance tasks in the background on their scheduled timings. The maintenance tasks are run only if your system is idle at the scheduled time. If you are using the system then the background maintenance tasks will run at some later time. The maintenance tasks involves updating of Windows apps and various other third party apps. It also involves system scanning and system diagnostics.
Although we would advise you to not disable this feature because it is crucial for the security of your system but there are a few users who like to disable this feature. If you are one of those users who wants to disable the automatic maintenance features of Windows then follow the steps given in method 1.
Note: Disabling Automatic Maintenance in Windows doesn’t disable Windows Automatic Updates.
Check whether the Automatic Maintenance is enabled or disabled
If you want to see whether your Automatic Maintenance is enabled or disabled then follow the steps given below
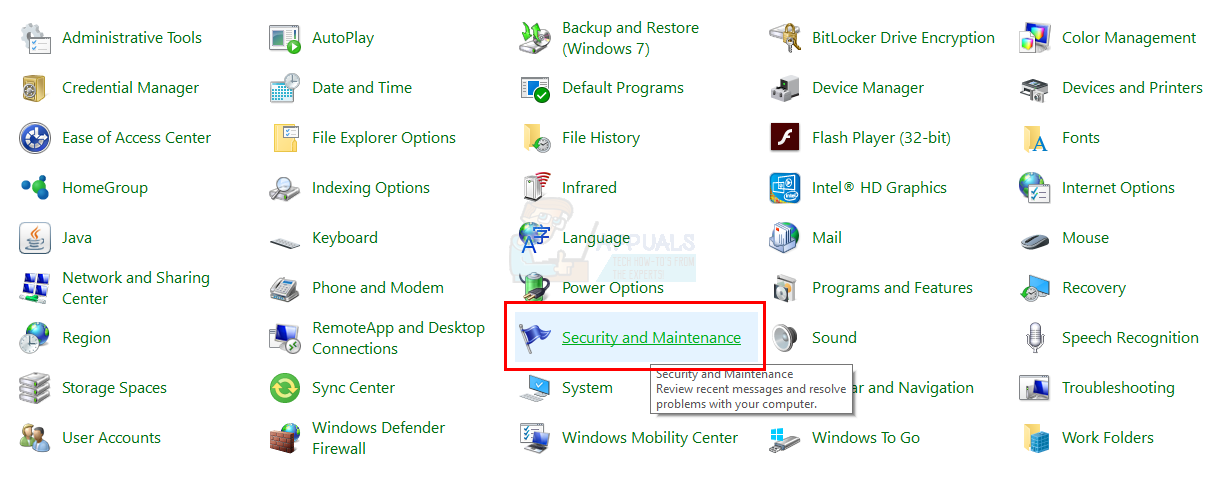
- Hold Windows key and press R
- Type control panel and press Enter

- Select Large icons from the drop down menu in View By section

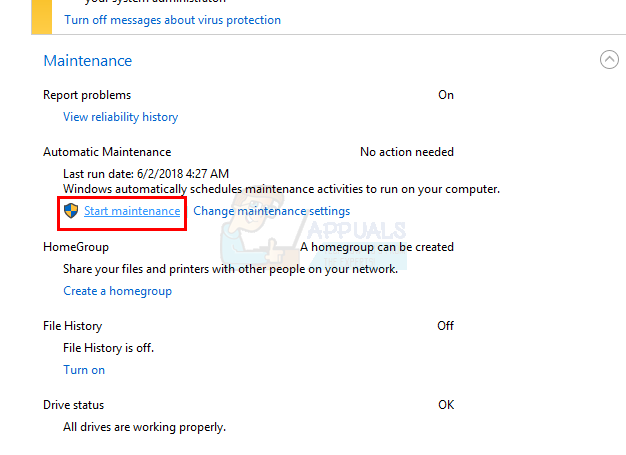
- Select Security and Maintenance
- Click Maintenance to expand its options
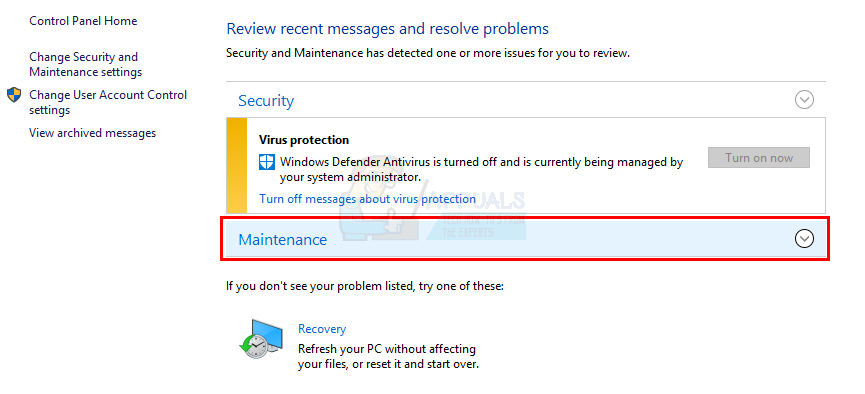
Click the Start Maintenance button. If the status of your maintenance has changed, i.e. it changed to Maintenance in progress (from No action required) then that means your Automatic Maintenance is enabled and you have manually started the Automatic Maintenance. You can click Stop Maintenance to stop the process now.
Method 1: Change MaintenanceDisabled Registry Key
In order to turn off the Automatic Maintenance in Windows, you have to change the MaintenanceDisabled key from the Registry Editor. Follow the steps given below
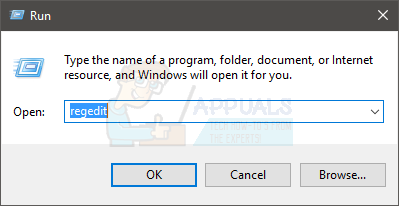
- Hold Windows key and press R
- Type regedit and press Enter
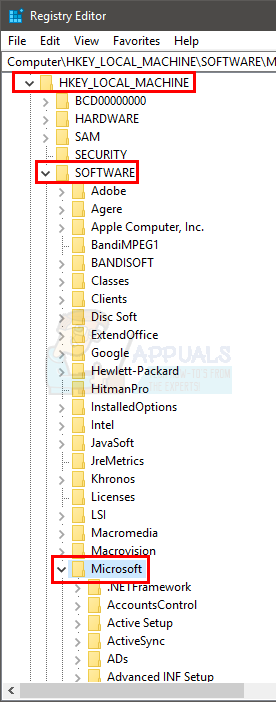
- Now, navigate to this address HKEY_LOCAL_MACHINE\SOFTWARE\Microsoft\Windows NT\CurrentVersion\Schedule\Maintenance. If you don’t know how to navigate there, then follow the steps given below
- Locate and double click HKEY_LOCAL_MACHINE from the left pane
- Locate and double click SOFTWARE from the left pane
- Locate and double click Microsoft from the left pane
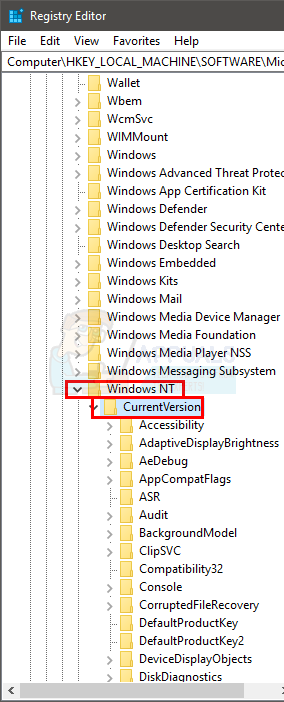
- Locate and double click Windows NT from the left pane
- Locate and double click CurrentVersion from the left pane
- Locate and click Schedule from the left pane
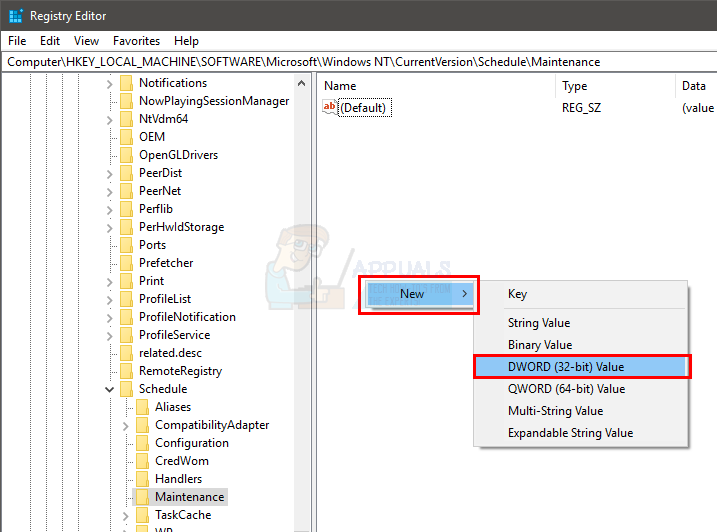
- Locate and select Maintenance from the left pane
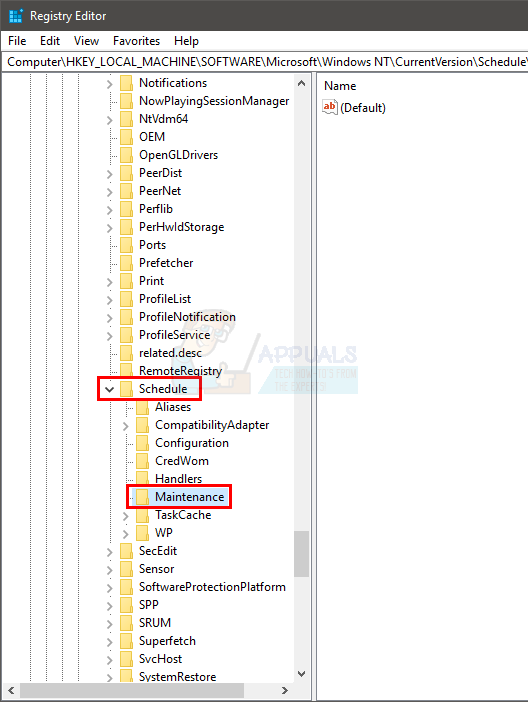
- Look for an entry named MaintenanceDisabled from the right pane. If there isn’t a MaintenanceDisabled entry in the right pane then right click on an empty space (in right pane) -> select New -> select DWORD (32-bit) Value. Name this entry MaintenanceDisabled and press Enter
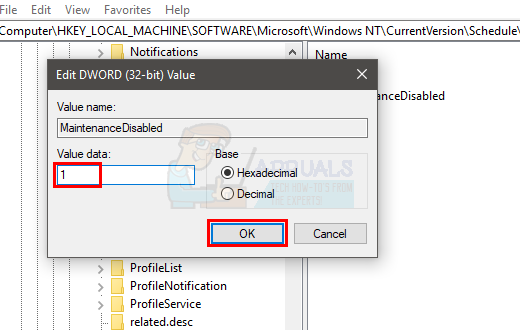
- Now, double click MaintenanceDisabled entry and enter 1 in its value data Click Ok
- Close the registry editor
This should disable the Automatic Maintenance in your Windows. Note that this will also disable the manual starting of system maintenance. If you want to confirm, follow the steps given below
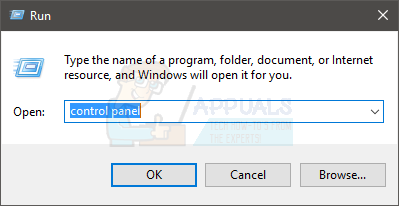
- Hold Windows key and press R
- Type control panel and press Enter
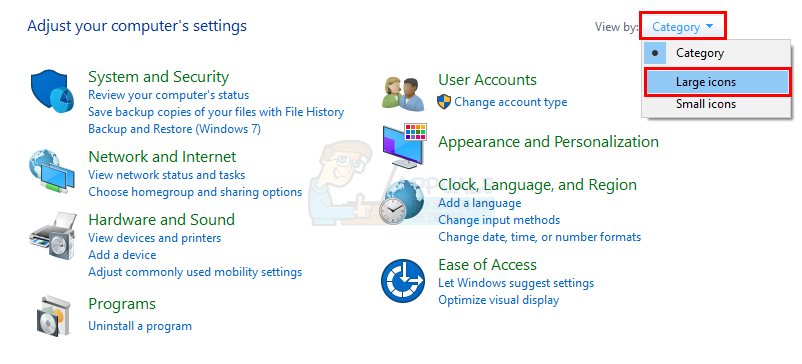
- Select Large icons from the drop down menu in View By section
- Select Security and Maintenance

- Click Maintenance to expand its options

- Click the Start Maintenance button
You will notice that nothing happens when you click Start Maintenance button. The status of your maintenance (shown in front of Automatic Maintenance text) didn’t change. The status can either be Maintenance in progress or No action needed. If the Start Maintenance button isn’t working then that means you have successfully disabled the automatic maintenance.
You can check the status or the “last run date” of the maintenance after a couple of days as well. If the “Last run date” didn’t change then that means the maintenance is disabled.
Note: If you want to enable the Automatic Maintenance then simply repeat all the steps given above and change the value of MaintenanceDisabled to 0 (in step 6)
Method 2: Disable or Delete via Task Scheduling
You can disable (or delete) the automatic maintenance tasks from the task scheduler. Here are the steps for disabling via the task scheduler
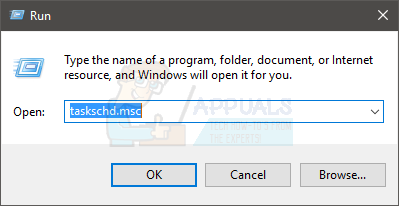
- Hold Windows key and press R
- Type taskschd.msc and press Enter
- Double click Task Scheduler Library from the left pane
- Double click Microsoft from the left pane
- Double click Windows from the left pane
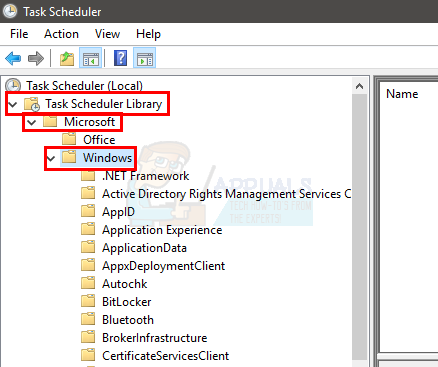
- Locate and double click Task Scheduler from the left pane
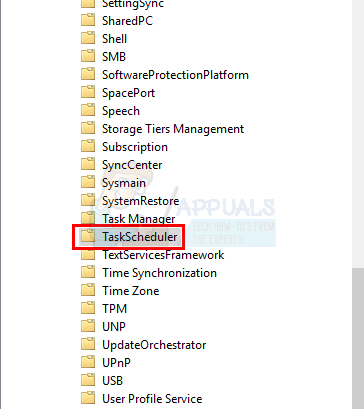
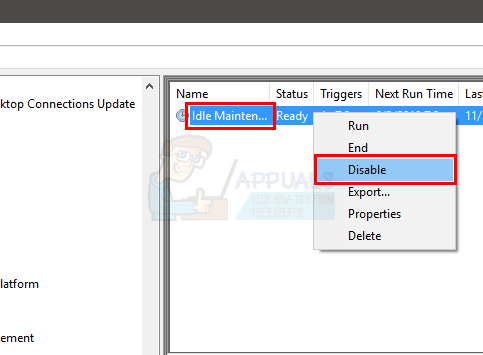
- Locate Idle Maintenance from the right pane. Right click Idle Maintance and select Disable
- Locate Manual Maintance from the right pane. Right click Idle Manual Maintance and select Disable
- Locate Regular Maintance from the right pane. Right click Idle Regular Maintance and select Disable. Note: If you can’t disable it, simply select Delete
- Close the Task Scheduler
Note: For a lot of people, the schedules came back after a restart or after a Windows Update. If it comes back after a Windows Update then you might have to repeat the whole process. On the other hand if the automatic maintenance schedule comes back after a restart then perform the steps given in method 1.