Fix: DX11 feature level 10.0 is required to run the engine
The error “DX11 feature level 10.0 is required to run the engine” appears when the system does not have the appropriate Direct3D Hardware Feature Level required by the game engine. This particular error message is signaling that the application engine is unable to use Direct 3D Feature Level version 10.0.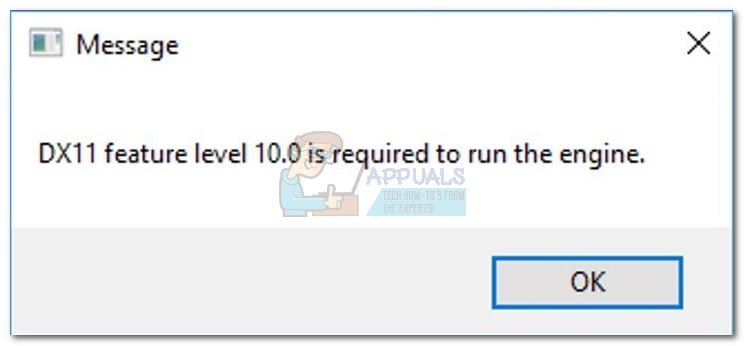 If the operating system has the latest DirectX version, the error is usually a sign that the GPU doesn’t meet the minimum system requirements or is running on outdated driver software. Users will encounter this error when trying to run games and other applications that require extensive graphical processing.
What is DirectX?
DirectX is a collection of application programming interfaces (APIs) developed by Microsoft to handle tasks related to game programming and multimedia on all Microsoft-affiliated platforms. The collection of APIs provides DirectX-compatible programs with hardware-accelerated multimedia support. Among other things, DirectX provides the means for a program (game or other application) to determine your hardware capabilities and adapt its parameters to provide the best experience.
Many of the APIs present in the DirectX subsystem are mandatory and should be regarded as essential to everything from simple video playback to demanding 3D video games.
DirectX Runtime vs Direct3D Hardware Feature Level
A lot of users are confusing the DirectX runtime environment with the Direct3D Hardware Feature Level. The DirectX Runtime describes the DirectX version that OS software can support. On the other hand, the Direct3d Hardware Feature Level describes the support that your video hardware (GPU) provides.
With this in mind, having the latest DirectX runtime environment installed on your PC does not mean that your hardware is capable of supporting Direct3D Hardware Feature Level 10.0. Even if your Windows version is equipped to handle the latest DirectX APIs, your GPU card might not support the required feature levels. This is often the case with older or integrated GPUs.
How to find out if DirectX is installed
If you have Windows 10, DirectX 12.0 Runtime was automatically installed with the operating system (assuming that you have the latest Windows updates). But in order to use the new DirectX APIs, your GPU card needs to support them.
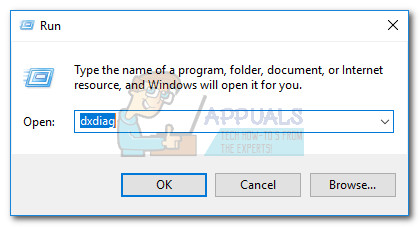
To confirm this and check which DirectX version is supported by your OS, you’ll need to run the DirectX Diagnostic Tool (dxdiag). This built-in Windows tool can be accessed on any Windows version by opening a Run box (Windows key + R) and typing “dxdiag“.
You can view your DirectX runtime version under System Information in the System tab.
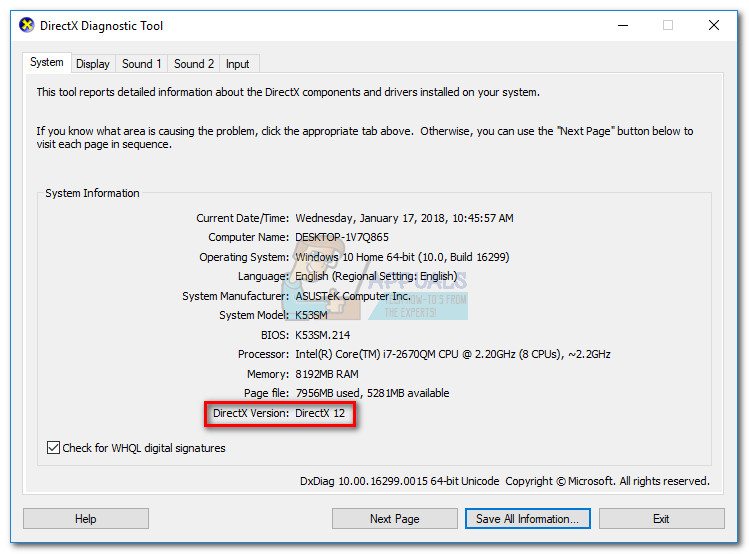
In order to see if your GPU is capable of supporting the required feature levels, go to the Display tab under Drivers and see which Feature Levels are supported by your graphics card.
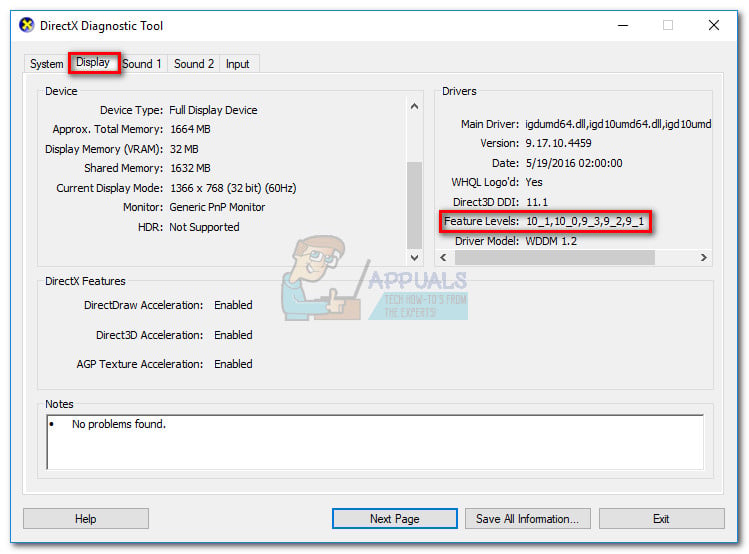
If you find that feature level 10_0 (10.0) is not showing among the Feature Levels entries inside DirectX Diagnostic Tool, it’s one of the following scenarios:
- Your graphics card (GPU) is running with outdated drivers that need to be updated. Unless your system has a driver that instructs the graphics hardware on how to use the respective feature level, it won’t shop up inside the DirectX Diagnostic Tool.
- Your OS requires an additional platform update. Only applicable to Windows 7 and Windows XP users.
- Your graphics card does not support Feature Level 10.0. In this case, the applicable fix would be to buy a new graphics card (GPU).
Keep in mind that DirectX has backward compatibility – if you have DirectX 12, all the previous runtime distributions should be present on your system. The same goes for DirectX 11 and DirectX 10.
However, some legacy games need older DirectX APIs that are since obsolete on Windows 10 and can only be found on DirectX 9.0c or lower. In this case, you will be required to install that particular distribution in order to run the program. Even though the latest DirectX version is 12.0, the vast majority of games still rely heavily on feature levels implemented with DirectX 10 runtime.
Fixing the “DX11 feature level 10.0 is required to run the engine” error
If the DirectX Diagnostic tool revealed that you have DirectX 10 runtime or newer and you GPU supports the required Direct3D feature level, you should have the necessary components to run the application in question. However, if you still get the “DX11 feature level 10.0 is required to run the engine” error despite meeting the requirements, one of the fixes in this article will enable you to fix the error.
Below you have a collection of solutions that users have found helpful in fixing the “DX11 feature level 10.0 is required to run the engine” error. Please follow each method in order until you encounter a fix that works for you.
Note: The methods below are only applicable if you’re certain that your GPU supports Feature Level 10.0. Before trying out any of the fixes, it’s recommended that you do some research on your graphics card specifications to see if it’s capable of supporting Direct3D Feature Level 10.0.
Method 1: Running the application with the dedicated GPU
If you’re seeing the error on a laptop or notebook, chances are you have both a dedicated GPU and an integrated solution. If you have two cards, your system will decide on which GPU card to use by analyzing how many resources are required by the application engine. However, this can be overridden by your battery-saving utility – if it’s set to battery-saving mode, it might force the system to start the program with the integrated GPU since it consumes fewer resources.
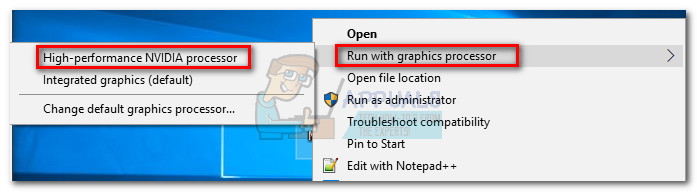
This can be easily remedied by setting the utility to “Performance mode” or by uninstalling the software altogether. But if you don’t wish to uninstall the battery manager, you can force your dedicated GPU by right-clicking on the game shortcut and choosing Run with graphics processor. Then, select your dedicated card and see if it starts without the “DX11 feature level 10.0 is required to run the engine” error.
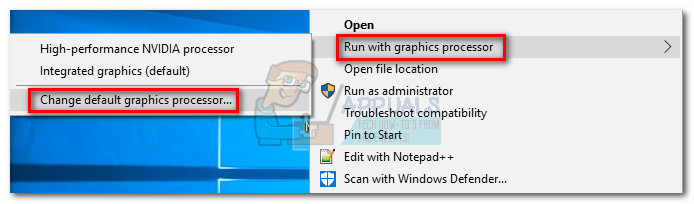
If it starts successfully, you can return to this setting and click on Change default graphics processor to set a permanent rule for the program in your GPUs Control Panel settings.
Method 2: Updating your graphics card driver
The obvious place to start in order to solve the “DX11 feature level 10.0 is required to run the engine” error is to update your graphics card drivers. There are several ways to do so, but the ideal way to do it is dependable on the video card manufacturer.
The newest Windows versions (Windows 10 and Windows 8) should automatically install the software driver needed by your graphics card. But even if your OS automatically downloads and install a driver for your GPU, chances are it’s not the latest version available. Your system might report this error because the GPU doesn’t know how to use Feature Level 10.0 despite having the supporting hardware.
This can be solved by installing the appropriate graphics driver. There is one universal way to do it (regardless of your GPU manufacturer), but it isn’t as reliable as following the manufacturer’s guidelines of installing the driver.
Installing graphics driver via Device Manager
Below you have the steps of updating your graphics driver via Device Manager. It’s a good place to start, but it relies on Windows Update to look for the appropriate driver online. If this method doesn’t update your GPU driver, please follow through with the next guides that are specific to the most popular graphics card manufacturers.
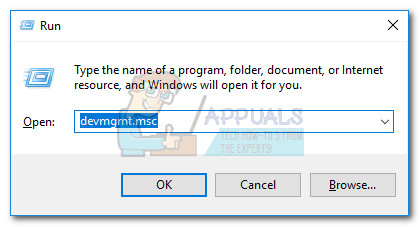
- Press Windows key + R, type “devmgmt.msc” and hit Enter to open Device Manager.
- Scroll down to Display Adapters and expand the drop-down menu. Right-click on the graphics driver and select Update Driver (Update Driver Software).
 Note: You might see two different entries under Display Adapters. This usually occurs with laptops and notebooks that have both an integrated and a dedicated graphics card. As of now, Intel only manufactures integrated cards. Dedicated cards have more processing power and are used to process demanding games and applications – for our purpose, please update the dedicated component.
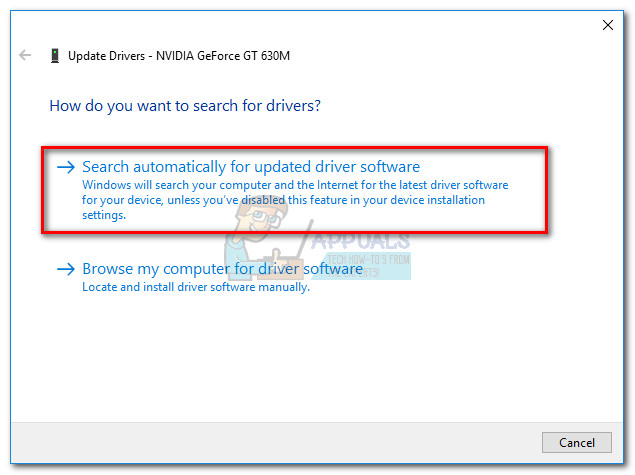
 - Click on Search automatically for updated driver software and wait while Windows scans online for drivers. If it founds a newer driver, wait until it is installed and your system rebooted.
 In the event that Windows determined that you have the latest driver, continue with one of the guides below. If the steps above installed a new driver, see if the error is still occurring when you launch the application. If it does, move to Method 2.
Users with Nvidia graphics cards
If you have a Nvidia GeForce dedicated graphics card, you can update the drivers in two different ways. The most elegant solution would be to download GeForce Experience and let the software automatically identify your GPU and install the appropriate drivers. The program will spare you from having to search manually for the latest driver version.
However, GeForce Experience is known to glitch and not function properly with some motherboard models. If you’re unable to use GeForce Experience, follow the steps below to manually download the latest graphics card driver for your GPU:
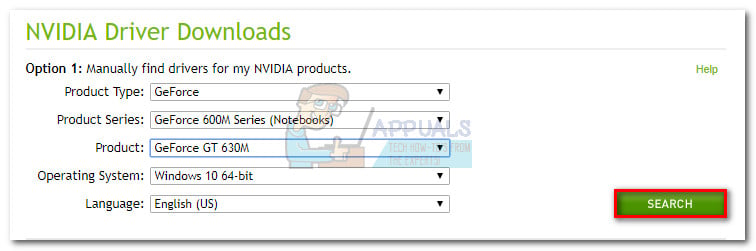
- Visit the official Nvidia download page (here), and choose your Product Type, Product Series, and Product. Make sure to select the appropriate Operating System and hit the Search button.
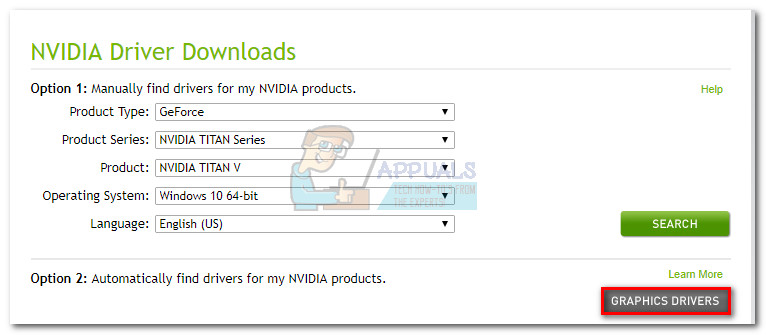
 Note: A quicker method is to go with Option 2 and click on Graphics Drivers. This will automatically scan your system and download the appropriate driver for your GPU. But keep in mind that you might need to download the latest version of Java for this to work.
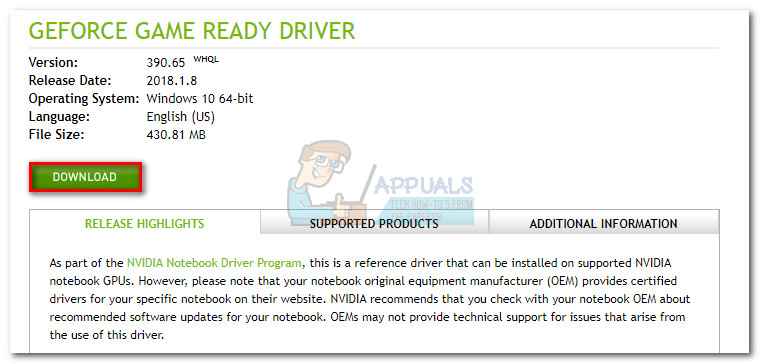
- Download and install the recommended Nvidia driver.
- If the system does not automatically reboot when the installation is complete, restart manually and see whether the issue is resolved.
Users with ATI graphics cards
AMD’s equivalent to GeForce Experience is Gaming Evolved. You can use this AMD utility to automatically update your graphics card drivers. In addition to keeping your system updated with the latest graphics drivers, Gaming Evolved will optimise your games by automatically changing the graphics settings so that you get the best experience based on your system specs.
If you don’t want to install an additional program for this job, you can also download the driver the old-fashioned way. Here’s a quick guide through the whole thing:
- Visit the official AMD download page (here).
- Under Manually Select Your Driver, select the product type, product family, and model. Then, select the appropriate operating system and click on Display Results.
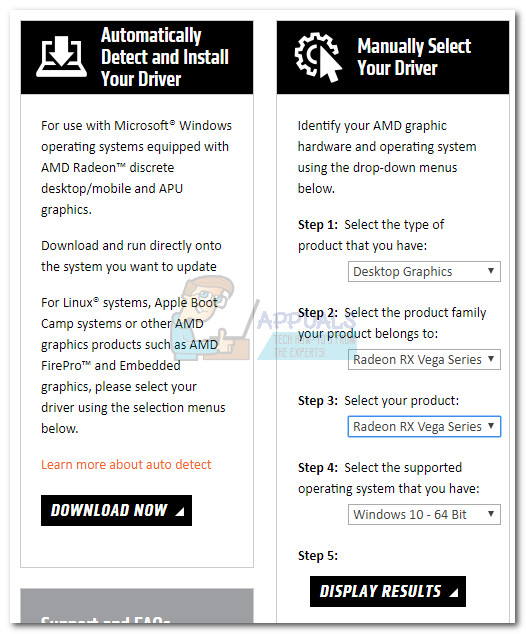 Note: If you’re unsure of your GPU model or want to automate even further, you can also click the Download Now button under Automatically Detect and Install Your Driver. This will install another ATI utility that will scan your system and apply the latest driver.
 - After the driver is installed, reboot your machine and see if the error is removed.
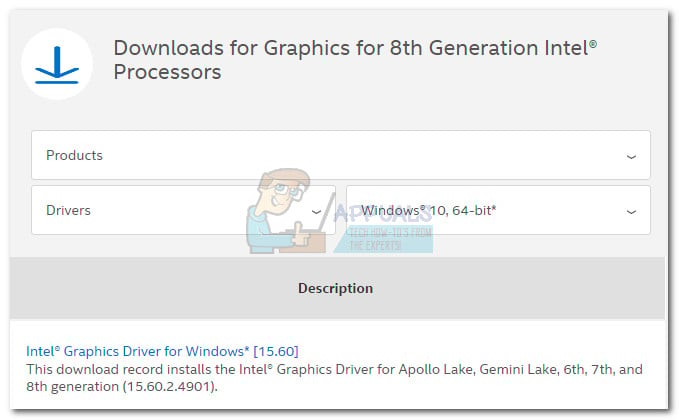
Users with integrated Intel Graphics
Until now, ATI only produced integrated graphics cards. Most of the time, the driver is successfully updated from Device Manager (first guide in this method). However, if you’re unable to update from there, you can download it from Intel’s Download Center (here).
Method 3: Repairing the DirectX runtime environment
The APIs included in the DirectX package rarely break, but it’s known to happen. Unfortunately, you can’t really uninstall the DirectX effectively. DirectX runtime 11.3 and 12 is included with Windows 10 and any updates/repairs are handled by Windows Update. There is no stand-alone package for these versions of DirectX.
However, you can repair all DirectX files (except the ones from DX12) by using DirectX End-User Runtime Web installer and DirectX Redist (June 2010).
Start by downloading the DirectX End-User Runtime Web Installer (here). You’ll need to right-click on the executable and choose Run as administrator to grant elevated privileges. Then follow up with the on-screen prompts to make sure you all your DirectX 9.0c files are intact.

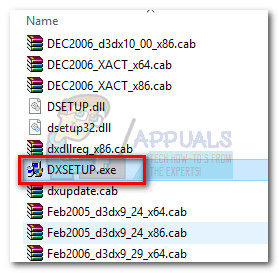
Then, download the DirectX Redist (June 2010) from this link (here). Open the package and extract the DirectX SDK somewhere accessible. Next, go to the extracted files and open the DXSetup executable. Follow the on-screen prompts to re-install the DirectX components.
Once the installation is complete, reboot your system and see if the issue is resolved.
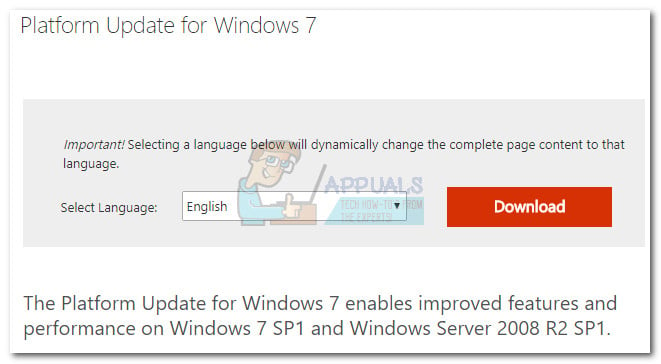
Method 4: Installing the platform update KB2670838 (Windows 7 only)
Unlike Windows 8 and Windows 10, Windows 7 requires an additional platform update (KB2670838) in order to enable DX 11 Feature Level 10.0. It’s labeled as an optional update, so you might have missed it even if you think your WU is up to date.
To see if this is the cause of the error, either apply all pending optional updates or visit this Microsoft link (here) and download the KB2670838 platform update. With the update installed, reboot your computer and see if it resolved the issue.