How to Build Advanced and Professional Looking Forms For Your Wordpress Powered Website
WordPress has provided the world with an incredibly easy and simple for everyone. Making websites of whatever type of content is made a walk in the park through the incredible tool that WordPress is. Although it started out as just a blogging tool, it has since expanded and evolved into one of the most popular and widely used content management system. Due to its ease of use, it is used by even the bigger tech giants. WordPress provides you with various tools and plugins that you can use to make your website look much better. One of them, that is quickly becoming almost a necessity due to the nature of it, is creating forms.
Gravity Forms is one tool that has withstood just about all the challenges thrown at it and proven itself to be a robust form builder plugin. Making advanced forms for your website is an important factor that are essential for the professional image that you’re going for. Getting them done with the aid of Gravity Forms is a great option for a multitude of reasons. All the essential tools in one place, easy to create the forms, in-built conditional logic and easy embedding the forms on to your WordPress powered website. Those who are just starting out or are looking for that extra bit of “omph” in their forms have come to the right place. Today, you’re going to learn how to fully put Gravity Forms to good use and build advanced and professional looking forms for your website.
Installing Gravity Forms
Go to the web page of Gravity Forms here. It has a demo mode as well as three different packages which you can buy. All three of those have yearly based subscriptions and have different add-ons. You can try out the demo mode which you can sign up with the credentials received via email. The demo mode does not have all the functions and add-ons such as mail functions. However, you can install an SMTP plugin to use mail functions and to send notifications. You can look at the different packages as well as sign yourself up for the demo version from the main webpage of Gravity Forms.
If you’re trying out the demo, you’ll be sent to the WordPress dashboard with your login credentials. From there, you can create new forms or customize the already existing ones to get a taste of Gravity Forms.
When you purchase a program, the installation is a little different. In order to get things up and running for a purchased plan:
- Download the provided .zip file and put it in a directory of your choosing.
- Open your WordPress dashboard and navigate to the plugins menu.
- Click on Add New to be taken to an installation page.
- Browse and navigate to the downloaded .zip file and Gravity Forms will be installed.
Creating a new form
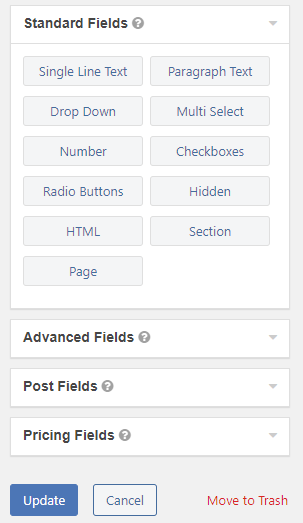
Once you’ve gone through the process of creating a new form, Gravity Forms will open up a window where all the fields that are available will be on the right side. The center space is your working field where you can select the fields from the left menu.
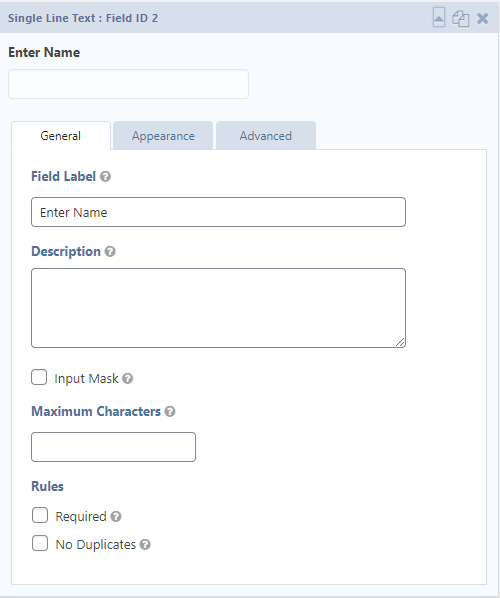
Once you’ve selected the field that you want in your form, you can then edit its properties and change the characteristics. The name of the field, how the field will look and more can be changed here. You simply need to click on the chosen field to have these options be displayed.
There are many different options that you can work with here. From simple fields to names, addresses, phone numbers and even passwords. Gravity Forms provides all the necessary tools at your disposal. The more common entries are already set out and you can simply have them on your form with one click.
However, additional fields can be customized and entered based on what you want the form to contain.
Gravity Forms has immense uses and provides you with all the options you could possibly ask for. Asking for payments directly onto your PayPal account and much more. As a result of that, Gravity Forms is ideal for not just a contact-based form but for other stuff such as registrations as well. At the end, you can add a captcha code to prevent any automated and spam entries as well as write a disclaimer note.
Once everything is done, make sure to click the “Update” button to save your progress.
Exporting Gravity Forms entries to Excel .csv file
Another highly useful thing that Gravity Forms lets you do is directly import the filled out entries on your WordPress site to an Excel file in the form of a .csv file. For keeping records, this can come in handy and you can get this done in just a matter of minutes.
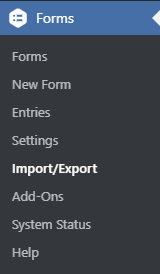
- The first thing that you’ll want to do to get started is to click on the “Import/Export” button from the WordPress tab on the right side.
- Your page will be navigated and you’ll see a dropdown menu through which you can select the form that you want to export.
- You will see all the entries that are in the form that you have selected. Check all the ones that you want to have stored in the Excel file.
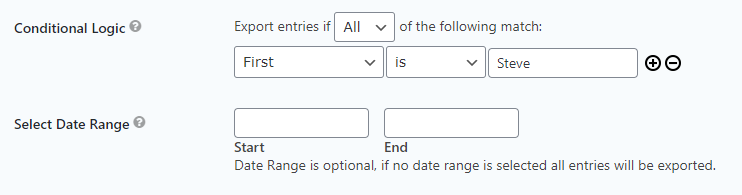
- You can also add conditional logics as well as a start to end date for the range of entries that you want to extract. Conditional logic lets you extract data by putting filters so you only have the entries that are relevant to what you want. For example, for a job application form, I can extract all the entries of candidates with “Steve” as their first name.
Verdict
Gravity Forms is an incredibly useful tool that you can use in just a matter of minutes to create professional and advanced forms for your website. It is a simple and easy to install plugin for WordPress powered websites. Using Gravity Forms, you can portray the right image for your website and have the forms be done in a quick and professional manner.