FIX: Windows Detected a Hard Disk Problem
Windows (and almost all of the Hard Disk Drives available in the market today) have a number of different HDD diagnostic tools in place that scan for and inform the user of any issues with their Hard Disk Drive. One such tool is designed to make sure that there are no problems with a Hard Disk Drive that may put it at risk of failing. If this tool detects any issues that may cause imminent Hard Disk Drive failure, it projects a warning message stating “Windows detected a hard disk problem” every time the computer in question boots up.
The message goes on to instruct the user to back up any and all important data stored on the Hard Disk Drive and then contact their computer’s manufacturer to determine if the drive needs to be repaired or replaced. While this message can be dismissed by clicking on Ask me again later or simply closing the warning altogether, the warning pops back up every time the computer is started up. Also, in some cases, no matter how many times this warning is dismissed, it pops back up every 5-10 minutes or so.
Unfortunately, the problem with this Windows Disk Diagnostic tool is that, in many cases, it becomes affected by a kind of phantom HDD problem syndrome and keeps projecting “Windows detected a hard disk problem” warning messages even though the HDD of the computer in question is perfectly healthy and won’t be failing any time soon. However, if the warnings that the diagnostic tool is projecting turn out to be legitimate and there actually is a threat of imminent HDD failure, you’d better take the warning messages seriously. This can be really confusing as even if the warning messages are legitimate and there is a looming threat, the affected computer will continue to function as it normally would until its HDD actually fails.
The trick to getting rid of the “Windows detected a hard disk problem” warning messages is determining whether or not they have some truth to them and whether or not the affected computer’s HDD is actually on track to imminent failure. Thankfully, you can determine if there are any issues or problems with a Hard Disk Drive by simply running a series of tests on it, but before you do so, treat the warning messages seriously and make sure that you back up any and all valuable data on the affected HDD. The following are the four tests that you should run in order to determine whether or not there are any issues with the affected HDD and whether or not it is healthy:
Test 1: Run an SFC Scan
Follow steps here to run the test.
Test 2: Scan your computer for viruses
Go here and download a free 30-day trial version of Kaspersky Anti-Virus. You can also use other antivirus programs (such as those offered by BitDefender and McAfee) as alternatives.
Install and run the antivirus software.
Run a full system-wide scan for viruses and other malicious elements using the antivirus program.
If any viruses, malware or other threats are detected by the program, get rid of them. If the program does not report any issues, move onto the next test.
Test 3: Run CHKDSK on all partitions of the HDD and attempt to fix found issues
Press Windows Logo key + E to open Windows Explorer. If you are not already there, navigate to the Computer. Right-click on any one partition of the HDD affected by the issue. Click on Properties. Navigate to the Tools Click on Check now under the Error-checking.
Enable the Automatically fix file system errors and Scan for and attempt recovery or bad sectors options by checking the boxes beside them and click on Start to begin the process. Clicking on Start will trigger the CHKDSK utility and it will start scanning the selected partition of the HDD for issues such as file system errors and bad sectors. The utility will also try to fix any issues that are found and will inform you of any that it wasn’t able to fix.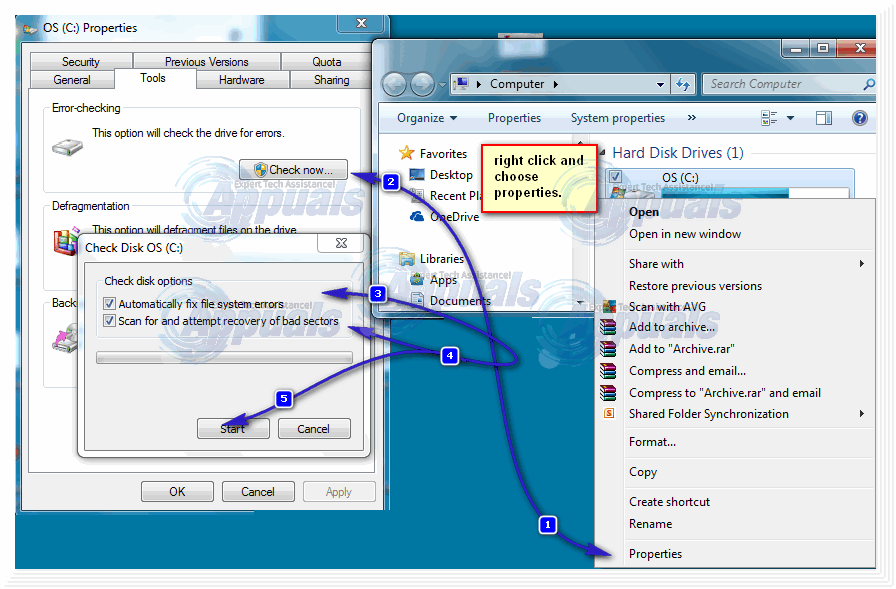
Repeat the same process again and again, every time with a different partition of the HDD affected by the problem. Remember to run CHKDSK on the partition that has an Operating System installed last because when you run the utility on it, you will be asked to restart the computer to allow the CHKDSK process to be completed entirely.
If this test also yields no problems or issues that it could not manage to fix, perform the next test on the HDD affected by this issue.
Test 4: Run a short and long diagnostic test on the HDD using SeaTools
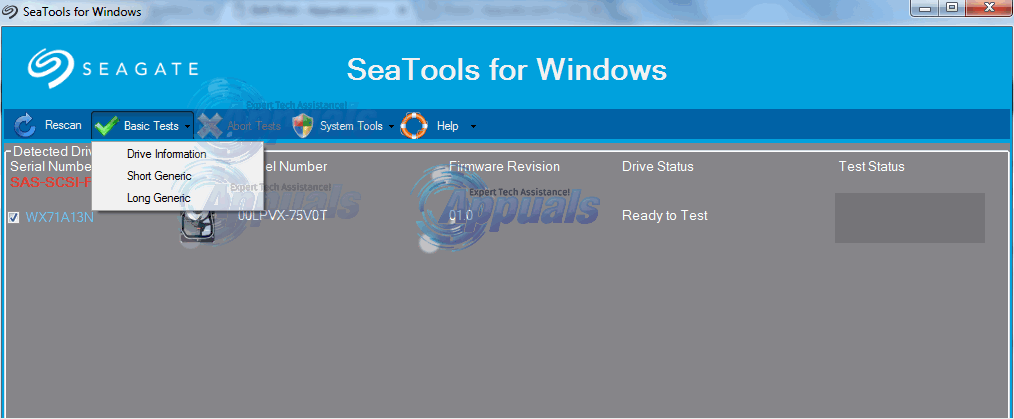
Go here and download SeaTools for Windows. SeaTools for Windows is an HDD diagnostic utility designed by none other than veteran HDD manufacturer Seagate. SeaTools for Windows is capable of running diagnostic tests on Hard Disk Drives of all brands and manufacturers and determine whether or not they are completely healthy.
Once you have downloaded SeaTools for Windows, browse to the directory where you saved it, run it on your computer and run both a short and long diagnostic test on the affected HDD. Running both of these tests may take some time, but doing so will be able to definitively determine, once and for all, whether or not there are any problems with the drive in question. A guide for using SeaTools for Windows can be found on its download page. All you need to do in order to access it is click on SeaTools for Windows guide in the Software & App Support section.
If even one of the four tests listed and described above come up with any HDD issues or problems or malware or viruses and was not able to fix them, there is a more than decent chance that the “Windows detected a hard disk problem” error messages are legit. If that’s the case, you should acquire a new HDD and replace your old one with it as soon as you possibly can, preferably before the old one gives in and fails.
However, if none of the four tests listed above turn up any issues, problems or virus or malware infections, the HDD in question is probably completely healthy and the cause of the “Windows detected a hard disk problem” error messages is the diagnostic tool responsible for them going haywire and detecting hard disk problems when there are none. If that is the case, your course of action should be to simply get rid of the annoying “Windows detected a hard disk problem” warning messages that keep popping up. The following are the two methods that you can use to do so:
Method 1: Disable the diagnostic tool through the Local Group Policy Editor
The Local Group Policy Editor is a tool available on most versions of the Windows Operating System – save for any version prior to Windows Vista and a couple of versions of Windows Vista and Windows 7 – that allows users to view and edit local group policies. This tool can be used to disable the diagnostic tool responsible for the “Windows detected a hard disk problem” warning messages, and to do so, you need to:
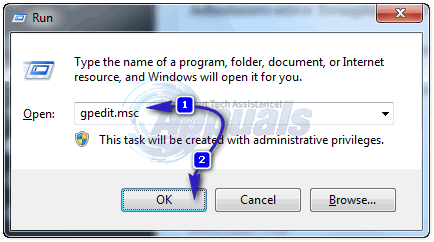
Press Windows Logo key + R to open a Run. Type gpedit.msc into the Run dialog and press Enter.
In the Local Group Policy Editor, navigate to the following directory:
Administrative Templates > System > Troubleshooting and Diagnostics > Disk Diagnostics
Double-click on Disk Diagnostic: Configure execution level in the right pane of the window.
Set Disk Diagnostic: Configure execution level to Disabled.
Click on Apply.
Click on OK.
Restart your computer, and the warning message will no longer appear when your computer boots up. Instead of the diagnostic tool warning you of any HDD issues and problems that it finds, it will simply write them to the computer’s log.
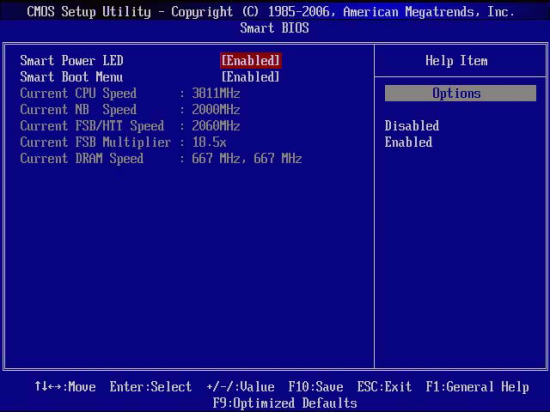
Method 2: Turn SMART off in BIOS
If you are using a version of the Windows OS that doesn’t have the Local Group Policy Editor or if you don’t want to mess with any group policies, you can use this method. SMART is the technology responsible for detecting the errors and issues that lead to the “Windows detected a hard disk problem” warning messages popping up, so turning it off in BIOS will effectively get rid of the warning messages. However, you should understand that turning off SMART will also disable other SMART attributes such as HDD temperature monitoring.
To turn off SMART, all you need to do is restart your computer and, on the first screen that you see, press the key that will allow you to access your computer BIOS settings. This key depends on the manufacturer of your computer’s motherboard and will be listed in your computer’s user manual and also on the first screen you see when your computer boots up. Once you are in the BIOS, scroll through the various tabs looking for SMART. Once you find SMART and see that it is enabled, simply disable it, save the change and exit the BIOS.
Note: Some computers do not have the option to disable SMART through BIOS settings. If that is the case with your computer, you will not be able to get rid of the warning messages using this method.