How to Fix Photos App Crashing on Windows 10/11?
Microsoft Windows built-in photos app might be crashing for several reasons. Outdated windows and corrupt installation files are prominent causes of this issue. Before jumping straight into the solution bit, take a glance over the causes of this issue in detail.

After a thorough investigation of the issue at hand, we have gathered the below-mentioned factors to be the chief culprits for us facing this error with the photos app/ video editor
- Outdated Windows Version- It is possible that your windows version is outdated and unstable. Microsoft releases new updates that solve the previously discovered bugs now and then.
- Damaged Application files- Another possibility of facing this issue can be a corrupt application. This can be easily fixed by reinstalling the photos app or using the windows utility tool to repair the application.
- Outdated Photos app- It is likely that the version of the Photos app installed on your computer is outdated or unstable. This can easily be dealt with by installing the newest updated photos app.
- Corrupt Windows System files- Another general cause of applications not functioning properly is corrupt windows system files. It can easily be identified by running an SFC scan.
1. Update Photos App
It is possible that the version of the Photos application installed on your computer is outdated and possibly a version that is buggy. You can easily update the photos app, Follow these steps to do so:
- Press the Windows key to open the start menu and in the start menu search bar, search for Microsoft store.`
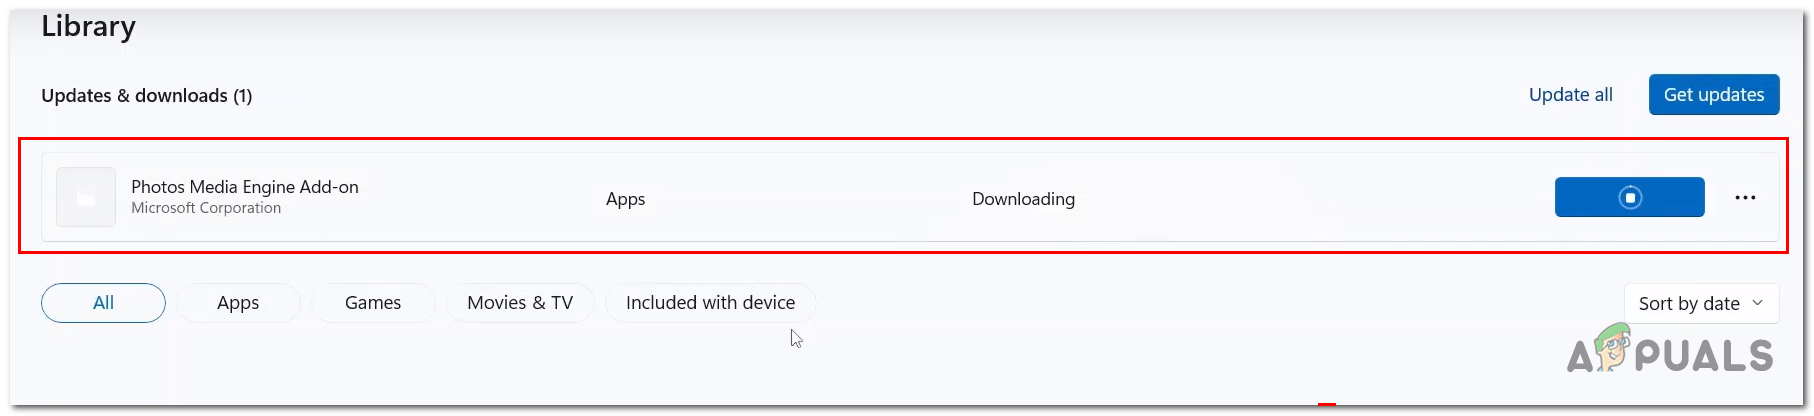
- Open the Microsoft Store and in the bottom-left of your screen, Click on Library.

Updating photos app - Now, Click on Get Updates and wait for a while.
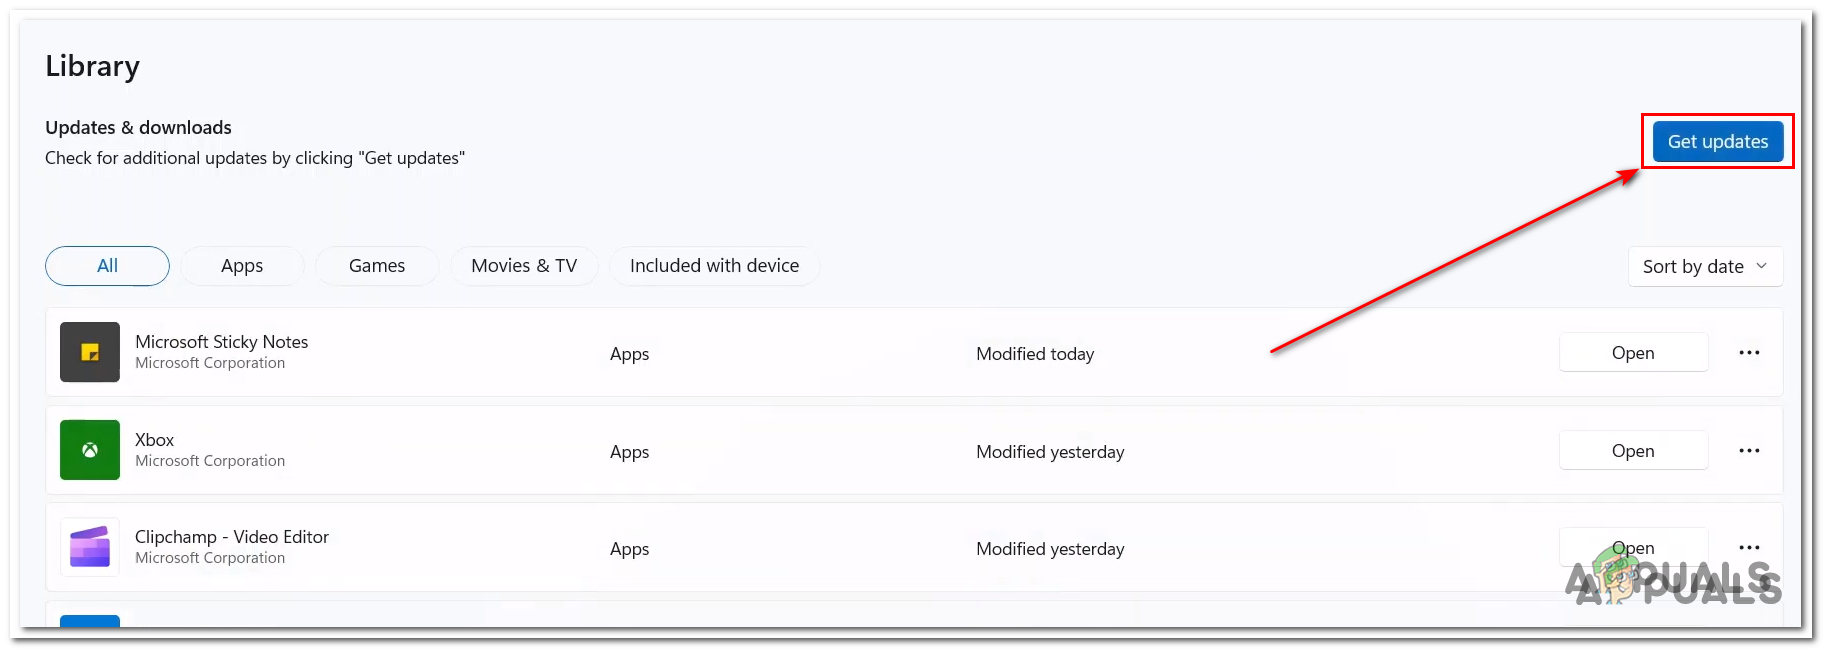
Updating photos app - Install any available updates, and open Photos App.
If the issue presumes, continue to the next step.
2. Run the Windows Application troubleshooter
Windows comes equipped with a utility tool that helps users in similar cases, Windows application troubleshooter will automatically identify and fix the issue. Follow these steps to run the windows application troubleshooter.
2.1 Windows Application troubleshooter on Windows 11
If you’re a Windows 11 user, follow these steps to run the windows application troubleshooter on your computer:
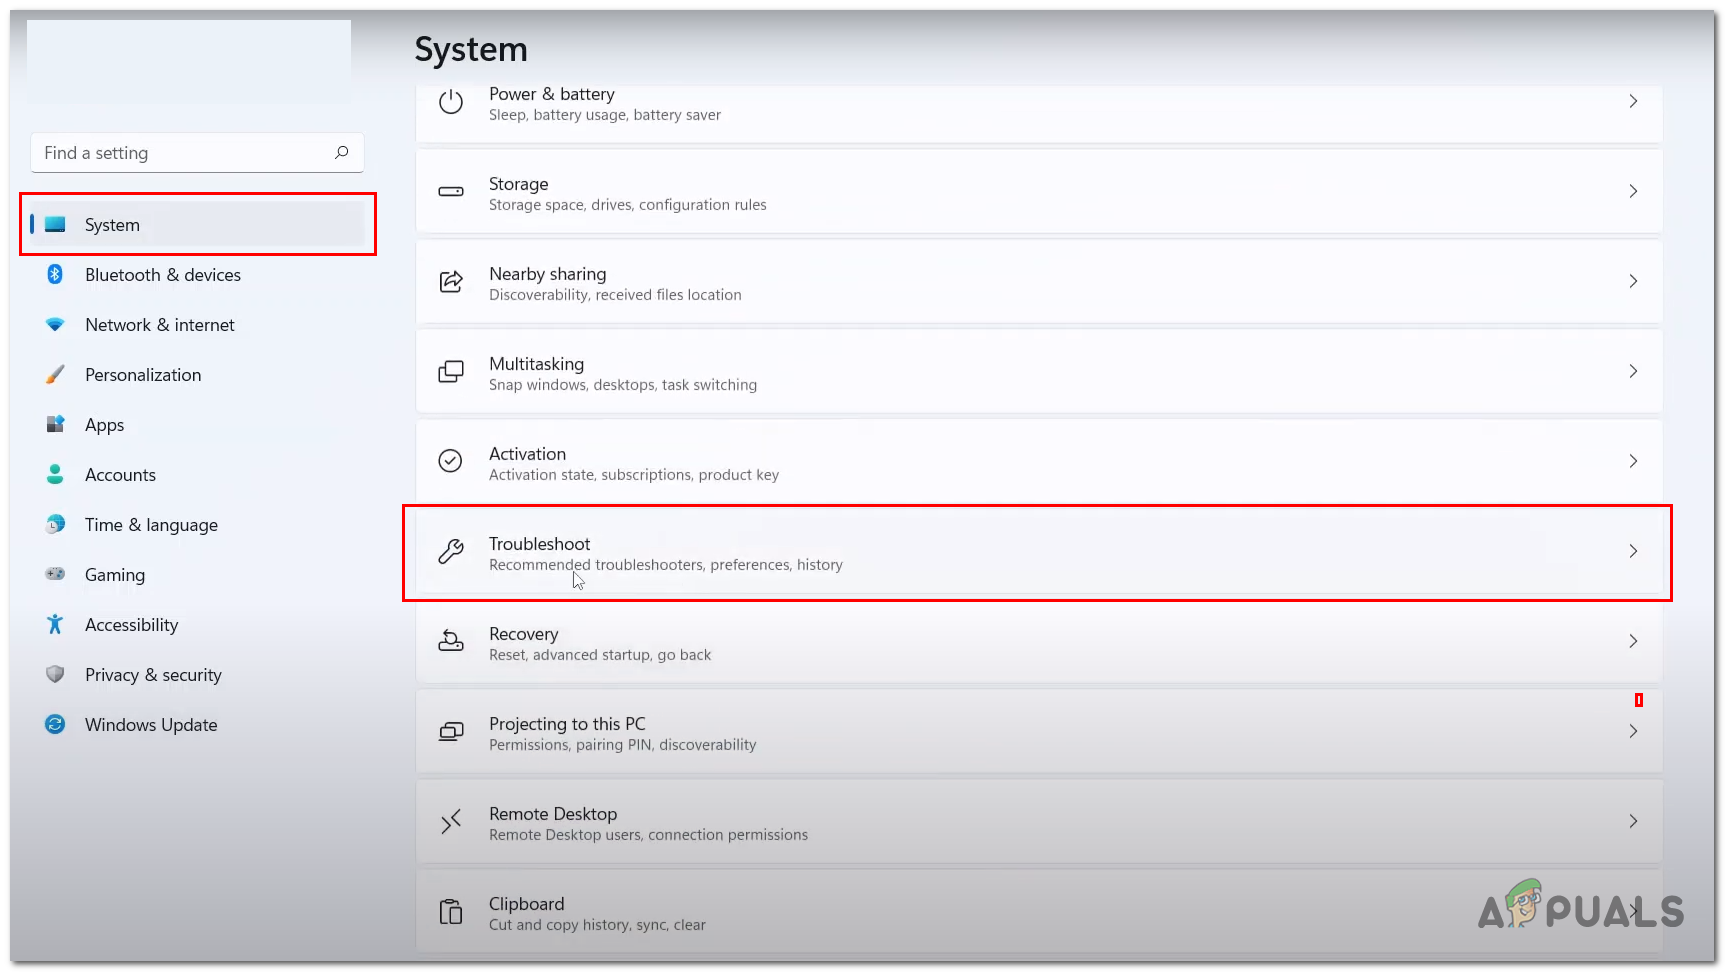
- Press the Windows key to open the start menu and click on settings or alternatively on your desktop, Press the Windows + I key to open settings.
- In the menu situated on the left side of the screen, click on System.
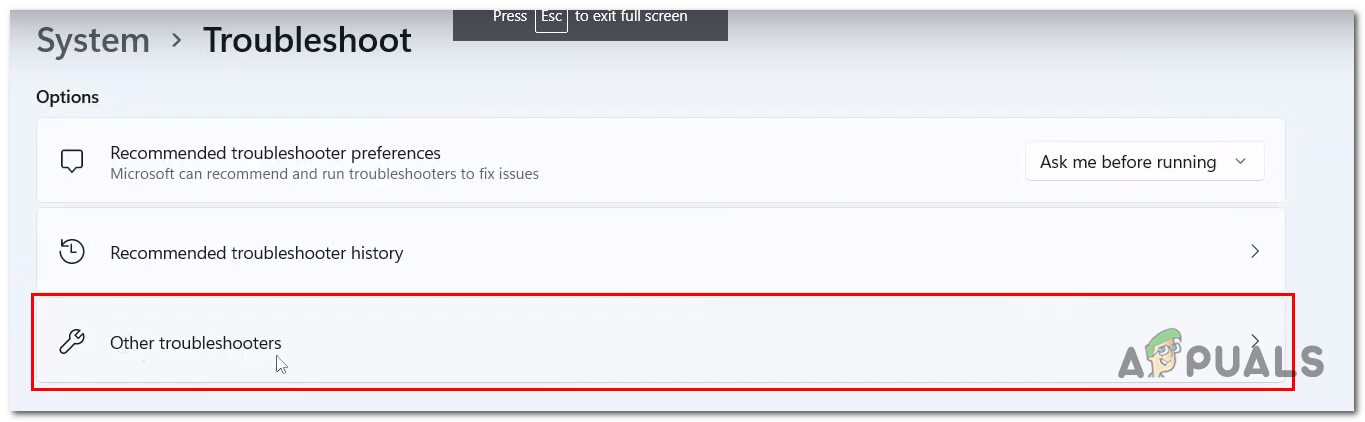
- Scroll down, and click on Troubleshoot.
Running the windows application troubleshooter - Click on Other Troubleshooters.
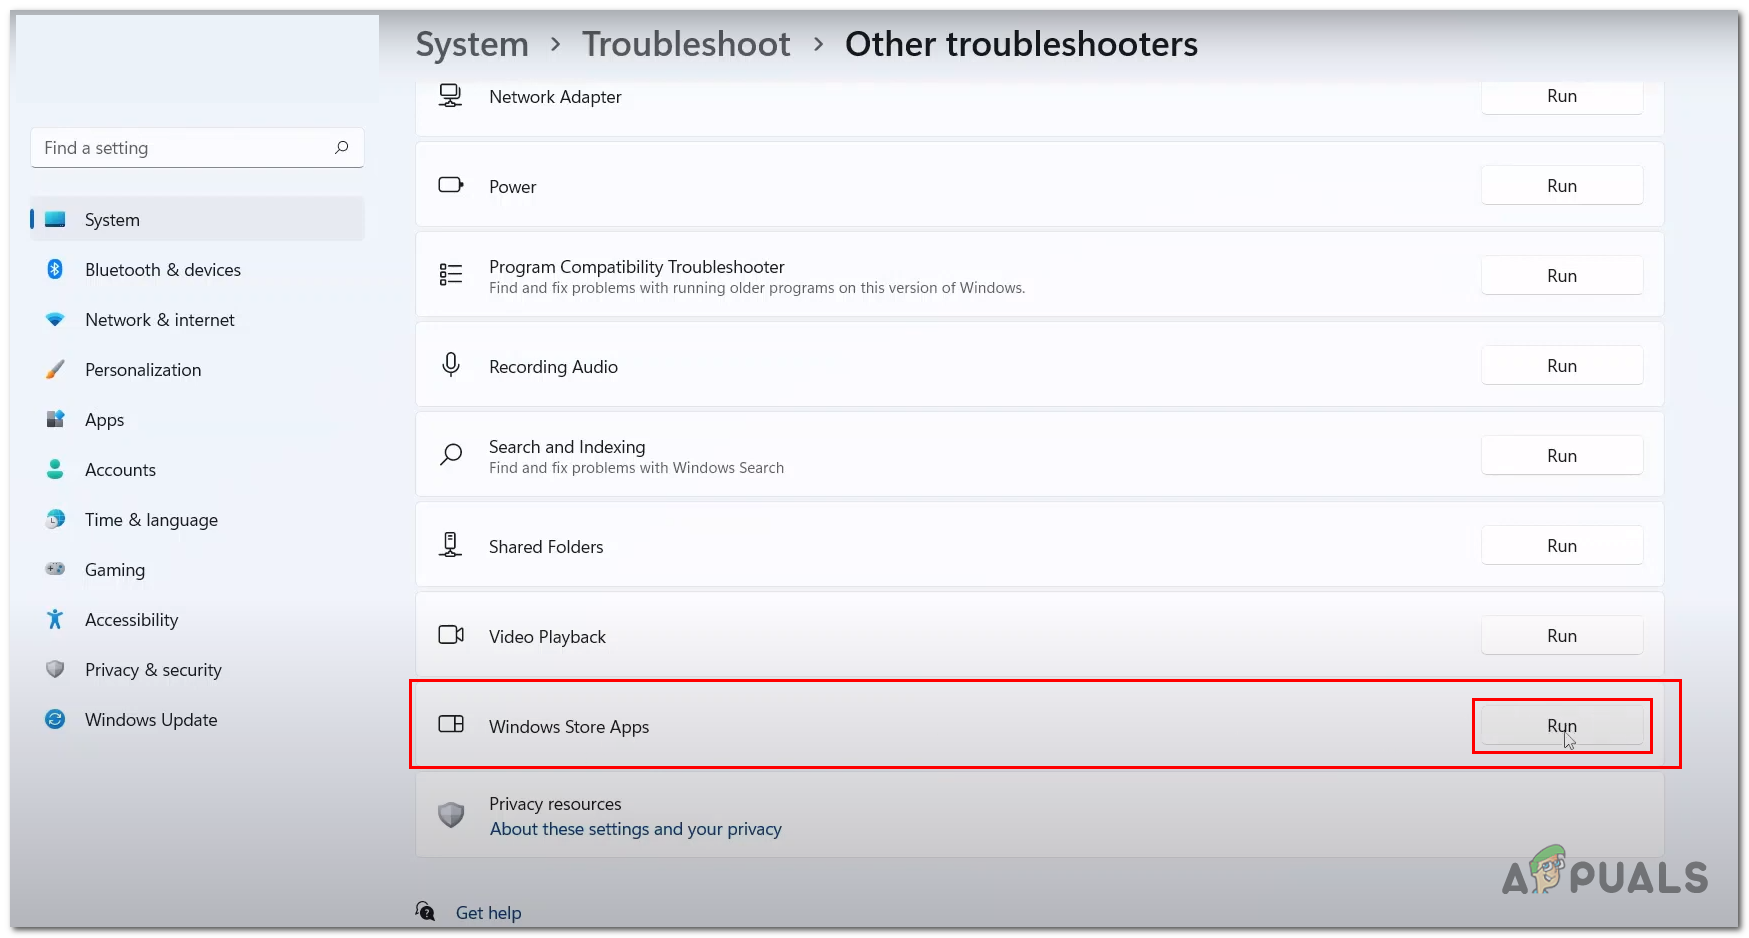
Running the windows application troubleshooter - Now, Scroll down and click on the Run button inside the Windows apps box as shown in the image below.
Running the windows application troubleshooter - Wait for a while until it finishes processing.
2.2 Windows Application troubleshooter on Windows 10
If you’re a user of Microsoft Windows 10, follow these straightforward steps to run the windows application troubleshooter:
- Press the Windows key to open the start menu and open settings by clicking on the settings icon or alternatively on your desktop, press the Windows + I key to open the windows settings.
- Click on Update and security.

Running the windows application troubleshooter - In the menu situated on the left side of your screen, click on Troubleshoot.
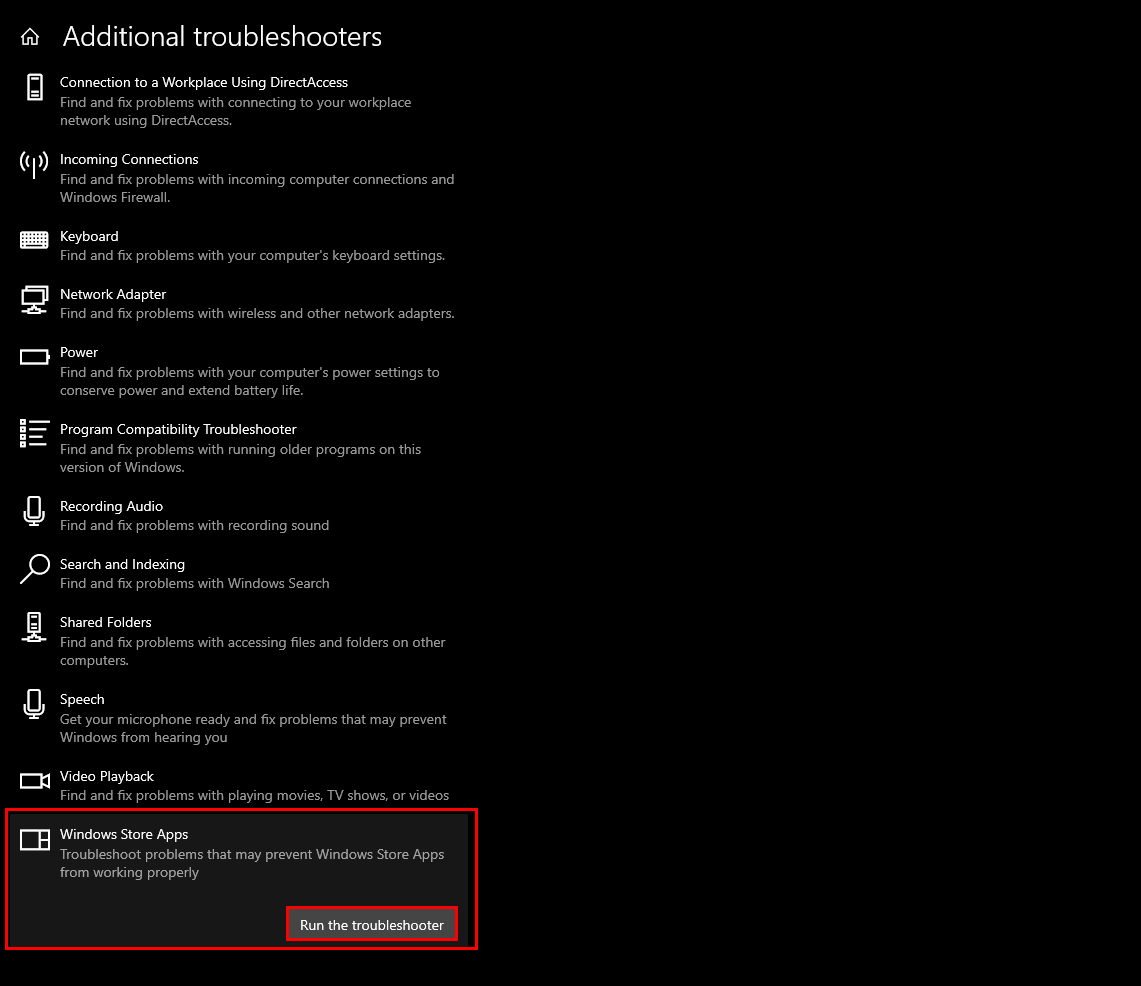
- Click on Additional Troubleshooters.

Running the windows application troubleshooter - Scroll down, Click on Windows Store Apps
- Now, Click on Run Troubleshooter.
Running the windows application troubleshooter - Wait for a while until it finishes processing.
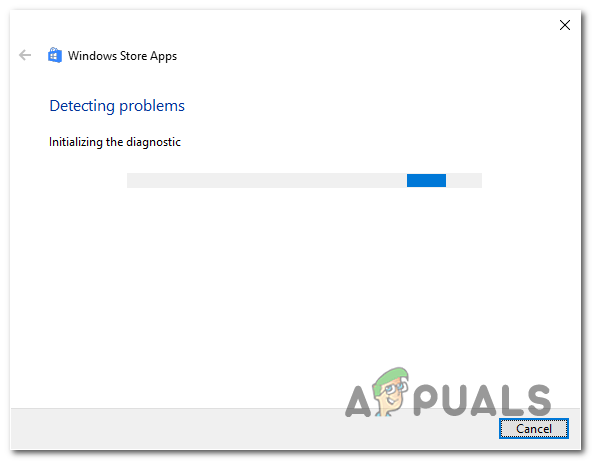
Running the windows application troubleshooter
Once it has finished processing, try launching the photos app to check. If the issue presumes, continue to the next step.
3. Reset and Repair Photos Application
Another common fix to this issue can be resetting or repairing the application using windows provided utility. Resetting will delete any custom changes and reset the app to default settings and repairing will check the application’s root file and verify for files integrity. Follow these steps to reset and repair the windows photos application:
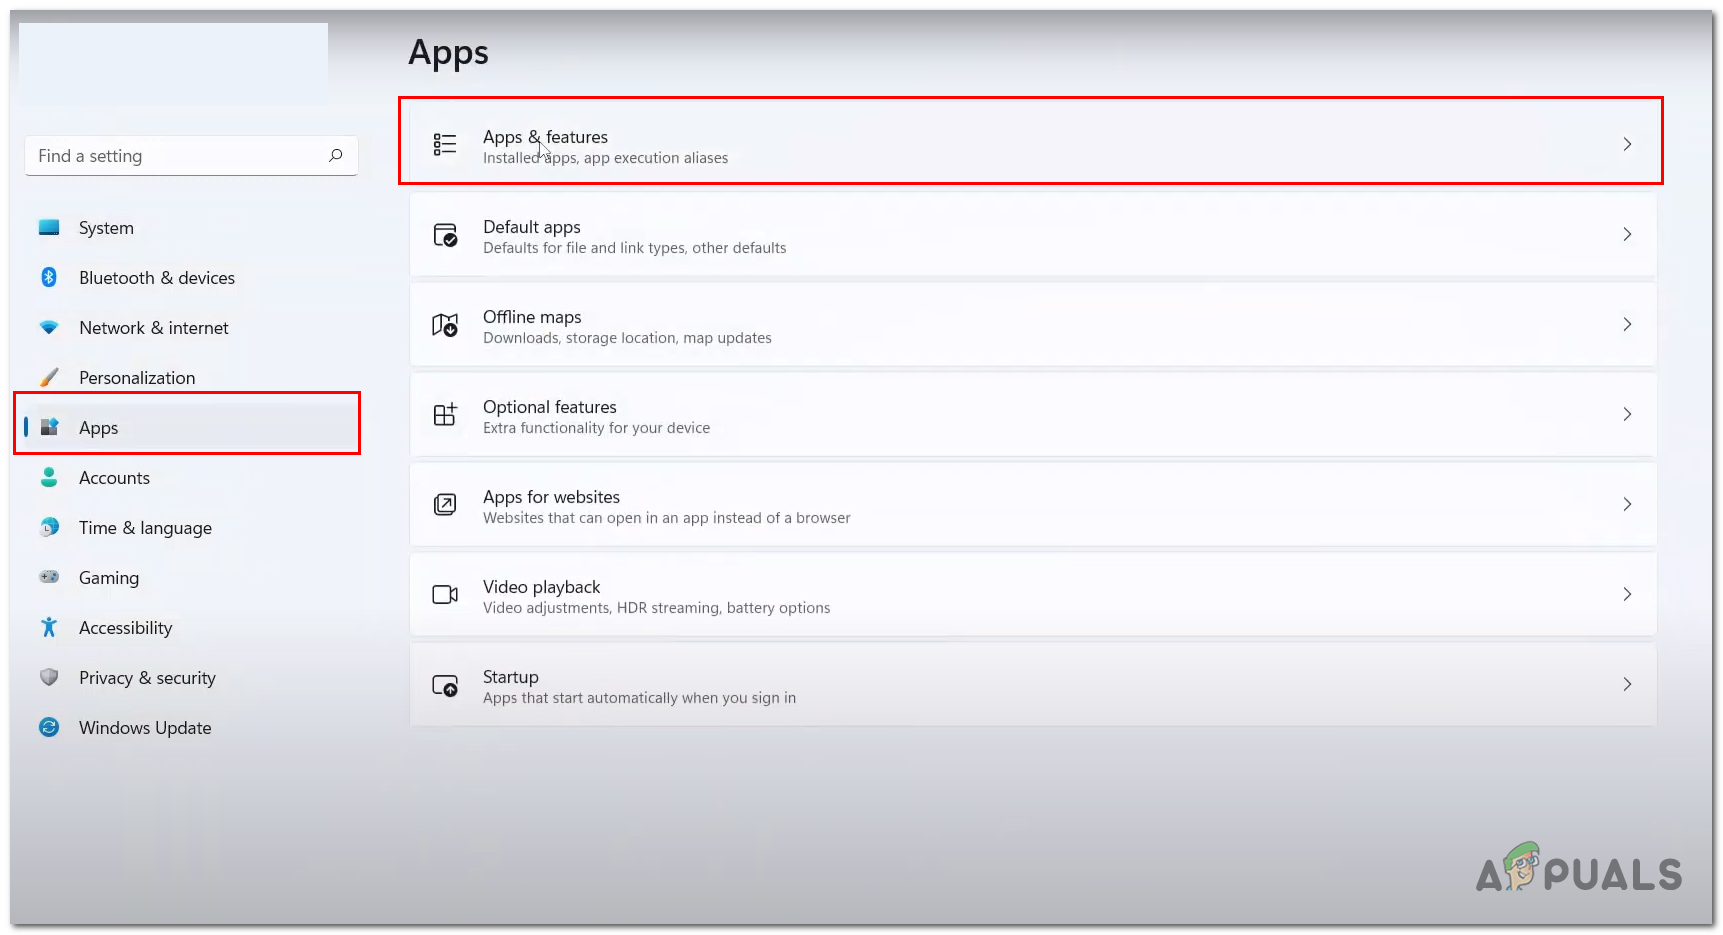
- Press the Windows key to open the start menu and click on the settings icon or alternatively press the Windows + I keys simultaneously to open the settings.
- In the menu situated on the left side of the screen, Click on Apps.
- Now, Click on Apps & Feature.
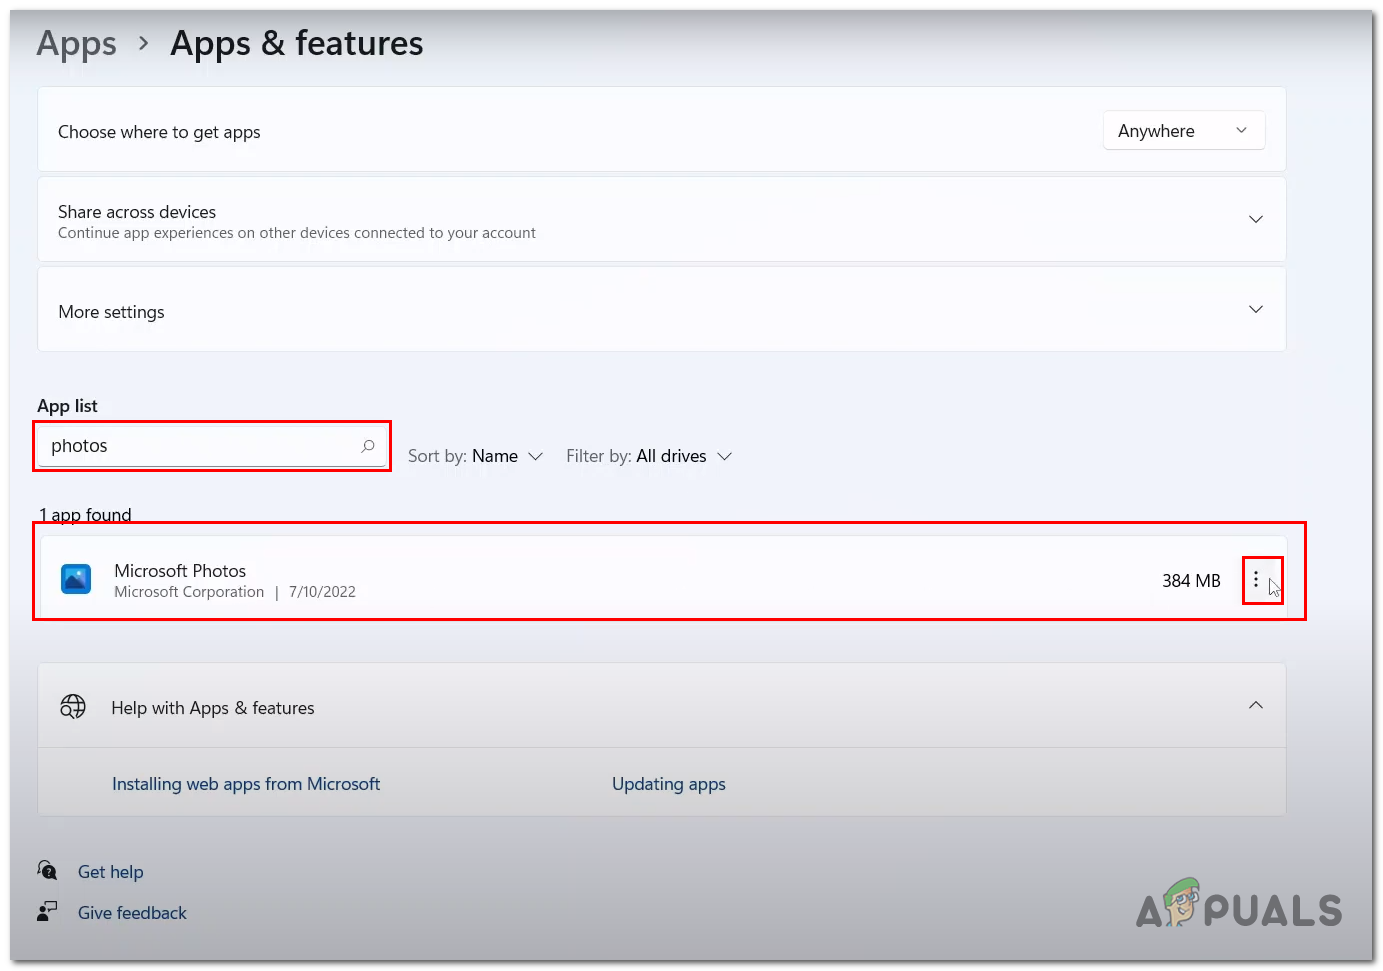
Repairing and resetting the windows photos application - Inside the apps & features windows, type Photos in the search bar as shown in the image.
- Click on the three dots situated inside the Photos box and click on Advanced Options.
Repairing and resetting the windows photos application - Scroll down, and click on the Repair button.
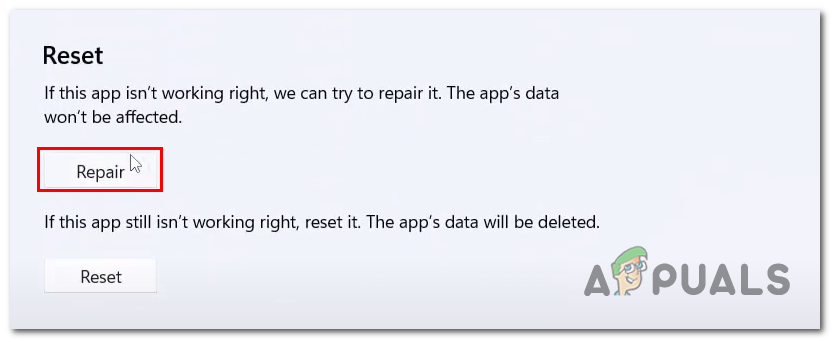
Repairing and resetting the windows photos application - Once it is done processing, open the photos app to check if the issue is fixed, if not continue.
- Click on the Reset button.

Repairing and resetting the windows photos application
Once done processing, try relaunching the photos application. If the issue presumes continue to the next step.
4. Uninstall and Reinstall the Photos application
You can try uninstalling and reinstalling the photos application, doing so has fixed the error for multiple people facing the same issues with their photos applications. Follow these steps to uninstall and reinstall the photos application:
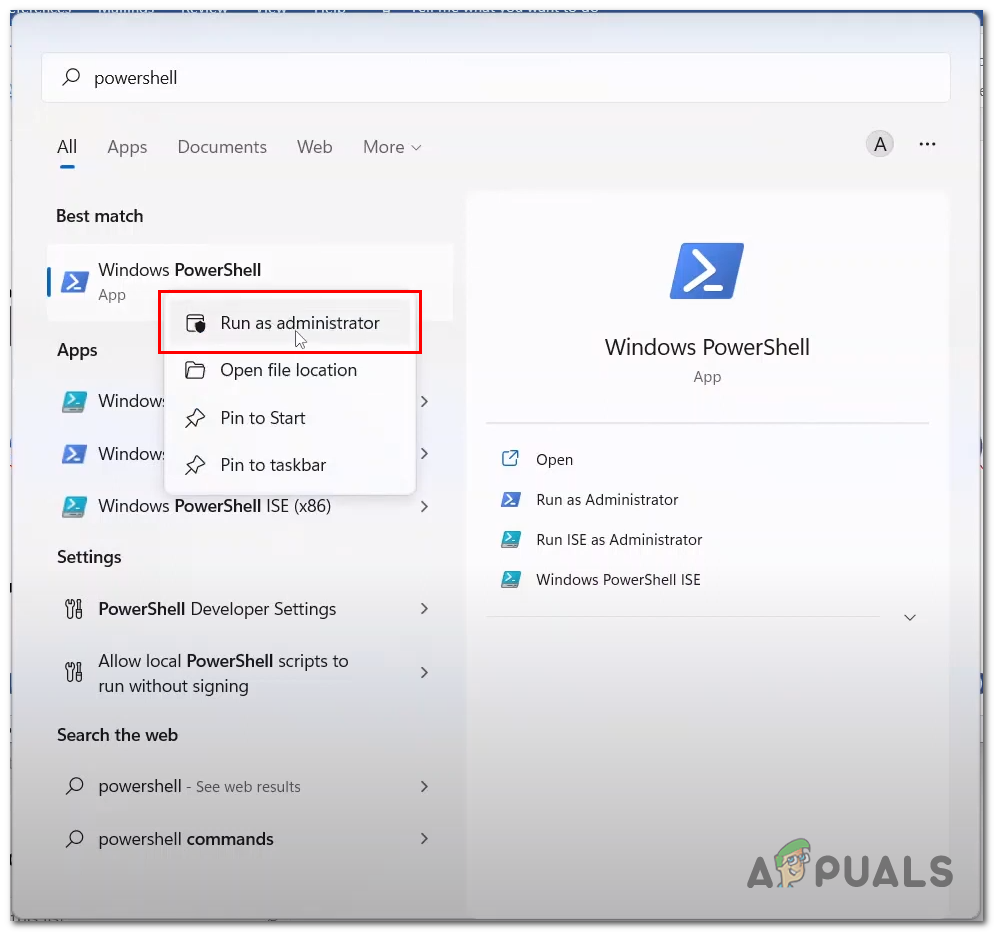
- Press the Windows key to open the start menu and in the start menu search bar type Powershell, Right-click on it and click on Run as an Administrator.
Uninstalling the photos application - Paste the Following command inside of the PowerShell command terminal to uninstall the windows photos application
get-appxpackage Microsoft.Windows.Photos | remove-appxpackage
- Restart your computer.
- Once rebooted, Open Powershell as an administrator again.
- Paste the following command inside of the PowerShell command terminal to install the windows photos application,
Get-AppxPackage -allusers Microsoft.Windows.Photos | Foreach {Add-AppxPackage -DisableDevelopmentMode -Register “$($_.InstallLocation)\AppXManifest.xml”} - Once installed, Open the Microsoft store.
- Click on Library and click on Get Updates.
- Update if any are available, try launching the photos application.
updating the photos application
Try launching the photos application to check if the issue has been fixed. If the issue presumes, continue to the next step.
5. Run an SFC and DISM scan
An SFC scan or a System File checker is a windows utility tool that is used to scan all system files and replace them from the cache whereas in DISM it scans protected system files and replaced them by mirroring files from Microsoft’s catalogue. Follow these steps to run an SFC and DISM scan.
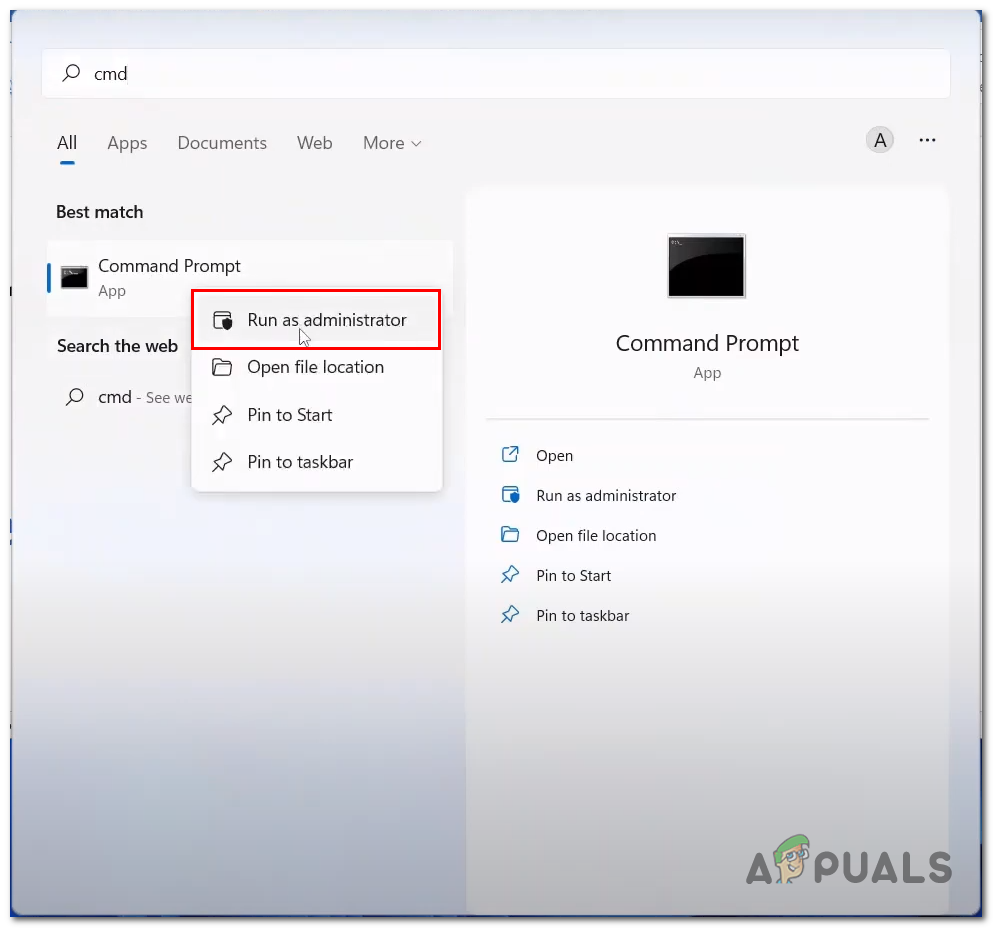
- Press the Windows key to open the start menu and in the start menu search box search for Command prompt.
- Run Command prompt as an administrator.
Run an SFC and DISM scan - Paste in the following command to Run an SFC scan
sfc /scannow
- Now, Paste in the following command to run a DISM scan.
dism.exe /Online /Cleanup-image /Restorehealth
- Restart your computer.
Once restarted, check if the issue has been resolved or not. If the issue presumes, continue to the next step.
6. Repair Photos Application Package using PowerShell
Repairing the photos app package might fix our issue as preparing the application package will fix minor glitches inside of it that may help us to solve our issue. Follow these steps to repair the photos application using PowerShell:
- Press the Windows key to open the start menu and in the search bar type PowerShell
- Right-click on Powershell and click on Run as an administrator.
- Now, Paste in the following command and hit enter.
Get-AppXPackage -AllUsers | Foreach {Add-AppxPackage -DisableDevelopmentMode -Register “$($_.InstallLocation)\AppXManifest.xml - Wait for a while until it finishes processing.
Once processing finishes, retry the photo application. If the error presumes, continue to the next step.
7. Update Windows Using Windows Media Creation Tool
Updating your windows using the windows media creation tool might help you fix this error, follow these steps to update your windows to the latest version:
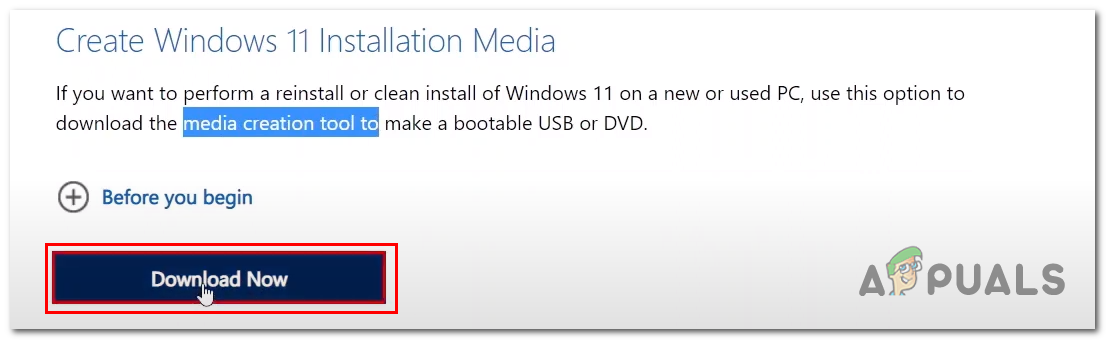
- Click here to download the Windows media creation tool for Windows 11
Click here to download the Windows media creation tool for Windows 10 - Once on the Microsoft website, Click on Download Now.
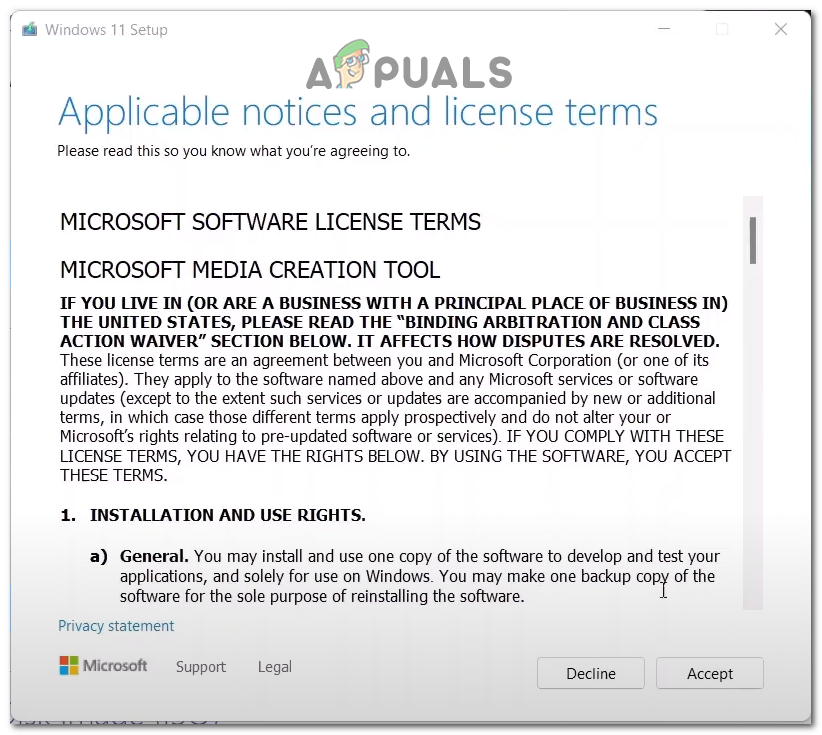
Upgrading windows to the latest version - Open the File you Just downloaded.
- Click on Allow.
- Click on Accept.
Upgrading windows to the latest version - Now, Click on the ISO check button since we want it to create an ISO file.
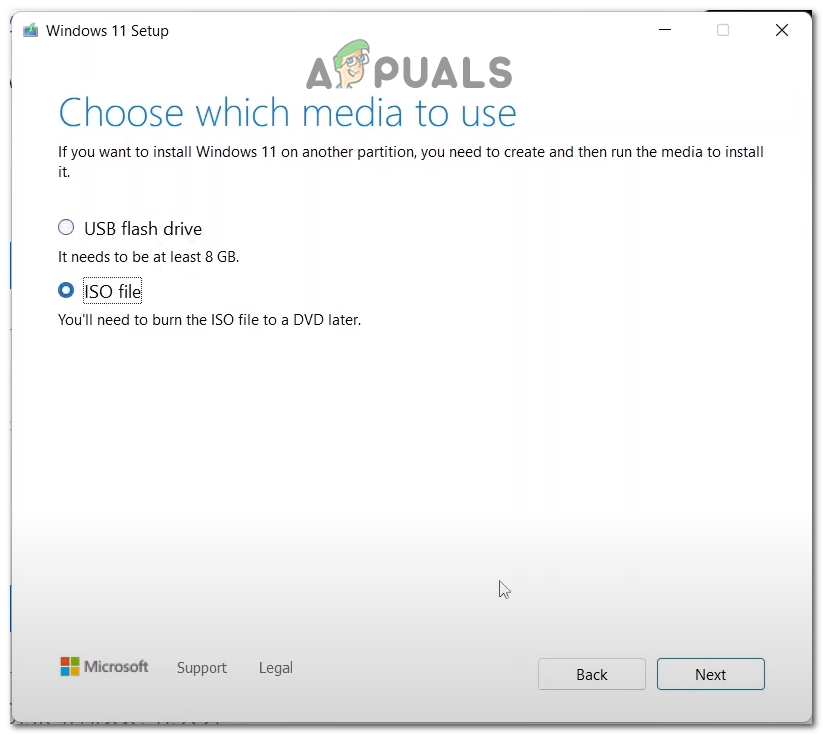
Upgrading windows to the latest version - Select a path for it to save the ISO file.
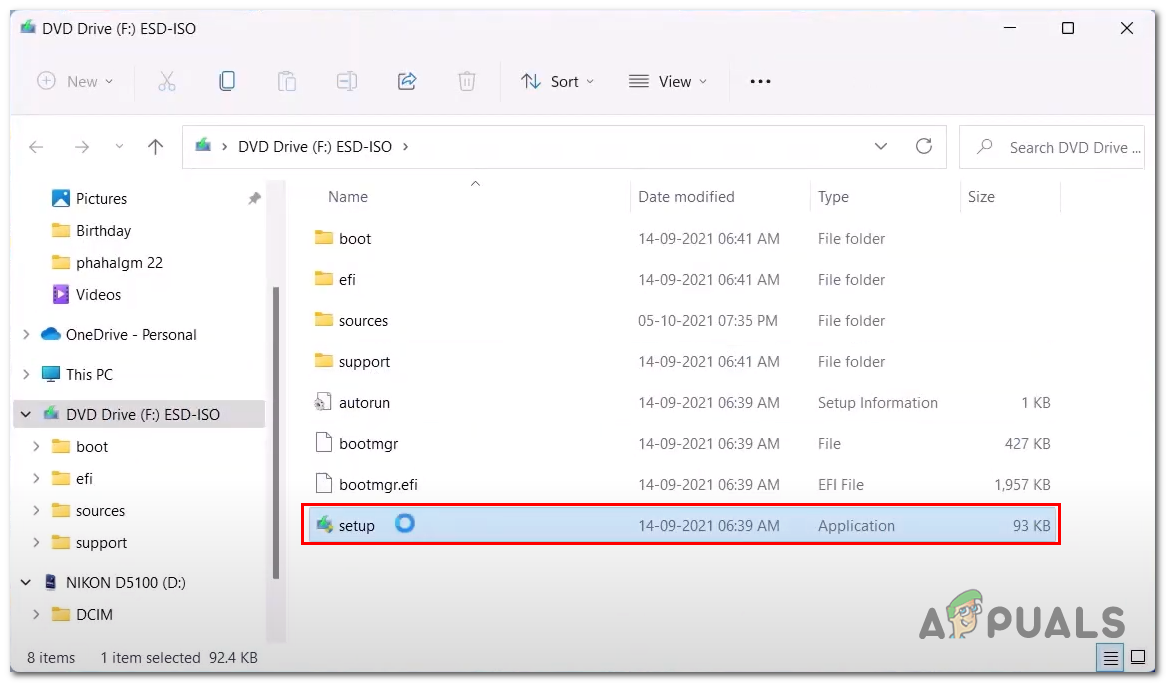
- Open the ISO file and Double-click on the setup application file.
Upgrading windows to the latest version - Proceed with the straightforward installation procedure.
Once updated try launching the photos application.